This site is supported by our readers. We may earn a commission, at no cost to you, if you purchase through links.

Extend the front length by 1-2 inches too, preventing that annoying ride-up effect that makes you constantly tug at your clothes.
The beauty of pattern alteration for large stomach adjustments lies in treating different pattern pieces as different sizes – your back stays true to your high bust size while the front gets the extra room it needs.
This approach creates a custom fit that’s both flattering and comfortable, letting you wear clothes that actually move with your body instead of against it.
Table Of Contents
Key Takeaways
- You’ll use your high bust measurement for the base size, then add 2-4 inches of width specifically to the front bodice pieces while keeping your back pieces at the original size for a custom fit.
- You’ll make strategic vertical cuts in the front pattern pieces and add 1-2 inches of extra length to prevent the annoying ride-up effect that makes you constantly tug at your clothes.
- You’ll need to blend seam lines smoothly after adjustments and may require different pattern sizes for front and back pieces—treating them as separate entities for optimal fit.
- You’ll choose fabrics with good drape like cotton knits with spandex or bamboo viscose blends, and use styling tricks like empire waists and darker colors to create flattering silhouettes that work with your adjustments.
Choosing Pattern Sizes for Front and Back
When you’re dealing with a larger stomach, you’ll often need different pattern sizes for your front and back pieces—and that’s totally normal.
Think of it like buying shoes in two different widths: your back might be a size medium while your front needs a large for the perfect fit, which is a normal situation.
Your pattern needs the same approach as a custom-tailored dress—different measurements for different curves create the perfect fit
Measuring Your Body Accurately
Accurate body measurements form the foundation for successful full abdomen fitting adjustments. You’ll need precise numbers to determine where your torso needs extra room and length.
- High Bust measurement: Measure around your back and across the fullest part of your bust while wearing a well-fitted bra
- Waist measurement: Find your natural waistline by bending to the side – measure at that crease point
- Hip Shape assessment: Take both high hip (3-4 inches below waist) and low hip measurement (at fullest part)
- Torso Length: Measure from shoulder to natural waist, then waist to desired garment length
- Back Width verification: Have someone measure across your back from armpit to armpit for accurate fit
Selecting Different Sizes for Bodice Pieces
How do you choose the right sizes when your front needs more room than your back? Start with your High Bust Measurement to determine your base size, then consider Combining Sizes for perfect fit.
This approach prevents unnecessary adjustments later, and it is based on a Pattern Size Charts method that guarantees a good fit.
| Body Area | Measurement Used | Pattern Size Selected |
|---|---|---|
| Front Bodice | Full bust + belly | One size larger |
| Back Bodice | High bust measurement | Your standard size |
| Sleeves/Arms | Upper arm circumference | Match back bodice size |
This Bodice Size Selection method guarantees your garment fits where it matters most while maintaining proper proportions throughout, ensuring a perfect fit by considering the front and back measurements separately.
Understanding Pattern Grading Principles
Pattern grading follows specific increments between sizes, typically 1-2 inches around the bust and waist.
When you’re mixing sizes for front and back pieces, you’ll need consistent grade rules to maintain proper fit.
Grade application guarantees smooth transitions between different pattern sizes.
Understanding these size increments helps you make accurate pattern adjustments while maintaining the garment’s original design proportions across your body measurements.
It’s vital to understand essential grade rules for systematic adjustments to achieve a proper fit.
Preparing Your Pattern for a Large Stomach
Before you start cutting into your pattern, you need to set yourself up for success with the right prep work.
Getting organized now will save you from headaches later when you’re halfway through your adjustment and can’t find that ruler you swore was right there, which is why doing the right prep work is essential.
Identifying Adjustment Points on Patterns
Before a successful full belly adjustment begins, you’ll need to identify critical pattern landmarks where changes occur. Think of these spots as your "adjustment GPS" – they guide every modification decision you make.
Here are the five essential adjustment points to mark:
- Bust apex location – Mark where your bust point aligns on the pattern piece
- Waist seam intersection – Note where side seams meet the waistline
- Grainline impact zone – Identify areas where fabric grain affects drape
- Torso balance points – Mark natural waist versus pattern waist placement
- Key measurements reference – Note bust, waist, and hip alignment marks
These pattern landmarks become your roadmap for successful pattern alteration. Body measurements taken earlier will guide exactly where these adjustment points fall on your specific pattern pieces.
Tools and Materials Needed
Get ready to transform your sewing space with the right gear.
You’ll need a measuring tape for accurate measurements, marking tools like chalk or pencils, and scrap paper for pattern adjustments. Your sewing machine or serger will handle the construction, while an optional projector makes full belly adjustment easier.
Proper fitting requires a quality sewing measuring tape. These pattern alteration essentials guarantee successful full tummy adjustment using proper pattern fitting methods and sewing techniques.
| Essential Tools | Purpose | Why You’ll Love It |
|---|---|---|
| Measuring tape | Accurate body measurements | No more guessing games |
| Marking tools | Pattern adjustments | Clean, precise lines |
| Scrap paper | Testing alterations | Your safety net |
Tracing and Marking The Pattern
Once you’ve gathered your tools, pattern paper and marking tools help you trace accurately without damaging the original.
Your mission: create a working copy that’ll transform your fit! Here’s your game plan:
- Trace completely – Copy pattern pieces onto pattern paper with grainlines matter precision
- Mark everything – Transfer all notches placement, darts, and adjustment lines clearly
- Label pieces – Write "Full Tummy Adjustment" and size info on each traced section
- Double-check – Verify all belly adjustment techniques markings before cutting your original pattern.
Accurate pattern making relies on high-quality marking implements.
Step-by-Step Full Belly Adjustment Techniques
Now you’re ready to tackle the actual pattern alterations that’ll make your shirt fit like it was custom-made for your body.
These four key techniques work together to create the perfect front bodice that accommodates your belly without adding unnecessary bulk everywhere else, using complete concepts to achieve this goal.
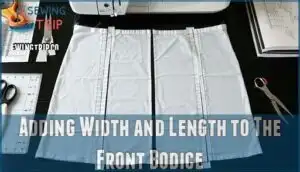
Adding Width and Length to The Front Bodice
How do you master the art of bodice expansion without losing your garment’s shape? The secret lies in strategic slashing and spreading techniques that’ll transform your front bodice into a perfect fit.
Start by making vertical cuts from the hem toward the bust area, then horizontal slashes at the waistline. For prominent full belly adjustment, you’ll need 2-4 inches of extra width distributed evenly across these cut lines.
Remember, every inch of extra width requires corresponding front length additions to prevent that dreaded "riding up" effect. For those with larger waists compared to hips, consider waist pattern adjustment for a better fit.
| Adjustment Type | Amount Needed | Placement |
|---|---|---|
| Extra Width | 2-4 inches total | Vertical cuts at center front |
| Extra Length | 1-2 inches | Horizontal slash above hem |
| Pattern Shaping | Gradual blending | Side seam modifications |
Your front bodice adjustment should feel like giving your pattern room to breathe. Spread those cut sections carefully, adding paper beneath to maintain the new shape. This hemline adjustments and seam blending foundation sets you up for garment success.
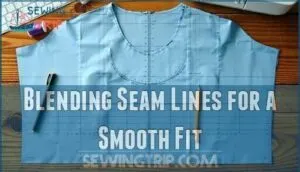
Blending Seam Lines for a Smooth Fit
After adding width and length to your front bodice, you’ll need smooth connections where old meets new.
Use curve blending tools like a French curve ruler to redraw seamlines gradually. Check notch alignment between front and back pieces, adjusting positions as needed.
Practice seam grading techniques to eliminate sharp angles—your full tummy adjustment should flow naturally into existing pattern lines without creating awkward bumps or pulls.
Consider smile line corrections for a better fit around the crotch area.
Adjusting Waist and Hip Areas
After blending seam lines smoothly, you’ll need to address waist and hip areas for proper fit.
Hip grading becomes important when your full tummy adjustment changes the natural flow. Start by measuring how much extra width you added to the front bodice, then gradually reduce that amount as you move toward the side seams.
For waist shaping, consider adding darts if your pattern doesn’t have them—they’ll help the fabric follow your body’s natural curves without creating bulk. Remember to check pocket placement too, since your adjustment might shift these details, and ensure a proper full tummy adjustment for the best results, which involves a careful hip grading process.
Incorporating Full Bust Adjustments if Needed
You’ve got your belly fit dialed in—now let’s tackle the bust if needed.
Measure your high bust versus full bust; if there’s more than a 2-inch difference, you’ll need a Full Bust Adjustment alongside your full tummy adjustment.
The need for this adjustment is highlighted when you see diagonal lines on your garment.
When combining adjustments, work on the front bodice systematically: add bust width first, then belly room, ensuring your pattern fitting methods create smooth shifts between both areas.
Cutting, Sewing, and Checking The Fit
Once you’ve adjusted your pattern pieces, you’re ready to cut your fabric and create a test garment that actually fits your body.
Start with a basting stitch so you can make tweaks before committing to permanent seams—think of it as a dress rehearsal for your clothes!
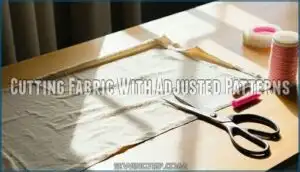
Cutting Fabric With Adjusted Patterns
With your full tummy adjustment complete, it’s time to cut your fabric.
Place pattern pieces on fabric following the grain line arrows—this guarantees proper drape.
Use sharp fabric scissors and mark notches with chalk or washable markers.
Double-check seam allowances match your pattern adjustments before cutting.
For cleaner edges, consider fabric scissor selection to ensure accurate and clean results.
Basting and Fitting The Garment
Before you stitch anything permanently, baste your adjusted pattern pieces together using loose, temporary stitches.
This muslin fitting stage reveals fitting challenges you might’ve missed during pattern adjustment.
Check fit around your full tummy area carefully—does the garment pull, gap, or bunch?
For various options, you may want to explore available sewing patterns.
Mark any spots needing final alterations with pins or chalk before moving forward to ensure a proper fit and make any necessary final alterations.
Troubleshooting Common Fit Issues
After basting, you might spot common fit problems that need quick fixes.
Fabric bunching around the tummy area signals too much ease, while side seam pulling means your Full Tummy Adjustment needs more width.
Button gaping screams for additional front length, and armhole tightness requires shoulder tweaks.
Hemline unevenness often happens when your Full Abdomen Fitting creates different front and back lengths—simply trim or add fabric to match, which may involve a quick fix.
Styling and Fabric Tips for Larger Stomachs
Once you’ve mastered the technical adjustments, you’ll want to choose styles and fabrics that work with your new fit.
Smart fabric choices and styling tricks can make your garments look polished while keeping you comfortable all day long.
The perfect fabric and fit create clothes that work with your body, not against it
Choosing Flattering Silhouettes
Five key silhouettes work like magic after your Full Tummy Adjustment: Empire Waists sit under your bust, creating graceful drape that skims over everything below.
A-line shapes gently flare from your narrowest point, while Asymmetrical Styles cleverly redirect attention.
Flattering Necklines draw eyes upward, and strategic Slimming Colors in darker tones visually recede your midsection, balancing Body Proportions beautifully.
Best Fabrics for Comfort and Drape
Beyond choosing the right silhouette, your fabric choices make or break comfort and drape for a full tummy adjustment.
Smart Fabric Choices create garments that move with you rather than against you:
- Cotton knits with 3-5% spandex – stretches comfortably without clinging
- Bamboo viscose blends – drapes beautifully while staying breathable
- Ponte knits – maintains structure without adding bulk
- Rayon challis – flows away from curves naturally
These Soft Fabrics guarantee your relaxed fit actually feels relaxed.
Understanding fabric weight properties is vital for achieving the perfect drape and comfort in your garments.
Visual Tricks to Balance Proportions
Color blocking with dark accents creates a slimming silhouette that draws eyes upward.
Pair darker tops with lighter bottoms, or try vertical stripes to elongate your frame.
Asymmetrical hems cleverly distract from your midsection while adding visual interest.
These tricks work beautifully with full tummy adjustment techniques, helping balance proportions after your waist seam adjustment or princess seams modifications, and can be used to create a more balanced look.
Waistline and Hem Adjustments for Shape
When positioning your waistline, remember that your belly button is your best friend for finding the most flattering spot.
Full Tummy Adjustment and Waist Seam Adjustment work together for perfect Waistline Definition.
Curve Alterations at the waist create natural Silhouette Adjustments, while Hem Modifications balance your Hip Structure.
These Fit Solutions transform any Full Abdomen Adjustment into flattering Waist Shaping magic.
Frequently Asked Questions (FAQs)
Can pattern alterations work with stretchy knit fabrics?
Like a master tailor adjusting a beloved suit, you’ll find knit fabrics beautifully forgiving when altering patterns.
They stretch and mold to your body’s contours, making stomach adjustments easier and more comfortable than rigid woven materials, which makes knit fabrics beautifully adaptable.
How do you adjust patterns for pregnancy belly?
You’ll gradually add width and length to your pattern’s front bodice as your belly grows. Start with small increments, adding 1-2 inches per trimester for comfort and room.
What about alterations for mens shirt patterns?
Men’s magnificent modifications matter most.
You’ll add extra fabric to the front pattern pieces, creating comfortable room around your midsection.
Focus on lengthening the front hem while maintaining the shirt’s natural drape and fit.
How do you grade between multiple pattern sizes?
Grading between sizes means blending different measurements smoothly across pattern pieces.
You’ll cut between size lines, creating custom curves that shift from one size to another at strategic points like bust, waist, and hips.
Conclusion
Mastering pattern alteration for large stomach adjustments isn’t just about adding fabric—it’s about reclaiming your confidence, one perfectly fitted seam at a time.
You’ve learned to treat your front and back bodice pieces as separate entities, giving your midsection the room it deserves while maintaining your overall silhouette.
With these techniques in your sewing toolkit, you’ll create garments that actually flatter your figure instead of fighting against it.
Every alteration brings you closer to clothes that feel as good as they look.
- https://www.youtube.com/watch?v=a7Pjq5Bb1Lo
- https://amandawynn.com/2020/01/02/using-slopers-full-abdomen-adjustments/
- https://www.reddit.com/r/sewing/comments/1jwqmd4/lower_belly_pattern_adjustment/
- https://curvysewingcollective.com/tutorial-full-tummy-adjustment-pants-or-skirt/
- https://www.plusbydesign.com/blogs/news/how-to-dress-when-your-plus-size-tummy-is-extra-plus

