This site is supported by our readers. We may earn a commission, at no cost to you, if you purchase through links.
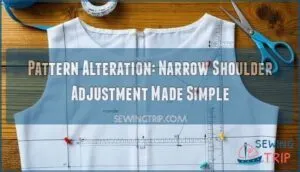
Start by identifying how much adjustment you need—grab a well-fitting garment and measure the distance from your neck to your shoulder edge.
On your pattern, draw a line from the shoulder seam to just above the bust point. Cut this line and “hinge” it inward to remove the excess width.
Be sure to redraw smooth armhole curves and adjust any sleeve caps so they match. It’s like giving your garment a custom shoulder massage—tailored and snug. Master this, and your clothes will thank you!
Table Of Contents
Key Takeaways
- Measure your shoulder width accurately to identify how much adjustment your pattern needs and ensure a perfect fit.
- Draw guide lines on your pattern, slash and hinge to remove excess fabric, and smooth curves for a seamless alteration.
- Test your adjustments with a muslin fitting to pinpoint errors, refine armholes, and confirm alignment with your natural shoulder slope.
- Choose tools like tracing paper, marking supplies, and sharp scissors for precision, and don’t forget to adjust back bodice pieces to match.
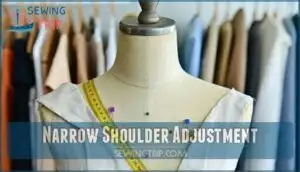
Narrow Shoulder Adjustment
If your garments always seem to sag off your shoulders or bunch awkwardly at the armpits, a narrow shoulder adjustment might be the fix you need.
A narrow shoulder adjustment transforms saggy seams into a perfect fit, ensuring your garments sit snugly and stylishly where they belong!
It’s a quick, straightforward tweak that guarantees your clothes sit perfectly where they should—no more tugging or awkward fit!
Identifying Narrow Shoulders
Ever wonder if you need a narrow shoulder adjustment? Look for these signs:
- Shoulder slope causing seams to droop.
- Garment pulling across the chest or back.
- Sleeve bagging near the armpits.
- Poor posture influence making shoulders appear narrower.
- Muslin fitting reveals excess fabric at the shoulders.
Spotting these clues simplifies your shoulder alteration journey! Remember, accurate shoulder slope impacts garment fit.
Measuring Shoulder Fit
Finding the right shoulder fit is like hitting a bullseye—it takes precision. Start by measuring your Upper Chest Measurement or use wall markers for accuracy.
Hitting the perfect shoulder fit needs precision—measure carefully, aim accurately, and watch your garments transform with effortless elegance!
Locate your Natural Shoulder Location by moving your arm to feel the hinge point. These steps guarantee your narrow shoulder adjustment aligns perfectly, making garment fitting and pattern alteration easier than ever.
| Measurement Technique | Tools Needed | Key Area Measured | Tip for Accuracy |
|---|---|---|---|
| Upper Chest Measurement | Flexible tape measure | Across chest above bust | Keep tape snug but not tight. |
| Natural Shoulder Location | Hand, mirror | Shoulder hinge point | Feel for the arm’s natural movement. |
| Wall Marker Method | Marker, wall | Shoulder width | Stand straight; mark outermost shoulder tips. |
| Horizontal Shoulder Fit | Flexible tape measure | Shoulder seam to seam | Guarantee tape is parallel to the ground. |
Determining Adjustment Needs
Now that you’ve measured, let’s spot fit issues.
Look for:
- Drooping seams sliding onto your arm.
- Blousing fabric pooling near the shoulder.
- Pinched fabric revealing excess length.
- Eyeballing adjustments by comparing muslin fitting results to your natural shoulder fit.
These clues confirm if a narrow shoulder adjustment is the pattern alteration your garment fitting needs.
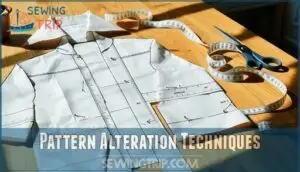
Pattern Alteration Techniques
Once you’ve spotted the need for a narrow shoulder adjustment, it’s time to reshape your sewing pattern.
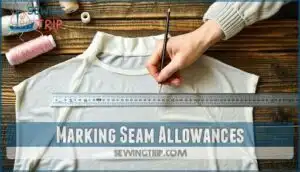
Start by marking the seam allowances along the shoulder, neckline, and armscye. This gives you clear guidelines for your pattern adjustment.
Use a muslin fitting to confirm how much fabric needs removing—pinching excess fabric helps pinpoint the adjustment amount.
Next, draw two lines: one from the shoulder center to a third down the armscye, and another from the outer shoulder corner to meet the first. Carefully cut along these lines, creating hinges to pivot the pattern.
Overlap the pieces to reduce width, then smooth out the armscye curve. Don’t forget—blending sizes and adjusting princess seams or shoulder darts can refine the fit further!
Body measurement precision is key to achieving a perfect fit.
Supplies and Preparation
You’ll need a few basic tools to get started, like your pattern, scissors, tape, and tracing paper—nothing fancy, just the essentials.
Think of it as gathering your sewing "superpowers" before tackling the adjustment; even pattern weights can be as simple as washers from your toolbox, which can be considered a part of your sewing "essentials".
Required Tools and Materials
You’ll need a few sewing supplies to get started: pattern weights (like washers), tracing paper (Swedish tracing paper works great), marking tools, cutting implements, and taping supplies.
Keep scissors sharp and tape handy for adjustments. These tools may seem basic, but they’re your secret weapons for precision!
Many sewers find sewing pattern weights particularly useful.
Bonus tip: pattern weights double as makeshift paperweights—practical and sneaky!
Tracing Paper Options
When choosing tracing paper for sewing, think about paper weight, transparency levels, and budget.
Swedish tracing paper is strong and reusable, while medical exam paper is cheaper but less durable. Tissue paper works well for lighter projects but tears easily.
Consider environmental impact and markability when shopping for sewing supplies; a good pattern marking experience makes adjustments much easier!
Many tailors purchase specialized sewing products for their pattern work, looking for a good pattern that is both durable and easy to use.
Marking Seam Allowances
Marking seam allowances is quick but critical for a smooth narrow shoulder adjustment. Accurate markings tools make life easier, especially for curved seam allowances and tricky knit fabrics.
- Use a fine pencil or erasable pen for the shoulder seam.
- Highlight seam allowance width for consistent seam lines.
- Work gently to avoid tearing patterns.
- Double-check markings for accurate pattern adjustment.
For transferring patterns, consider using tracing paper effectively to make the process smoother, and always ensure to have accurate markings and smooth narrow shoulder adjustment for the best results, with a focus on critical steps.
Adjusting Shoulder Seams
Adjusting shoulder seams might sound tricky, but it’s easier than you think with just a few precise cuts and hinges.
By shifting the pieces carefully and measuring the adjustment amount, you’ll guarantee a snug, custom fit that eliminates excess fabric—no stress required!
This process allows for a custom fit, which is the ultimate goal of adjusting shoulder seams, providing a comfortable and well-tailored outcome.
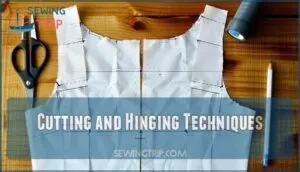
Cutting and Hinging Techniques
You’ve got your tools ready—now let’s tackle cutting and hinging! Start by carefully placing hinges along the shoulder seam at Line 1 and Line 2.
Follow this cutting order: shoulder edge first, then armscye. Allow the corner overlap before gently pivoting sections. Once adjusted, fill any gaps, tape down, and smooth edges.
Many sewers find success using hinging sewing patterns for these alterations. Pattern cutting is all about precision!
| Step | Action | Tip | Outcome |
|---|---|---|---|
| Hinge Placement | Snip Lines 1 & 2 carefully | Stop at seam allowances | Creates flexibility |
| Cutting Order | Begin with shoulder, then armscye | Use sharp scissors for control | Clean cuts, no distortions |
| Corner Overlap | Pivot pieces inward | Align edges accurately | Maintains design integrity |
| Gap Filling | Add tracing paper beneath pieces | Use tape to secure firmly | Shapes redefined seamlessly |
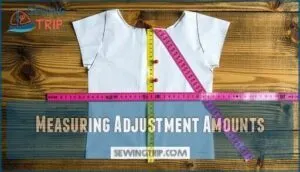
Measuring Adjustment Amounts
After cutting and hinging the pattern, it’s time to pinpoint how much adjustment you’ll make.
Use muslin testing to check the fit and determine if pinning excess fabric from the shoulder seam is necessary. Eyeballing adjustments works too—mark the distance of excess on your muslin or pattern.
This narrows shoulder width while making proper shoulder slope adjustment during bodice alteration.
To guarantee the correct fit, it’s important to know how to measure shoulder to hem.
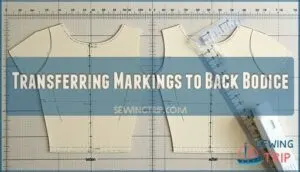
Transferring Markings to Back Bodice
To guarantee Back Matching and proper Adjustment Symmetry, transfer markings from the front to the back bodice pattern with precision.
Align both bodice pieces along seam allowances, confirming Seam Consistency.
Trace the new shoulder seam and armhole, maintaining Marking Accuracy.
This step keeps your bodice alignment flawless, making the narrow shoulder adjustment smooth—no excuses for uneven shoulders in your pattern alteration!
Frequently Asked Questions (FAQs)
How to adjust pattern for narrow shoulders?
Adjusting for narrow shoulders is achieved by drawing guide lines on your pattern.
Slash them, and overlap the pieces to reduce width, then smooth the curves.
Secure with tape, and repeat for the back bodice, ensuring a proper fit by following these complete concepts.
What does narrow shoulder mean?
Think of your shoulders as coat hangers—if they’re narrower than average, clothes may droop or sleeves sit poorly.
Narrow shoulders mean your shoulder width is smaller compared to the expected size for your frame, which can be considered a complete concept in understanding body proportions.
How to adjust patterns for asymmetrical shoulders?
Tweak each shoulder seam separately to match your asymmetry.
Shift the seamline inward or outward, depending on the lower shoulder, and smooth curves evenly.
Test adjustments on muslin first—you’ll thank yourself later!
Can narrow shoulder adjustment affect armhole comfort?
Around 70% of fit issues start at the shoulders, so yes, narrow shoulder adjustments can change armhole comfort.
If not done right, you might feel restricted or get gaping, but precise adjustments keep movement smooth.
Is it possible to avoid shoulder rippling?
You can avoid shoulder rippling by ensuring smooth progressions at seams, proper fabric choice, and accurate shoulder adjustments.
Always test-fit using muslin, refine any uneven edges, and smooth curves carefully for seamless results to achieve the desired outcome with smooth progressions.
How do different fabrics impact shoulder adjustments?
Did you know stretchy fabrics, like knits, reduce shoulder fitting headaches by 50%?
Stiffer fabrics, like denim, exaggerate misfits.
Adjust shoulders carefully for fabric type—soft fabrics forgive minor tweaks, but firm ones demand precision.
When should shoulder pads be used post-adjustment?
Add shoulder pads after adjusting when you need extra structure or balance to enhance the garment’s silhouette.
They’re great for jackets or blazers, helping align seams and creating a polished, professional look.
Conclusion
Imagine slipping into a handmade top, only to feel your shoulders fit perfectly without any awkward gaps—how satisfying is that?
A pattern alteration for a narrow shoulder adjustment takes the guesswork out of achieving this custom fit.
By carefully measuring, cutting, hinging, and smoothing your patterns, you’ll create garments that feel customized to you.
Don’t forget to fine-tune your armholes and sleeves for a professional finish.
Now, grab your tools—your sewing projects just leveled up!

