This site is supported by our readers. We may earn a commission, at no cost to you, if you purchase through links.
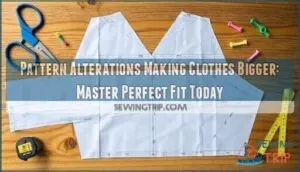
Start with the slash-and-spread method: cut your pattern pieces along marked lines, then spread them apart to add width. Think of it like stretching a rubber band, but with paper.
For length, tape strips of paper where you need extra inches. Always maintain your grainlines – they’re your pattern’s GPS.
Full bust adjustments work magic for fitted tops, while letting out darts gives you breathing room around the waist. The real game-changer lies in knowing which technique works best for your specific fit challenge, and making full bust adjustments.
Table Of Contents
Key Takeaways
- You’ll master the slash-and-spread method by cutting pattern pieces along strategic lines and spreading them apart to add width, but remember this technique works best for increases up to two inches before you’ll need to redraft completely.
- You should choose your pattern size based on your high bust measurement rather than your full bust, then use Full Bust Adjustment (FBA) techniques to add the extra room you need in the chest area for a perfect fit.
- You can transform tight-fitting garments by letting out darts for waist room, adding diamond gussets for seamless expansion, or replacing elastic in gathered skirts to create more comfortable clothing that flatters your unique body shape.
- You’ll achieve the best results by always testing your alterations with muslin fabric first, maintaining proper grainlines throughout the process, and working gradually since you can remove more fabric but can’t put it back once it’s cut.
Choosing Pattern Size
You’ll want to pick your pattern size based on your high bust measurement, not your full bust, since this gives you the best fit through your shoulders and neckline.
Once you’ve got that sorted, you can always add the extra room you need in the bust area using a Full Bust Adjustment, which we’ll cover next.
Selecting Size Based on High Bust
When selecting your pattern size, always choose based on your high bust measurement rather than your full bust.
This approach prioritizes shoulder fit and makes proper neckline alignment with your upper torso shape possible.
Pattern size charts work best when your shoulders and armholes fit correctly first.
You’ll handle bust adjustments through full bust adjustment techniques later, making pattern alterations much simpler.
Remember to think about adjusting armhole curve for proper fit.
Measuring Full Bust and High Bust
Taking proper measurements is like getting the right key for a lock – precision matters.
Use your measuring tape to capture your high bust measurement just under your armpits, keeping it parallel to the floor.
For full bust measurement, wrap around the fullest part of your chest.
These accurate measurement tips guarantee your pattern alterations and bust adjustments will create the perfect fit you’re after.
Determining Cup Size and FBA Requirement
Once you’ve got your high bust and full bust measurements, you’ll discover the magic formula for perfect fit.
When your full bust exceeds your high bust by 2.5 inches, you’ve found your FBA requirement – this difference determines your cup sizing needs.
Watch for these FBA signs:
- Tight pulling across the chest
- Uneven hem lines
- Horizontal wrinkles under the bust
Why Patterns Need Alterations
You’ve probably stood in a fitting room, staring at a shirt that gaps at the buttons or pants that pinch at the waist, wondering why nothing fits right off the rack.
You deserve clothes that actually fit your body, not the other way around.
The truth is, standard patterns can’t possibly fit every body shape and size, which is exactly why learning to alter them gives you the power to create clothes that actually work with your unique measurements, and have a better fit with your body shape.
Common Fit Issues in Off-the-Rack Clothing
You’ve picked your pattern size, but here’s the reality check: off-the-rack clothing rarely fits anyone perfectly.
Most people struggle with the same frustrating issues that make shopping feel like a battlefield.
| Problem Area | Common Issue | Why It Happens |
|---|---|---|
| Bust | Gapping Busts in button-downs | Standard sizing doesn’t account for cup variations |
| Sleeves | Sleeve Lengths too short/long | Arm proportions vary substantially between body types |
| Hips | Hip Fit problems in pants | Manufacturers use basic measurements for diverse body shapes |
Torso Tightness, awkward Hip Fit, and Gapping Busts aren’t personal failures—they’re design limitations.
Off-the-rack clothing uses standardized measurements that don’t match real Body Shapes.
Whether you’re curvy, rectangular, or somewhere between, garment fitting challenges affect everyone.
Understanding these common issues helps you identify which clothing alterations and pattern alterations will transform your wardrobe from frustrating to fabulous.
Importance of Proper Fit for Confidence and Comfort
When your clothes fit perfectly, you stand taller and smile brighter.
When your clothes embrace your body perfectly, you radiate confidence from the inside out.
Well-fitted garments boost your self esteem and support body positivity by celebrating your unique shape.
Properly crafted clothing enhances personal expression while improving mental wellbeing.
You’ll feel confident knowing your outfit flatters you, creating positive social perception and embracing inclusive fashion that honors your body, which is a key part of body positivity.
Role of Alterations in Empowering Individuals
You deserve clothes that celebrate your unique shape, and alterations are your gateway to accessible fashion.
When you make clothes bigger through thoughtful adjustments, you’re claiming your space in a world that often overlooks diverse bodies. This body positivity approach transforms frustrating shopping trips into confident self-expression, proving that individual style isn’t about fitting patterns—it’s about making patterns fit you.
To get started, consider measuring hip and waist accurately.
Pattern Grading Techniques
You’ll discover that pattern grading transforms your favorite designs into perfect fits, whether you need to add just an inch or completely resize for a different body shape.
These proven techniques, from the simple slash-and-spread method to drafting entirely new patterns, give you the power to make any garment work beautifully for your unique measurements.
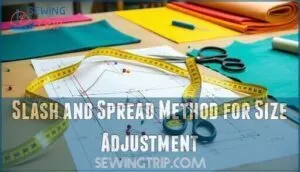
Slash and Spread Method for Size Adjustment
When you need to increase garment size substantially, the slash and spread method becomes your best friend.
This technique involves cutting strategic lines through your pattern pieces and spreading them apart to add extra room where you need it most.
Here’s how to master this game-changing approach:
- Draw guide lines from key fitting points like bust apex to hem and side seams for Pattern Accuracy
- Cut along marked lines and spread pieces apart by your desired measurement increase
- Fill gaps with tissue paper and tape securely, then check Grainline Adjustments for proper alignment
- Test with Muslin Testing before cutting expensive fabric – this prevents costly mistakes and helps guarantee a perfect fit
The slash and spread method works brilliantly for pattern adjustments up to two inches.
You can find products related to the slash spread pattern.
Beyond that, you’ll need Redrawing Patterns or Complex Adjustments to maintain the garment’s original proportions and style lines.
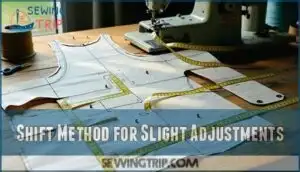
Shift Method for Slight Adjustments
The shift method offers a gentler approach when you need to enlarge clothing size by just 1-2 inches.
Simply move pattern pieces outward along cutting lines, considering your body shape and weight distribution.
This sewing alterations technique works beautifully for minor pattern adjustments before hitting adjustment limits that require redrawing patterns.
Understanding sizing chart familiarity guarantees accurate grading.
Test with muslin fitting to confirm perfect results and ensure a good fit, using the shift method for minor adjustments.
Drafting New Patterns for Different Body Shapes
Sometimes your body simply doesn’t match standard pattern proportions, and that’s where custom patternmaking shines.
You’ll create entirely new patterns using your body measurements for true shape inclusivity. Start with a basic sloper, then make proportional adjustments for petite, regular, or plus sizes.
Digital pattern design tools can streamline this process, making pattern alterations feel less overwhelming.
Custom patterns also help brands achieve consistent sizing, which builds customer trust.
Full Bust Adjustment Methods
When your shirts pull across the chest and create unflattering gaps between buttons, you’re probably dealing with a bust that’s fuller than what standard patterns expect.
You’ll master three proven FBA methods that add just the right amount of room where you need it most, turning those frustrating fit problems into perfectly custom-made garments that actually flatter your figure.
Measuring and Marking for FBA
Getting your FBA measurements right makes all the difference between a shirt that fits like a glove and one that looks like a potato sack.
Here’s your measuring game plan:
- Bust Apex Marking – Find your fullest point and mark it with a safety pin
- Accurate Tape Placement – Keep that measuring tape parallel to the floor, no sagging
- Asymmetrical Busts – Measure each side separately because nobody’s perfectly symmetrical.
It’s important to have the right tools for FBA.
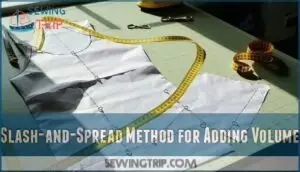
Slash-and-Spread Method for Adding Volume
The slash-and-spread method is a game-changer for making clothes bigger.
Start by slashing your pattern near the bust apex, then spread the pieces to add volume.
Secure with tape, fill gaps with paper, and true up edges for a seamless look.
Muslin testing confirms your adjustments work before cutting final fabric.
Pattern slashing simplifies clothing expansion beautifully!
Y-Dart and Pivot and Slide FBA Methods
When you need more precision than basic slash-and-spread, Y-Dart placement creates targeted fullness exactly where you need it.
The pivot point accuracy in pivot and slide FBA lets you add seamless fullness without traditional darts.
This dartless FBA works brilliantly for asymmetrical busts since you can adjust each side independently, giving you complete control over your pattern alterations.
This method is particularly useful when a pattern requires a Full Bust Adjustment (FBA).
Dress Alteration Techniques
When your favorite dress feels more like a straightjacket than a flattering outfit, you don’t have to abandon it in the back of your closet.
These simple alteration techniques will help you add room where you need it most, turning that too-tight dress into your go-to piece again.
Adding Diamond Gussets for Seamless Fit
Diamond gussets work like magic when you need to add fabric to clothes without sacrificing style.
These triangular inserts transform tight spots into comfortable zones while maintaining your garment’s original silhouette.
Think of them as your secret weapon for clothing resizing—they’ll expand clothing exactly where you need it most.
Many sewists utilize a diamond gusset pattern for accurate results.
- Gusset Shape: Choose diamond or football shapes for maximum flexibility and movement
- Fabric Choice: Match your original fabric or embrace contrast for a designer touch
- Gusset Placement: Position under arms, side seams, or back panels for ideal comfort
- Blending Seams: Use precise stitching techniques to make gusset insertion nearly invisible
Letting Out Darts for Increased Waist Size
Darts aren’t set in stone – they’re your ticket to breathing room. When you let out darts in the bodice, you’re basically redistributing fabric to create more space around your waist.
Start by carefully removing the existing dart stitching, then reshape the dart to be smaller or eliminate it entirely. This waist alteration technique works best when you need just an inch or two of extra room.
| Dart Adjustment | Fabric Choice Impact | Stitching Technique |
|---|---|---|
| Remove completely | Woven fabrics hold shape better | Use seam ripper carefully |
| Reduce by half | Stretch fabrics need less precision | Press seams flat after |
| Reshape angle | Heavy fabrics require wider seam allowance | Reinforce with stay stitching |
| Move placement | Lightweight fabrics show alterations more | Test on scrap fabric first |
| Convert to ease | Structured fabrics maintain bodice support | Hand-baste before machine sewing |
Remember, letting out darts affects your waist definition, so you might need to adjust the side seams too. The key is working slowly – you can always take more fabric out, but you can’t put it back once it’s cut. This approach ensures a precise fit and allows for better fabric management. By following these steps, you can achieve a more comfortable and flattering silhouette.
Replacing Elastic in Gathered Skirts
Transform your too-tight gathered skirts with strategic elastic replacement. Measure your current casing width, then select appropriate elastic types that won’t roll or twist.
Control tension carefully while threading—too tight creates puckering, too loose looks sloppy.
Master these alteration techniques by practicing proper stitching techniques and waistband finishes. These clothing adjustments turn frustrating fits into flattering favorites, with a focus on flattering favorites.
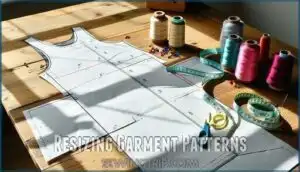
Resizing Garment Patterns
When your favorite patterns don’t quite fit your body’s unique shape, you’ll need to resize them instead of settling for clothes that pull, gap, or feel uncomfortable.
Resizing garment patterns lets you transform any design into your perfect fit, whether you’re adding inches to pants that are too snug or lengthening sleeves that barely reach your wrists, allowing for a more comfortable adjustment to your needs.
Increasing Pants Pattern Size
Most pants patterns require strategic adjustments to increase pant size effectively.
You’ll tackle waist adjustments by expanding the waistband, then focus on hip adjustments through hip width increase techniques.
Address the crotch curve adjustment for comfort, modify leg shape modification for proper fit, and complete inseam lengthening.
Grading patterns allows for precise adjustments to fit unique measurements.
These pattern alterations transform ill-fitting pants into perfectly customized garments that flatter your unique body shape.
Resizing Sleeves and Adding Length
Sleeve circumference adjustments can make or break your garment’s comfort. When you’re tackling sleeve length and width changes, start by measuring your bicep and desired length placement.
The sleeve cap stays unchanged during most alterations.
- Split sleeves into upper, lower, and cuff sections for precise resizing
- Add 3/8" horizontally for bicep adjustment without distorting the fit
- Test cuff resizing with muslin before cutting your final fabric to ensure a proper fit
Frequently Asked Questions (FAQs)
Can you size up a pattern?
Releasing your creativity’s full potential starts here.
You can absolutely size up a pattern using slash-and-spread or shift methods.
Just remember, going beyond two inches means you’ll need to redraft for the best fit.
How to sew clothes to make them bigger?
Add side panels or diamond gussets to seams for extra room.
Let out darts and seams where possible.
Use contrasting fabric creatively—it’ll look intentional.
Remember, you’re customizing, not just fixing!
How to increase the size of a pants pattern?
You’ll need to use the slash-and-spread method on your pattern pieces.
Cut vertical lines at the waist and hips, then spread them apart to add width.
Don’t forget to adjust the inseam length too.
How to adjust armhole size for broad shoulders?
Like a tight squeeze through a narrow doorway, constricted armholes can cramp your style.
Cut horizontal slash lines across the armhole, spread them wider, then blend the curves smoothly for shoulders that finally have room to breathe.
Can you enlarge necklines without ruining garment structure?
Yes, you can carefully enlarge necklines by cutting along the original seam line and adding facing strips or bias tape.
Work gradually, testing fit frequently to maintain the garment’s structural integrity.
This approach ensures that the garment remains intact and functional after alterations.
Whats the best way to widen narrow sleeves?
Tight sleeves versus comfortable movement—you’ll choose comfort every time.
Slash vertically from shoulder to cuff, spread the pattern piece, then add fabric strips or triangular gussets.
Test with muslin first to nail the perfect fit.
How do you adjust crotch depth in pants?
Slash your pattern horizontally at the crotch line, then spread it apart to add the depth you need.
Pin tissue paper underneath, blend the seam lines smoothly, and test with muslin first.
Can patterns be graded beyond manufacturers size range?
You can grade patterns beyond manufacturer ranges, but you’ll hit limits.
Beyond two sizes up or down, you’ll need to redraft completely.
The proportions get wonky, and fit suffers when you push grading too far.
Conclusion
Transforming ill-fitting garments into perfectly fitted pieces doesn’t require a miracle—just the right knowledge.
You’ve now mastered essential pattern alterations making clothes bigger, from slash-and-spread techniques to full bust adjustments.
Remember, every body deserves clothes that fit beautifully, and with these skills in your toolkit, you’ll confidently tackle any fit challenge, and your sewing journey just leveled up—embrace the freedom of perfect-fitting clothes you’ve created yourself, and don’t let sizing frustrations hold you back from creating stunning garments.


