This site is supported by our readers. We may earn a commission, at no cost to you, if you purchase through links.

You’ll need to shorten torso lengths, adjust sleeve proportions, and modify waistline placement. Start by measuring your unique proportions, then mark adjustment lines on patterns before cutting.
Common changes include shortening bodice length by 1-2 inches, reducing sleeve length, and repositioning darts for better fit. Don’t forget shoulder adjustments, as petite figures often need narrower shoulder seams.
The key is maintaining pattern balance while scaling down proportions. Think of it as tailoring patterns to your body’s blueprint, not forcing your body into standard sizing. Smart techniques make all the difference, and understanding how to apply these techniques is crucial for achieving a perfect fit and creating garments that are truly customized to your needs.
Table Of Contents
Key Takeaways
- You’ll need to take precise measurements of your unique petite proportions, focusing on shorter torso length, arm measurements, and shoulder width rather than relying on standard sizing charts designed for 5’6" frames.
- You can’t just hem garments shorter – you must make strategic vertical adjustments by removing 1-2 inches from bodice length, repositioning darts upward to align with your natural bust point, and adjusting sleeve proportions to maintain garment balance.
- You should reduce horizontal dimensions by narrowing shoulder width, adjusting armhole depth, and modifying waist-to-hip proportions to prevent that "swimming in fabric" look while preserving the original design’s integrity.
- You’ll achieve professional results by using proper tools like flexible measuring tape and French curves, testing adjustments with muslin fittings first, and maintaining pattern balance through proportional scaling rather than random size reductions.
Petite Proportions Matter
When you’re under 5’4", your body’s proportions don’t match the standard 5’6" model that patterns use, which means your shorter torso, arms, and legs need specific adjustments beyond just hemming.
Your petite frame deserves patterns that celebrate your proportions, not fight against them.
Your unique petite frame requires precise measurements and strategic pattern modifications to transform ill-fitting clothes into garments that look like they were custom-made for your body.
Shorter Torso Length
Mastering torso measurement becomes your secret weapon for achieving that coveted petite fit. Your shorter torso length demands strategic adjustments that transform baggy patterns into refined perfection, making every garment feel custom-made for your unique frame.
- Bodice adjustment typically requires 1-2 inches of length reduction for proper proportions
- Dart placement must shift upward to align with your natural bust point
- Pattern reshaping involves cutting horizontal lines above and below the waistline
- Petite silhouette emerges when you balance torso proportion with overall garment design
- Strategic length modifications prevent fabric bunching and create clean, flattering lines
Proportional Reduction
When you’re working with petite pattern alteration, you can’t just shrink everything equally. Your proportional adjustments need strategic scaling techniques to maintain garment balance and design integrity.
Think of it like resizing a photo—you need the right ratios to keep silhouette harmony intact while addressing petite fit issues.
| Body Area | Standard Reduction | Petite Proportions Impact |
|---|---|---|
| Shoulder Width | 1-2 inches | Prevents oversized appearance |
| Armhole Depth | 0.5-1 inch | Maintains comfortable movement |
| Torso Length | 1-3 inches | Eliminates excess fabric pooling |
| Hip Curve | Proportional | Preserves natural silhouette |
Fabric considerations matter too—lightweight materials work better for petite size adjustments since they won’t overwhelm your frame.
Unique Body Shape Variations
Forget the one-size-fits-all approach – your petite body is beautifully unique!
Curvy Petite figures need different petite pattern alteration techniques than Slim Petite frames.
You’ll discover torso differences, shoulder slope variations, and back variations that standard petite size adjustments ignore.
Understanding these petite fit issues helps you tackle petite proportions with confidence, creating garments that celebrate your individual petite body measurements perfectly.
Accurate Measurements
You’ve identified your unique petite shape variations, but now you need laser-sharp measurements to make those pattern alterations work.
Getting measurements right transforms your sewing from good to phenomenal. One key is to verify you’re taking accurate body measurements for the best results.
- Consistent Posture: Measure in the same position wearing identical undergarments every time
- Digital Records: Track your measurements digitally to spot changes over time
- Tool Calibration: Use quality measuring tapes and verify accuracy regularly
- Professional Charts: Follow specialized petite measurement charts for better results
Mastering Petite Measurements
You’ll transform your sewing from frustrating to fantastic once you master the art of taking precise petite measurements, because accuracy here makes all the difference between clothes that fit and clothes that actually flatter your frame.
Getting your measurements right isn’t just about numbers on a tape measure, it’s about understanding how your petite proportions work together, and with the right techniques and tools, you’ll create patterns that feel like they were custom-made just for you.
Perfect measurements unlock patterns that hug your petite frame like they were designed exclusively for you.
With the right approach, you’ll be able to create clothes that not only fit well but also flatter your frame, making a significant difference in how you look and feel in your handmade garments.
Vertical Adjustments
Three key areas need your attention when adjusting petite patterns vertically.
Torso shortening typically requires removing 1-2 inches from bodice length, while sleeve length needs similar reduction.
Don’t forget crotch depth and rise alterations in pants – they’re game-changers for comfort.
These pattern alterations transform ill-fitting garments into custom pieces that actually flatter your petite frame perfectly.
Horizontal Reduction
Narrowing your pattern’s horizontal dimensions prevents that "swimming in fabric" feeling petite sewers know too well.
You’ll need to reduce shoulder width by adjusting armhole depth, which eliminates fabric bulk around your frame.
Focus on waist-to-hip proportions and dart placement when adjusting petite patterns.
This pattern alteration guide guarantees your bodice fits snugly without overwhelming your smaller silhouette, providing a solution to the "swimming in fabric" feeling by ensuring a snugly fit.
Measuring Techniques
Nail down your measurements by maintaining consistent posture every time you measure.
Use the same undergarments and stand naturally—slouching throws everything off.
Digital records help track changes over time, while tool calibration helps your measuring tape stay accurate.
A vital step involves using a non-stretch measuring tape for precision.
These precise measurements create your accurate foundation for perfect petite alterations, making body scanning techniques incredibly effective.
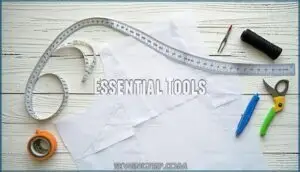
Essential Tools
You’ll need specific sewing tools to nail petite adjustment success.
A flexible measuring tape captures curves accurately, while a clear ruler guarantees straight lines.
French curves create smooth armhole adjustments, and quality pattern paper withstands multiple alterations.
Don’t forget your tracing wheel for transferring markings.
Accurate measurements rely on flexible tape availability.
These essential tools transform challenging sewing pattern adjustments into manageable petite sewing victories, ensuring accurate measurements and smooth armhole adjustments.
Common Alteration Challenges
You’ll face frustrating moments when pants bunch at your ankles, sleeves swallow your arms, and necklines gap awkwardly—but these common petite fitting problems have straightforward solutions.
Once you understand these typical challenges, you can tackle each alteration with confidence and transform ill-fitting patterns into perfectly proportioned garments.
Pants Alterations
Frustration melts away when you master petite pattern alterations for pants.
You’ll need inseam grading to prevent bunching, rise alterations for proper waist positioning, and crotch curve adjustments for comfort.
Don’t forget leg width modifications and hem variations.
These sewing pattern adjustments for petite figures transform ill-fitting pants into custom treasures that actually flatter your proportions.
Addressing fit issues may require crotch curve corrections for a better fit, which involves making crotch curve adjustments to ensure a comfortable and proper fit.
Sleeve Adjustments
Your sleeves probably hang past your fingertips like you’re wearing your dad’s shirt.
Adjusting sleeve length requires more than just chopping off the bottom. You’ll need cap reshaping to maintain shoulder symmetry, plus width reduction through the bicep adjustment.
To achieve professional results, be sure to select the proper sleeve alteration tools.
These sleeve alterations transform oversized patterns into petite clothing alterations that actually fit your proportions perfectly.
Neckline Modifications
Beyond sleeve troubles, gaping necklines plague petite sewers constantly.
Your petite shoulders can’t fill standard pattern dimensions, creating awkward gaps.
Start neckline adjustments by shortening the bodice length above your bust by ½ to ¾ inch.
Then narrow the neckline width by ¼ inch on each side.
These collar adjustments and facing alterations transform gaping disasters into perfectly proportioned necklines through strategic neckline reshaping techniques.
Vertical adjustments can help address length discrepancy issues.
Silhouette Shaping
Creating a flattering silhouette requires balancing proportions across your entire frame.
Adjust torso length first, then tackle shoulder width and armhole depth for comfortable movement.
Your waist-hip ratio guides dart placement, preventing that dreaded "swimming in fabric" look.
Remember, silhouette shaping isn’t just about making things smaller—it’s about creating harmony between all your measurements for that perfect petite fit.
For accurate adjustments, consider measuring front torso before altering your pattern.
Pattern Adjustment Techniques
You’ll transform your sewing game when you master these four essential pattern adjustment techniques that work like magic for petite frames.
These methods, including full bust adjustments, shoulder modifications, waist reductions, and dart manipulation, will help you create clothes that fit your body perfectly instead of swimming in fabric.
Full Bust Adjustment
You’ve tackled those tricky fitting issues, now let’s master full bust adjustment for your petite frame.
FBA principles work differently when you’re working with petite proportions. Start by measuring your apex placement carefully—it’s usually higher on petite figures.
Pattern grading requires adjusting for both cup size and shorter torso length. A key first step is to measure your high bust to determine pattern size.
Always test your bust adjustments with muslin fitting before cutting your final fabric.
Shoulder Modifications
Perfect shoulders transform your petite sewing from frustrating to fabulous.
You’ll need specific shoulder modifications for square shoulders, broad shoulders, or round shoulders.
Adjust shoulder slope by reshaping pattern pieces, then fine-tune armhole adjustments for comfort.
These petite shoulder modifications prevent that droopy, ill-fitting look.
Pattern alterations targeting your unique shoulder shape create garments that actually fit your petite frame properly, ensuring a fabulous look and preventing an ill-fitting appearance, which can be frustrating.
Waist Reduction
After perfecting your shoulders, you’ll tackle waist adjustment with confidence.
Most petite sewists need waist shaping that’s 1-2 inches smaller than standard patterns.
Use pattern resizing techniques to reduce circumference gradually, maintaining smooth curves.
Focus on torso proportion by adjusting dart placement strategically, this fabric redistribution prevents bunching while creating that coveted hourglass silhouette.
Your petite sewing tips just leveled up substantially by using these techniques to achieve a better fit, and with practice, you will master the art of waist adjustment.
Dart Manipulation
Why struggle with ill-fitting darts when you can master dart manipulation for your petite frame?
Strategic dart placement and fabric redistribution transform basic patterns into custom-fitted garments.
You’ll reshape bust shaping and waist contouring while maintaining design integrity.
These petite sewing tips make pattern alterations feel achievable, turning dart manipulation into your secret weapon for flawless fits.
Customizing Patterns
You’ll transform any standard pattern into your perfect petite fit by mastering length modifications, width adjustments, and smart size blending techniques.
These customization skills turn frustrating fitting sessions into confident sewing victories, giving you clothes that actually look like they were made just for you, utilizing smart size blending techniques.
Length Modifications
Always start with torso shortening and sleeve shortening adjustments before tackling pant length modifications.
You’ll find that proper bodice length reduction prevents bunching, while strategic rise alteration guarantees comfort.
Remember, hem adjustments are your final step—never your first!
Pattern grading petite requires methodical length modifications across multiple sections.
Think of shortening pattern length as sculpting, not just chopping off excess fabric.
Width Adjustments
Once you’ve tackled length modifications, width adjustments become your next challenge in pattern alterations.
These horizontal mods require precision to maintain pattern integrity while achieving that perfect petite fit.
- Seam Method: Adjust side seams gradually for subtle changes
- Slash Spread: Cut and spread pattern pieces for major width increases
- Horizontal Mods: Reduce across chest, waist, and hip areas systematically
- Pattern Grading Petite: Scale proportionally to preserve original design lines
Blending Between Sizes
When you’re working with multi-size patterns, blending between sizes creates that perfect petite fit you’re after.
Focus on bust-waist blending first, then tackle hip-waist ratio adjustments at size shift points.
Smooth grade changes prevent weird bulges or puckering, and this petite adjustment technique transforms basic pattern alterations into custom-feeling garments that actually fit your proportional frame beautifully.
Maintaining Pattern Integrity
Once you’ve blended sizes successfully, you’ll want to preserve what makes your pattern work beautifully.
Think of pattern alterations like tuning a guitar – each adjustment affects the whole instrument’s harmony.
Key principles for successful petite pattern drafting:
- Maintain original Design Line Preservation across all size shifts
- Consider Fabric Drape Impact when making multiple adjustments simultaneously
- Check Proportional Balancing between modified and unmodified pattern pieces
- Preserve essential Garment Structure elements like grain lines and notches
- Confirm Measurement Harmony between connecting seams and curves.
Smart customizing petite patterns means respecting the designer’s original vision while adapting for your frame.
Frequently Asked Questions (FAQs)
How do you adjust height on a pattern?
Need a pattern that actually fits your frame? You’ll cut along designated "lengthen or shorten" lines, removing excess length from bodice, sleeves, and skirt sections to match your proportions perfectly.
How do you alter a pattern to make it smaller?
You’ll reduce pattern sizes by making width adjustments using the "seam method" or "slash and spread" technique.
Start with bust, waist, and hip measurements, then blend between sizes for smooth gradations and proper fit.
Does anyone want old sewing patterns?
Sure, someone’s treasure hunter instincts are tingling.
You’ll find enthusiastic buyers on Facebook Marketplace, Etsy, eBay, and local quilting groups.
Vintage patterns especially fetch good prices from collectors and nostalgic sewists.
What is the golden rule sewing pattern system?
The Golden Rule sewing pattern system helps you create perfectly fitted garments by using your measurements to adjust patterns.
You’ll measure key body points, then modify patterns accordingly for custom-tailored results every time, achieving a fit that is perfectly fitted.
How do petite alterations affect fabric requirements?
Like a carefully orchestrated recipe, your fabric needs typically decrease when you’re altering patterns for petite proportions.
You’ll generally need 1/4 to 1/2 yard less fabric since you’re shortening lengths and narrowing widths throughout, which can be considered a complete concept in altering patterns.
Which petite alterations require professional pattern drafting?
Complex shoulder slope adjustments, full bust redistributions across multiple dart points, and crotch curve reshaping need professional drafting.
You’ll also want expert help with armhole depth modifications and intricate waist-to-hip ratio calculations that affect garment structure.
Can vintage patterns be adjusted for petites?
Vintage patterns work beautifully for petites with smart adjustments.
You’ll need to shorten bodice length, reduce shoulder width, and trim sleeve lengths.
The classic designs actually flatter petite frames once you’ve made these essential modifications.
How to alter patterns for petite plus sizes?
Sarah’s size 18 petite needed major adjustments—shortening bodice by 2 inches, reducing shoulder width, and carefully redistributing fabric around curves.
You’ll combine standard plus-size techniques with petite proportions, focusing on torso length while maintaining proper ease.
Whats the cost difference between petite alterations?
Petite alterations typically cost $15-40 more than standard adjustments due to complex proportional changes.
You’ll invest extra for specialized techniques, but custom-fitted garments are worth every penny when you achieve that perfect silhouette.
Conclusion
Mastering pattern alterations petite adjustment is like having a secret key that reveals perfectly fitting clothes.
You’ve learned to measure accurately, shorten lengths, and adjust proportions while maintaining balance.
Don’t rush the process—take your time with each modification, and remember, every body’s unique, so trust your measurements over standard sizing.
With practice, you’ll transform any pattern into a custom fit, and your sewing skills will improve dramatically, so you’ll never settle for ill-fitting clothes again, and have a perfectly fitting experience, with dramatically improved skills.
- http://www.madalynne.com/patternmaking-how-to-make-a-pattern-petite
- https://discord.gg/mpBkj2hhJ4?utm_source=makezine&utm_medium=article&utm_campaign=discord&utm_content=launch
- https://curvysewingcollective.com/tutorial-narrow-shoulder-adjustment/
- https://www.sbccpatterns.com/blogs/news/the-number-one-alteration-you-are-doing-wrong
- https://www.moderndailyknitting.com/community/techniques-in-depth-alterations-part-i/

