This site is supported by our readers. We may earn a commission, at no cost to you, if you purchase through links.
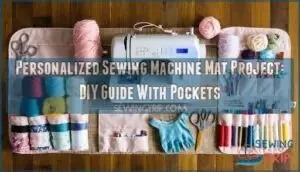
You’ll craft a custom mat that dampens machine vibration while protecting your table surface. Strategic storage pockets keep essential tools within easy reach, eliminating that frustrating hunt for seam rippers mid-project.
This DIY solution works perfectly whether you’re using a compact machine or full-sized quilting setup. The beauty lies in complete customization – choose fabrics that match your aesthetic, adjust dimensions for your space, and position pockets exactly where your workflow needs them.
Smart construction techniques guarantee professional results even for beginners, ensuring that your project turns out well with customization that fits your needs, and provides a space with essential tools within easy reach, making it an ideal DIY solution.
Table Of Contents
Key Takeaways
- You’ll create a custom-fit mat that reduces machine vibration by 30% while protecting your work surface from scratches and heat damage
- Strategic pocket placement keeps essential tools like scissors, seam rippers, and thread within arm’s reach, eliminating mid-project searches and boosting workflow efficiency
- Complete customization lets you choose fabrics that match your style, adjust dimensions for any machine size, and position storage exactly where your workflow needs it
- Simple construction techniques using quilting cotton, batting, and binding strips guarantee professional results even for beginners, with options for left-handed adaptations
Sewing Machine Mat Benefits
Your personalized sewing machine mat brings both style and function to your workspace, creating an attractive surface that keeps essential tools organized within easy reach.
This simple project transforms chaotic sewing sessions into efficient experiences by reducing noise, protecting surfaces, and containing threads while you work, making it a simple project that improves your overall sewing experience with efficient use of space.
Decorative Surface Options
During your mat-making journey, you’ll discover endless decorative possibilities that transform basic fabric into stunning functional art.
Choose vibrant Color Schemes like sunset oranges or calming blues, select Pattern Choices from florals to geometrics, and experiment with Fabric Textures from smooth cotton to textured linen.
Your sewing machine mat design becomes a canvas for creativity through decorative stitches and sewing machine mat embroidery, letting you craft Aesthetic Themes that perfectly match your workspace personality and Mat Designs that inspire every project.
Storage Pocket Features
Strategic pockets transform your sewing machine mat into a command center for seamless projects.
You’ll organize scissors, pins, and notions in dedicated notion holders while maintaining easy access during stitching.
The integrated pocket organization system features multiple compartments for tool storage, keeping thread management supplies sorted.
Your sewing accessories stay within arm’s reach, eliminating mid-project searches and boosting workflow efficiency by up to twenty-five percent.
Customizable Size Options
Your sewing space deserves a mat that fits like a glove, not one that hangs off the edges or leaves your machine swimming in excess fabric. Custom sewing mat size flexibility means you can create the perfect workspace for any machine, from compact portables to industrial-sized workhorses.
Here’s your Mat Sizing toolkit for creating Custom Fits:
- Measurement Guides – Add 2-4 inches to your machine’s footprint for comfortable workspace margins
- Size Adjustment flexibility – Scale patterns up or down while maintaining proper pocket proportions
- Scalable Designs – Adjust batting and fabric pieces proportionally to your machine’s dimensions
- Custom dimensions – Standard 18" x 28" works for most, but you can go smaller or larger as needed
- Sewing mat construction adaptability – All techniques work regardless of your chosen final size
Vibration Dampening Effects
Beyond the hum of your motor lies a simple solution for peaceful crafting.
Your sewing machine mat’s vibration dampening materials provide impressive noise minimization—reducing machine racket by up to 30%.
Transform your chaotic workspace into a peaceful crafting haven with 30% less noise.
This shock absorption transforms your workspace into a quieter haven, while machine stabilization prevents that annoying wobble during intensive stitching sessions.
You’ll appreciate how dampening materials in proper sewing mat construction create vibration reduction that benefits both you and your neighbors.
Workspace Protection Features
Your trusty workspace deserves better than scratches and heat damage from prolonged sewing sessions.
A quality sewing machine mat provides thorough table protection through these essential features:
- Surface Guards – Prevents scratches, dents, and scuff marks from machine weight and movement
- Heat Resistance – Shields surfaces from motor heat during extended projects
- Dust Protection – Contains fabric particles and thread debris while you work
Smart sewing workspace organization starts with protecting your investment.
Mat Design Techniques
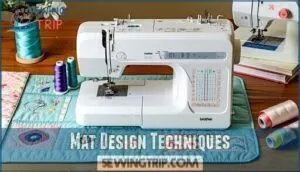
You’ll discover that Brother sewing machines offer exceptional versatility for creating custom mat designs with their built-in embroidery and quilting capabilities.
These machines handle everything from cross-hatch quilting patterns to decorative appliqué attachments, making your personalized sewing mat both functional and beautiful.
Brother Machine Compatibility
Most Brother Machine Models work seamlessly with your sewing machine mat project.
The Brother Pacesetter PS200T, Brother Luminaire, and Brother Dream Machine all handle standard mat dimensions perfectly.
Run Compatibility Tests by checking your machine’s footprint against mat measurements.
Brother Accessories like extension tables might require sewing machine mat customization.
Avoid Sewing Machine Errors by confirming Model Updates don’t affect fitment.
For more information on compatible models, check the Brother machine lineup to guarantee the best fit for your project, ensuring a proper machine setup and mat fit.
Embroidery Mode Features
Modern machines offer powerful embroidery features that transform your personalized sewing mat into a masterpiece.
You’ll access fill stitch capabilities that create densely packed, professional-looking pockets with consistent thread colors.
Machine settings allow precise control over stitch patterns and embroidery designs, while the touchscreen interface lets you preview, scale, and rotate motifs before stitching begins on your sewing machine mat.
For complex designs, understanding computerized embroidery is essential to achieve high-quality results with precise control.
Quilting Lines Patterns
Through strategic straight stitch quilting, you’ll transform your sewing machine mat into a professional masterpiece.
These quilting designs create fabric textures while securing your mat layers together permanently.
- Cross-hatch pattern: Stitch parallel lines every ½" to 1" in both directions for classic quilting designs
- Walking foot technique: Prevents fabric shifting during pattern making and guarantees even stitches throughout
- Measured spacing: Use your sewing machine mat tutorial guidelines to maintain consistent line placement across the entire surface
Appliqué Attachment Methods
Beyond quilting lines, you’ll want to master appliqué attachment methods for your sewing machine mat pockets.
Fusible web creates strong quilting bonds between fabric layers, while needle turn techniques give crisp edges.
Try fabric adhesives for quick placement before stitching appliqué stitches around decorative elements.
These methods transform basic sewing project ideas into personalized sewing machine mat tutorial masterpieces with professional-looking appliqués.
Understanding various applique techniques is essential for achieving intricate designs and patterns on your sewing machine mat.
Materials Cutting Instructions
Gathering the right materials sets the foundation for your professional-looking sewing machine mat.
You’ll need specific fabric cuts and batting pieces to create both the main mat and functional storage pockets.
Fabric Requirements List
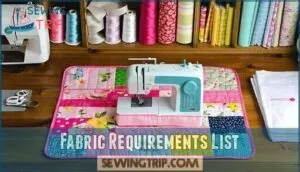
You’ll need approximately 1.5-2.25 yards total for your sewing machine mat project.
Start with ⅔ yard quilting cotton for the main body, plus matching yardage for backing fabric.
Add ¼ yard each for pocket fabric and binding strips.
Cotton Requirements include interfacing types for structure, while fabric measurements should accommodate your machine’s dimensions plus seam allowances.
The project also involves working with quilting cotton to achieve the desired outcome.
Batting Size Options
Different batting thickness levels affect your sewing machine mat project’s durability and comfort.
Choose the right batting thickness and fabric selection for ideal mat sizing and quilt layering performance. When selecting batting materials, consider the importance of proper sewing mat batting for your project’s success.
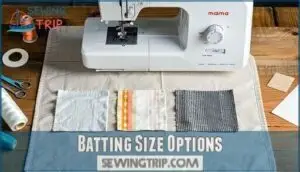
- Medium-weight cotton batting (18″ x 28″) provides standard cushioning for your sewing mat backing
- Thin batting strip (5″ x 28″) creates structured pocket support without bulk
- Dense batting options offer superior insulation options for vibration dampening
- Lightweight batting works best for portable quilting project applications
Ribbon Attachment Methods
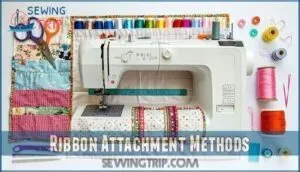
You’ll secure your mat’s portability with proper ribbon attachment using these reliable sewing techniques.
Position your ribbon at the mat’s center edge before binding, ensuring it won’t get caught during construction. Choose ribbon width that complements your fabric weight for ideal rolling performance.
To achieve a professional finish, consider the ribbon material selection for durability and aesthetics.
| Attachment Styles | Folded Edges | Binding Methods |
|---|---|---|
| Center placement | Double-fold finish | Sandwich technique |
| Corner positioning | Raw edge sealing | Bias tape coverage |
| Multiple tie points | Mitered corners | French seam binding |
The key to a successful mat construction is using the right sewing techniques and ensuring the ribbon material is suitable for the task, providing durability and aesthetics.
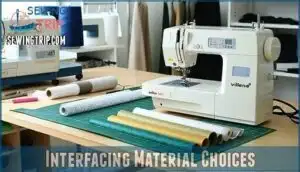
Interfacing Material Choices
After securing your ribbon attachment, you’ll select interfacing material that determines your sewing machine mat’s structure and durability.
Choose fusible options like Pellon 987F or Vilene H630 for quick heat application with cotton fabrics. These midweight interfacing types provide excellent fabric backing without excessive stiffness.
Consider material selection based on your stabilizer choices—woven varieties offer better longevity than non-woven alternatives for frequently washed mats.
Assembly Construction Guide
Now you’ll transform your cut fabric pieces into a functional sewing machine mat through careful layering and precise construction techniques.
The assembly process requires attention to detail, but following each step methodically guarantees professional results that’ll serve your sewing space for years.
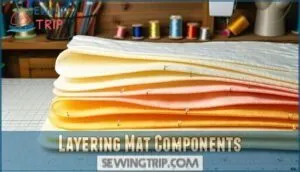
Layering Mat Components
Now you’ll stack your sewing machine mat like building the perfect sandwich.
Start with your mat bottom fabric face-down, add the batting piece, then place your mat top fabric face-up.
Pin around all edges to prevent shifting during quilting.
This Mat Layering creates the foundation for your sewing mat layers, ensuring proper Batting Choices support your finished project perfectly, with a focus on complete concepts.
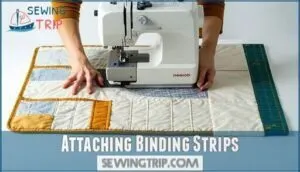
Attaching Binding Strips
Now you’ll attach the binding strips that give your sewing machine mat a polished, professional finish. This mat edging process transforms your layered components into a durable, finished project.
Here are your binding strip tips for success:
- Cut binding strips 2½ inches wide for adequate coverage around thick batting layers
- Use quilting binding techniques with a walking foot to prevent puckering during attachment
- Pin strips every 3-4 inches before sewing to maintain even tension throughout the strip attachment process
Remember, quality sewing mat binding makes the difference between a homemade look and professional results for your sewing mat project. Mastering wide quilt binding techniques is essential for a flawless finish.
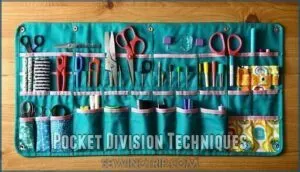
Pocket Division Techniques
With your binding strips neatly secured, it’s time to map out your pocket layout for maximum storage solutions.
Mark your pocket divisions with erasable fabric pen, creating a roadmap for your sewing mat pockets that’ll keep tools organized and accessible.
| Pocket Width | Tool Storage |
|---|---|
| 3.5 inches | Seam rippers, pens |
| 7 inches | Scissors, rotary cutters |
| 12cm | Rulers, measuring tools |
| 15cm | Large accessories |
Stitch vertical sectional dividers through all layers, backstitching at top and bottom for reinforcement. Your compartment design becomes the backbone of mat organization, transforming chaos into controlled creativity.
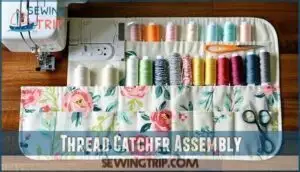
Thread Catcher Assembly
With your thread catcher, you’ll transform fabric scraps into a handy sewing accessory that snaps conveniently onto your mat.
Iron shape flex interfacing onto your thread catcher pieces, then layer the lining and outer fabrics right sides together.
Sew around the edges, leaving an opening for turning, then add snaps for easy attachment and removal during sewing mat assembly.
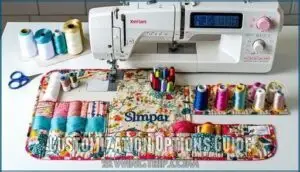
Customization Options Guide
You can personalize your sewing machine mat to fit your specific needs and work style perfectly.
This guide shows you how to adjust dimensions, modify pockets, and add features that match your unique sewing setup.
Adjustable Mat Sizes
Modular construction gives you complete control over your sewing machine mat dimensions. You can adjust the length to accommodate different machine sizes, creating a custom fit that works perfectly for your workspace and equipment.
- Cut mat pieces to match your machine’s footprint exactly
- Add or subtract fabric width for compact or oversized machines
- Create modular sections that connect for larger work surfaces
- Adjust pocket placement based on your dominant hand preference
- Scale down dimensions for portable travel-friendly versions
Considering the standard placemat size guidelines, such as standard sizes can help in determining the ideal dimensions for your sewing machine mat, allowing for a custom fit that meets your specific needs.
Integrated Pocket Features
Since you’re crafting your sewing machine mat DIY, smart pocket organization transforms chaos into control.
Design notion holders for scissors, seam rippers, and measuring tools while adding dedicated thread management compartments.
Your sewing accessories deserve specific homes—create batting-backed tool storage sections that keep everything visible and accessible.
This sewing mat pattern lets you customize pocket depths and widths for perfect sewing pockets functionality.
Utilizing custom sewing pocket designs can enhance the overall organization of your sewing space with custom solutions.
Left Handed User Adaptations
Ten percent of sewers are left-handed, yet most patterns ignore their needs.
Most sewing patterns overlook the ten percent who think differently.
Your sewing machine mat can flip the script with smart Left Handed Sewing adaptations that put comfort first.
- Mirror Imaging your pocket layout places tools on the left side for natural reach
- Reversible Design lets you attach thread catchers to either side instantly
- Adaptive Tools storage accommodates left-handed scissors and rotary cutters perfectly
- Ambidextrous Features include dual-sided ribbon ties for rolling convenience
- Custom dimensions optimize workspace flow for left-to-right cutting patterns
Additional Accessory Ideas
Beyond basic pockets, you can enhance your sewing machine mat with specialized Thread Organizers, Needle Cases, and Scissor Holders.
Consider adding Machine Covers that coordinate with your mat design.
Attach magnetic strips for pins, create dedicated spaces for seam rippers, or include elastic loops for rulers.
These sewing machine mat accessories transform your DIY project into a thorough workspace solution with specialized tools.
Frequently Asked Questions (FAQs)
Can washable batting be used instead of cotton?
Like choosing the perfect fabric for your masterpiece, washable batting works beautifully for your sewing mat.
You can substitute it for cotton batting without any issues—just follow the same layering and quilting steps outlined in the instructions, which makes it a beautiful choice.
What thread weight works best for quilting lines?
For quilting straight lines on your sewing machine mat, you’ll want 40-weight cotton thread—it’s strong enough to secure layers without creating bulk.
This weight glides smoothly through batting while providing excellent stitch definition for your crosshatch quilting pattern.
How do you prevent fabric puckering during assembly?
Use a walking foot and proper tension to prevent puckering. Pin layers securely before stitching. Go slow when quilting, letting the foot guide fabric naturally without forcing it through.
Can the mat accommodate overlock serger machines?
Standard mats accommodate 80% of overlock sergers perfectly.
You’ll need to measure your machine’s footprint first – most sergers are wider than regular sewing machines.
Consider customizing the mat size or creating a dedicated serger version for an ideal fit.
Whats the best way to store completed mats?
Roll completed mats tightly and secure with the attached ribbon. Store them flat in a drawer or upright in a basket to prevent creasing and maintain their shape.
Conclusion
Congratulations, you’ve joined the exclusive club of sewers who actually know where their seam ripper lives.
Your personalized sewing machine mat project now transforms chaotic crafting sessions into organized bliss.
This custom creation protects surfaces while keeping tools precisely where you need them.
You’ve built more than just a mat – you’ve crafted a foundation for countless future projects that’ll make every stitch smoother and every creative moment more enjoyable.
- https://www.brother-usa.com/blogs/stitching-sewcial/quilted-sewing-machine-mat
- https://www.itsseweasytv.com/projects/series_2000/2006/Itsseweasy_2006-2.htm
- https://rstyle.me/n/c83j3u4b6w
- https://www.digitizingusa.com/showblog/brother-se1900-review-and-tips
- https://www.poconosewandvac.com/products/brother/machines/cs6000i?associated=other-parts

