This site is supported by our readers. We may earn a commission, at no cost to you, if you purchase through links.
 Pressing techniques for curved seams require the right tools and approach to maintain fabric shape.
You’ll need a tailor’s ham or pressing mitt to support the curve’s natural contour.
Place your curved seam over the ham, matching the fabric’s curve to the tool’s shape.
Press gently with steam, moving the iron in the direction of the curve rather than against it.
Don’t drag the iron across the fabric.
Use a pressing cloth to prevent shine on delicate materials.
For princess seams and armholes, work in sections, allowing each area to cool before moving on.
The secret lies in understanding how different curve types respond to heat and pressure and using the right technique to achieve a smooth finish with a pressing cloth.
Table Of Contents
Key Takeaways
- Use a tailor’s ham as your essential tool – You’ll need this curved pressing surface to support your fabric’s natural contours and prevent unwanted pleats when pressing curved seams, such as princess seams and armholes.
- Clip your seam allowances strategically before pressing – You’ll eliminate puckering by making small cuts perpendicular to your stitching line every half-inch on concave curves and notching outward curves to help them lay flat.
- Apply steam correctly with controlled movements – You’ll achieve professional results by holding your iron two inches above the fabric, letting steam penetrate, then pressing down firmly without dragging across the curve.
- Press in the direction of the curve, not against it – You’ll maintain your fabric’s shape by following the natural curve line with your iron movements and allowing each section to cool completely before moving to the next area.
Pressing Curved Seams
Curved seams require special attention during pressing to maintain their shape without creating unwanted pleats or puckers.
You’ll need to clip the seam allowances, use a tailor’s ham for support, and apply controlled steam to achieve smooth, professional results, utilizing controlled steam.
Preparing Fabric
Before tackling curved seam pressing, proper fabric preparation sets the foundation for success.
Pre-washing benefits include removing chemicals that interfere with pressing.
Starching fabric creates stability, making curves easier to handle.
Test your iron’s temperature on scraps first—fabric stabilization depends on correct heat settings.
Consider glue basting for tricky curves.
This groundwork guarantees your pressing techniques deliver professional results every time.
Using Tailor’s Ham
Your tailors ham becomes your best friend when pressing curved seams.
Your tailor’s ham transforms tricky curves into perfectly pressed seams with professional ease.
Position the curved seam over the ham’s rounded surface, matching the fabric’s natural curve. The ham size should accommodate your project—smaller hams work for armholes, larger ones for hip curves.
Press gently, allowing the ham’s shape to support the fabric’s contours. This shaping technique prevents unwanted pleats and maintains the seam’s intended curve throughout pressing, which is crucial for achieving a professional finish with curved seams and requires a gentle approach.
Applying Steam
After shaping your curved seams on the tailor’s ham, steam application becomes your secret weapon for professional results.
Hold your steam iron two inches above the fabric, allowing moisture to penetrate without direct contact. Different fabric types require varying steam temperatures—wool loves heavy steam, while silk needs gentle mist.
Let steam work its magic, then press down firmly to set the curve permanently. Consider using a specialized sleeve board for easier handling, which can help achieve professional results.
Essential Pressing Tools
You’ll need the right pressing tools to achieve smooth, professional-looking curved seams that won’t pucker or distort.
A steam iron, sturdy ironing board, and pressing cloth form the foundation of your pressing toolkit, while specialized tools like a tailor’s ham and sleeve roll help you shape curves with precision.
They help you shape curves with the right tools.
Iron Types
Once you’ve mastered pressing curved seams, choosing the right iron becomes your next priority.
Steam irons offer versatility with adjustable temperature control and moisture delivery. Dry irons work well for delicate fabrics requiring precise heat without steam.
Gravity feed systems provide consistent steam pressure for professional results. Steam iron options are widely available.
Regular iron maintenance guarantees peak performance and prevents fabric damage during pressing tasks.
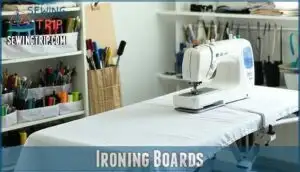
Ironing Boards
Choosing the right ironing board transforms your pressing techniques for curved seams.
Look for adjustable board height to match your comfort level, preventing back strain during detailed work.
Quality cover material like breathable cotton over metallic mesh guarantees superior steam flow.
Stability features matter most—wobbly boards create uneven results.
Italian-made boards offer superior construction, while portability options and storage solutions suit smaller spaces perfectly.
Many users find an adjustable ironing surface particularly useful.
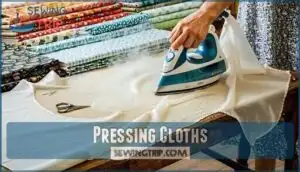
Pressing Cloths
Why risk damaging your fabric when a simple pressing cloth can save the day?
This protective barrier prevents shine on delicate materials and diffuses steam evenly across curved seams.
You’ll find silk organza, cotton voile, or wool gauze work best for heat protection.
Even a clean cotton handkerchief works for DIY pressing when you’re mastering those tricky curved sewing techniques.
Many sewers find it helpful to purchase pressing cloths for best results.
Seam Pressing Techniques
You’ll master three essential seam pressing methods that transform your curved sewing projects from amateur to professional quality.
These techniques—open seams, closed seams, and enclosed seams—each serve specific purposes and require different approaches to achieve crisp, flat results without puckering or distortion.
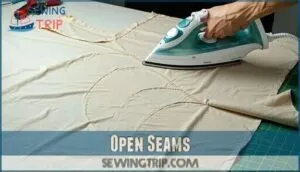
Open Seams
Open seams create the flattest finish for curved seam techniques, preventing bulk that can distort your garment’s shape.
Press seam allowances apart using your fingertips first, then apply heat with short, controlled movements.
This method works perfectly for layered fabrics, reducing bulk while securing edges.
When sewing curved seams, open pressing prevents fraying and maintains professional results through proper grading seams.
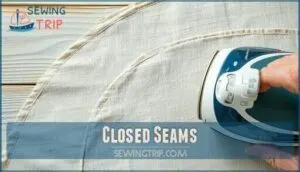
Closed Seams
When you’re pressing seams to one side, you’re creating a stronger, more durable finish that’s perfect for curved areas.
This technique works especially well for princess seams and armhole curves where bulk reduction matters most.
Here’s your closed seam pressing game plan:
- Press the seam flat first – Set those stitches before moving the fabric around
- Fold both seam allowances together – Keep them unified as you press toward the designated side
- Use your tailor’s ham for curves – This curved pressing surface prevents unwanted pleats and maintains the garment’s natural shape
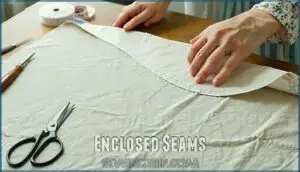
Enclosed Seams
Enclosed seams create clean, professional finishes where fabric edges hide inside.
Start by grading allowances—trim one shorter than the other to reduce bulk.
Clip corners at angles, then press seam allowances open before turning.
Apply understitching to prevent rolling.
After turning right side out, press again for a flat finish.
This technique transforms amateur-looking curved seams into polished results.
For lightweight fabrics, consider using French seam techniques.
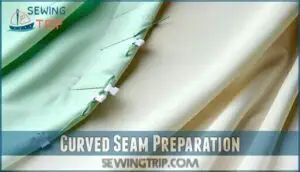
Curved Seam Preparation
You’ll need to prepare your curved seams properly before pressing to achieve smooth, professional results.
Start by marking your curves accurately, cutting precise seam allowances, and making strategic clips that allow the fabric to lay flat without puckering or distortion, to ensure smooth and professional results.
Marking Curves
Accurate curve tracing starts with selecting proper Curve Marking Tools like water-soluble fabric pens or tailor’s chalk.
When Transferring Markings from patterns, you’ll achieve Marking Precision Tips by using curved rulers or flexible measuring tape.
Choose Fabric Pen Types that disappear with steam – essential for pressing curved seams later.
Mark slowly, following your pattern’s natural curve for perfect shaping fabric results, using the right tools for perfect shaping and ensuring Marking Precision.
Cutting Seam Allowances
Proper seam allowances make curved seam pressing achievable.
Trim your seam allowances to reduce bulk before pressing – quarter-inch works well for most curves.
Grade seams by cutting one layer shorter than the other, preventing ridges on your garment’s right side.
This trimming step sets you up for successful pressing and professional-looking curved seams that lay flat, with proper seam allowances.
Clipping Curves
When sewing curved seams, you’ll need to clip strategically to eliminate puckering.
Concave clipping involves snipping inward curves at regular intervals, while convex clipping requires notching outward curves.
Your seam allowance determines notch frequency—typically every half-inch works well.
Aim clipping angles perpendicular to stitching lines, cutting close but never through them.
This technique transforms amateur pressing tips into professional-looking results.
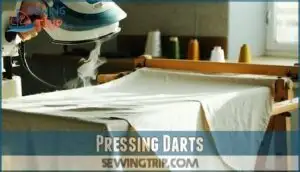
Pressing Darts
You’ll need to press darts carefully to maintain their three-dimensional shape and prevent unsightly ridges from showing through on the right side of your garment.
Position the dart over a tailor’s ham, press the fold flat, then direct vertical darts toward the center front or back and horizontal darts downward to create smooth curves.
Vertical Darts
Perfect dart placement starts at the apex, where fabric naturally curves around your body.
Press vertical darts toward the garment’s center, using your tailor’s ham to maintain the fabric’s natural shape.
Steam lightly while avoiding puckering by keeping steady pressure, and remember that your pressing direction matters.
Work from the wide end toward the point for professional results in curved seams.
Horizontal Darts
Since horizontal darts control fit across the bustline and waistline, proper dart direction becomes essential for successful shaping techniques.
Press these darts downward toward the hem, using your tailor’s ham to maintain the body’s natural curve.
Steam lightly while avoiding distortion of the fabric choice. Let the pressed dart cool completely before moving your garment to prevent shifting, ensuring a smooth finish with proper dart direction.
Curved Darts
Curved darts follow gentle arcs instead of straight lines, creating better body contours than their horizontal counterparts.
Transform your sewing with curves that follow your body’s natural lines—because straight darts belong in the past.
When pressing curved seams and dart pressing, position the curved dart over your tailor’s ham to match its natural shape.
Steam lightly while maintaining the dart’s arc, this dart shaping technique requires careful angle adjustment and proper tool selection for professional results in sewing curved seams with a focus on achieving better body contours.
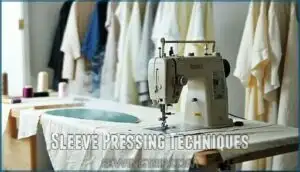
Sleeve Pressing Techniques
You’ll need specific techniques to press sleeves properly since their curved shape creates unique challenges that require careful attention to detail.
The key is using the right tools like sleeve rolls and tailor’s hams, along with controlled steam application to shape the fabric without creating unwanted creases or distortion, which is a complete concept in itself.
Pressing Sleeve Heads
After mastering darts, you’ll tackle sleeve heads with confidence.
Drape your sleeve over a tailor’s ham or sleeve roll, maintaining the fabric’s natural curve. Apply gentle steam while supporting the sleeve’s shape, then let it cool completely before moving. This cooling technique sets the pressed shape permanently.
- Shaping Sleeve Heads: Use curved pressing tools to maintain the sleeve’s three-dimensional form
- Stabilizing Fabric: Steam application followed by complete cooling prevents future distortion and wrinkles
- Achieving Fullness: Proper pressing preserves the sleeve’s designed ease without flattening the gathered areas
Pressing Sleeve Hems
Sleeve hems require specialized pressing techniques for professional results.
Place your sleeve over a sleeve board to access the entire circumference without creating unwanted creases.
For curved hems, work slowly around the shape, adjusting your hem allowance as needed.
Blind hems benefit from gentle steam application, while mitered corners need precise pressing to maintain sharp angles and prevent bulk.
Pressing Sleeve Inseams
Turn your sleeve inside-out and center the inseam on your sleeve board or pressing roll. This inside-out pressing technique prevents fabric distortion while maintaining proper seam alignment.
Press the seam open or to one side, depending on your pattern requirements. The sleeve board use here is key for preventing creases in tight spaces where standard pressing tools can’t reach, which is crucial for preventing fabric distortion and maintaining proper seam alignment.
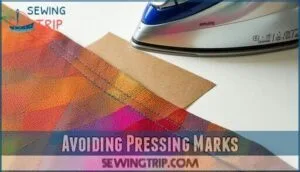
Avoiding Pressing Marks
You’ll prevent unwanted impressions on your fabric’s right side by placing a barrier between the seam allowance and the main fabric during pressing.
Use cardboard strips, scrap fabric, or a pressing cloth to shield delicate materials from heat marks and seam ridges that can ruin your finished garment’s professional appearance.
Using Pressing Cloths
Pressing cloths act as your fabric’s bodyguard against iron damage.
These protective barriers prevent shine, scorch marks, and unwanted impressions while ensuring even heat distribution across delicate materials.
Essential Pressing Cloth Techniques:
- Fabric Protection – Place cloth between iron and garment surface to shield delicate fibers from direct heat contact
- Shine Prevention – Use on wool, silk, and synthetic fabrics to maintain original texture and appearance
- Heat Distribution – Cotton voile or silk organza spreads temperature evenly across curved seam areas
- Moisture Control – Slightly damp cloths create controlled steam for better pressing results on stubborn wrinkles
- Cloth Materials – Choose breathable fabrics like muslin, cotton, or specialized pressing cloth materials for superior results
Applying Cardboard
Cardboard becomes your secret weapon for pressing curved seams without leaving imprints on delicate fabrics.
Place thin cardboard between seam allowances and your main fabric to prevent ridges from showing through. You can create DIY templates by cutting cardboard to match your curve’s shape, making it perfect for repeated pressing tasks.
Choose medium cardboard thickness for best results when manipulating fabric around curves. This technique is especially useful because cardboard becomes your secret weapon for achieving professional-looking results.
Preventing Shine
Fabric shine happens when heat meets synthetic materials or delicate weaves. You’ll prevent this by matching your iron’s temperature control to each fabric type.
Use pressing cloths made from cotton or silk organza as barriers between iron and fabric. Test steam usage on scraps first.
Selecting gentle detergents helps maintain fabric quality during cleaning.
Light pressure application works better than heavy pressing when working with sewing curved seams and delicate sewing techniques.
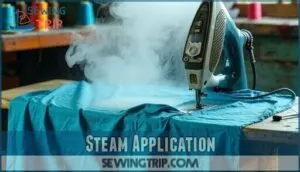
Steam Application
You’ll achieve the smoothest curved seams when you use steam to shape and set the fabric, especially with wool and linen materials.
Steam penetrates the fabric fibers, allowing you to mold curves around your tailor’s ham while the moisture helps eliminate wrinkles and creates crisp, professional edges.
Using Steam Irons
Steam irons transform your sewing game by delivering controlled heat and moisture for professional results.
Different Steam Iron Types offer varying benefits, while proper Temperature Control prevents fabric damage during pressing seams.
- Gravity feed irons provide consistent steam for heavy fabrics
- Traditional steam irons work well for most sewing curved seams projects
- Dry irons offer precise heat without moisture risks
- Professional models feature advanced temperature settings for Fabric Protection
Choose based on your specific pressing vs ironing needs and seam pressing advantages requirements.
Adding Water
Water quality makes the difference between professional pressing and amateur results.
You’ll need distilled water in areas with hard water to prevent mineral buildup in your steam iron. Fill your water spray bottle with the same quality water for consistent fabric moisture.
A dauber soaked in appropriate water creates controlled steam when pressed with a dry iron.
| Water Types | Best Use |
|---|---|
| Distilled | Hard water areas, prevents mineral buildup |
| Filtered | Moderate mineral content, good alternative |
| Tap Water | Soft water areas only |
| Demineralized | Professional pressing, extends iron life |
| Spring Water | Avoid – contains minerals that clog irons |
Controlling Steam
The secret to perfect seam pressing lies in mastering your steam iron’s output.
Different fabric types demand precise moisture levels and steam temperature control for desirable results.
- Adjust steam settings based on fabric weight and fiber content
- Monitor moisture levels to prevent water spots or fabric damage
- Control steam application timing for consistent pressing results
- Maintain iron temperature matching your pressing cloth requirements
- Practice steaming fabric techniques on scraps before pressing seams
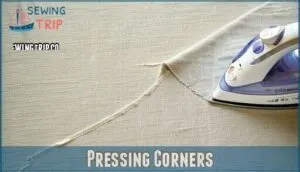
Pressing Corners
Pressing corners requires specific techniques to achieve sharp, flat edges without creating bulk or distortion in your fabric.
You’ll need to adjust your approach based on whether you’re working with outward corners, inward corners, or curved corners, as each type demands different handling methods, which can be considered complete concepts.
Outward Corners
Outward corners require precise pressing to achieve Sharp Points without bulk.
Trim seam allowances diagonally, leaving enough fabric to prevent fraying.
Press seams open first, then fold corner right sides together. Use your iron’s tip to create crisp edges while avoiding Preventing Bulk at intersection points.
| Technique | Method | Result |
|---|---|---|
| Mitering Corners | Fold fabric at 45-degree angle | Clean diagonal seam |
| Pointed Finishes | Trim excess before turning | Sharp corner points |
| Corner Shaping | Press seams open first | Reduced bulk accumulation |
| Seam Grading | Cut layers at different lengths | Smooth corner shifts |
| Final Pressing | Steam lightly after turning | Professional corner appearance |
Inward Corners
Inward corners require careful fabric manipulation to prevent bunching.
Start by clipping corners at a forty-five-degree angle, stopping just short of your stitching line.
Grade seams by trimming layers to different lengths, creating smooth passages.
Use a point turner to gently push out corners from the inside.
Press with steam while layering fabric carefully to avoid creating bulk at the intersection, and make sure to use a technique that prevents bunching and allows for smooth passages.
Curved Corners
Curved corners blend the best of both worlds, creating smooth shifts that eliminate bulk while maintaining shape. Unlike sharp angles, these gentle curves require careful grading seams and strategic clipping corners to achieve professional results.
Specialized pressing tools help achieve this with ease. They are essential for creating smooth curves without compromising the fabric’s integrity.
- Use a point turner to gently coax fabric into perfect curves without creating sharp creases
- Grade seam allowances progressively, trimming each layer shorter than the previous one
- Apply steam gradually while shaping the curve over your tailor’s ham for dimensional accuracy
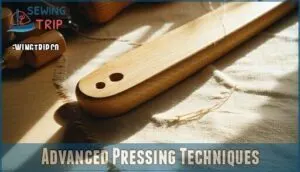
Advanced Pressing Techniques
You’ll master professional-level curved seam pressing when you combine specialized tools like wooden clappers with precise pressure techniques and proper finishing methods.
These advanced methods transform your curved seams from amateur attempts into crisp, commercial-quality results that maintain their shape through multiple wears and washes, utilizing proper finishing methods.
Using Clappers
After pressing curved seams with steam, you’ll want to reach for your tailor’s clapper.
This hardwood tool absorbs moisture and locks in heat, creating razor-sharp pressed seams without shine.
Press the clapper down immediately after lifting your iron. The wood traps steam and sets the seam permanently, making your curved seams look professionally finished.
| Clapper Feature | Class Size | Regular Size |
|---|---|---|
| Portability | More portable | Traditional weight |
| Wood Type | Dense hardwood | Dense hardwood |
| Steam Absorption | Excellent | Superior |
| Best For | Light fabrics | Heavy seam allowances |
| Cooling Time | 30-45 seconds | 45-60 seconds |
Applying Pressure
After using clappers to flatten seams, proper pressure control becomes your secret weapon for professional results.
Apply even pressure across curved seam allowances to prevent distortion and maintain fabric stability. This technique sets seams permanently while maintaining their intended shape.
Master these pressure application methods for flawless curved seams:
- Hold firmly for 10-15 seconds – Let steam penetrate completely before lifting
- Press in sections – Work methodically along concave curves for consistent results
- Apply downward force – Use your body weight, not just arm strength
- Maintain steady contact – Keep iron flat against fabric throughout pressing
- Cool before moving – Allow fabric to set completely for lasting shape
Finishing Seams
After applying pressure sets your curved seams, you’ll want clean finishing to prevent fraying.
Seam allowances need proper edge finishes for durability.
Serged edges work perfectly for knits, while binding seams suits delicate fabrics.
Use your pressing cloth when finishing to avoid shine.
Finger press first, then apply heat to lock everything in place.
| Finish Type | Best For |
|---|---|
| Serged edges | Knit fabrics and stretchy materials |
| Binding seams | Delicate or fraying fabrics |
| Pinked edges | Stable woven fabrics |
| French seams | Sheer or lightweight materials |
Frequently Asked Questions (FAQs)
How to press curved seams?
Don’t put the cart before the horse—first press your curved seam flat to set stitches.
Clip the seam allowance, drape over a tailor’s ham, then steam carefully to shape without creating pleats, and remember to steam carefully.
Which of the following is used to press the curved seam?
A tailor’s ham is your go-to tool for pressing curved seams effectively.
You’ll place the curved seam over this ham-shaped cushion, then press slowly with steam to shape the fabric without creating unwanted pleats or distortion.
How to stitch curved seams?
Like traversing a winding road, you’ll starch fabric first for stability.
Sew slowly with shorter stitches, easing tension around curves.
Clip seam allowances afterward, then press over a tailor’s ham for professional shaping.
How do you press bias-cut curved seams?
You’ll need extra care with bias-cut curved seams since they stretch easily.
Use a tailor’s ham, press gently with steam, and let the fabric cool completely before moving to prevent distortion.
What pressing technique works for armhole curves?
Armholes require 90% more precision than straight seams due to their complex curve.
Drape the garment over a tailor’s ham, steam gently without stretching, and press in sections following the natural curve to prevent puckering.
Can you press curves without a ham?
You can press curves without a ham by using rolled towels, a sleeve roll, or even your ironing board’s curved edge.
These alternatives won’t give you the same precision, but they’ll work for basic curve shaping.
How to prevent puckering in lightweight fabrics?
Lower your iron’s temperature and use minimal steam when working with delicate materials.
Place a pressing cloth between the iron and fabric, then lift and press gently without sliding to avoid stretching or distorting lightweight weaves.
Then, to ensure the best results, remember to always press gently.
Should curved seam allowances be trimmed differently?
Tailors trim curved seam allowances to just 3/8 inch for ideal results.
You’ll need to grade them differently – trim the under layer shorter than the top layer, then clip at regular intervals to eliminate bulk and prevent puckering when pressed.
Conclusion
Ready to transform your sewing from amateur to professional?
Mastering pressing techniques for curved seams isn’t just about having the right tools—it’s about understanding how fabric responds to heat, steam, and pressure.
You’ve learned to use tailor’s hams, work with different curve types, and avoid common mistakes like dragging your iron.
With practice, these pressing techniques for curved seams will become second nature, giving your garments that polished, store-bought appearance you’ve always wanted to achieve.


