This site is supported by our readers. We may earn a commission, at no cost to you, if you purchase through links.
Get yourself a quality tracing wheel and dot-and-cross paper—they’ll transfer markings cleanly without bleeding through your delicate fabrics.
For seam allowances, stick to the industry standards: 1⁄4 inch for armholes and 5⁄8 inch everywhere else.
French curves smooth those tricky necklines and armholes like magic. Maintain cutting tolerances within 1-2mm to prevent fabric waste and fitting nightmares. Sharp tools aren’t just helpful—they’re your lifeline to professional results that separate weekend hobbyists from true craftspeople.
Table Of Contents
Key Takeaways
- Master your cutting tools: Sharp fabric scissors, quality tracing wheels, and French curves transform pattern cutting from guesswork into professional precision—dull tools create frayed edges and wonky seams that scream amateur work.
- Align grainlines like your garment depends on it: Proper grain alignment prevents twisted seams and maintains the garment’s intended drape, while crooked grainlines turn even premium fabric into a disaster that hangs like a dishrag.
- Maintain cutting tolerances within 1-2mm: Professional pattern cutting demands millimeter-level precision to prevent fabric waste and fitting nightmares—this accuracy separates weekend hobbyists from true craftspeople.
- Use industry-standard seam allowances consistently: Follow the golden rule of ¼ inch for armholes and ⅝ inch elsewhere, marking these allowances accurately with tracing wheels to ensure pattern pieces fit together seamlessly during construction.
Essential Tools for Precision Pattern Cutting
Precision pattern cutting starts with having the right tools in your arsenal—because even the most skilled hands can’t overcome dull scissors or warped rulers.
Your Pattern Master, quality tracing wheels, sharp fabric scissors, and reliable French curves form the foundation that transforms pattern cutting from guesswork into professional-grade precision.
Pattern Master Features and Uses
Think of the Pattern Master as your secret weapon in the battle against wonky seams and crooked cuts—this isn’t just another ruler gathering dust in your sewing box.
With built-in seam guides and angle lines, this Master tool transforms pattern drafting from guesswork into precision cutting.
You’ll mark accurate cutting lines and maintain consistent seam allowances across all pattern pieces, guaranteeing your pattern making reaches professional standards every time.
Choosing The Right Scissors and Cutters
Your cutting tools are the unsung heroes of pattern precision—choose poorly, and even the most expertly drafted pattern becomes a frustrating battle against frayed edges and wonky lines. Dressmaking Shears with exceptional Edge Durability and Handle Ergonomics transform cutting from chore to craft.
Quality fabric scissors demand regular Blade Sharpening—dull blades crush fibers instead of slicing cleanly. For straight lines and multiple layers, rotary cutters offer peerless precision.
Smart Cutter Selection means investing in tools that match your projects and maintain their edge through consistent Scissor Maintenance.
Importance of French Curves and Rulers
Perfect curves don’t happen by accident—they’re carved from chaos with the right tools in your hands. French curves and rulers transform jagged necklines and wayward armholes into professional masterpieces through precise fabric manipulation.
- Smoothing techniques eliminate choppy transitions between pattern pieces
- Curve mastery requires quality French curves for accurate tracing
- Ruler precision ensures straight seams and consistent measurements
- Cutting mat grids provide essential reference points for alignment
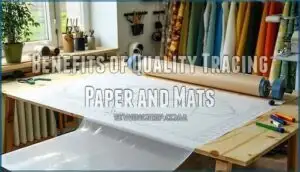
Benefits of Quality Tracing Paper and Mats
Most sewers underestimate how much time and frustration quality tracing paper and cutting mats can save until they experience the difference firsthand. Dot-and-cross tracing paper with carbon backing transfers markings cleanly without bleeding through delicate fabrics.
Self-healing cutting mats protect your blades while providing grid lines for precision tools like tracing wheels, guaranteeing cutting accuracy and fabric protection throughout every pattern cutting project.
Preparing Fabric and Patterns for Cutting
Get your prep work right, and your sewing project starts on solid ground.
Master the art of aligning grainlines, laying out pattern pieces strategically, and prepping different fabric types to guarantee every cut fulfills your vision.
Aligning Grainlines and Crossgrain Edges
Think of grainlines as the skeleton of your garment—get them wrong, and even the most beautiful fabric will hang like a dishrag. Start by establishing your crossgrain edges with a perpendicular cut to the selvage.
Get your grainlines wrong, and even the most beautiful fabric will hang like a dishrag
Your grainline alignment determines fabric orientation and ensures precision layout. Match pattern arrows to fabric grain direction for accurate cutting—this fundamental step prevents twisted seams and preserves the garment’s intended drape and structure.
Laying Out Pattern Pieces for Accuracy
Your fabric layout is like a puzzle where every piece needs to find its perfect spot—and one wrong placement can throw off your entire garment.
Start with your largest pattern pieces first, positioning them along the fabric grain direction for ideal drape. Check symmetry by folding paired pieces together—sleeves, collar halves, and front panels must mirror perfectly.
This systematic approach to pattern placement ensures accuracy optimization while maximizing fabric efficiency.
Preparing Fabric for Different Pattern Types
Each fabric type calls for its own approach – cotton behaves nothing like silk or jersey knits.
With wovens, you can fold fabric and cut double layers for cutting efficiency. Knits need single-layer cutting to prevent stretching during fabric preparation.
Directional prints require careful pattern layout planning, while bias cuts demand extra fabric grain attention for proper alignment.
Techniques for Accurate Measuring and Marking
Getting your measurements and markings right makes all the difference between clothes that fit like they were made for you and ones that look homemade. These basics aren’t glamorous, but they’re what separate beginners from sewists who consistently nail the fit.
Using Tracing Wheels and Seam Guides
Tracing wheels aren’t just marking tools—they’re your secret weapon for transferring every critical detail from pattern to fabric with surgical precision. Single wheels excel at basic pattern cutting, while double wheels automatically add seam allowances as you trace. Pair them with quality dot-and-cross tracing paper for clean, accurate transfers that boost cutting efficiency.
Master These Tracing Techniques:
- Use single wheels for basic pattern outlines and marking notches with fabric precision
- Choose double wheels to automatically add consistent seam allowances while tracing
- Apply steady pressure to guarantee complete pattern accuracy without tearing delicate fabrics
- Follow seam guides methodically to maintain uniform spacing across all pattern pieces
- Clean wheels regularly to prevent ink buildup that compromises weaving precision
Marking Seam Allowances Correctly
One wrong seam allowance can turn your perfectly cut pattern piece into an expensive learning experience. Industry standards call for ¼ inch on armholes and ⅝ inch for general seams—memorize these measurements for cutting precision.
Use marking tools to add fabric margin beyond pattern edges, maintaining measurement control through double-checking before cutting. Your accurate marking determines whether pattern pieces fit together seamlessly.
Transferring Pattern Markings to Fabric
Pattern markings are like a secret language between your pattern and fabric—miss the translation, and your garment won’t speak fluent fit.
Use sharp tracing wheels with quality tracing paper for clean transfers. Dressmakers chalk works perfectly on light fabrics, while chalk alternatives like washable markers handle marking dark fabrics beautifully.
Always mark accurate notches and pattern pieces precisely—they’re your roadmap to professional results.
Measuring Tools for Consistent Results
Good measuring tools make the difference between amateur work and professional results. You can have excellent cutting technique, but without accurate measurements, your project will still look rough around the edges.
Your arsenal should include clear rulers with measurement standards, fabric gauges for consistent seam allowances, and a quality cutting mat with grid lines.
These measuring techniques guarantee accurate cutting every time, transforming your pattern pieces from guesswork into precision rulers for professional results.
Advanced Cutting Methods for Best Results
After you nail the fundamentals, advanced cutting techniques make all the difference between weekend warrior work and true craftsmanship.
These techniques focus on precision execution—from maneuvering tricky curves to maintaining industry-standard tolerances that guarantee a perfect fit every time.
Cutting Along Curves, Notches, and Details
Mastering curves and notches separates amateur cutters from those who create garments that fit like they were born on the body. French curves become your best friend for smooth edge finishing around armholes and necklines.
Use sharp, pointed scissors for precision trimming around notches—cutting perpendicular to the edge prevents fraying. For curved seam cutting, work slowly with small snips rather than long cuts.
Detail management means transferring every marking with tracing wheels before cutting.
Rotary Cutters Vs. Fabric Scissors
Two distinct cutting speed patterns emerge when comparing rotary cutters and fabric scissors. Rotary cutters slash cutting time by 50% for straight lines and handle up to eight fabric layers simultaneously, while fabric scissors excel at intricate curves and delicate details. Your choice depends on project demands and fabric types.
- Cutting Speed: Rotary cutters dramatically reduce time for bulk cutting and straight seams
- Blade Sharpness: Scissors maintain consistent precision longer; rotary blades need frequent replacement
- Fabric Types: Stretch fabrics cut cleaner with rotary tools; delicate materials prefer scissor control
- Ergonomic Grips: Rotary cutters reduce hand fatigue by 35% during extended cutting sessions
- Safety Features: Scissors offer better control; rotary cutters require blade guards and cutting mats
When selecting the right tool, consider the cutting tool costs to make an informed decision for your sewing needs.
Maintaining Cutting Tolerances
In the realm of professional sewing, a millimeter here or there can transform a perfectly customized garment into something that screams ‘homemade disaster.’
That’s why maintaining cutting tolerances within 1-2mm isn’t just perfectionism—it’s your secret weapon against fabric waste and fitting disasters.
Professional pattern cutting demands precision tools and tolerance control that separate the pros from weekend warriors, guaranteeing your efficient layouts translate into garments that actually fit.
Organizing Cut Pieces for Efficiency
After hours of precise cutting, your beautifully shaped pattern pieces can quickly turn into a chaotic pile if you don’t have a system for keeping them organized and ready to sew. Stack pieces by cutting order and use piece labeling with sticky notes.
Create efficiency systems by grouping similar components together—sleeves with sleeves, bodice pieces with bodice pieces. Smart storage solutions like shallow boxes prevent fabric sorting nightmares later.
Common Pattern Cutting Mistakes to Avoid
Even seasoned sewers hit the same cutting snags that can wreck a whole project before you even thread the needle.
These slip-ups turn beautiful fabric into expensive mistakes, but they’re totally avoidable once you know what to watch for.
Skipping Seam Allowances
Forgetting seam allowances is like building a house without leaving room for the walls—you’ll end up with pieces that simply won’t fit together, no matter how perfectly you cut everything else. This seam allowance error wreaks havoc on pattern fitting and garment structure.
Here are three critical consequences of skipping seam allowances:
- Fabric waste increases dramatically when you discover cut pattern pieces won’t connect properly
- Cutting accuracy becomes meaningless if your fabric cutting doesn’t account for joining edges
- Pattern cutting techniques fall apart without proper allowances for seamwork
Your cutting techniques must always include these essential margins.
Incorrect Measurements and Poor Alignment
Nothing derails a project faster than sloppy measurements and wonky grainline alignment. When you’re measuring fabric incorrectly, you’re setting yourself up for fabric distortion that’ll haunt your finished garment. Poor pattern accuracy from measurement errors leads to fitting disasters in nearly half of homemade pieces. Achieving a good fit requires understanding pattern making problems that can affect garment quality.
| Error Type | Impact | Prevention |
|---|---|---|
| Off-grain cutting | Twisted, pulling garments | Check grainline before every cut |
| Wrong seam allowances | Sizing issues, poor fit | Double-check pattern markings |
| Misaligned pieces | Uneven hems, crooked seams | Use cutting tolerances of 1-2mm |
| Rushed marking | Inaccurate construction lines | Take time with tracing wheels |
Your cutting accuracy depends on methodical fabric layout and consistent marking fabric techniques.
Using The Wrong Cutting Tools
Your beautiful pattern pieces can turn into a nightmare faster than you can say "oops" when you’re wielding the wrong cutting tools for the job. Here’s what happens when sewing tools don’t match your fabric’s needs:
- Dull blades tear delicate fabrics instead of slicing cleanly
- Wrong rotary cutters create jagged edges on lightweight materials
- Fabric scissors used on paper destroy cutting precision
- Damaged cutting mat surfaces cause incorrect angles
- Poor tool maintenance leads to fabric damage and cutting errors
Sharp, appropriate tools prevent costly mistakes.
Cutting on Uneven or Unstable Surfaces
Cutting fabric on a wobbly table is like trying to perform surgery on a trampoline—precision becomes impossible when your foundation shifts beneath you.
Surface preparation starts with a stable cutting mat on a firm, level table. Uneven fabric layers create distortion that your rotary cutter can’t compensate for.
Cutting stabilizers help when working on less-than-perfect surfaces, but proper surface correction beats adaptive techniques every time for accurate fabric cutting.
Frequently Asked Questions (FAQs)
How to cut out a sewing pattern?
Start by establishing crossgrain edges and aligning grainlines with your fabric’s weave. Position pattern pieces according to layout diagrams, then use sharp fabric scissors for precise cuts along marked lines.
How to cut a pattern correctly?
You know what separates a seasoned seamstress from someone just starting out? It’s all in how they cut their fabric.
Getting clean, accurate cuts starts with investing in quality fabric scissors, making sure your fabric grain runs straight, and taking your time to follow those seam allowance marks. No rushing here.
When you nail these basic cutting steps, you’re setting yourself up for professional-looking results that actually fit right and hold up over time.
Should sewing patterns be cut on the right or wrong side?
Which side matters when cutting patterns depends on your Fabric Orientation and Cutting Strategy. Most patterns are cut on the fabric’s wrong side for better Seam Visibility and reduced Fabric Distortion.
Key considerations for pattern cutting decisions:
- Right side cutting – Use for directional prints, napped fabrics, or when matching fabric patterns requires visual confirmation
- Wrong side cutting – Standard practice for most fabrics, allows clearer Pattern Placement marking and reduces cutting errors
- Grainline alignment – More important than fabric side choice, guaranteeing proper drape regardless of cutting surface
- Pattern pieces organization – Stack cut pieces systematically to prevent confusion during construction, especially with asymmetrical designs
How do you cut a fabric pattern?
Like a surgeon wielding a scalpel, precise fabric cutting transforms your pattern into garment excellence.
First, establish proper Fabric Preparation by pressing and aligning grainlines. Position pattern pieces following efficient layouts, securing with weights.
Use Precision Tools—sharp fabric scissors or rotary cutters—maintaining steady hands. Cut confidently through marked lines, preserving accuracy.
What tools do I need to cut a pattern?
To cut patterns accurately, you need essential sewing tools that guarantee precision and clean results. Fabric shears cut cleanly through multiple layers, while rotary cutters provide straight edges on your cutting mat.
- Cutting Mats – Protect surfaces and provide grid lines for measuring
- Pattern Weights – Hold patterns flat without pins damaging delicate paper
- Ruler Sets with Seam Guides – Measure accurately and mark consistent seam allowances
{{/END-OFTEXT}}
How do you cut out paper patterns?
Paper tracing begins with securing your pattern pieces flat against quality tracing paper. Use sharp fabric scissors for clean edges, following pattern markings precisely. Rotary cutters work well for straight lines.
Pattern preparation demands accuracy—measure twice, cut once for professional results.
How do you handle stretchy fabrics when cutting?
When cutting dynamics meet elastic edges, stabilizing stretch fabrics becomes your secret weapon.
Use tissue paper underneath knit cutting areas, weights instead of pins, and sharp rotary cutters for clean cuts without pulling. This fabric manipulation prevents distortion during pattern cutting.
Whats the best way to cut bias tape?
Successful bias tape cutting requires diagonal precision across the fabric’s grain. First, establish your 45-degree angle using a ruler and rotary cutter for clean, consistent strips.
Quality fabric scissors work, but rotary cutters deliver exceptional accuracy for fabric cutting techniques.
- Mark continuous cutting lines at your desired width using fabric shearing techniques
- Use tape maker tools for uniform folding after cutting sewing patterns
- Stack bias strip methods allow multiple pieces from single diagonal cuts
How do you adjust patterns between sizes?
Pattern grading transforms single-size designs into multiple sizes through proportional scaling. You’ll redistribute measurement adjustments across pattern pieces, maintaining shape integrity while modifying key dimensions.
Professional pattern drafting requires systematic size conversion, adjusting both length and width proportionally for accurate fit modifications.
When should you use pattern weights versus pins?
Choosing between pattern weights and pins seems backwards—the heaviest option often delivers the lightest touch.
Pattern weights excel when cutting delicate fabrics or using rotary cutters, providing fabric stability without piercing.
Pins work best for slippery materials needing secure hold during cutting accuracy checks.
Conclusion
Look, we all started somewhere. That master tailor whose work you admire? They once butchered their first sleeve just like you might.
These professional sewing tips for pattern cutting transform your workspace into a precision studio where every measurement counts. Sharp tools become extensions of your hands, grainlines guide your vision, and each cut builds toward garments that rival high-end fashion.
Master these fundamentals, and you’ll never look back.
- https://www.reddit.com/r/sewing/comments/17zwcpp/how_accurate_do_you_tolerate_when_cutting_and/
- https://blog.stateless.nyc/can-effective-pattern-making-reduce-waste-for-fashion-brands-in-2024/
- https://www.youtube.com/watch?v=U42I-u3wWmk
- https://highlatitudestyle.com/zero-waste-pattern-cut-clothes/
- https://patternlab.london/home/what-is-seam-allowance-basic-pattern-making/


