This site is supported by our readers. We may earn a commission, at no cost to you, if you purchase through links.
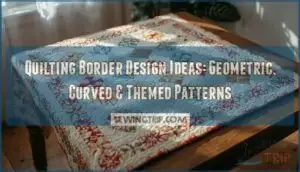
Quilting border design ideas aren’t just the finishing touch; they’re the frame that gives your masterpiece its confidence. From crisp diamonds lined up like dancers, to scalloped edges that ripple with movement, fresh inspiration for modern quilts is everywhere.
Borders transform quilts, and when you get them right, everything inside sings.
Table Of Contents
Key Takeaways
- Thoughtfully designed quilt borders do more than frame your work—they control the finished size and give your quilt a sense of balance and completion.
- Geometric, curved, and themed border styles each offer unique ways to add structure, movement, or playful storytelling to your quilts.
- Border proportions, fabric choices, and construction techniques—like starting with side borders and using accurate marking tools—are key to achieving professional, polished results.
- Mixing inspiration with practical methods allows you to create borders that both express your personality and bring harmony to your entire quilt.
Why Quilt Borders Matter for Your Design
You might think borders are just the finishing touch on a quilt, but they’re actually pulling double duty in ways you probably haven’t considered. They frame your work, sure, but they’re also controlling how big your quilt ends up and whether the whole thing feels complete or like something’s missing.
Quilt borders aren’t just decoration—they shape both the finished size and the sense of completion in your design
Let’s look at three specific ways borders shape your design from the ground up.
Framing Your Quilt’s Central Design
Think of your quilt border as the picture frame around a masterpiece—it draws your eye exactly where you want it. A mitered corner method gives that polished gallery look, while border width ratios (aim for one-third to one-half your block size) keep visual emphasis points locked on your center.
Mastering borders requires understanding proportions and design. These quilt border ideas transform good designs into stunning ones that command attention.
Creating Visual Balance and Finished Size
Border proportions shape how your finished quilt feels—symmetrical borders create calm balance, while asymmetrical borders add drama. Your border measurements directly control finished size: a 2-inch border adds 4 inches to each dimension. Border layering with multiple strips (say, 2-inch, then 4-inch) lets you hit your target size without overwhelming your quilt design. A quilting calculator app can help with border yardage calculations.
Here’s what smart border planning gives you:
- Precise control over your final quilt dimensions for any bed size
- Visual harmony that makes viewers pause and appreciate your work
- Creative flexibility to adjust quilt patterns without redoing center blocks
- Professional polish that separates casual projects from showstoppers
- Confident fabric shopping when you know exact border measurements upfront
Enhancing Overall Quilt Aesthetics
Beyond size, your border choice transforms raw craftsmanship into visual harmony. Thoughtful fabric selection ties your quilt together—repeating colors from the center creates color balance, while bold patterns add aesthetic appeal.
Geometric quilt patterns work beautifully with simple borders, but complex centers need restraint. Think quilt proportion: borders between one-third to one-half your block size prevent overwhelming your design. That’s where quilt design inspiration meets technical precision.
Geometric Quilt Border Design Ideas
Geometric borders bring structure and visual punch to your quilt with clean lines and repeating shapes. These patterns work beautifully when you want symmetry and bold impact around your quilt’s center.
Let’s look at some standout geometric options that’ll frame your work with style.
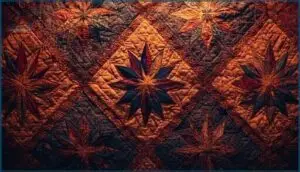
Diamond Star Border Patterns
You’ll love how Diamond Star quilt borders bring geometric beauty straight to your edges with their signature diamond shapes and star motifs.
This diamond border quilt pattern isn’t just stunning—it carries deep cultural significance in Native American and Amish traditions.
The geometric quilt patterns require precise quilting techniques for those tricky bias edges, but the payoff? A three-dimensional effect that makes your stars practically twinkle across the fabric.
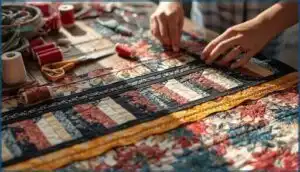
Checkerboard and Pioneer Braid Designs
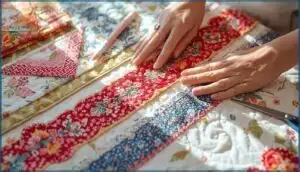
Checkerboard and Pioneer Braid designs give you that classic geometric punch with endless fabric selection possibilities. These geometric quilt borders appear in nearly one-third of contemporary patterns, and they’re perfect for exploring border color theory while nailing your quilt sizing.
Here’s what makes these border patterns shine:
- Strip piecing cuts your construction time by 40% compared to sewing individual squares
- Pioneer Braid (also called Prairie or Scrappy Braid) weaves together 2.5 × 6-inch strips for striking movement
- High-contrast checkerboards create instant visual drama—think black and white or bold complementary pairs
- Braid techniques usually add 6–8 inches per side, making them ideal for resizing panel quilts to bed dimensions
Eight-Pointed Star Border Variations
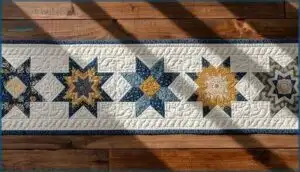
Star pattern variations release remarkable creativity when you’re ready to enhance your quilt border designs. The Eight-Pointed Star Quilt Border shines in geometric quilting patterns—you can build classic versions using half-square triangles with scant 1/4-inch seams, or try wonky stars with asymmetrical points for custom star designs.
Economy stars reduce background fabric, while modified versions swap center squares for secondary pieced blocks, following current quilt border trends toward adaptable star block construction.
Glacier Star and Angular Patterns
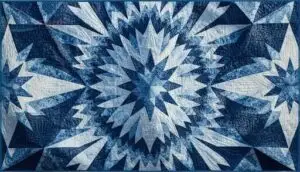
Angular design really shines with Glacier Star and similar patterns, where crisp geometric borders and sharp angular lines set the mood. If you crave quilt border designs that highlight precision, try angular borders using three to five colors.
Quilt extensions with geometric quilting patterns bring star patterns and vigorous movement to your project—perfect for big, show-worthy finishes.
Curved and Flowing Border Designs
If you’re drawn to movement and softness in your quilts, curved borders can add that organic flow you’re looking for. These designs break away from straight lines and bring a sense of rhythm that feels almost alive.
Let’s look at some curved and flowing options that’ll give your quilt a graceful, eye-catching finish.
Drunkard’s Path Border Technique
Drunkard’s Path brings centuries of history to your quilt border design—this curved piecing pattern dates back to Ancient Egypt and became a symbol of temperance movements in 19th century America.
You’ll need steady hands for those quarter-circle seams, but the organic flow creates visual breathing room around your central blocks. Echo quilting those curves really makes them pop.
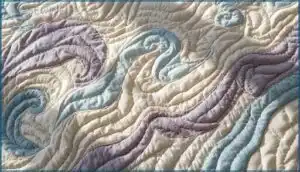
Scalloped and Wave Border Patterns
Scalloped borders add a soft, feminine finish that transforms your quilt from squared-off to stunning. You’ll mark your scallop depth—usually 1.5 to 3 inches—with fabric marking tools, then use border templates or household items like plates to trace those curvaceous binding curves.
Here’s your game plan for waves and scalloped edges:
- Measure your quilt perimeter and subtract 4 inches for trimming
- Calculate scallop width by dividing border length by desired number of curves
- Add 0.5 inches to your scallop depth for seam allowances
- Use bias binding for smooth application around curved edges
Autumn Lattice and Woven Strip Designs
You’ll love how woven strip borders blend autumn colors into geometric quilting patterns that feel both modern and cozy.
These geometric foundations use 2.5-inch strips or jelly rolls to create lattice patterns with minimal fussing—just offset your seams to form diamond effects.
Your autumn lattice quilt border design works up fast using contrasting fabrics, and walking foot quilting techniques keep those woven strips perfectly aligned without distortion.
Garden Trellis With Interlacing Lines
Garden Trellis borders bring nature-inspired structure to your geometric quilting patterns through interlacing techniques that create depth. You’ll use quilting rulers to keep those lines crisp—usually spacing them ¼” apart, though you can densify to ⅛” for texture.
Fabric selection matters here: coordinate 11 prints in garden greens and florals, then choose thread colors that define each segment. Border measurements averaging 58-72 inches suit most projects.
Whimsical and Themed Border Ideas
If geometric precision isn’t your thing, you’re going to love the playful side of quilt borders. Themed designs let you bring personality and storytelling into your work—whether that’s woodland animals, vintage charm, or seasonal blooms.
Let’s look at a few whimsical options that’ll make your quilt feel like a creative adventure.
Woodland Creatures and Nature Motifs
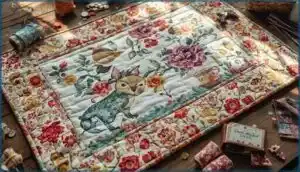
Bringing foxes, rabbits, and raccoons into your borders adds enchantment to any quilt project. You can use fusible appliqué to create detailed Woodland Creatures against nature palettes of forest greens and misty grays.
Try combining animal prints with floral design strips or geometric pattern accents for layered visual interest. These Motif Combinations work beautifully as Seasonal Borders, and current Market Trends show strong demand for these charming quilting patterns.
Paradise Panel With Pinwheel Blocks
When you’re ready to frame a scenic paradise print, pinwheel blocks create the perfect quilt border. This combination lets you expand your project from around 24×48 inches to a full 40×64 inches—ideal for lap or throw quilts.
Panel color coordination becomes simple when you echo tropical hues from the center into your pinwheel size variations:
- Use six 12-inch pinwheel blocks per side for balanced visual border impact
- Cut two 10-inch fabric squares to make four half-square triangles per block
- Add 1-inch sashing between panel and border for crisp definition
- Alternate dark and light fabrics in your border fabric selection for dimensional contrast
- Plan block layout options by “auditioning” placement before final sewing
This quilt border design gained serious traction in quilting communities since 2020, and it’s easy to see why. The geometric designs of spinning pinwheels draw your eye inward while giving that tropical panel room to breathe. You’ll love how these quilting designs transform a simple print into a show-stopping finished quilt.
Floral and Seasonal Border Designs
If nature’s changing seasons speak to your creative soul, you’ll appreciate how floral quilt border designs bring year-round beauty to your work. Appliqué flower designs with custom shading create stunning transitions from spring blooms to autumn-themed quilting motifs. The Four Seasons Quilt Border perfectly captures this concept—each seasonal quilt block celebrates nature’s transformation through edge-to-edge quilting and carefully chosen floral hints.
| Season | Floral Border Elements |
|---|---|
| Spring | Cherry blossoms, tulips, fresh greens |
| Summer | Sunflowers, roses, bright petals |
| Autumn | Maple leaves, chrysanthemums, warm tones |
Vintage-Inspired Border Patterns
With antique fabric scraps and classic vintage quilt block designs, you can recreate the charm of 19th-century quilts. Try these timeless quilt border patterns:
- Eight-Pointed Star borders with light-dark contrast
- Checkerboard patterns featuring 200+ tiny squares
- Broderie perse appliqué with cut-out motifs
- Ribbon Border Classic Vintage Quilt Block with interlocking chains
Modern adaptations let you blend vintage quilt patterns with contemporary quilting designs while honoring motif symmetry and traditional color palettes.
Essential Techniques for Border Construction
Once you’ve chosen your perfect border design, the real magic happens in how you actually build it. The right techniques can make the difference between a border that lies flat and looks professional versus one that puckers or warps.
Let’s walk through the essential methods that’ll help you construct borders with confidence and precision.
Using Walking Foot for Precise Quilting
When you’re working through border quilting, a walking foot is your secret weapon for keeping those fabric layers perfectly aligned. This attachment feeds your top, batting, and backing through at exactly the same rate, so you won’t deal with shifting or puckering.
It’s especially exceptional for geometric quilting patterns and straight-line work, giving you stitch consistency that makes your borders look professionally finished every time.
Marking Tools and Quilting Guides
Precision in quilt border techniques starts with the right tools—think Hera Markers for crisp lines without residue, and Air Erasable or Frixion Pens for temporary marks.
Digital Guides and downloadable Quilting Templates can boost accuracy, especially for intricate designs.
Whether you’re using walking foot quilting or free motion quilting, these marking tools give your projects clarity and confidence.
Adding Borders to Quilt Sides First
Wondering why your quilt borders sometimes look wavy? Here’s the secret: start with the sides. Quilt Border Sequencing matters—measuring and cutting side borders first prevents distortion and keeps everything square.
This Border Measurement Tip helps your Accurate Border Attachment shine. Side Border Construction truly sets the stage for every other quilt border design and pieced border idea you dream up.
Free Motion Quilting for Custom Borders
Think free motion quilting is just for show quilts? Not at all. Free Motion Tips make borders pop with genuinely custom motifs—perfect if you crave a border as unique as your story.
Keep these emotional highlights in mind:
- Quilting Density tames Border Waves
- Stitch Regulation is your gentle guide
- Custom Motifs bring heartfelt charm
- Geometric quilting patterns boost creative freedom
Frequently Asked Questions (FAQs)
How do I match border fabric colors effectively?
Matching border fabric colors for your quilt is all about Color Harmony and Visual Balance. Echo dominant hues from your quilt center, weave in a Quilt Accent, and play with Border Contrast to showcase beautiful, inspired fabric selection.
What’s the best way to calculate border yardage?
Picture yourself balancing a checkbook by candlelight—calculating border yardage is just as methodical.
Use Border Yardage Formulas, measure seam allowance, estimate quilt size, and consult a Free Online Quilt Binding Calculator for foolproof fabric calculation.
How do I handle pieced borders on irregular quilts?
For pieced borders on irregular quilts, combine Quilt Stabilization—like stay-stitching and careful pressing—with Pieced Edge Management.
Use Border Alignment Tips: measure in three spots, match marks, pin often, and ease fullness for seam accuracy and flat, mitered corners.
What borders work well for modern quilt styles?
For a modern quilt, try geometric patterns like shifted piano keys, solid squares, or even asymmetric designs.
Border textures pop with modern fabrics, while creative border types—especially those playing with quilt proportions—bring fresh, contemporary flair.
How can I prevent border fabric from warping?
To boost fabric stability and prevent border warping, cut borders on the lengthwise grain, use precise pressing methods, stabilize with starch, reinforce corners, and secure your seam allowance—especially on wide or mitered borders—for crisp quilt border designs.
Conclusion
Standing at the edge where tradition meets innovation, quilting border design ideas reveal their power. Imagine a quilt with sharp, geometric lines in stark contrast to a dreamy wave—neither diminishes the other, but together they tell your quilt’s whole story.
Whether you crave order or a twist of whimsy, choose borders that reflect your spirit and frame your hard work with purpose. Somewhere between bold and subtle, you’ll find that border that simply feels right—your perfect finish.
- https://www.gathered.how/sewing-and-quilting/quilting/8-unique-quilt-border-ideas
- https://www.reddit.com/r/quilting/comments/wsgp7e/how_to_calculate_backing_and_borders_yardage/
- https://extension.usu.edu/sewing/research/straight-grain-quilt-borders
- https://www.accio.com/business/quilt_trends_brown_bag_mystery
- https://graceful-art-48700.myflodesk.com/i7wrvwh39q

