This site is supported by our readers. We may earn a commission, at no cost to you, if you purchase through links.
Your sewing machine sits on the kitchen table, fabric stacks are tucked behind the couch, and your ironing board lives in the hallway closet. If this sounds familiar, you’re not alone—most quilters don’t have sprawling studios with endless counter space. The good news? A cramped workspace doesn’t mean you have to abandon your quilting dreams or settle for simple projects.
With the right quilting techniques for small spaces, you can create beautiful quilts without tripping over batting or losing your rotary cutter under a pile of scraps. Smart storage, strategic furniture choices, and a few clever methods can transform even the tightest corner into a functional quilting zone where creativity flows as freely as it would in a dedicated room.
Table Of Contents
Key Takeaways
- Smart storage solutions like vertical shelves, pegboards, and clear bins help you keep tools and fabrics organized and easy to reach in tight spaces.
- Foldable furniture and multi-purpose items, such as collapsible tables and storage ottomans, let you quickly adapt your workspace for different quilting tasks.
- Quilt-as-you-go and modular assembly methods allow you to make large quilts by working on smaller sections, making it easier to quilt comfortably in a small area.
- Regular decluttering, sorting projects, and upcycling scraps keep your space functional and help you focus on creative quilting instead of managing clutter.
Space-Saving Quilting Room Layouts
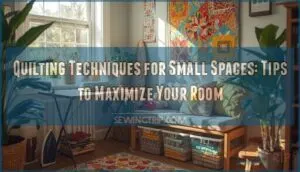
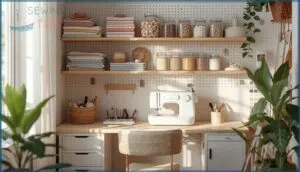
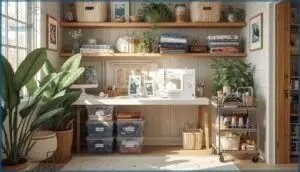
You don’t need a mansion to build a thriving quilting space. With the right layout, even a 7×14 shed or corner of your bedroom can become a productive studio.
Let’s walk through four key ways to set up your small quilting area so it works with you, not against you.
Planning a Functional Small Quilting Space
How do you turn a tiny corner into a creative quilting haven? Start with Space Prioritization—identify what you truly need. Consider these essentials for Layout Optimization:
- Dedicated cutting zone near your dominant hand
- Equipment Selection based on actual project frequency
- Clear pathways between stations for Ergonomic Design
- Budget Allocation for multi-function pieces
- Designated pressing area within arm’s reach
To heighten efficiency, consider using a craft tool pegboard for simple storage. Measure twice, plan once.
Maximizing Vertical Storage With Shelves and Pegboards
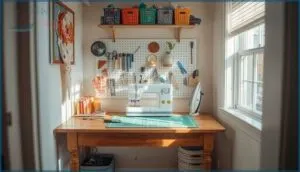
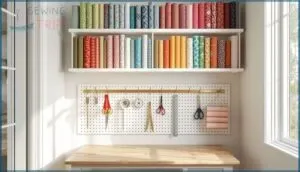
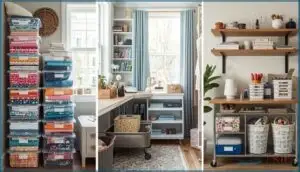
Once your layout is in place, look up. Wall-mounted shelves offer Shelf Customization for fabric bolts and folded yardage, while pegboards with hooks and Pegboard Accessories keep scissors, rulers, and rotary cutters within reach.
A master list can help with inventory management and tracking supplies. This vertical approach transforms Tool Accessibility and creates an attractive Fabric Display. You’ll free up precious table space through smart Space Optimization, making your small room feel surprisingly roomy.
Choosing Foldable and Multi-purpose Furniture
Foldable Table Benefits shine when you need cutting space one minute and open floor the next.
Multi-Use Chairs and Storage Ottomans double as seating and supply holders, while Space-Saving Desks collapse to just three inches when you’re done sewing.
Murphy Bed Alternatives free over thirty square feet, letting you reclaim your quilting room each morning without sacrificing comfort.
Ergonomic Setup for Comfort in Tight Quarters
Once your furniture is in place, comfort becomes your next priority. Chair Adjustments to support your back and keep knees at ninety to one-hundred ten degrees cut strain by thirty percent.
Match Table Height to your wrists, position Lighting Solutions overhead to eliminate shadows, and keep Tool Placement within eighteen inches of your seat.
Take five-minute Stretching Breaks every hour to stay fresh.
Efficient Fabric and Tool Organization
When your quilting space is tight, smart organization becomes your best friend. You can keep fabrics neat and tools within reach without cluttering every surface.
Let’s look at some practical ways to store your supplies so everything has a home and you can actually find what you need.
Folding, Rolling, and Storing Fabric for Easy Access
Think of fabric storage as a puzzle where every inch counts. The right folding or rolling method can boost your storage by 30% or more. Here’s how to make your fabric easy to find and grab:
- Fold larger cuts flat and stack them vertically so you can see each piece at a glance.
- Roll smaller fabrics from the selvage edge to save 25% more space and prevent wrinkles.
- Sort by size first – separate fat quarters from half yards for faster selection and smoother project prep.
These fabric folding methods and rolling fabric benefits add up to real measurable storage outcomes. You’ll spend less time hunting and more time sewing.
Using Clear Bins, Drawers, and Comic Book Boards
By combining clear bins with drawer dividers, you’ll achieve instant bin visibility and smarter space maximization. Stack five-inch bins to organize fat quarters by color, and tuck drawer dividers inside for precuts.
Board alternatives like comic book boards wrap larger yardage neatly on shelves, cutting wrinkles by 30% and boosting fabric preservation. These simple swaps free up room fast.
Smart Tool Storage With Pegboards and Over-the-door Organizers
Ever wonder how to keep tools visible and close at hand in a tight quilting nook? Pegboard Customization lets you arrange scissors, rulers, and thread for instant access. Over-the-door organizers boost Space Optimization, offering up to 40 pockets for small supplies. With DIY Solutions, you’ll tailor Organizer Ergonomics to your workflow—making Tool Visibility a breeze.
- Modular pegboard layouts
- Over-the-door pocket organizers
- Ergonomic tool zones
Under-bed and Wall-mounted Storage Solutions
When floor space runs short, look up and down. Wall racks hold up to 120 spools and keep rulers vertical—freeing precious countertops.
Under-bed bins slide neatly beneath any frame, storing batting or finished quilts in clear containers for fabric protection.
This space optimization duo slashes clutter and boosts user satisfaction, letting you see inventory at a glance without rearranging half your stash.
Quilting Techniques for Limited Spaces
When your quilting space is tight, the right techniques can make all the difference. You don’t need a huge studio to create beautiful quilts—you just need to work smarter with the room you have.
Small quilting spaces can produce stunning quilts when you use smart techniques and make the most of every inch
Here are some practical methods that’ll help you quilt comfortably, even in the smallest corners of your home.
Quilt-as-you-go and Modular Assembly Methods
Why wrestle with a bulky quilt when you can build it block by block? Quilt-as-you-go (QAYG) and modular assembly methods let you quilt smaller sections, boosting space efficiency and ergonomic comfort. You’ll notice quicker project completion and fewer jams. Modular workflow also keeps your workspace tidy and flexible.
Try these approaches for small-space quilting success:
- Quilt blocks individually, then join
- Use sashing strips for structure
- Store blocks in bins or shelves
- Assemble in manageable segments
Working With Mini Quilt Patterns and Small Pieces
Mini quilts are your secret weapon in tight spaces. These projects under 24 inches let you master paper piecing and print scale without the bulk.
Use smaller rotary cutters for control, and pre-starch your fabric to boost fabric stability. Watch your seam allowance closely—even 1/32 inch off can throw alignment.
Small-scale prints shine here, and you’ll finish faster while perfecting your technique.
Accurate Measuring, Cutting, and Pressing in Small Areas
Perfect technique starts with your tools. Precision rulers with clear markings keep your measurements sharp, while a seam guide ensures consistent seams every time. Check your blocks before and after pressing—fabric shifts happen. Compact irons work wonders on small tables, and fresh rotary blades are non-negotiable.
Here’s your accuracy toolkit:
- Use transparent rulers at your workstation for in-process checks
- Test two 2″ squares—they should finish at 3.5″ together
- Starch fabric beforehand to improve fabric stability
- Set seams by lifting and placing your iron, not sliding
- Pin before stitching for error reduction on tight surfaces
Adapting Stitch Length and Using Smaller Tools
Your stitch length matters more than you might think. Set it to 2.5 mm for piecing—ideal stitching that holds tight without stressing seams. Go slightly longer (3.5 mm) when machine quilting.
Miniature tools like compact rotary cutters and small rulers boost space efficiency and offer real ergonomic benefits in tight quarters. Market trends show these tools are gaining ground fast, and for good reason.
Decluttering and Project Management Tips
When your quilting space is tight, clutter becomes your biggest enemy. Getting rid of what you don’t need and managing your projects wisely can free up room you didn’t know you had.
Let’s look at some practical ways to keep your small space organized and functional.
Purging Unnecessary Supplies and Fabrics
Clearing out fabric you won’t use can feel hard, but it’s worth it. Over 90% of quilters deal with stash overflow.
When you declutter, you’ll see real benefits like less stress and faster project completion. Try purging strategies like sorting by color or setting monthly buying limits.
Waste reduction through donation helps the environment, and mindful purchasing keeps your space functional.
Organizing UFOs (unfinished Objects) and Active Projects
Once you’ve purged unnecessary items, tackle those UFOs sitting in piles. Store each project in labeled bags or boxes with all its pieces together—this is smart physical storage.
Use a simple project management tool like Trello to track progress stages. Join social challenges through your guild for accountability, and keep active UFOs on rolling carts near your workspace for better space optimization and UFO prioritization.
Keeping Patterns and Scraps Tidy and Accessible
Patterns and scraps can quickly turn into chaos if you don’t stay on top of them. Here’s how to keep things manageable:
- Store patterns in mini binders with sheet protectors for quick reference—Digital Patterns on your tablet work too.
- Sort scraps by Color Sorting in clear bins to speed up selection.
- Use Project Trays with clips to group pattern pieces.
- Apply Space Techniques like under-bed storage for overflow.
Upcycling and Reusing Sewing Materials
Turning leftover bits into new treasures isn’t just practical—it’s part of Sustainable Sewing. Creative Repurposing with Fabric Scrap Projects or Material Swapping with friends can transform your approach.
Upcycling scraps into quilt blocks, appliqué, or mending patches directly contributes to Textile Waste Reduction. This practice not only saves space and cuts costs but also keeps your quilting fresh and supports a greener studio.
Top 3 Storage Products for Small Quilting Spaces
The right storage products can transform a cramped quilting space into an organized workspace. When you’re working with limited square footage, choosing containers that stack, organize, and protect your supplies makes all the difference.
Here are three tried-and-true storage solutions that quilters in small spaces swear by.
1. Novelinks Clear Photo Organizer Storage Case
If you’re tight on space, the Novelinks Clear Photo Organizer Storage Case can hold up to 1,600 small items in 16 snap-tight cases. Its clear, durable plastic lets you see what’s inside without opening each one.
Consumer feedback praises its organization features and space suitability for quilters managing beads, threads, and notions. The stackable design and built-in handle make it easy to move and store.
Best For: Quilters and crafters in small spaces who need to organize tons of small items like beads, threads, and notions without taking up much room.
- Holds up to 1,600 items across 16 clear cases so you can see everything at a glance without digging around.
- Stackable design with a handle makes it easy to store vertically and move between workspaces.
- Snap-tight closures keep dust out and everything secure, perfect for protecting delicate supplies.
- The included labels don’t always stick well, so you might need your own label maker or tape.
- The handle can break over time with heavy use or frequent transport.
- Clear plastic shows dust easily, so it needs regular wiping to stay looking clean.
2. ArtBin 12×12 Portable Craft Organizer
Ever wonder how to keep your quilting projects visible and within reach? The ArtBin 12×12 Portable Craft Organizer delivers with Organizer Dimensions perfect for fabric squares and pads.
Its Material Durability stands up to daily use, while Portability Features like a sturdy handle make it easy to carry.
With generous Storage Capacity and positive Market Reception, it’s a smart choice for small-space quilters.
Best For: Quilters and crafters who need a simple, portable way to organize 12×12 materials in small spaces.
- Spacious compartment fits fabric squares, scrapbook paper, and more.
- Durable, clear plastic makes it easy to see contents and lasts through frequent use.
- Stackable, portable design with a sturdy handle for easy transport.
- Some units may arrive with a slight spray paint smell or oily residue.
- Hinges can pop off if the box is opened awkwardly.
- Occasional reports of missing handles on delivery.
3. ArtBin Super Satchel Craft Organizer Box
When you need more flexibility, the ArtBin Super Satchel Craft Organizer Box offers serious Storage Customization with up to 20 removable dividers and 6 fixed compartments.
Its Material Durability comes from acid-free polypropylene that resists wear.
Portability Benefits shine with snap-tight latches and an ergonomic handle. User Satisfaction runs high for organizing bulkier supplies, and Market Pricing ranges from $30 to $52 depending on the retailer.
Best For: Crafters and hobbyists who need a sturdy, customizable storage solution for organizing a variety of art, quilting, or sewing supplies.
- Highly customizable with up to 20 removable dividers and 6 fixed compartments
- Durable, acid-free polypropylene construction keeps supplies safe and visible
- Easy to carry with secure latches and an ergonomic handle
- Rearranging dividers can be a bit tricky once set up
- May be too pricey for some budgets
- Not ideal for storing very large or bulky craft items
Frequently Asked Questions (FAQs)
How can I quilt without a dedicated sewing room?
You can create beautiful quilts anywhere by embracing mobile quilting with portable tools and adaptable projects.
Use shared spaces strategically, adopt minimalist quilting approaches, and master techniques that don’t require permanent setups.
What lighting options work best in small spaces?
LED advantages make them ideal for small spaces—they’re energy efficient, cool, and long-lasting.
Task lighting, like clamp-on or adjustable lamps, paired with high color temperature bulbs, ensures true fabric colors and precise work.
Fixture preferences vary by workspace.
How do I reduce noise when quilting at home?
Imagine your sewing machine humming like a gentle river instead of a roaring train. Use silicone mats for vibration dampening, and try soundproofing techniques like heavy curtains. Choose quiet machines to further reduce noise.
Gentle stitching and smart behavioral adjustments can also help minimize machine noise, ensuring a quieter sewing experience.
Can I safely store a sewing machine in a closet?
Yes, you can safely store a sewing machine in a closet if you use closet climate control, rust prevention methods, and pest control measures.
Proper machine storage preparation helps avoid space optimization risks like moisture, dust, or accidental damage.
What are tips for quilting with pets around?
Keep pins locked away, threads picked up, and fabrics covered. Pet safety starts with cleanliness strategies and behavior awareness.
Use distraction techniques like toys, then try friendly projects like pet beds to keep everyone happy.
Conclusion
Think of your small space as a quilt itself—every inch matters, and the right arrangement makes the whole picture work. With these quilting techniques for small spaces, you’ve learned to stack vertically, fold strategically, and stitch smarter.
Your kitchen table can absolutely become your creative headquarters. Start with one change today—clear a drawer, hang a pegboard, or try quilt-as-you-go. You’ll be amazed what you can accomplish when every corner pulls its weight.
- https://freemotionproject.com/2018/11/how-to-quilt-in-a-tiny-space-quilting-podcast-85/
- https://www.simplegeometricquilting.com/blog/tips-for-working-in-a-small-space
- https://www.fatquartershop.com/quilting-notions/bags-tins-and-storage
- https://sherriquiltsalot.com/2024/04/17/quilting-tools-we-absolutely-would-buy-again-and-again-and-again/
- https://www.archivemarketresearch.com/reports/quilt-514646

