This site is supported by our readers. We may earn a commission, at no cost to you, if you purchase through links.
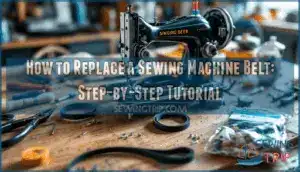
Replacing a worn belt isn’t complicated, but it does require knowing which type your machine uses and how to install it properly. Getting the tension right matters more than most people realize, since a belt that’s too loose will slip while one that’s too tight can damage your machine’s components.
Table Of Contents
Key Takeaways
- Your sewing machine belt typically fails quietly through squealing, burning smells, or slipping stitches, and ignoring these signs leads to motor overheating, bearing damage, and potential fire hazards that cost far more than a simple belt replacement.
- Choosing the right belt matters—round, V-belt, or cogged designs each serve different purposes, with modern synthetic materials like polyurethane lasting up to 2.5 times longer than old leather belts while improving efficiency by reducing friction losses up to 10%.
- Proper belt tension is the critical sweet spot that most people miss—aim for half an inch of deflection when pressing mid-span, since too loose causes slipping and too tight damages bearings and overheats the motor.
- Regular maintenance extends belt life significantly through monthly inspections for cracks and glazing, weekly lint removal that cuts jamming by 30%, and oiling every 10-12 hours of use that reduces wear by 40%.
Recognizing Sewing Machine Belt Problems
Your sewing machine isn’t running like it used to, and there’s a good chance the belt is to blame. Before you can fix the problem, you need to know what you’re looking for.
Let’s walk through the common issues and warning signs. What happens if you put off that belt replacement?
Common Issues With Vintage Sewing Machines
Vintage sewing machines are workhorses, but they weren’t built to run forever without a little TLC—and the belt is usually the first thing to show its age.
Beyond belt issues, you’ll often encounter tension problems that make stitches look messy, bobbin problems that jam the works, or motor issues that leave your machine humming but not moving. Regular oiling points need attention too, or fabric feeding becomes jerky and unreliable.
Replacing vintage sewing machine belts solves many headaches, but knowing what else might go wrong helps you tackle vintage sewing machine repair with confidence.
Signs of a Failing or Slipping Belt
If your machine starts making a squealing noise, slips when you hit thick fabric, or stops turning the needle mid-stitch, the belt is waving a white flag. You might notice speed fluctuations, stitching inconsistencies, or even a burning smell when belt slippage happens.
Unusual noises and visible belt wear—like cracks or glazing—tell you it’s time for belt replacement before troubleshooting sewing machine issues becomes a bigger headache. Proper belt tension keeps everything humming smoothly.
Risks of Ignoring Worn Belts
Let that belt go too long without replacing it, and you’re not just dealing with annoying squeals—you’re setting yourself up for motor damage, burnt bearings, and a machine that quits on you right in the middle of a project.
Here’s what belt slippage leads to:
- Motor overheating from working harder to compensate for the worn sewing machine belt
- Bearing damage and machine downtime that’ll cost you more than simple belt replacement
- Stitch quality problems and potential fire hazard from friction buildup
Don’t wait until sewing machine repair becomes urgent.
Choosing The Right Replacement Belt
Not all sewing machine belts are created equal, and picking the wrong one can leave you stuck with a machine that still won’t run right. The type of belt you need depends on your machine’s age, design, and how it transfers power from the motor to the needle.
Let’s break down your options so you can grab the right belt the first time.
Types of Sewing Machine Belts (Round, V-belt, Cogged)
Your sewing machine’s belt is like the transmission in a car—without the right one, even the best machine won’t run smoothly. Round rubber belts were the original design, simple loops that get the job done but stretch over time.
V-belts improved things with better grip and contact, reducing slippage. Cogged belts take it further, offering flexibility on smaller pulleys while maintaining strong performance and longer life.
Evolution and Benefits of Modern Belt Designs
When synthetic rubbers and polyurethane entered the scene, sewing machine belts got a serious upgrade in tensile strength and climate resistance. Modern V-belt designs with fiber reinforcement last up to 2.5 times longer than old leather drive belts, reducing maintenance headaches.
Material advancements also improved efficiency—wrapped V-belts cut friction losses by 10%, while cogged designs boost power transmission and flexibility. These improvements mean less downtime, quieter operation, and better environmental impact through reduced waste and energy use.
Selecting the right belt material is important, as material affects longevity.
Where to Buy Replacement Belts and Tools
Finding the right replacement belt doesn’t mean driving across town to a dusty repair shop—most parts are just a few clicks away online. You’ll find sewing machine belts at online retailers like Amazon and eBay, from brand suppliers’ official sites, or at local sewing machine shops that stock DIY sewing machine repair parts and accessories.
- Online Retailers – Amazon and auction sites offer diverse belt types with quick shipping
- Brand Suppliers – Singer, Brother, and Janome provide OEM parts directly through their websites
- Local Shops – Specialty sewing stores carry belts and let you verify sizing in person
Selecting The Correct Belt Size and Material
To get precise belt fit—a non-negotiable for smooth stitching—you’ll need accurate belt sizing methods: measure the old belt stretched flat, or loop a string around both pulleys and measure it. Match width and thickness to your pulley grooves; common V-belt designs run 6–10 mm wide and 3 mm thick.
Material properties matter: rubber suits light home use, polyurethane withstands industrial torque, and neoprene resists heat and stretching. Check your manual for model considerations, as heavy-duty machines and geared pulleys demand specific belts.
Choosing wisely impacts belt life expectancy and reduces constant replacements. For instance, you can find Bernina sewing machine belts in various sizes.
Gathering Tools and Preparing for Replacement
Before you tackle the belt replacement itself, you’ll want to get your workspace and tools ready. The right preparation makes the whole process smoother and helps you avoid mid-project frustrations.
Here’s what you need to gather and consider before you begin.
Essential Tools and Materials Needed
Before you dive into the replacement process, let’s round up the gear that’ll make this job smooth instead of frustrating. You’ll need a replacement belt matched to your sewing machine model—round, V-belt, or cogged, depending on what drives your machine.
Grab a screwdriver set for accessing sewing machine parts, a measuring tape for checking belt size, and a flashlight to see those tight spaces. Belt removal tools like needle-nose pliers help with stubborn drive belts, while basic safety gear protects your hands from sharp edges and moving components.
Safety Precautions Before Starting
The moment you start working on a sewing machine without unplugging it, you’re gambling with more than just a belt replacement—you’re risking serious injury. Before disassembly, follow this sewing machine repair guide checklist:
- Unplug the machine completely from the wall outlet
- Wear gloves to protect your hands from sharp edges
- Secure your area with proper lighting for accessing sewing machine components
- Read your manual for model-specific sewing machine maintenance instructions
Accessing Belt Components on Different Machine Models
Getting to the belt on your sewing machine isn’t the same for every model—some manufacturers hide it behind panels, while others leave it right out in the open. On Singer Simple models, you’ll remove the back cover by unscrewing a few screws for component location and belt access.
Vintage machines often require disassembly of side panels or the entire bottom housing, so reference your sewing machine repair guide to identify the specific accessing sewing machine components route for your model.
Tips for Working With Vintage and Treadle Machines
Vintage and treadle sewing machines need extra care during belt work. Support your treadle sewing machine tutorial with proper oiling mechanisms—check pivot points before starting.
Test fabric compatibility and needle selection after installation, since older machines run differently than modern ones.
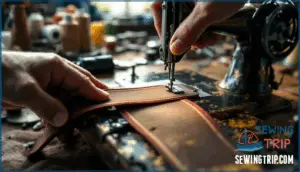
When replacing treadle belt components, adjust thread tension and inspect motor maintenance needs. Use jeweler’s pliers for delicate parts and keep a wood block handy to support the belt during hole-making on vintage sewing machine models.
Step-by-Step Belt Replacement Tutorial
Now that you’ve got everything ready, it’s time to swap out that belt. The process isn’t complicated, but each step matters if you want your machine running smoothly again.
Here’s how to remove the old belt, install the new one, and get the tension just right.
Removing The Old Belt Safely
Once you’ve unplugged your machine and removed the necessary covers, you’ll need to carefully slide that old belt off the pulleys—and if it’s cracked or sticky with age, don’t be surprised when it practically disintegrates in your hands.
Take note of the belt path before removal, which helps with DIY repair later. If the belt’s stuck, gently work it loose without forcing anything—you don’t want to damage the motor pulley or handwheel during this mechanical issue fix.
Installing a New Round, V, or Treadle Belt
With the old belt out of the way, it’s time to loop your replacement onto those pulleys—and the technique changes depending on whether you’re working with a round belt, a V-belt, or a leather treadle strap.
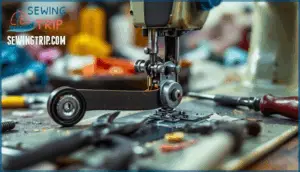
For a new belt on most electric machines, slip it around the motor pulley first, then stretch it over the handwheel while rotating slowly to guarantee proper belt alignment and material compatibility—your initial run-in should feel smooth, not forced.
Adjusting Belt Tension for Optimal Performance
After you’ve got the belt seated, a little fine-tuning will save you from slipping stitches and overworked bearings—too loose and your machine loses power, too tight and you’re asking for motor trouble.
Press down gently mid-span between pulleys and measure that deflection—you’re aiming for about half an inch of give on most V-belts, which prevents slippage while protecting against bearing damage and motor overheating during sewing machine maintenance.
Troubleshooting Installation Issues
If your machine stops or you’re battling belt slippage right after installation, you’re likely facing one of three culprits—improper tension, alignment errors, or material compatibility issues.
Double-check that belt deflection sits around half an inch, inspect for twisted routing causing noise reduction problems, and confirm you’ve matched the correct belt type to your specific model to prevent machine stoppages and motor damage.
Maintaining and Extending Belt Life
Installing a new belt is only half the battle—keeping it in good shape means your machine will run smoothly for years.
A few simple habits can prevent premature wear and save you from frequent replacements. Here’s what you need to know to get the most out of your sewing machine belt.
Regular Inspection and Cleaning Practices
Think of your sewing machine belt like the tires on your car—regular check-ups can save you from a breakdown at the worst possible moment. Preventative maintenance starts with monthly inspections to catch material degradation early. Check for lint buildup around pulleys, cracks in the rubber, and proper pulley alignment.
Keep your machine running smoothly with these simple habits:
- Brush away lint from pulleys and belts after every major project to prevent slippage
- Watch for glazing or cracking on the belt surface—these signal it’s time for replacement
- Feel the belt for sticky residue or brittleness that indicates chemical breakdown
Adjusting Tension to Prevent Slippage and Damage
Your sewing machine won’t run right if the belt’s too loose or too tight—finding that balance takes a little know-how but makes all the difference.
For V-belts, press the center with your thumb—you should get about half an inch of deflection. Too loose causes belt slippage and stitching problems, while over-tightening leads to bearing damage and motor overheating that’ll cost you more than belt replacement.
Recognizing When to Replace Belts Again
Even the best belt won’t last forever—watch for glazing, cracks, or that telltale squeal that means trouble’s brewing. Catch these belt wear signs before performance degradation causes stitch quality issues:
- Visible fraying or cracking along the belt surface
- Slipping during operation despite proper belt deflection measurement
- Squealing noises indicating belt slippage and motor damage
- Stitching issues like skipped or uneven stitches
Preventative maintenance beats emergency repairs—check your belt monthly and follow belt replacement instructions when these symptoms appear.
Expert Tips for Ongoing Sewing Machine Care
Professional servicing once a year keeps household machines running smoothly, even if you sew occasionally. Here’s your maintenance roadmap to dodge common problems and extend machine life.
| Task | Frequency | Impact |
|---|---|---|
| Oiling Frequency | Every 10-12 hours of use | Reduces wear by 40% |
| Needle Maintenance | After every 8 hours | Prevents 60% of stitch problems |
| Lint Removal | Weekly for hobbyists | Cuts jamming calls by 30% |
Between professional visits, perform weekly belt tension checks and daily lint removal if you’re sewing heavily. Proper workspace environment matters too—dust covers prevent 25% more belt issues over time.
Log your tension checks and cleaning dates to spot patterns before breakdowns happen, and you’ll master troubleshooting like the pros do in industrial settings.
Frequently Asked Questions (FAQs)
How often should I replace my sewing machine belt?
Belt replacement depends on usage frequency and belt material more than a fixed schedule. Check yours every six months if you sew regularly—signs like slipping, cracking, or performance decline mean it’s time for maintenance, regardless of age.
Can I use a generic belt for my specific model?
Most generic belts work if they match your Singer sewing machine‘s size and style, but performance differences exist.
Different types of sewing machine belts vary in quality, so model variations matter when you replace sewing machine accessories for peak compatibility.
What causes a sewing machine belt to wear out?
Friction and heat from motor pulleys gradually break down rubber belt material, causing cracks and loss of elasticity. Improper tension accelerates wear, while environmental factors like humidity and temperature fluctuations speed up material degradation, especially in V-belt designs.
Is it possible to repair a damaged belt?
Like a thread that’s frayed beyond recognition, a damaged belt rarely returns to working condition. Belt repair feasibility is extremely low—most attempts fail quickly. Temporary fixes with tape or adhesive don’t withstand the friction and heat generated during sewing machine operation.
DIY repair risks include sudden breakage mid-project, motor strain, and further damage to your machine’s components. Replace worn belts instead of attempting repairs for reliable, long-term performance.
How do I adjust belt tension after replacement?
After installation, check deflection by pressing the belt midway between pulleys—it should give about half an inch. Too tight strains bearings, while loose belts slip and wear quickly.
Test the machine at different speeds to confirm smooth operation.
Can I use motor oil on belts?
No, don’t use motor oil on belts. Oil Degradation destroys rubber and neoprene, causing Belt Slippage and Material Compatibility issues.
For Singer sewing machine maintenance, dry belts work best—Alternative Lubricants aren’t needed, and Long-Term Effects of oil include rapid belt deterioration.
How often should belts be replaced normally?
Most belts last one to three years, but usage impacts longevity dramatically—daily sewers might replace theirs annually, while occasional users stretch it to five years.
Belt material, environmental factors, and machine type also determine replacement timing.
What causes belts to squeal during operation?
Squealing usually indicates one of three culprits: insufficient tension causing belt slippage, pulley misalignment creating friction, or foreign debris lodged between the motor pulley and sewing machine belt, which demands immediate belt adjustment.
Are universal belts compatible with all machines?
No, universal belts aren’t truly one-size-fits-all. Machine specifics like pulley size variations and tension differences mean you’ll need to match belt compatibility carefully.
V-belt designs and material impacts vary, so always check your machine’s requirements before you replace it.
Can stretched belts be repaired or reused?
Stretched belts can’t be repaired and shouldn’t be reused. Once a belt loses its original tension, it’ll keep slipping no matter how much you adjust sewing machine belt tension.
Replace the old belt with a new belt—whether it’s a treadle belt or V-belt—for reliable performance and proper belt lifespan.
Conclusion
A loose belt slips and squeals, while an overtight one grinds bearings into dust—that ideal balance is what separates smooth stitching from costly repairs. This replacing sewing machine belt tutorial walked you through finding that balance, from identifying worn belts to tensioning new ones correctly.
Your machine doesn’t need much: regular checks, proper tension, and timely replacements. Manage those basics, and that belt will keep your stitches consistent for years while your motor runs cool and quiet.

