This site is supported by our readers. We may earn a commission, at no cost to you, if you purchase through links.
Most people toss worn-out jeans without a second thought, but those metal buttons are built to outlast the denim by decades. Each button represents raw materials mined, processed, and manufactured—resources that don’t need to end up in a landfill.
When you reuse jeans buttons, you’re not just saving a small piece of metal. You’re keeping textile scraps and hardware out of the waste stream while cutting demand for new production.
The process doesn’t require special skills, just a few basic tools and the willingness to give these durable fasteners a second life. Whether you’re repairing another pair of jeans or getting creative with upcycling projects, salvaged buttons offer both practical function and a chance to participate in circular fashion without the usual complications.
Table Of Contents
- Key Takeaways
- Benefits of Reusing Jeans Buttons
- How to Remove Buttons From Old Jeans
- Preparing Jeans Buttons for Reuse
- Reattaching a Jeans Button to Denim
- Creative Ways to Upcycle Jeans Buttons
- Top 9 Tools and Products for Reusing Jeans Buttons
- 1. Dritz Nickel No Sew Dungaree Buttons
- 2. No Sew Jean Buttons Rose Black Silver
- 3. Channellock 12 Inch Tongue Groove Pliers
- 4. YaHoGa Instant Jean Button Pins
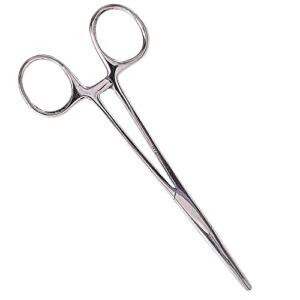
- 5. MABIS Kelly Forceps Locking Medical Forceps
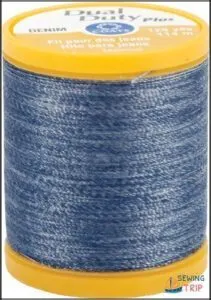
- 6. Coats Clark Denim Blue Thread
- 7. Silicone Thimble Finger Protectors Sewing Needlework
- 8. Laurie Felt Embroidered Hem Bootcut Jeans
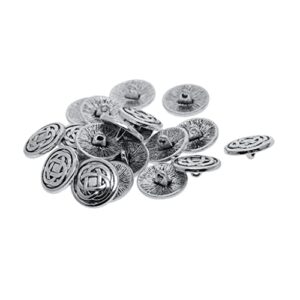
- 9. Vintage Metal Celtic Knot Buttons
- Tips for Sustainable Button Reuse
- Frequently Asked Questions (FAQs)
- Conclusion
Key Takeaways
- Reusing jeans buttons keeps metal hardware and textile scraps out of landfills while avoiding the 33 kg of CO₂ emissions and 11,000 liters of water needed to manufacture replacements.
- You can remove buttons safely with basic tools like needle-nose pliers and flathead screwdrivers, then reattach them using no-sew tack methods or traditional hand-sewing with reinforced stitching.
- Salvaged buttons work beyond denim repairs—they’re durable enough for upcycling projects like bag closures, jacket embellishments, and decorative wall art that support circular fashion practices.
- Choosing zinc alloy, brass, or stainless steel buttons from the start ensures they’ll outlast the fabric and stay functional through multiple garments, making true reuse possible instead of just recycling.
Benefits of Reusing Jeans Buttons
Reusing jeans buttons isn’t just a crafty move—it’s a small act with surprisingly big ripple effects. Every button you save keeps both textile scraps and metal out of the waste stream, cutting down on the resources needed to make replacements.
Let’s look at three key reasons why this simple practice matters for the planet and your wardrobe.
Reducing Textile and Metal Waste
Every jeans button you rescue chips away at a massive problem: textile landfill reduction and metal trim recovery working together. You’re joining the circular fashion adoption movement when you save those metal pieces. The fashion industry could reclaim its share of the $150 billion opportunity by recovering textile waste.
Here’s what your small act accomplishes:
- Diverting metal fasteners from 92 million tons of annual textile waste
- Supporting garment disassembly design innovation
- Preventing decades-long metal persistence in landfills
- Enabling component reuse incentives across fashion
- Advancing resource conservation through eco-friendly practices
Lowering Environmental Impact
Beyond keeping buttons out of landfills, you’ll slash the carbon footprint of your wardrobe. Reusing one pair of jeans hardware avoids roughly 33 kg of CO₂ emissions and saves nearly 11,000 liters of water—the hidden cost of manufacturing replacements. Given that denim production contributes to significant pollution, reusing buttons is a small way to help. That’s waste reduction and resource conservation rolled into one simple action.
| Environmental Impact | Savings Per Reused Button |
|---|---|
| Water conservation | ~3,780 liters avoided |
| Carbon footprint reduction | ~33 kg CO₂-eq prevented |
| Energy savings | 156 MJ preserved |
| Pollution prevention | Toxic dye discharge eliminated |
| Landfill diversion | Metal & textile waste reduced |
Reuse turns an eco-friendly habit into measurable pollution prevention.
Supporting Sustainable Fashion
When you reuse buttons, you’re tapping into a market projected to hit $15 billion by 2030—proof that circular fashion trends aren’t just buzz. With 79% of shoppers prioritizing sustainability and Gen Z leading the charge on secondhand finds, your small act fuels a bigger shift.
Reusing buttons taps into a $15 billion market by 2030, as 79% of shoppers and Gen Z fuel circular fashion’s mainstream rise
Ethical fashion growth relies on waste reduction outcomes like yours, turning eco-friendly choices into collective momentum for sustainable practices.
How to Remove Buttons From Old Jeans
Removing buttons from old jeans might seem tricky at first, but with the right approach, you can salvage these metal fasteners without wrecking the fabric.
The key is working carefully and using tools that give you control over the removal process.
Here’s what you need to know to get those buttons off cleanly and ready for their next life.
Tools Needed for Safe Removal
You’ll need the right gear to pull buttons off without shredding your denim. Think of your toolkit as insurance against frustration—pliers and grips give you control, cutting implements handle stubborn rivets, and support tools keep fabric stable. This setup makes reuse possible while supporting waste reduction and sustainability.
- Pliers and Grips: Needle-nose or locking pliers grip button posts firmly, letting you pull straight out instead of twisting and tearing fabric
- Cutting Implements: Small flathead screwdrivers pry up rivet edges; metal-cutting pliers tackle deformed hardware when pulling won’t work
- Support Tools: A wooden cutting board underneath prevents flexing and keeps your waistband flat during removal
- Sewing Tools: Seam rippers and fabric scissors clean up threads and frayed edges after you’ve extracted the button
Detaching Two-Part and Rivet Buttons
Which removal method keeps your button ready for another life? Two-part buttons respond to slow twisting—grip the cap and post with separate pliers, then rotate in opposite directions until the friction joint releases. Rivets need a different approach: push the post from behind with a screwdriver or use cutting pliers on the shaft, preserving button integrity and reattachment potential while supporting waste reduction.
| Button Type | Best Removal Method |
|---|---|
| Two-part friction | Twist cap and post with dual pliers |
| Screw-type | Unscrew counterclockwise with Phillips driver |
| Rivet (small) | Push post from back or snip shaft |
| Rivet (waistband) | Lever gently, then compress internal post |
| Reusable metal | Slow controlled twisting over cutting |
Avoiding Damage to Denim Fabric
When you pull hardware from denim, watch the fabric around each buttonhole. Twill weave offers up to 25% more tensile strength than plain cotton, yet repeated washing weakens yarn cohesion over 10–20 cycles.
Control your tool impact force to prevent tearing; gentle leverage protects the weave for reuse.
Reinforce stress points before installing new hardware, turning waste reduction into a practical second life for every component.
Preparing Jeans Buttons for Reuse
Once you’ve removed your buttons, a little prep work goes a long way. Cleaning off dirt and checking for damage ensures they’ll work smoothly when you’re ready to reattach or upcycle them.
Here’s how to get your salvaged buttons ready for their next use.
Cleaning and Polishing Metal Buttons
Metal buttons deserve a fresh start before you reuse them in your next eco-friendly project. Soak them briefly in lukewarm water with mild detergents free of bleach—strong alkaline cleaners corrode finishes and accelerate tarnish.
For stubborn oxidation, gently apply baking soda or white vinegar with a soft cloth. Dry thoroughly to prevent re-tarnishing, then store buttons in a low-humidity reuse container to support sustainable recycling practices.
Inspecting for Wear or Damage
Before you drop that button into your reuse container, check for surface corrosion—rust or pitting can reduce fatigue life by more than 50%. Spot structural cracks around rims or bent shanks, since pre-damaged buttons fail far sooner under wear.
Test attachment security by tugging gently; any wobble signals the post is compromised.
Inspect fabric interaction too—torn waistband holes undermine even sound metal, shortening lifespan estimation and sabotaging your waste reduction strategies.
Storing Removed Buttons Safely
Once your buttons pass inspection, you’ll want to protect that metal from humidity and handling impacts. Store them in glass jars or acid-free boxes with silica gel packets—moisture control prevents corrosion that undermines reuse goals.
Keep buttons separated by material to avoid abrasion, and place containers away from temperature swings. This ecofriendly waste management strategy preserves your salvaged hardware for years of creative recycling ahead.
Reattaching a Jeans Button to Denim
Once you’ve got a clean button ready to go, the next step is putting it back where it belongs. Whether you’re working with the original holes or dealing with a worn waistband, you’ve got options that don’t require complex sewing skills.
Here’s how to reattach your button using methods that actually hold up.
Reusing Original Buttonholes
When you reattach a button, reusing the original buttonhole keeps alignment issues at bay and preserves structural integrity—those bar tacks distribute stress far better than a fresh cut ever could.
Repair techniques like dense zigzag stitching or backing the opening with a small denim patch add reinforcement methods that respect wear limits, turning recycling into a truly eco-friendly practice that honors waste management principles.
Reinforcing Torn Waistband Fabric
Before you reattach any button, check the surrounding fabric—stress distribution at the closure often tears denim first. Slip lightweight fusible interlining materials behind the waistband to boost dimensional stability and wear performance.
This reinforcement technique spreads the load, cutting the risk of a second rip while keeping your reuse and recycling efforts aligned with waste reduction strategies and ecofriendly practices that actually hold up.
Attaching With No-Sew and Sew-on Methods
Once your waistband is stable, you’re ready to lock in your hardware. No-sew installation drives tack buttons through denim in seconds—hammer them flat on a solid surface for instant mechanical testing resistance.
Sew-on reinforcement takes longer but works when you lack tools: multiple thread passes and buttonhole repair techniques distribute stress better.
Choose your method based on fabric condition, gear availability, and how ecofriendly practices fit your sustainable living goals, all supporting waste reduction strategies and reuse.
Creative Ways to Upcycle Jeans Buttons
Once you’ve mastered removing and reattaching buttons, you can explore creative ways to give them new life. Jeans buttons work beautifully in craft projects, fashion updates, and handmade accessories.
Here are three practical approaches to upcycling these durable metal fasteners.
Decorative Uses in DIY Projects
You can transform salvaged jeans buttons into striking button art for wall hangings or mixed-media pieces. They work beautifully as textile embellishments on pillows and coasters, where original hardware adds character while supporting waste reduction strategies.
Try using them as closures on removable pillow covers or as decorative “eyes” on soft sculptures. These eco-friendly practices turn discarded components into home decor that tells a story about sustainable living and reuse.
Repurposing for Bags, Jackets, and Accessories
Move beyond decorative projects—you can put denim hardware reuse to work on functional gear. Reinforce tote bag straps with salvaged rivets, or add authentic closures to upcycled denim jackets through jacket button reinforcement.
Bag design integration benefits from original hardware’s durability, while accessory market trends show growing demand for these authentic touches.
This sustainable living approach reduces landfill waste and cuts upcycling project costs considerably.
Crafting With Vintage and Novelty Buttons
You’ll discover fresh creative territory when you blend reclaimed jeans buttons with vintage metal shanks or novelty designs in button art and jewelry making.
Mix eras and materials for textile embellishment—pair denim hardware with floral or Celtic-knot pieces as mixed media craft supplies.
This reuse approach aids recycling and ecofriendly lifestyle goals while fueling sustainable living through inventive ecofriendly practices that turn overlooked fasteners into statement pieces.
Top 9 Tools and Products for Reusing Jeans Buttons
Having the right tools makes reusing jeans buttons so much easier, whether you’re removing old hardware or attaching new pieces. You don’t need a fully stocked workshop—just a few reliable products can handle most button projects.
Here are nine tools and supplies that’ll help you work with denim buttons like a pro.
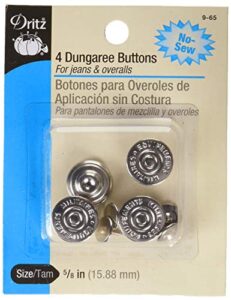
1. Dritz Nickel No Sew Dungaree Buttons
If you’re restoring a favorite pair of jeans, the Dritz Nickel No-Sew Dungaree Buttons offer a quick, thread-free fix. These 5/8-inch nickel-plated fasteners snap together like rivets, eliminating the need for stitching and making button reuse accessible even if you don’t sew.
Their intended applications range from denim repairs to upcycling projects on bags and jackets. Wide retail availability means you can grab a 4-count pack easily.
User performance reports confirm these buttons stay secure through regular wear, supporting your eco-friendly lifestyle by extending garment life and embracing reduce and reuse principles over buying new.
Best For: People who want to fix broken jean buttons at home without sewing skills or a trip to the tailor.
- Installs without any stitching—just press or tap the two parts together through the fabric and you’re done
- Holds up well once attached, staying secure through regular washing and daily wear
- Widely available at craft stores and online, usually in affordable 4-packs with extras in case you need them
- Thick denim waistbands often need a pre-punched hole, so you might need an awl or seam ripper handy
- Some users report the buttons feel flimsy or tricky to snap on properly during installation
- Once they’re in, they’re hard to remove if you change your mind or mess up placement
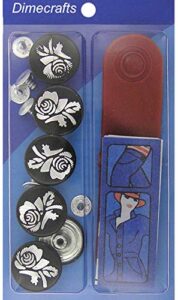
2. No Sew Jean Buttons Rose Black Silver
With rose, black, and silver finishes, these 20 mm zinc-alloy buttons let you match any denim wash while practicing sustainable waste management strategies. The included setter tool makes installation methods straightforward—press the tack and cap together, no sewing required.
You’ll find reuse applications beyond jeans: attach them to jackets, bags, or skirts for functional closures or decorative accents. Their corrosion-resistant metal allows for repeated reuse, though durability concerns arise with very thin fabrics.
At $7.49 for six pieces, they’re an affordable entry into circular fashion and recycling hardware instead of discarding it.
Best For: Anyone looking to quickly fix or adjust jeans without sewing skills, especially people who want a reusable solution for multiple garments or temporary waist adjustments.
- No sewing needed—just press the tack and cap together with the included setter tool for installation in seconds
- Reusable across multiple garments like jeans, jackets, skirts, and bags, making them cost-effective for frequent repairs
- Corrosion-resistant zinc alloy construction holds up through repeated washing and reattachment cycles
- Only 6 buttons per package, which may not be enough for multiple projects or frequent use
- Not suitable for thin or delicate fabrics—designed specifically for heavyweight materials like denim
- Sharp pin ends require careful handling and storage, especially around children
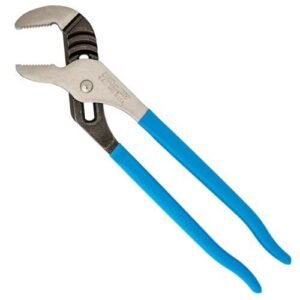
3. Channellock 12 Inch Tongue Groove Pliers
When rivet removal demands real muscle, these 12-inch pliers deliver Steel Durability and Joint Strength you can rely on. Their 2.25-inch Jaw Capacity grips stubborn metal hardware firmly, while laser-hardened teeth maintain their bite through repeated reuse projects—a practical step in waste management and resource efficiency.
Handle Ergonomics reduce hand fatigue during extended upcycling sessions, and the reinforced design prevents stress breakage under high torque.
Application Versatility extends beyond button removal to general denim repair tasks. At around $21, they’re a worthwhile investment for anyone committed to Reduce Reuse Recycle principles in fashion.
Best For: DIY enthusiasts and professionals who need a reliable, heavy-duty tool for gripping, twisting, and turning hardware in plumbing, mechanical repairs, and upcycling projects.
- Laser-hardened teeth and high-carbon steel construction provide excellent grip and long-lasting durability, even with repeated use on tough materials.
- PERMALOCK fastener system and undercut joint design prevent slipping and fastener failure during high-torque applications.
- Comfortable handle grips and 12-inch length offer good leverage without excessive hand fatigue during extended work sessions.
- Some users report sticking issues that can make the pliers difficult to adjust smoothly between positions.
- Machining precision may not meet expectations for delicate or high-precision tasks, limiting use on fine work.
- Higher price point compared to some competing brands, though many feel the quality justifies the cost.
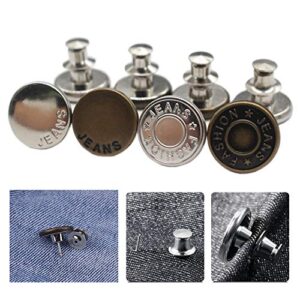
4. YaHoGa Instant Jean Button Pins
When waist adjustments need to happen without scissors or thread, these 17mm no-sew pins embody instant application at its best. Their installation process takes under 10 seconds—pull the tab, pierce from the wrong side, snap the base over the pin. The adjustable waistband feature tightens fit by up to one inch.
The metal durability enables reuse applications across 50+ uses, turning waste reduction and recycling from concept into daily practice. This delivers environmental benefits by extending garment life and reducing replacement purchases in line with reduce reuse recycle values.
Best For: People who need quick waist adjustments on jeans and pants without sewing, especially useful during weight changes or for extending the life of clothes that don’t fit quite right.
- Installs in under 10 seconds with no tools or sewing required—just pull, pierce, and snap
- Reusable up to 50 times and removable for repositioning, making them versatile for multiple garments
- Durable metal construction withstands washing and daily wear without losing hold
- The backing can be uncomfortably long and poke into your skin during wear
- May not grip well on thin or low-quality fabric, with some customers reporting mixed results on hold strength
- Leaves small holes in fabric when removed, which could be visible on certain materials
5. MABIS Kelly Forceps Locking Medical Forceps
You’ll find precision in unexpected places when stainless steel Kelly forceps step into button work. This 5.5-inch locking tool grips rivet shanks and hardware with serrated jaws that won’t slip, turning fiddly repairs into controlled operations.
The ratchet mechanism holds tension, keeping your hands free—essential when aligning buttonholes or extracting stuck posts for reuse.
At around $10, a forceps pricing comparison reveals solid value for recyclables salvage and precision craft applications. Beyond medical vs. home boundaries, these tools support waste reduction and recycling through multi-use durability that outlasts disposable pliers.
Best For: Crafters, model makers, and DIY enthusiasts who need a reliable locking tool for gripping small hardware, buttons, or components during precision repair and assembly work.
- Locking ratchet mechanism holds tension automatically, freeing your hands for alignment and detailed work without constant grip pressure.
- Serrated stainless steel jaws provide secure, non-slip control on small objects like rivets, fasteners, and buttons without bending under force.
- Affordable at around $10 with durable construction that supports repeated use across medical, craft, and household repair applications.
- Some users report the locking mechanism can pop open unexpectedly or fail after light use, affecting reliability.
- Mixed reviews indicate inconsistent quality, with reports of breakage during gentle tasks that question durability claims.
- Design optimized for right-handed users may limit comfort and control for left-handed individuals during extended craft sessions.
6. Coats Clark Denim Blue Thread
Strong thread makes the difference between a button that lasts and one that pops off mid-wear. Coats Clark Dual Duty Plus in denim blue brings polyester core-spun construction to your repairs—tensile strength that holds through stress points without snapping.
The 125-yard spool blends seamlessly with faded jeans, and its heavy weight suits button reattachment durability when paired with a 90/14 denim needle.
At under $4, you’re investing in waste management through repeated repairs, turning one spool into multiple fixes that keep functional denim out of landfills.
Best For: Home sewers repairing jeans or reattaching buttons who need strong, color-matched thread that blends with denim and holds up through repeated wear.
- Polyester core-spun construction delivers high tensile strength for stress points like buttons and waistbands without early seam failure
- Denim blue shade blends seamlessly with faded jeans, making repairs less visible than mismatched thread colors
- Affordable price under $4 for 125 yards enables multiple repairs from a single spool, supporting sustainable garment care
- Smaller spool size compared to standard all-purpose thread spools means less yardage for larger projects
- Not ideal for dark blue or black jeans due to the specific denim blue shade, limiting versatility across different jean colors
- Some users report it’s not worth the price compared to regular thread options for simple repairs
7. Silicone Thimble Finger Protectors Sewing Needlework
Hand-sewing heavy denim demands protection, especially when your fingers push needles through multiple fabric layers. Silicone thimble finger protectors offer comfort factors that rigid metal versions can’t match, molding to your hand while distributing pressure across textured surfaces that prevent slippage. You’ll reduce finger fatigue during extended repair sessions, and their breathable design means no sweaty discomfort mid-project.
The maintenance ease is unbeatable—rinse with warm water between uses. At under $6 for a 15-piece set covering three sizes, you’re supporting sustainable practices through repeated hand-repairs that keep functional denim circulating instead of heading toward waste management facilities.
Best For: People who do frequent hand-sewing projects like denim repairs, quilting, or embroidery and want comfortable finger protection without the bulkiness of traditional metal thimbles.
- Soft silicone molds to your fingers and stays breathable during long sewing sessions, so no sweaty discomfort or pressure sores
- Super affordable at $5.57 for 15 pieces in three sizes, giving you multiple backups for different fingers
- Easy to clean with just warm water and soap, plus they’re temperature-resistant and durable enough for repeated use
- Sizing can be hit-or-miss—some users find them too small for larger fingers or thumbs
- The holes that make them breathable also create weak spots where needles might poke through
- Material feels flimsy to some people, raising durability concerns for heavy-duty projects
8. Laurie Felt Embroidered Hem Bootcut Jeans
Investing in well-made denim like Laurie Felt’s embroidered hem bootcut jeans bolsters sustainable consumption from the start. The 98% cotton, 2% spandex blend with essential stretch technology delivers denim comfort that holds its shape through repeated wear and washing—meaning you won’t replace these jeans prematurely.
Bootcut style meets embroidery quality at the hem, creating a California-casual look that receives compliments year after year. Sizing accuracy runs true across XXS to 3X, and when your waistband button eventually loosens, you’re repairing quality worth saving instead of contributing to the 16 million tons of annual textile waste management challenges.
Best For: Shoppers who want a flattering bootcut silhouette with decorative embroidery at the hem, backed by durable cotton-blend fabric that stays comfortable through repeated wear and washing.
- Ultra-soft 98% cotton, 2% spandex fabric with stretch technology that contours to your body while maintaining structure and shape over time
- Beautiful floral embroidery below the knee adds a unique, eye-catching detail that elevates the classic bootcut style for both casual and dressier occasions
- Inclusive sizing from XXS to 3X with petite and tall options available, so you can find the right length and fit for your height and body type
- Some customers report the waist runs slightly loose, which may require a belt or alterations for a snug fit
- Petite shoppers sometimes find the inseam too long even in petite sizes, potentially requiring hemming
- The bootcut leg opening (18 inches) feels wide for some wearers who prefer a slimmer leg profile
9. Vintage Metal Celtic Knot Buttons
Beyond reliable basics, decorative hardware like these vintage metal Celtic knot buttons (20-piece packs at around $17) transforms button reuse into self-expression. Celtic knot history stretches back 1,600 years to Insular metalwork, and today’s 17mm pewter or brass reproductions carry that continuity into denim button styles and upcycled button appeal.
Button material analysis confirms lead-free pewter lasts through decades of wear, making vintage button pricing worthwhile. When you choose reuse over recycling generic hardware, you’re practicing environmental conservation while honoring craft—exactly the ecoconsciousness that reduces denim’s environmental impact one button at a time.
Best For: DIY enthusiasts and slow-fashion advocates who want to add historical character to denim repairs or upcycling projects while supporting circular fashion practices.
- Durable lead-free pewter or brass construction withstands decades of wear on heavy fabrics like denim, making them a long-term investment for garment customization
- Authentic Celtic knot designs dating back 1,600 years add unique visual interest and cultural depth that generic hardware can’t match
- Choosing vintage or upcycled metal buttons diverts usable materials from landfill and reduces demand for new manufacturing, supporting environmental conservation
- At roughly $0.85 per button, they’re pricier than basic replacements (often under $1.00), which may not fit tight budgets for simple repairs
- Shank-style attachment requires basic sewing skills and proper tools, creating a barrier for beginners unfamiliar with button installation
- Limited to 20 pieces per pack, so larger projects or multiple garment updates will need additional purchases
Tips for Sustainable Button Reuse
Reusing buttons isn’t just about fixing jeans—it’s about making smarter choices that reduce waste from the start. The buttons you choose, how you share extras, and the habits you build all play a role in creating a more sustainable wardrobe.
Here are three practical ways to make button reuse part of your everyday approach to fashion.
Choosing Durable, Reusable Button Types
When you’re picking buttons for your next denim project, the metal composition matters more than you’d think. To boost reuse and build a truly ecofriendly lifestyle, look for durable products with these traits:
- Zinc alloy or brass for enhanced rust resistance and corrosion protection
- Stainless steel for high-wash garments needing long lifecycles
- Simple, mono-material button design that facilitates easy disassembly
- Plastic alternatives like recycled metals, reducing waste and pollution while withstanding repeated reattachment
Lifecycle assessment data confirms these reusable products outlast conventional options.
Donating or Trading Spare Buttons
Once your collection grows beyond your needs, community craft swaps and online destash groups offer direct channels to redistribute spare buttons. Local donation channels—schools, libraries, and sewing circles—welcome metal fasteners alongside fabric scraps, supporting zero waste goals.
These social outcomes extend beyond reducing waste and pollution: sharing surplus notions fosters economic empowerment for makers while keeping recyclable materials in active circulation, anchoring sustainable living through reuse.
Encouraging Circular Fashion Practices
When you repair, upcycle, or share your jean buttons, you’re practicing a circular economy that keeps materials in use longer. Consumer education drives demand for repair access and upcycling promotion, while industry incentives and policy changes make sustainable living easier.
This shift in waste management strategies—choosing reuse over disposal—aids recycling and reuse loops that transform sustainability practices from niche hobby into mainstream culture.
Frequently Asked Questions (FAQs)
Can recycled buttons work on non-denim clothing?
Yes, jeans buttons work on shirts, jackets, backpacks, and cotton garments—not just denim.
Metal hardware from zinc alloy or aluminum suits diverse fabrics when you reinforce thinner textiles with interfacing for durability and circular fashion versatility.
Where to buy bulk replacement jeans buttons?
You’ll find bulk replacement buttons on Etsy bulk options, through wholesale minimums from domestic suppliers, or via international sourcing.
Custom trim specialists and salvage-based sources support resource efficiency, circular economy practices, and resource management through recycling and reuse.
Are vintage buttons stronger than modern ones?
Vintage buttons often used steel or solid brass, offering higher mechanical strength and corrosion resistance than some modern zinc-alloy alternatives.
However, failure analysis shows proper installation and material quality matter more than age for reuse implications.
How to match button finish with jeans?
Want your hardware to look intentional? Pair warm brass with medium blue denim, silver-toned finishes with dark indigo, and matte black with charcoal washes.
Coordinating undertones creates visual harmony while supporting circular economy principles through thoughtful reuse.
What adhesives work for temporary button fixes?
Temporary fabric glues formulated with polyvinyl acetate bond cotton and denim for short-term repairs, washing out easily to support sustainability.
Spray adhesives offer a repositionable hold but skip laundering.
Both reduce waste while you plan permanent reattachment.
Conclusion
Like finding cash in an old coat pocket, learning to reuse jeans buttons reveals value you didn’t know you had. Each salvaged button extends the life of materials already in circulation, reducing waste without complicating your routine.
You don’t need a workshop or specialized skills—just attention to detail and a willingness to see potential instead of trash. Start with one pair of worn jeans, and you’ll quickly understand why these small metal circles deserve a second chance.
- https://studenttheses.uu.nl/handle/20.500.12932/47105
- https://euric.org/resource-hub/press-releases-statements/press-release-clothing-reuse-has-a-70-times-lower-environmental-impact-reveals-new-study
- https://denimfocus.net/the-rise-of-denim-recycling/
- https://www.fibre2fashion.com/industry-article/9474/the-need-for-denim-recycling-and-its-challenges
- https://www.candianidenim.com/en/post-consumer-recycled-denim


