This site is supported by our readers. We may earn a commission, at no cost to you, if you purchase through links.
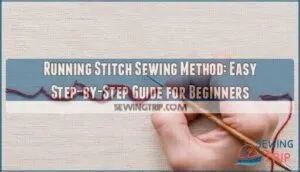
You’ll simply weave your needle up and down through fabric, creating small, evenly spaced stitches that look like a dashed line.
Start by threading an embroidery needle with 18 inches of floss, then bring it up from the fabric’s underside and back down about 1/8 inch away.
Keep your stitches consistent in length and spacing—think of it as drawing dotted lines with thread instead of a pen.
This ancient technique works perfectly for outlining designs, creating geometric patterns, or adding decorative borders to any project.
Once you’ve got the rhythm down, you’ll discover some surprising tricks that can transform this simple stitch into something truly spectacular.
Table Of Contents
Key Takeaways
- You’ll master this fundamental technique by threading an 18-inch piece of embroidery floss and creating evenly spaced stitches about 1/8 inch apart that look like dashed lines
- You’ll need basic supplies including embroidery needles, cotton thread or floss, medium-weight fabric, and an embroidery hoop to keep your fabric taut while stitching
- You can transform simple running stitches into decorative elements by trying variations like whipping (threading under existing stitches) or weaving patterns for added texture and visual interest
- You’ll find this versatile stitch works perfectly for outlining designs, creating borders, quilting projects, and traditional techniques like Japanese sashiko embroidery
What is The Running Stitch Method?
The running stitch method is the most basic hand sewing technique where you simply weave your needle in and out of fabric to create a dashed line pattern.
It’s like drawing dotted lines with thread—perfect for beginners since it only requires moving your needle up and down through the fabric in even intervals, using the running stitch method, which is a basic hand sewing technique.
Definition and Key Features
The running stitch is your gateway into hand embroidery—think of it as the alphabet before writing poetry.
Every stitch tells a story—yours begins with mastering this timeless foundation of needle and thread
You’ll create a simple in-and-out motion that forms a dashed line pattern, making it perfect for beginners learning sewing techniques.
Key features of this fundamental running stitch technique:
- Simple execution: Needle goes up through fabric at point A, down at point B
- Versatile applications: Works for straight lines, curves, and filling patterns
- Consistent spacing: Ideal stitch length is 1/8 inch or less for neat results
- Ancient origins: This hand embroidery method dates back over 50,000 years
- Global presence: Found in Japanese sashiko, Indian kantha, and European traditions
Common Uses in Sewing and Embroidery
You’ll find running stitch everywhere in the crafting world.
This versatile sewing method works perfectly for hand embroidery projects, creating beautiful embroidery patterns and decorative borders.
It’s essential for quilting, especially in traditional sashiko textile art.
Whether you’re outlining designs, filling spaces, or practicing basic embroidery stitches, this fundamental technique opens doors to countless sewing techniques and crafting ideas for fabric decoration.
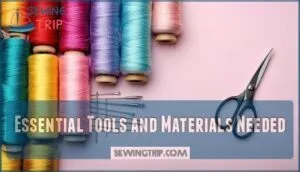
Essential Tools and Materials Needed
You’ll need just a few basic supplies to get started with running stitch, and most are probably already in your sewing kit.
The right needle, thread, and fabric make all the difference between smooth stitching and frustrating tangles.
Choosing The Right Needle and Thread
Why settle for mediocre results when the right needle and thread combo can make your running stitches sing? Matching needle sizes to thread types isn’t rocket science, but it’s the secret sauce for flawless embroidery basics.
The right needle-thread combination transforms ordinary stitches into masterpieces
Understanding the correct use of embroidery needles is essential for achieving professional-looking results.
- Embroidery needle with larger eye prevents thread breakage during threading your needle
- Thread types like cotton embroidery floss work best with 75/11 needles for medium fabrics
- Needle sizes from 60/8 to 110/18 accommodate different yarn weights and fabric selection needs
Selecting Fabric and Using an Embroidery Hoop
Once you’ve got your needle and thread ready, fabric selection becomes your foundation for clean stitches. Cotton with tight weaves offers stability, while medium-weight quilting cotton balances durability with easy needle work. Understanding the best fabric types is essential for achieving professional-looking embroidery.
Your embroidery hoop keeps fabric taut like a drum skin. Choose sizes that exceed your design by 1-2 inches for proper tension control.
| Fabric Type | Weight (GSM) | Best For |
|---|---|---|
| Quilting Cotton | 130-190 | Beginner projects, home décor |
| Linen | 140-200 | Advanced work, detailed designs |
| Canvas | 200-300 | Heavy-use items, dense patterns |
| Evenweave | 110-140 | Precise, symmetrical embroidery |
| Denim | 300-400 | Jackets, bags, durability projects |
Frame types range from small 3-5 inch hoops for delicate work to large 9+ inch versions for expansive designs. Medium 6-8 inch hoops handle most embroidery basics perfectly.
Stretching techniques matter—align fabric grain with your hoop, then tension gradually. Too tight causes hoop burns; too loose creates puckered embroidery floss work.
Marking Guidelines and Patterns
Several guideline tools make your hand embroidery project smoother than silk.
Heat-erasable transfer pens let you draw straight line and curved line patterns directly onto fabric—they vanish with heat.
Water-soluble markers work great too.
For pattern transfer, try transfer paper or light boxes for stitch templates.
Design mapping becomes easy when you mark your running stitch paths clearly before starting, using tools like heat-erasable transfer pens to ensure accuracy.
Recommended Embroidery Supplies
Getting the right embroidery supplies makes all the difference in your stitching success.
You’ll want to stock up on these five essentials:
- Embroidery needles – sharp points for clean fabric penetration
- DMC embroidery floss – quality thread types for vibrant colors
- Cotton or linen fabric – proper fabric selection guarantees smooth stitching
- Small sharp scissors – precise scissor choices for clean cuts
- 6-8 inch embroidery hoop – appropriate hoop sizes keep fabric taut
Choosing the correct embroidery needles is vital for a successful project.
Step-by-Step Guide to Running Stitch
Now you’ll master the running stitch step-by-step, from threading your needle to securing that final knot.
Think of it like learning to ride a bike – once you get the rhythm down, your hands will move almost automatically through each simple motion.
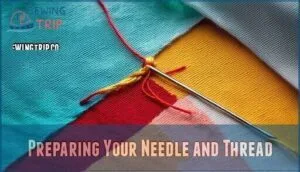
Preparing Your Needle and Thread
Before diving into the actual stitching, you’ll want to cut about 18 inches of DMC Embroidery Floss—any longer and you’ll be wrestling with tangles.
Thread your embroidery needle and tie a small knot at one end.
This simple Thread Selection and needle prep sets you up for smooth hand sewing with proper Stitch Tension throughout your Embroidery Basics project.
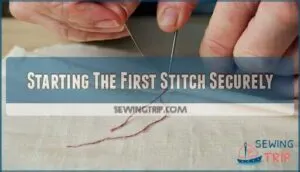
Starting The First Stitch Securely
With your needle threaded, you’re ready to make that first stitch count. Starting securely prevents your hard work from unraveling later.
Here’s how to anchor your running stitch like a pro:
- Tie a small knot at the thread’s end – about the size of a peppercorn works perfectly
- Insert needle from underneath the fabric so the knot sits on the back side
- Pull gently until the knot catches against the fabric without puckering
- Check your thread tension – it should feel snug but not tight enough to distort fabric
- Position your first stitch exactly where your pattern or guideline indicates
Understanding the running stitch basics is essential for a strong foundation in sewing.
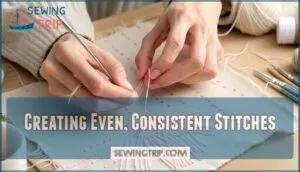
Creating Even, Consistent Stitches
Once you’ve mastered your first stitch, maintaining consistency becomes your main focus.
Keep your stitch tension steady and develop a natural stitch rhythm.
Your needle angle should stay perpendicular to the fabric, while thread control prevents tangling.
The running stitch is a basic sewing technique for various projects.
| Element | Best Practice |
|---|---|
| Stitch Length | 1/8 inch or smaller for strength |
| Spacing | Even gaps between stitches |
| Fabric Choice | Tightly woven for easier alignment |
| Visual Check | Aim for dotted-line appearance |
Practice these hand embroidery techniques consistently, and you’ll nail perfect running stitch variations every time.
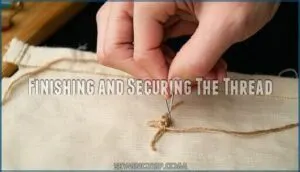
Finishing and Securing The Thread
Once you’ve completed your running stitch line, proper thread management becomes essential for professional results.
You’ll want to create invisible finishes that won’t unravel or show through your fabric—think of it as the thread equivalent of tucking in your shirt!
- Knotting the end: Make a small knot close to the fabric’s back surface, then trim excess thread
- Burying tails: Pull the needle through several existing stitches on the fabric’s underside to hide the thread end
- Securing loops: For hand embroidery projects, weave the thread through previous basting stitches to lock everything in place
Running Stitch Techniques and Variations
Once you’ve mastered the basic running stitch, you can explore exciting variations that’ll transform your simple stitches into eye-catching designs.
These techniques range from decorative enhancements like whipping and weaving to adjusting stitch lengths for different visual effects.
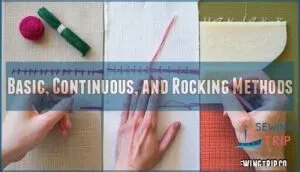
Basic, Continuous, and Rocking Methods
Once you’ve grasped the basic technique, you can explore three main approaches.
The basic method works stitch by stitch—perfect for precision work.
The continuous method lets you pick up multiple stitches before pulling through, boosting speed.
The rocking method uses a gentle back-and-forth motion, ideal for quilting layers.
| Method | Speed Comparison | Method Difficulty |
|---|---|---|
| Basic | Slowest but most controlled | Easiest for beginners |
| Continuous | Fastest for straight lines | Moderate – requires rhythm |
| Rocking | Medium speed, smooth flow | Hardest – needs practice |
Each running stitch variation offers different benefits.
Basic method gives you stitch consistency every time.
Continuous works great on lightweight fabrics where fabric suitability matters.
Rocking method shines in hand embroidery projects requiring even tension.
Choose your best applications based on your project needs—these running stitch tutorial techniques form the foundation for all embroidery stitches and running stitch variations you’ll master.
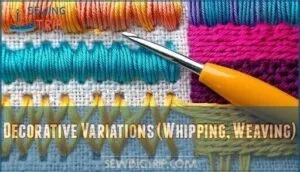
Decorative Variations (Whipping, Weaving)
Beyond basic methods, you can transform running stitch with whipping techniques and weaving patterns that add incredible texture effects.
Whipping involves sliding your needle under each stitch from one direction, creating rope-like lines with stunning color contrasts.
Consider how thread selection matters for quilting projects.
- Whipping: Thread under stitches in single direction for raised, corded appearance
- Weaving: Alternate over-under threading for basket-like texture effects
- Color Contrasts: Use contrasting threads to make decorative stitching pop
- Stitch Combinations: Layer multiple running stitch variations for complex designs
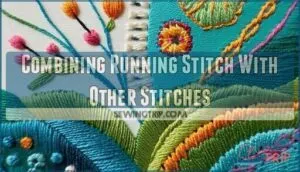
Combining Running Stitch With Other Stitches
Why settle for simple lines when you can create stunning Mixed Stitch Textures?
Layer running stitch with French knots, chain stitches, or backstitch for rich Embellishment Techniques.
Try Color Blending by overlapping different thread colors, creating depth in your Hand Embroidery Stitches.
These Modern Interpretations transform basic sewing stitches into sophisticated Decorative Stitching that’ll make your projects pop with personality.
Adjusting Stitch Length for Different Effects
Your stitch length controls everything from visual weight to decorative impact in hand embroidery.
Short stitches (1/8 inch) create sharp, dense lines perfect for detailed work, while longer stitches (1/4 inch) give bolder outlines with airier texture.
Match your fabric type—lightweight materials need shorter stitches to prevent bunching, heavy fabrics handle longer ones beautifully.
This simple adjustment transforms basic running stitch into versatile hand embroidery techniques, making it possible to achieve a wide range of effects with decorative impact.
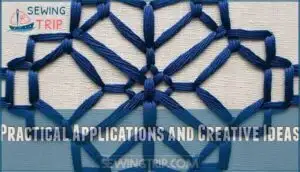
Practical Applications and Creative Ideas
Now that you’ve mastered the basic running stitch technique, you’re ready to explore its endless creative possibilities.
From adding delicate details to your embroidery projects to creating stunning sashiko patterns, this simple stitch can transform ordinary fabric into something truly special.
Embellishing Hand Embroidery Projects
Several clever techniques can transform your basic Running Stitch into stunning Hand Embroidery masterpieces that’ll make your friends wonder if you’ve secretly become a textile wizard overnight.
- Adding Beads: Thread small beads onto your needle before each stitch for instant sparkle and texture
- Sequins Integration: Secure flat sequins by stitching through their centers, creating shimmering accents
- Metallic Threads: Switch to gold or silver threads for elegant borders and highlighted details
- Ribbon Embroidery: Use thin ribbons instead of floss for bold, dimensional flower petals and leaves
- Dimensional Effects: Layer multiple running stitch rows at varying heights for sculptural depth
Using Running Stitch in Quilting and Sashiko
In Quilting Applications, you’ll secure all quilt layers using evenly spaced running stitch work that creates identical patterns on both sides.
For Hand Quilting Methods, maintain 1/8 to 1/4 inch stitch lengths.
In sashiko, Japanese Embroidery uses longer front stitches with white Thread Selection on indigo Fabric Choices.
Traditional Sashiko Patterns need five to ten stitches per inch with careful Stitch Density control.
Beginners should start by practicing even tension techniques for best results.
Designing Borders, Patterns, and Motifs
Beyond quilting and sashiko lies endless creative potential with running stitch borders and motifs.
You’ll discover how straight line variations create stunning visual effects through strategic placement and rhythm.
Transform your Hand Embroidery Techniques with these Pattern Fills approaches:
- Geometric Border Variations – Layer parallel lines at different angles for dynamic visual depth
- Motif Inspiration from nature – Create leaf veins, flower stems, and wave patterns using varied stitch lengths
- Color Palettes experimentation – Alternate thread colors within single motifs for striking contrast effects
Master Stitch Combinations by mixing running stitches with French knots or chain stitches for textured storytelling.
Many crafters find inspiration from available stitch patterns.
Tips for Beginners and Troubleshooting
Practice makes perfect, but even seasoned stitchers hit snags.
When your running stitch looks wonky, check your thread tension first—too tight causes fabric wrinkling.
Mark stitch placement with removable guidelines for consistent stitching.
Prevent knots by using shorter thread lengths and conditioning with beeswax.
Remember, hand embroidery techniques improve with patience, not perfection.
Frequently Asked Questions (FAQs)
What thread weight works best for running stitch?
Like your great-grandmother’s telegraph messages, you’ll want medium-weight thread for running stitch success.
Six-strand embroidery floss or cotton thread works perfectly—it’s thick enough to see clearly but won’t create bulky stitches that’ll frustrate you.
How do you prevent fabric puckering while stitching?
Keep your fabric taut in an embroidery hoop to maintain even tension.
Don’t pull stitches too tight—they should lie flat against the fabric.
Use consistent, gentle pressure when drawing the thread through to avoid bunching or distorting the weave, and maintain gentle handling to ensure the best results.
Can running stitch work on stretchy fabrics?
Running stitch on stretchy fabrics works like trying to tame a wild horse—you’ll need stabilizer or stay tape underneath.
The fabric’s stretch can distort your neat stitches and create puckering.
Whats the ideal tension for hand embroidery?
You’ll want medium tension – snug enough that your thread doesn’t sag or pucker the fabric, but loose enough to pull through easily without straining your hand.
Or creating tight, gathered stitches.
How do you fix uneven stitch spacing?
Practice on paper with guidelines first. Mark equal spacing intervals before stitching. If you’ve already stitched, gently remove uneven sections and re-stitch using consistent 1/8-inch measurements for better results.
Conclusion
Mastering the running stitch sewing method opens doors to endless creative possibilities in your embroidery journey.
You’ve learned the fundamentals—from threading your needle to creating those perfect, evenly-spaced stitches that dance across your fabric like tiny footprints.
With practice, you’ll develop the muscle memory that makes this technique feel natural.
Don’t worry if your first attempts look wobbly; even experienced stitchers started somewhere.
Keep experimenting with different thread weights and stitch lengths to discover your personal style and watch your projects transform, and find your own unique creative possibilities.
- https://www.funclothcrafts.com/all-posts/how-to-running-stitch
- https://www.mh-chine.com/blog/products/running-stitch-on-sewing-machine
- https://pastelcraftcafe.com/basics-running-stitch/
- https://pintangle.com/2012/03/05/running-stitch-stitch-dictionary/
- https://www.hooptalent.com/fr/blogs/news/mastering-running-stitch-in-embroidery-techniques-and-innovations

