This site is supported by our readers. We may earn a commission, at no cost to you, if you purchase through links.
Most sun hats from stores arrive flimsy, oversized, or designed for someone else’s head shape entirely. When you sew your own, you control the fit, the fabric, and how much sun protection you actually get—which matters more than you’d think when you’re spending hours outside.
A well-constructed sun hat stays put, breathes properly, and won’t collapse in a backpack.
Better yet, making one isn’t as complicated as it sounds. With the right materials, accurate measurements, and a straightforward assembly process, you’ll end up with a hat that fits like it was made specifically for you—because it was.
Table Of Contents
Key Takeaways
- Choosing the right fabric (polyester, canvas, or linen blends) and fusible interfacing gives your hat structure, sun protection, and durability that store-bought options rarely match.
- Accurate head measurement and proper pattern sizing prevent costly mistakes—measure 1 cm above your ears, choose the larger size when between options, and double-check before cutting any fabric.
- Dense topstitching spaced ¼ inch apart transforms a floppy brim into a structured, professional-looking hat while reinforcing seams for years of outdoor wear.
- Adding functional chin straps with breakaway safety clips and padded webbing keeps your hat secure during activity while protecting against chafing and strangulation risks.
Gather Materials and Choose Fabrics
Before you start sewing, you’ll want to gather the right materials to make sure your hat holds its shape and looks polished. The fabrics you choose affect both the sun protection and the overall drape of your finished piece.
Let’s walk through the essential supplies and a few optional extras that can take your sun hat to the next level.
Best Fabrics for Sun Hats
The best fabrics for sun hats blend safety with comfort. Your material choice shapes protection and wearability:
- Cotton fabric – lightweight and breathable, though untreated versions offer minimal UV protection compared to polyester options rated UPF 45-50
- Linen blends – offer enhanced breathability and moisture management in humid conditions
- Polyester – blocks 98% of harmful rays while maintaining durability through repeated washing
- Canvas – provides enhanced structure for travel-ready designs
To improve performance, consider hybrid material options.
Selecting Fusible Interfacing
After fabric selection, you’ll choose fusible interfacing to give your hat structure without stiffness. Woven interfacing types work beautifully with cotton—look for a drape coefficient between 0.5 and 0.7. Lightweight options prevent bulk while maintaining shape through laundering. Non-woven varieties suit polyester fabrics well.
For sustainability-minded sewers, water-based adhesive interfacings reduce environmental impact. Match interfacing weight to your fabric properties for professional results. The ideal fusing temperature depends on the interfacing type.
Choosing Thread and Notions
With interfacing chosen, you’ll need sewing thread and notions for hat-making materials. All-purpose polyester thread works for most fabric selections, but UV resistance matters for outdoor wear—look for threads like Gütermann Mara 70 that maintain color and thread strength in sunlight.
Stock double-fold bias tape for clean edge finishing. For wide brims, hat boning prevents drooping. Match your color selection to fabric or choose contrast for decorative topstitching.
Optional Trims and Embellishments
Once thread and notions are ready, embellishment choices let you personalize your design. Ribbon embellishments and beaded accents appear on 12% of handmade sun hats, adding boutique appeal. Consider these trim options:
- Grosgrain ribbons or logo embroidery for classic style
- Sustainable trims from recycled materials
- Functional straps with decorative toggles
- Fabric scraps transformed into woven bands
Decorative stitches improve both structure and visual interest.
Download and Prepare The Pattern
Before you cut a single piece of fabric, you need a pattern that fits. Getting the right measurements now will save you from ending up with a hat that’s too tight or slides right off.
Here’s how to measure, print, and prep your pattern so everything comes together smoothly.
Measuring Head Circumference
Before you can choose hat sizes, you need an accurate head measurement. Wrap a soft, flexible tape around the widest part of your head—about 1 cm above your ears and mid-forehead, where the hat naturally sits.
Keep the tape level; even slight tilting shifts your custom hat size. Record to the nearest half-centimeter for pattern conversion later, ensuring your finished hat won’t pinch.
Selecting The Right Hat Size
Most patterns offer four to six hat sizes—XS through L, each spanning 1 to 2 cm of head circumference. Size charts match your measurement to a pattern designation: if you recorded 56 cm, medium usually fits.
When you fall between sizes, pick the larger one; adjustable features like drawstrings let you fine-tune fit preferences later. Sizing errors mean redrafting seams, so double-check before cutting.
Printing and Assembling Pattern Pieces
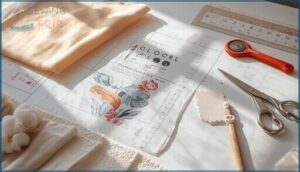
Set your printer to 100% scaling or “Actual Size” in Adobe Reader to avoid shrinking pattern pieces. Most printable patterns include a 10 cm test square—measure it after printing to catch alignment issues early.
Trim the margins off each page, then tape your cutting layout together along the registration marks. A0 format alternatives eliminate tiling if you prefer copy-shop printing over home assembly.
Transferring Pattern Markings to Fabric
Pin your pattern pieces flat before marking—even a small shift can throw off notch placement by an eighth of inch. Test your marking tool on scrap fabric first to prevent staining; chalk wheels work best for most cottons and linens, holding up through the entire cutting layout process. Mark on the wrong side so lines won’t show through. Accuracy now means fewer headaches during assembly.
Cut and Prepare Hat Pieces
Once your pattern is printed and ready, it’s time to bring your hat to life by cutting the fabric. This step sets the foundation for a professional-looking finish, so accuracy matters.
You’ll cut the main pieces, prep your interfacing, and learn a few tricks to keep everything aligned as you work.
Cutting Brim, Crown, and Top Pieces
Start your cutting by laying out the brim, crown, and top pieces with careful grainline alignment—parallel to the selvage for structure. Use a 28 mm rotary cutter for smooth curve cutting on the brim’s inner and outer edges.
Pattern duplication means you’ll cut two of each piece from your main fabric. Press everything flat first; cutting accuracy within a few millimeters prevents fit problems later.
Cutting Lining and Interfacing
Your lining piece count mirrors the shell: cut two brims, two crowns, and one top from lining fabric, following the same grainline orientation parallel to the selvage.
For interfacing coverage, trim the brim interfacing pieces slightly smaller—about 5 mm inside the seam allowance—so bulk won’t bunch at stitching lines.
This fabric preparation step ensures your brim parameters stay crisp without weighing down the crown’s softer drape.
Fusing Interfacing to Fabric
With your cutting and fusing fabrics ready, heat your iron to match your fabric’s temperature settings—165 to 180°C works well for cotton. Place the fusible interfacing adhesive-side down on the wrong side of each shell piece, then press firmly for 15 to 22 seconds.
For smooth fabric preparation:
- Test a scrap sample before fusing full pieces
- Avoid sliding the iron to prevent bubbling
- Let fused pieces cool flat before handling
- Check that edges bond completely without gaps
- Use a pressing cloth if fabric feels delicate
This pressure application locks structure into your brim without compromising fabric compatibility or causing troubleshooting issues like puckering.
Tips for Accurate Cutting
Once interfacing cools, you’re ready to cut—but accuracy here determines how cleanly your seams align later. Sharp cutting tools prevent fabric drift, so swap dull rotary blades before layout.
Align pattern pieces with grain lines, not just visually but by measuring from selvage to edge at both ends. A 1.5 mm seam allowance error compounds across six crown segments, distorting your final circumference and fit.
Sew and Assemble The Sun Hat
Now that your fabric pieces are cut and prepped, it’s time to bring your sun hat to life. This is where the flat pattern transforms into a structured, wearable piece—and don’t worry, even if you’re new to sewing, these steps use only straight stitches.
You’ll work through joining the crown segments, attaching the brim, adding your lining, and finishing with topstitching for that polished, professional look.
Sewing Crown and Brim Pieces
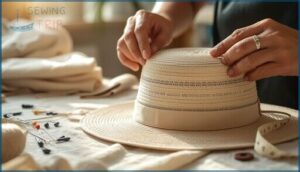
Pin your crown and brim pieces right sides together, then sew them using a 1/4-inch seam allowance with reinforced stitching at start and end points. Press seams open to reduce bulk and maintain crisp edges. Repeat this process for your second set of pieces.
These foundational techniques guarantee:
- Secure seam integrity throughout wear
- Even fabric distribution across crown size
- Professional brim width maintenance
- Structural durability for sun protection
Attaching Brim to Crown
Now it’s time to join your brim and crown—this is where your hat really takes shape. Place them right sides together, matching those alignment markings you transferred earlier. Use a ¼-inch seam allowance and sew with a 2.5mm straight stitch, concentrating extra pins along curves to prevent shifting. Press the seam toward the crown, then topstitch ⅛ inch away on the crown side for structure and polish.
| Element | Purpose |
|---|---|
| Seam Allowance (¼”) | Navigates curves without bulk |
| Pin Placement | Prevents fabric distortion |
| Straight Stitch (2.5mm) | Balances strength and flexibility |
| Pressing Direction | Directs brim outward naturally |
| Topstitching | Reinforces join and adds definition |
Adding Lining and Turning Right Side Out
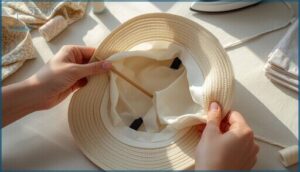
Your hat’s nearly complete. Place lining and exterior right sides together, then sew around with a ¼-inch seam allowance, leaving a 3–4 inch opening. Trim and grade seams to reduce bulk, then clip curves with pinking shears.
Turn everything through that opening using a blunt tool like a chopstick to push corners crisp. Press with moderate heat—no steam—to prevent puckering and achieve smooth, professional lining durability.
Topstitching for Structure and Style
With your hat now turned right side out, topstitching transforms the brim from floppy to structured while adding visual polish. Sew 5–6 concentric rows spaced roughly ¼ inch apart, working from the seam outward. This dense stitching dramatically strengthens the brim’s hold on shape.
Consider these choices:
- Use 40–50 weight thread for balanced visibility
- Match thread color to fabric for subtle elegance
- Keep machine speed steady around 1,000 stitches per minute
- Move the hat smoothly without sudden pivots
Dense stitching builds a firmer, more shapely brim that won’t droop.
Customize and Finish Your Sun Hat
Your sun hat is almost ready to wear, but a few finishing touches will make it truly yours. Now comes the fun part—adding practical features like chin straps and choosing decorative details that match your style.
Let’s walk through how to customize and finish your hat so it looks great and works hard for you.
Adding Chin Straps or Ties
Your chin strap is the difference between a hat that stays put and one that blows away mid-breeze. Cut bias tape straps around 16 inches long, then thread them through buttonholes positioned just above the brim seam.
Pair adjustable toggles or snaps with safety-focused breakaway clips—they’ll keep the hat secure during active play while protecting your child from strangulation risks. Soft, padded webbing prevents chafing under the chin, ensuring your child actually wants to wear it.
Safety-focused breakaway clips and padded webbing keep sun hats secure while protecting children from chafing and strangulation risks
Attaching Embellishments or Trim
Embellishments transform your hat from basic to beautiful, but safety and durability matter most. Choose attachment methods wisely:
- Secure ribbons and bias tape with reinforced stitching to withstand active wear
- Select metal components like snaps tested for nickel compliance to prevent allergic reactions
- Use sustainable trims from recycled materials, reducing environmental impact
- Verify all decorative elements won’t detach under normal use, especially for children
Quality finishing elevates your handmade sun hat.
Pressing Final Seams
Pressing your final seams transforms a homemade hat from good to professional. Use 350°F for cotton fabrics with firm pressure, holding for 15 seconds. Press immediately after stitching, before seams cross new stitches.
Open your seam allowances flat to reduce bulk in the brim layers. This finishing technique improves seam durability by up to 20%, preventing unraveling during active outdoor wear.
Proper equipment selection and temperature guidelines guarantee your hat withstands years of use.
Care Tips for DIY Sun Hats
Your handmade sun hat deserves proper care to protect your investment. Hand wash in cool water with gentle detergent—this preserves UV protection and prevents the 70% performance drop that harsh methods cause. Air dry in shade to avoid brim warping. Store in a hat box to maintain shape.
- Use cold water and mild soap for washing
- Remove sunscreen and sweat stains immediately
- Keep stored hats away from direct sunlight
Frequently Asked Questions (FAQs)
What kind of yarn do you use for a sun hat?
Cotton yarn breathes beautifully for sun hats—especially certified organic blends achieving UPF 50+ ratings. Lightweight polyester blends resist fading and moisture better.
Choose worsted-weight or DK yarns for structure, never bulky. Linen adds cooling benefits for hot climates.
How do you stiffen the brim of a sun hat?
Fusible interfacing converts lightweight fabric to canvas-like firmness. Topstitching spaced 25 inches apart increases rigidity considerably.
For maximum stability, add millinery wire or plastic inserts along the brim edge, securing them with zigzag stitches to maintain your hat’s shape and UPF performance.
How to make a sun cap?
Making a sun cap is like building a shield—simple structure, maximum protection.
Start with accurate sizing, choose UPF fabric for the crown and brim, apply interfacing for stiffness, then sew three pieces together using straight stitches only.
What fabric are sun hats made of?
Sun hats use natural fabrics like cotton and linen for breathability, or synthetic blends for enhanced UPF ratings. Canvas and hemp offer durability, while straw weaves provide lightweight options.
Modern trends favor UV-treated fabrics and eco-friendly blends for best sun protection and comfort.
How do I ensure proper sun hat fit?
Proper fit starts with measuring head circumference 1 cm above your eyebrows. Choose your hat size from charts, add 1–2 cm ease for comfort, and consider adjustment features like chin straps or toggles for security.
What fabric types are best for sun hats?
Choose tightly woven cotton canvas or polyester blends rated UPF 50+ for excellent protection. Natural fibers breathe well; synthetic options dry faster. Dark colors and dense weave density block more UV.
Match fabric weight to your climate and activity level.
Should I use interfacing for sun hats?
Interfacing is essential for sun hats. It gives your brim structure and helps it hold its shape through wear and washing.
Medium-weight fusible interfacing works best for most projects, delivering durability that lasts seasons of outdoor use.
How to adjust a pattern for head size?
Measure your head circumference across your forehead and back skull. Subtract 1–2 cm for negative ease, ensuring comfort.
Use this adjusted measurement to select your pattern size or grade between sizes by adjusting seam allowances proportionally.
Can I make a reversible sun hat?
Yes, absolutely. A reversible sun hat lets you wear two different fabrics by assembling two complete hats and joining them at the brim.
Use medium-weight cotton for both sides, interface only the brim, and leave a small opening for turning. Topstitch carefully for durability on both sides.
How do I adjust the pattern for an unusually shaped head?
Most heads aren’t perfectly oval—that’s why custom grading matters. Measure your full circumference, width, and vertical profile.
Use slash-and-spread techniques on crown pieces, spacing cuts one centimeter apart for asymmetrical adjustments that eliminate fit problems.
Conclusion
You’ve now learned what it takes to sew a sun hat that actually works for you. As the saying goes, measure twice, cut once—and you’ve done exactly that.
Your custom hat will outlast store-bought options, fit your head perfectly, and give you real sun protection where you need it most.
The skills you’ve built here apply to many sewing projects ahead. Your next adventure outdoors just got a whole lot more comfortable.
- https://www.solbari.com/blogs/solbari-blog/wide-brim-sun-hat-or-sunscreen-which-is-better-for-sun-protection
- https://www.gathered.how/sewing-and-quilting/sewing/how-to-make-a-childs-sunhat
- https://craftingshapes.art.blog/2021/08/17/reversible-sun-hat-part1/
- https://www.youtube.com/watch?v=anR7F4yjRDw
- https://www.marketgrowthreports.com/market-reports/home-sewing-machines-market-112738


