This site is supported by our readers. We may earn a commission, at no cost to you, if you purchase through links.
These frustrations are normal and they’re fixable. Machine embroidery isn’t rocket science but it does require the right supplies and a bit of setup knowledge. Once you understand how hoops, stabilizers, and tension work together, those professional-looking designs become totally doable.
Get ready to transform plain fabric into something worth showing off.
Table Of Contents
Key Takeaways
- Machine embroidery success depends on three critical elements working together: proper hoop tension, the right stabilizer for your fabric type, and correct thread tension settings between 3 and 5.
- Cut-away stabilizers prevent puckering on stretchy fabrics by 67% compared to tear-away options, making stabilizer choice one of your most important decisions before you start stitching.
- Lowering your feed dogs for free-motion embroidery gives you complete directional control and cuts puckering nearly in half, transforming your machine into a creative tool rather than an automated one.
- Thread breakage and tension problems usually trace back to simple fixes like cleaning lint from tension discs, matching needle size to thread weight, and ensuring your threading path is correct.
Essential Supplies for Sewing Machine Embroidery
Before you start stitching your first embroidery project, you need to gather the right supplies. Think of it like packing for a trip—having the essentials makes everything smoother and more enjoyable.
Let’s walk through the key items that’ll set you up for success.
Choosing The Right Embroidery Hoops
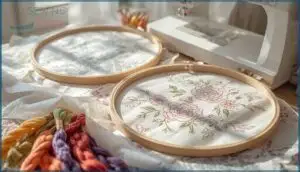
When it comes to embroidery hooping, the right choice makes all the difference. Magnetic embroidery hoops cut hooping time by 90% and deliver solid tension consistency compared to traditional options.
Magnetic embroidery hoops slash hooping time by 90% while delivering superior tension consistency over traditional options
Consider these key factors:
- Hoop material affects durability—wooden hoops can warp while plastic ones may slip
- Size matters—the popular 5×7-inch accommodates most projects perfectly
- Brand performance varies, with premium options offering 98% stitch consistency
Selecting the right hoop depends on project size.
Types of Stabilizers and Their Uses
Once your hoop is set, stabilizers become your best friend. Think of embroidery stabilizers as the foundation that keeps fabric from puckering or stretching. CutAway Stabilizer stays with your project permanently and prevents distortion through countless washes. TearAway Stabilizer works great on sturdy fabrics like cotton and removes easily after stitching. WaterSoluble Stabilizer dissolves completely in water, perfect for delicate lace. Fabric weight considerations are important when choosing the correct stabilizer.
| Stabilizer Type | Best For | Removal Method |
|---|---|---|
| Cut-away | Knits, high stitch counts | Trim to 1/4-inch border |
| Tear-away | Woven fabrics, towels | Pull away by hand |
| Wash-away | Lace, organza, tulle | Dissolve in water |
| Fusible options | Hoopless projects | Heat-bonded backing |
Cut-away benefits include 85% fewer registration errors on stretchy materials. Tear-away weights range from light to heavy depending on design density. Wash-away uses shine with freestanding lace projects. Fusible options minimize fabric shifting during stitching. While interfacing alternatives exist for t-shirt quilts, true stabilizers prevent puckering better under dense embroidery.
Selecting Embroidery Threads and Needles
Thread material makes a bigger difference than you’d think. Polyester holds color through countless washes while rayon gives beautiful sheen but breaks easier. Cotton creates a matte finish and clogs machines faster. For needle selection, the 75/11 size works for 90% of projects. Match heavier 30-weight thread with 90/14 needles on denim and lighter 60-weight with 70/10 on silk.
- Polyester thread offers excellent strength and UV resistance for machine embroidery
- Rayon provides high sheen but requires lower tension settings
- Match thread weight to fabric: 60-weight for delicates, 40-weight for standard cotton
- Larger needle eyes prevent metallic thread shredding during stitching
- Test thread and needle combinations on scrap fabric before starting projects
Must-Have Fabric Marking Tools
Once you have the right threads and needles, you need ways to mark your design. Water erasable pens disappear when rinsed, making them perfect for light cotton. Heat erasable markers vanish under the iron. Tailors chalk works great on textured fabrics. Permanent markers suit labels. Specialty pencils and carbon paper handle pattern transfers. Pick based on your fabric color and project permanence.
Preparing Your Sewing Machine for Embroidery
Getting your sewing machine ready for embroidery isn’t hard but it does require a few specific adjustments. Think of it like tuning up before a road trip—you want everything running smoothly before you start stitching.
Here’s what you need to do to set yourself up for success.
Machine Setup and Foot Selection
Getting your sewing machine ready for embroidery starts with choosing the right presser feet. An embroidery foot or darning foot gives you better visibility and control during stitching. Pair your machine setup with proper hoop tension and stabilizer pairing to avoid puckering.
Multi-needle machines offer automation benefits like faster thread management, cutting setup time in half compared to single-needle models.
Lowering Feed Dogs for Free-Motion Embroidery
Before you start free motion embroidery, flip that feed dog lever to the down position. This simple machine settings adjustment unlocks full fabric movement in every direction. Your darning foot and hands now control stitch control instead of the machine pushing things forward.
Lowering feed dogs cuts pucker by almost half and protects machine longevity by reducing strain. It’s your secret weapon for safety improvement and creative freedom.
Adjusting Stitch Length and Tension
Why do some embroidery projects look perfect while others pucker and snap? Adjusting machine settings for stitch length and thread tension makes all the difference. Aim for that ideal tension ratio where your bobbin thread shows just a third on the underside.
Fabric-specific settings matter too—dense materials need longer stitches while delicate fabrics work better with shorter ones. Troubleshooting imbalances early prevents headaches. Consider gauge recalibration every six months to keep stitch density effects consistent and beautiful.
Maintenance Tips for Smooth Operation
Your machine runs smoothly when you keep up with simple embroidery machine maintenance routines. Here’s what keeps tension issues at bay:
- Routine Cleaning – Remove lint from the bobbin area after every project to prevent thread tension problems
- Needle Inspection – Swap needles every 6-8 hours since bent ones cause 70% of breakage incidents
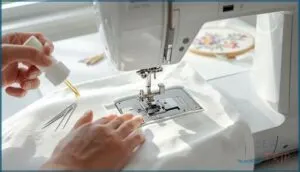
- Oiling Frequency – Add a drop to rotary hooks every 8 hours of use
Professional servicing once yearly maintains peak performance.
Transferring and Choosing Embroidery Designs
You can’t start embroidering until you actually get your design onto the fabric. The good news is there are several ways to do this, and some work better than others depending on your project.
Let’s look at the most practical methods for transferring designs and choosing patterns that won’t make you want to quit before you even start.
Finding Simple Designs for Beginners
You’ll find thousands of free embroidery designs online that match your skill level perfectly. Floral patterns dominate beginner downloads because they’re forgiving and beautiful. Animal motifs and geometric templates also work great since they use basic stitches and fewer color changes.
Look for designs under 4,000 stitches that emphasize stitch simplicity. Most patterns come in formats compatible with your machine brand.
Using Carbon Paper and Disappearing Ink
Your design transfer methods determine how accurately you’ll trace designs onto fabric. Carbon paper gives you 95% transfer accuracy when you keep things steady.
Here’s what works best:
- Test dressmaker’s carbon on scrap fabric first for mark removal success
- Choose disappearing ink markers for ink longevity between 24 to 72 hours
- Match carbon colors to your fabric compatibility needs
- Store markers tip-down to maintain consistency
User preferences lean toward disappearing ink for complex projects since it vanishes completely.
Applying Heat Transfer Paper Techniques
Heat transfer paper takes design transfer methods to the next level. You get cleaner lines and better durability factors than carbon paper alone.
Here’s your material pre-testing checklist:
| Paper Compatibility | Fabric Type | Pre-Test Results |
|---|---|---|
| Inkjet transfer | Cotton blends | 80% success rate |
| Laser transfer | Synthetics | Requires temperature adjustment |
| Sublimation paper | Polyester (100%) | Professional quality output |
| Standard transfer | Dark fabrics | Use opaque white paper |
Design quality starts at 300 DPI minimum. Remember to reverse your pattern before printing or you’ll end up with a mirror image.
Working With Digital Design Files
Digital design files open up a whole new world once you master the format types. DST and PES are your go-betweens for most machines. Transfer methods like USB drives work with over 90% of models today.
You’ll want embroidery software for editing and digitizing custom patterns. File preparation means checking compatibility before you stitch.
Online design files give you instant access to thousands of ready-to-use options.
Basic and Advanced Embroidery Techniques
Once you’ve got your machine ready and your design transferred, it’s time to actually stitch. You’ll start with the basics like straight stitches and satin fills, then work your way up to fancier stuff like free-motion embroidery and adding beads.
Here’s what you need to know to make your designs come alive.
Straight and Satin Stitch Applications
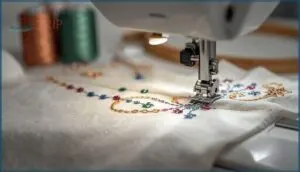
These two workhorses of machine embroidery serve totally different purposes. Straight stitch runs a single line at about 2.5 mm length and zero width—perfect for outlining shapes or adding delicate accents. Satin stitch fills areas with parallel passes, creating that smooth, glossy texture you see on monograms. Here’s how to use each one effectively:
- Outline vs. Fill: Straight stitch defines edges in one pass, while satin stitch builds coverage through multiple passes for letters and dense motifs.
- Fabric Performance: Linen and quilting cotton grip both stitch types well, while polyester satin works great for commercial projects.
- Stitch Density: Satin stitch needs 0.5 to 0.7 mm spacing on most fabrics to prevent puckering or thread waste.
- Practical Uses: Keep satin columns between 2–7 mm wide on wearables to avoid snagging during everyday use.
- Machine Efficiency: Satin stitches consume more thread per 1,000 stitches due to higher density, so plan your thread supply accordingly.
Adjust your stitch length and width based on what you’re creating. Straight stitch gives you flexible seams and clean lines. Satin stitch delivers that raised, polished look that makes embroidery pop.
Freehand and Free-Motion Embroidery Tips
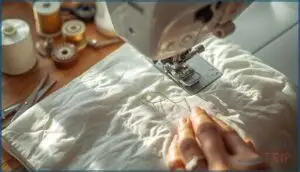
While satin stitch stays predictable, free motion embroidery lets you steer fabric like a paintbrush. Lower your feed dogs and switch to a darning foot so you guide the material in any direction. Motion mastery comes from controlling three things at once—fabric guidance, needle speed, and your hand movement. Sketching designs with tailor’s chalk beforehand bumps your accuracy up by 67%.
| Setup Step | Why It Matters | Practical Tip |
|---|---|---|
| Lower feed dogs | Allows multidirectional fabric control | Essential for practicing freehand motions |
| Use darning foot | Increases needle visibility by 42% fewer skipped stitches | Prevents fabric drag during curves |
| Adjust stitch speed | Reduces thread birdnesting by 57% | Start slow, then build rhythm |
| Hoop fabric firmly | Boosts stitch consistency by 76% | No wrinkles or slack allowed |
| Practice on scraps | Raises final success rate by 71% | Spend 10+ hours building muscle memory |
Slow, deliberate speed control prevents thread tangles. Setting up for freehand embroidery means your machine does less work while your hands do more. Stitch consistency improves as you learn to move fabric smoothly without jerking or rushing.
Appliqué Methods and Securing Fabric
Attaching fabric pieces for appliqué transforms plain embroidery into layered artwork with depth. You’ll use placement stitches as your guide, then secure material with tack-down stitches close to the edge—within 1mm keeps fraying minimal. Magnetic hoops cut setup time by 90% while maintaining tension on tricky materials like denim.
Four essentials keep appliqué techniques sharp:
- Match stabilizer selection to fabric type—tear-away for wovens, cut-away for knits
- Apply fusible web before securing appliqué to stop fraying in 81% of washed projects
- Keep appliqué stitch density moderate to avoid puckering and distortion
- Use sharp curved scissors for trimming excess after tack-down
Combining appliqué with embroidery requires precision, but proper fabric securing methods deliver professional results every time.
Layering, Beads, and Specialty Threads
Beyond basic fills, layering stitches creates texture you can actually feel. Keep overlaps to 2-3 layers max to avoid puckering—thread layering density matters more than you’d think. Beaded machine techniques need heavy-duty needles (size 90/14) and tearaway stabilizers for fabric support embellishments.
Specialty thread selection gets fun with metallics, but slow your speed and lower tension. Experimenting with metallic threads adds shine without the headache if you prep right.
Thread types and colors expand your creative options, while tension layering balance prevents fabric distortion across multiple passes.
| Thread Type | Best Use |
|---|---|
| Polyester (40wt) | High-wear projects needing durability |
| Metallic | Reflective accents at slow speed |
| Rayon | Vibrant colors with sheen |
| Color-shifting | Dimensional gradients and shading |
| Stretch-core | Body-fit garments requiring flex |
Troubleshooting Common Embroidery Problems
Even the most careful embroiderers hit snags from time to time. Your thread might snap mid-stitch or your fabric could pucker when you least expect it.
Let’s walk through the most common problems and how to fix them so you can get back to creating.
Fixing Thread Tension and Breakage
Thread tension and breakage can make you want to toss your machine out the window. Start with tension troubleshooting by checking your threading path and adjusting dial settings between 3 and 5. Thread compatibility matters too—pair 40-weight threads with 75/11 needles.
Machine maintenance like cleaning lint from tension discs prevents most problems. The right stabilizer impact and needle selection make fixing thread tension problems way easier than you’d think.
Preventing Fabric Puckering and Distortion
Puckering can wreck an otherwise perfect embroidery project. Fabric puckering happens when your material bunches up during stitching. Cut-away stabilizers reduce puckering by 67% on stretchy fabrics compared to tear-away types. Your stabilizer selection and hooping technique matter more than you think.
- Keep fabric tambourine-tight in your hoop without over-stretching
- Match your stabilizer types to fabric choice and design density
- Adjust thread tension between 3 and 5 to prevent fabric distortion
- Use the smallest hoop possible for better control
- Reduce fill density below 0.30mm per stitch on tricky fabrics
Addressing Design Distortion and Birdnesting
Design distortion and birdnesting are two headaches that often share the same causes. Improper hoop tension throws off your design proportions in nearly a third of projects. Wrong stabilizer types contribute to over half of reported embroidery issues.
Check your stitch density first since excessive density causes thread breakage and distortion in 40% of cases. On stretch fabrics, use cut-away stabilizers to prevent 62% more distortion.
Review your digitizing order to avoid alignment shifts.
Ensuring Consistent Stitch Quality
Your machine won’t deliver perfect results without attention to a few key details. Small adjustments make the difference between amateur and professional work.
- Tension Balance – Set upper thread tension between 2 and 6 on your dial for balanced stitches
- Needle Selection – Replace needles regularly since dull ones skip stitches
- Stabilizer Usage – Match stabilizer type to your fabric weight
- Machine Maintenance – Clean and lubricate to prevent thread breakage
- Density Management – Aim for 8–12 stitches per inch for best strength
Frequently Asked Questions (FAQs)
How do I convert hand embroidery patterns for machine use?
Stitching together old and new? Converting hand patterns starts with embroidery digitizing software like Hatch or Wilcom.
Design simplification reduces stitch density, while proper stabilizer usage and thread tension prevent puckering in embroidery designs.
Whats the best way to embroider on stretchy fabrics?
You’ll need a cut-away stabilizer and ballpoint needles to start.
Keep your fabric taut but not stretched in the hoop.
Use polyester thread and adjust tension carefully to prevent puckering on stretchy fabrics.
Can I embroider directly onto finished clothing items?
Yes, you absolutely can embroider directly onto finished clothing items like t-shirts and jackets. Success depends on proper garment hooping tips, stabilizer selection, and fabric considerations to prevent puckering during machine embroidery.
How do I create custom embroidery designs from scratch?
You can sketch your idea on paper or digitally, then use embroidery software to convert it into stitch files.
Digitizing artwork involves selecting stitch types, fabric choice, and color palettes for your custom design.
What are the differences between commercial and home embroidery machines?
The biggest difference isn’t size—it’s speed. Commercial machines stitch at 1000+ SPM with multi-needle automation and industrial durability.
Home models run 600-750 SPM, cost less, and fit smaller spaces perfectly for hobbyists.
Conclusion
Machine embroidery is like riding a bike—wobbly at first, then suddenly you’re flying. The gap between frustration and fun is smaller than you think.
With the right stabilizer, proper tension, and a little practice, those designs stop looking like accidents and start looking intentional.
When you need sewing machine embroidery help, remember: every expert was once a beginner who refused to quit. Your next project is waiting. Thread that needle and show it what you’ve got.
- https://www.precedenceresearch.com/embroidery-machine-market
- https://www.intelmarketresearch.com/embroidery-machine-market-16016
- https://www.marketgrowthreports.com/market-reports/home-sewing-machines-market-112738
- https://www.factmr.com/report/2015/embroidery-machinery-market
- https://www.archivemarketresearch.com/reports/sewing-embroidery-machines-488707

