This site is supported by our readers. We may earn a commission, at no cost to you, if you purchase through links.
Mastering sewing machine foot pedal control tips transforms those frustrating moments into smooth, confident stitching. Once you understand what’s making your pedal misbehave and learn a few clever fixes, you’ll stitch with the precision and speed control you’ve been chasing.
Table Of Contents
Key Takeaways
- Most foot pedal problems stem from slippery surfaces and poor sensitivity settings rather than user error, and simple fixes like non-slip mats or shelf liner can instantly stabilize a sliding pedal.
- Electronic foot pedals deliver smoother speed control, stay cooler during use, and last longer than mechanical versions because they eliminate worn carbon discs and offer consistent power output across the entire pedal range.
- Proper ergonomic setup—including 90-degree knee angles, heel-on-floor positioning, and pedals within easy reach—prevents the back and knee strain that affects nearly 90% of sewers during long sessions.
- Regular pedal maintenance like cleaning oxidized contacts and checking for soot buildup can prevent erratic speed shifts and overheating before they derail your projects mid-seam.
Common Foot Pedal Problems and Solutions
Ever feel like you’re wrestling with your foot pedal more than you’re actually sewing? You’re not alone.
Let’s look at the most common foot pedal headaches and how to fix them so you can get back to what matters—making something wonderful.
Causes of Foot Pedal Sliding
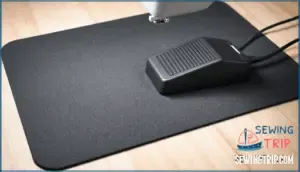
Ever had your foot pedal skate across the floor right in the middle of a perfect seam? It’s frustrating! The main culprit is usually surface friction—or the lack of it.
Most pedals have smooth plastic bottoms that slide easily on tables. Add in vibration effects from the machine and the repeated motion of pressing down, and you’ve got a pedal with a mind of its own.
Sometimes user posture shifts the pedal too, especially on uneven surfaces where table stability is iffy.
Effects of Unstable Pedals on Sewing
When your pedal won’t stay put, you’re fighting two battles at once—one with the machine, and one with your own frustration. Foot pedal sliding kills your stitch quality and throws off speed consistency.
A sliding foot pedal forces you to fight your machine and your frustration at once, wrecking stitch quality and speed control
Those constant interruptions make sewing fatigue kick in fast, and project delays pile up. You can’t get uninterrupted stitching when you’re chasing the pedal around.
Preventing foot pedal movement isn’t just about convenience—it’s about keeping your sanity and mastering sewing speed control.
Identifying Pedal Sensitivity Issues
If your machine suddenly lurches from a crawl to a sprint with barely a nudge, you’re dealing with a sensitivity problem that makes precision feel impossible. Most mechanical foot pedals struggle with slow stitching because they lack gradual speed control—you get abrupt speed changes instead of smooth acceleration.
Signs your pedal sensitivity is off:
- Inconsistent pedal pressure response – Tiny adjustments cause wild speed swings
- Electronic pedals outperform mechanical ones – User reports show 43% fewer control issues
- No ideal setting for moderate speed – You’re either crawling or racing
- Sewing speed control feels like an on-off switch – Precision work becomes guesswork
- Foot pedal sliding makes sensitivity worse – Unstable placement amplifies control problems
Preventing Foot Pedal Movement
A sliding foot pedal can turn sewing into a game of chase-the-pedal instead of a relaxing project. Luckily, you’ve got several ways to anchor that pedal so it stays put while you work.
Let’s look at the best solutions to keep your pedal right where you need it.
Non-Slip Mats and Foot Pedal Pads
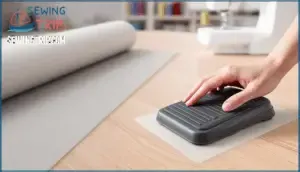
The right non-slip mat is like a trusty anchor for your pedal—it keeps everything in place so you can focus on sewing instead of chasing runaway equipment. Look for textured rubber mats that grip both your table and the foot pedal. The GetAGrip Foot Pedal Pad works great, but any nonslip mat with good friction will do the job.
Choose a pedal pad that fits your workspace and you’ll wonder how you ever sewed without one.
| Feature | What to Keep in Mind |
|---|---|
| Mat Material Types | Rubber or silicone provides best grip |
| Pad Size Matters | Match mat size to your pedal dimensions |
| Grip Technology Explained | Textured surfaces create friction on both sides |
| Pad Maintenance Tips | Wipe clean regularly to maintain tackiness |
DIY Solutions Using Shelf Liner
Grab some shelf liner from your kitchen drawer and you’ve got yourself a quick fix that costs next to nothing. Cut a piece slightly larger than your foot pedal, place it underneath, and watch the magic happen. Here’s how to make this DIY sewing project work:
- Choose the right shelf liner types – rubber or silicone gripper varieties work best for nonslip solutions
- Cut to fit – trace your pedal shape and add an extra inch around the edges
- Test alternative materials – drawer liners, yoga mat scraps, or even grippy rug pads deliver similar results
This cost-effective approach keeps your sewing machine pedal planted without buying specialized products.
Choosing The Right Surface for Stability
Your work table isn’t just a flat surface—it’s the foundation that determines whether your pedal behaves or goes on a wild adventure across the floor. Wood and laminate tables offer decent friction for rubber material pedals, while glass or metal surfaces create a slippery situation. Textured surfaces beat smooth ones every time for vibration dampening.
If your table composition works against you, layer shelf liner underneath your pedal for instant nonslip solutions that complement your workspace ergonomics.
Mastering Sewing Machine Speed Control
Getting your sewing speed just right can feel like a balancing act. Whether you’re inching through delicate fabric or racing through a straight seam, your foot pedal pressure makes all the difference.
Let’s look at four ways to take control of your machine’s speed so you can stitch with confidence.
Adjusting Foot Pedal Pressure
Learning to finesse your foot pedal pressure is like mastering the gas pedal in a car—too heavy-handed and you’ll zoom past your turn, too timid and you’ll crawl along wondering why nothing’s happening.
Start by resting your heel on the floor and gently rocking your foot forward. This gives you better pressure sensitivity and speed consistency.
Practice on scrap fabric until you find that ideal balance where your foot pressure translates to smooth sewing control and solid stitch quality.
Using Presser Foot Settings
Most sewers don’t realize their machine has a secret weapon hiding in plain sight—the presser foot settings can actually tame a runaway machine faster than any amount of foot pedal practice. Lowering your presser foot height gives you better fabric feed control, especially for delicate decorative stitching or quilting applications.
Some machines even have a speed control feature that works alongside your foot control functions—it’s like putting a governor on your pedal’s top speed, so presser foot lifting and adjusting become game-changers for precision work.
Benefits of Electronic Vs. Mechanical Pedals
Think of electronic pedals as the difference between riding a bike with rusty brakes versus smooth ones. Electronic pedals use pulse width modulation for minimal heat generation—they stay cool even during marathon projects, while mechanical pedals can get uncomfortably warm after just 30 minutes.
You’ll notice better control accuracy since electronic versions deliver consistent power output across the entire pedal travel, making delicate speed adjustments feel natural. They’re more durable too, with solid-state circuits that skip the carbon disc wear plaguing mechanical designs.
Plus, electronic foot pedals adapt easily across different machines and offer adjustable speed settings—no mechanical error from worn parts. A key component is the variable resistor function, which allows for speed changes. For user safety and easy sewing machine accessories, electronic wins hands down.
Using START/STOP Function Without Pedal
If your foot keeps drifting to the pedal out of habit, the START/STOP button might become your new best friend for projects that need rock-solid consistency. Hands-free sewing lets you focus entirely on guiding fabric while button activation controls speed.
Here’s what makes this alternative method work:
- Consistent stitch rhythm without foot controller variability
- Perfect for detailed work like appliqué or topstitching
- Speed limitations keep you from accidentally racing through delicate sections
- Easier on joints during long sessions
The START/STOP function transforms how you approach precision projects—just press once to start, once to stop.
Ergonomic Tips for Comfortable Pedal Use
You can’t sew your best if your body’s working against you. The way you sit and position yourself at the machine makes all the difference between a comfortable afternoon of sewing and ending up sore and achy.
Let’s look at how to set up your workspace so you can stitch for hours without paying for it later.
Optimal Foot and Chair Position
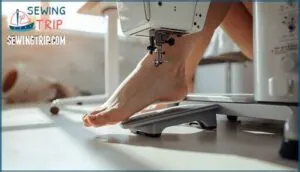
Getting the right setup between your chair and that pedal can make all the difference—kind of like finding the perfect spot on the couch where everything just clicks. Your chair height should let you rest your heel flat on the floor while your knee bends at about 90 degrees. Position the foot pedal within easy reach so you’re not stretching or cramping up.
This setup helps you control your sewing speed smoothly without throwing off your posture alignment or tiring out mid-project.
Preventing Back and Knee Strain
Once you’ve nailed that chair-and-pedal combo, the next challenge is keeping your body happy during those marathon sewing sessions—because nearly 9 out of 10 sewers deal with back pain, and knee discomfort isn’t far behind. The culprit? Poor posture alignment while controlling sewing machine speed with your foot pedal.
Focus on ergonomic seating with solid foot support and matching pedal height to your natural leg position. Take stretching breaks every 30 minutes—your back will thank you later.
Workspace Setup for Long Sewing Sessions
Your whole sewing space—from lighting to table height—plays a bigger role in comfort than most people realize. Adjust your table height so your elbows rest at 90 degrees, and position your supplies within arm’s reach to avoid awkward twisting.
Proper lighting reduces eye strain, while smart workspace organization keeps you focused on mastering sewing techniques instead of hunting for accessories.
These small ergonomic workspace tweaks deliver big solutions for long sessions.
Maintenance and Troubleshooting Foot Pedals
Your foot pedal works hard every time you sit down to sew, and like any hardworking part, it needs a little attention now and then. Knowing how to spot trouble early and keep things running smoothly can save you from frustrating mid-project breakdowns.
Let’s look at some straightforward ways to care for your pedal and fix common issues before they become real headaches.
Cleaning and Inspecting Pedal Components
Just like your car needs an oil change, your foot pedal needs a little TLC now and then to keep working smoothly.
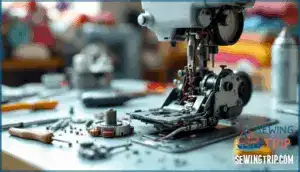
Pop open your foot controller and check for soot accumulation or contact oxidation on those metal plates—they’re usually the culprits when your sewing machine starts acting weird.
A quick clean with rubbing alcohol and a careful rheostat adjustment can prevent pedal heat buildup and keep everything running like new.
Recognizing Signs of Pedal Malfunction
When your pedal starts acting temperamental—hesitating, racing ahead, or cutting out mid-stitch—it’s waving a little red flag that something’s not quite right under the hood. Watch for erratic speed shifts, overheating pedal surfaces, delayed response when you press down, strange grinding or clicking pedal noise, or stitch inconsistency that makes your seams look like a toddler drew them.
These quirks signal it’s time to inspect your foot pedal before it totally gives up on you.
Upgrading to Electronic Foot Pedals
Switching to electronic foot pedals feels like upgrading from dial-up to high-speed internet—smooth, responsive, and way less frustrating. Electronic advantages include precise speed control, zero heat buildup, lighter weight, and plug-and-play simplicity that transforms sewing machine foot pedal usage. Before buying, check compatibility issues since some electronic pedals work only with specific brands.
Here’s what makes the switch worthwhile:
- Performance gains like smoother acceleration and speeds over 2800 stitches per minute
- Environmental benefits through recyclable materials and energy-efficient operation
- Longer lifespan with reduced mechanical wear
- Market trends show electronic control systems growing 5.4% annually through 2035
The increasing automation in the textile industry contributes to market share dominance. Electronic pedals give you better speed control function whether sewing with foot pedal or exploring sewing without foot pedal options.
Frequently Asked Questions (FAQs)
How do I adjust foot pedal angle?
Think of your foot’s natural arch like a compass—it needs the right angle to guide smoothly. Most foot pedals don’t physically adjust, but you can customize the angle using adjustable stands, tilted platforms, or DIY risers.
Experiment with pedal height until you find an ergonomic angle that reduces ankle strain and maximizes comfort during long sewing sessions.
Can I use wireless foot pedals for sewing?
Yes, wireless foot pedals exist for sewing machines, but they’re rare. Most sewing machines use wired foot control options because Bluetooth connectivity can cause signal interference and battery life issues affect reliability during long sessions.
What causes foot pedal lag or delay?
Lag strikes when electronic pedal latency creeps in—blame worn components, dodgy power supply fluctuations, or signal processing hiccups. Mechanical linkage issues can bog down foot control options too.
Regular sewing machine maintenance keeps stitching speed smooth and ideal speed dialed in.
How do I calibrate foot pedal sensitivity?
Most electronic foot pedals don’t require calibration—they’re factory-set for smooth speed variation.
For mechanical pedal modification, adjusting the carbon rheostat or replacing worn components can improve sensitivity.
If troubleshooting calibration issues persists, switching to an electronic pedal tuning system offers better stitching speed control and ideal speed response.
Are universal foot pedals compatible with all machines?
Not always. Voltage compatibility and connector types vary widely across brands. Machine impedance and signal protocols must match, or your foot pedal functions won’t work right.
Some machines need specific calibration needs that universal foot control options can’t manage.
Conclusion
Sarah’s first quilt had perfect fabric and thread, but her foot pedal kept sliding across hardwood, turning corners into disasters. She grabbed a rubber mat, adjusted her chair height, and suddenly those zigzag nightmares vanished.
Your sewing machine foot pedal control tips journey might start with one simple fix—a non-slip surface or sensitivity tweak—but the payoff is huge: smoother seams, less frustration, and projects you’re actually proud to show off. Control your pedal, and you control your craft.

