This site is supported by our readers. We may earn a commission, at no cost to you, if you purchase through links.
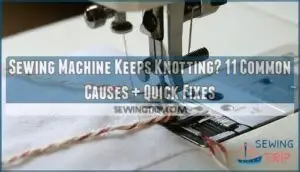
Check if you’ve threaded your machine correctly – it’s easier to miss a guide than you’d think. Next, examine your tension settings. If they’re too tight or loose, thread tangles underneath your fabric.
Make sure you’re using the right needle size for your material. Thick fabrics need heavy-duty needles, while delicate ones require finer points. Also verify your bobbin’s wound evenly and inserted properly.
These fixes solve most knotting headaches, but there are several other sneaky culprits that could be sabotaging your stitches. Additionally, ensuring the correct use of your sewing machine, including the proper needle choice, is crucial for preventing knots.
Table Of Contents
- Key Takeaways
- Possible Problems:
- 1. Plain Needle:
- 2. Inaccurate Threading:
- 3. String Tails Too Short:
- 4. Bobbin Placement Issue:
- 5. Bobbin Size Issue:
- 6. The Tension Isn’t Equal:
- 7. The Tension Isn’t Appropriate for Your Thread or Textile:
- What is The Correct Tension for My Sewing Machine
- 8. Dirty Machine:
- 9. The Machine is Not Oiled:
- 10. Where You Start Your Seam:
- 11. Thread Bunching in Bobbin Case:
- Knotting, Birdnesting, and Also Bunching– is All of It The Exact Same Thing?
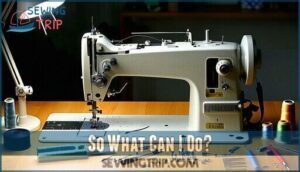
- So What Can I Do?
- Frequently Asked Questions (FAQs)
- Conclusion
Key Takeaways
- Check your threading and needle first – You’ll solve most knotting problems by rethreading your machine correctly, replacing dull or bent needles, and ensuring you haven’t missed any thread guides or the take-up lever.
- Adjust tension settings to match your materials – Your top and bobbin threads need balanced tension that’s appropriate for your fabric type – test on scraps first since heavy materials need different settings than delicate ones.
- Verify proper bobbin placement and thread tail length – Make sure your bobbin’s inserted correctly with thread pulling counter-clockwise, and always leave at least 5 inches of thread tails to prevent them from getting pulled into the machine.
- Maintain your machine regularly – Clean lint buildup from the bobbin area and needle plate, oil moving parts according to your manual, and start seams at least half an inch from fabric edges for proper thread anchoring.
Possible Problems:
When your sewing machine starts creating knots instead of neat stitches, you’re dealing with one of eleven common issues that can disrupt your project.
These problems range from simple threading mistakes to tension adjustments, but each has a straightforward solution you can tackle yourself.
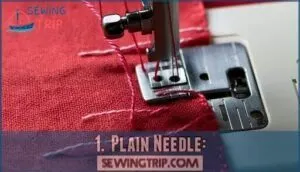
1. Plain Needle:
A dull needle is like trying to cut paper with a butter knife – it just won’t work properly.
A tangled bobbin is like a traffic jam in your sewing machine – nothing moves smoothly until you clear the mess.
Your sewing machine needle creates loops by catching the bobbin thread during each stitch.
When needle sharpness deteriorates, this critical process fails.
Instead of forming clean stitches in your fabric, sewing machine knots get trapped in the bobbin area, causing frustrating thread bunching underneath your work.
Bent needles also disrupt proper loop formation, leading to persistent knotting underneath your project.
The solution is straightforward: replace your sewing machine needle with a sharp, new one.
Check that your needle insertion is correct and make certain you’re using the appropriate needle type and needle size for your fabric.
Fresh needles eliminate most needle issues instantly.
Be sure to examine the needle plate for any imperfections.
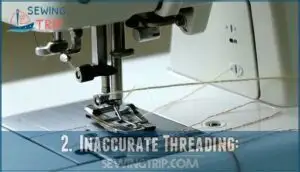
2. Inaccurate Threading:
Improper threading creates a domino effect that disrupts your entire sewing experience. When you don’t follow the correct Threading Order or miss the Thread Path, your machine can’t form proper stitches.
The thread won’t engage with Tension Discs correctly, causing uneven tension that leads to knotting underneath your fabric. Threading errors affect more than just the top thread.
When your Needle Threading is wrong, it prevents the bobbin thread from pulling up properly through the fabric. The thread might catch on moving parts or get stuck around the Presser Foot area.
Here’s what happens with incorrect threading:
- Thread bypasses tension discs, creating loose, loopy stitches
- Top thread tangles with bobbin thread incorrectly
- Thread catches on machine components during sewing
- Needle issues develop from improper thread flow
- Bobbin problems worsen when top threading is wrong
To fix threading errors, completely rethread your machine following your manual’s specific sequence for ideal thread tension. Resolving these issues may require addressing threading tension problems.
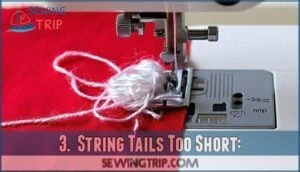
3. String Tails Too Short:
Short thread tails create knotting underneath your fabric because they get pulled into the machine during stitching.
When you start sewing, those stubby ends disappear into the mechanism, causing thread bunching and bobbin problems.
Leave at least five inches of thread hanging from both needle and bobbin before you begin, this simple step prevents retraction and secures your seam start properly.
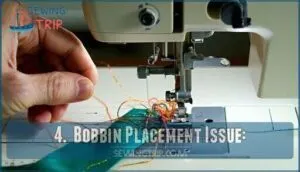
4. Bobbin Placement Issue:
Bobbin placement problems create messy tangles beneath your fabric. When you insert the bobbin incorrectly, the bobbin thread unwinds in the wrong direction, preventing proper interaction with your top thread.
Check that your bobbin thread pulls counter-clockwise from left to right. After cleaning your machine, make certain the bobbin case clicks back into position correctly.
Incorrect placement disrupts thread flow, causing bottom thread knots and top thread knots. Always verify proper bobbin insertion and thread direction to prevent thread knotting issues.
Many users find solutions for proper bobbin products online.
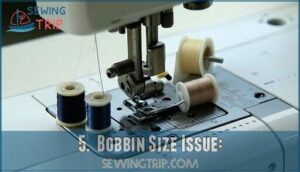
5. Bobbin Size Issue:
Using the wrong bobbin size creates serious problems that go beyond simple placement issues. **Incorrect size bobbins cause jamming, needle damage, and persistent thread knotting.
** When your bobbin doesn’t fit properly, thread unwinding becomes erratic and case insertion feels forced.
Bobbin compatibility isn’t universal – each machine requires specific dimensions:
- Check your manual for exact bobbin specifications
- Measure existing bobbins before purchasing replacements
- Buy bobbins designed for your machine brand
- Avoid generic bobbins that claim "universal fit"
- Test new bobbins before starting important projects
Wrong-sized bobbins damage your machine permanently. You can find the correct bobbin dimensions online.
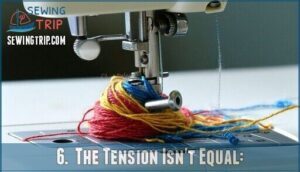
6. The Tension Isn’t Equal:
When your top and bobbin threads pull at different strengths, you’ll get tension imbalance that creates thread bunching and knotting causes.
Adjusting tension dials requires matching both threads perfectly. Test seams on fabric scraps first to identify sewing machine tension issues.
Thread nests form when one thread overpowers the other, creating those frustrating tangles underneath your fabric.
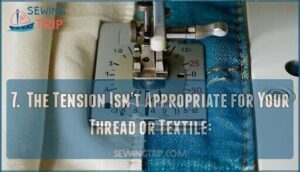
7. The Tension Isn’t Appropriate for Your Thread or Textile:
Different fabrics and threads need specific tension settings to prevent knotting and thread bunching.
Heavy materials require higher tension while delicate fabrics need lighter settings.
Your sewing machine tension must match your project materials. Test on scrap fabric first – bad tension creates messy stitches.
Adjusting tension screw based on your fabric tension guide prevents most tension issues.
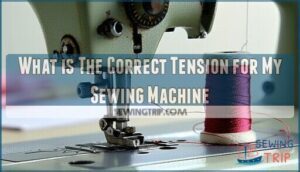
What is The Correct Tension for My Sewing Machine
Most sewing machines work best with tension set between 4 and 5 for general sewing. However, fabric considerations matter—thicker materials need lower tension, while delicate fabrics require higher settings.
Thread matching plays a vital role in balanced stitches. Always create test seams on scrap fabric before starting your project.
This tension troubleshooting prevents thread breaking and tangled thread issues. Proper stitching relies on balanced thread tension, which is crucial for successful sewing and preventing thread issues.
8. Dirty Machine:
A dirty sewing machine creates the perfect storm for thread jamming and knotting disasters. Lint buildup around your rotary hook acts like a magnet for problems, trapping thread and causing frustrating tangles.
Regular cleaning prevents these headaches before they start:
- Remove lint from the bobbin case area with a small brush
- Use canned air to blast debris from hard-to-reach spots
- Clean under the throat plate where dust loves to hide
- Wipe down the thread path to eliminate fiber buildup
A sewing machine brush is essential for this task.
**Proper maintenance keeps your machine running smoothly and extends its lifespan substantially.
9. The Machine is Not Oiled:
A well-oiled machine is a happy machine, and yours needs regular lubrication to prevent knotting disasters.
When you skip oiling your sewing machine, metal components grind against each other, creating friction that leads to timing issues.
This component lubrication keeps everything running smoothly and prevents thread tangles.
Without proper oil types designed for sewing machines, your needle and bobbin won’t coordinate correctly.
The timing gets thrown off, causing bunching and knotting problems that’ll drive you crazy.
Machine wear accelerates when parts scrape together without lubrication, shortening your machine’s lifespan.
For the best performance, consider using specialized machine lubricants to keep your machine in good condition.
Oiling frequency depends on usage, but monthly preventative maintenance keeps most machines happy.
Check your manual for specific oil recommendations and application points.
Regular machine maintenance prevents expensive repairs and keeps your stitches perfect.
Don’t let a dry machine turn your sewing projects into knotted messes – a few drops of oil saves hours of frustration.
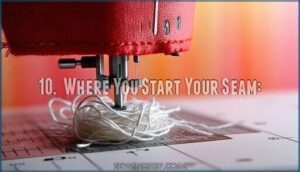
10. Where You Start Your Seam:
Starting your seam too close to the fabric edge creates thread knots and sewing machine problems.
When you begin stitching right at the edge, there’s insufficient fabric to anchor your threads properly. This causes thread retraction into the machine, creating tangles.
Begin your seam at least half an inch from the edge for proper seam starting, ensuring fabric feeding guides threads correctly and prevents knotting through secure stitch placement.
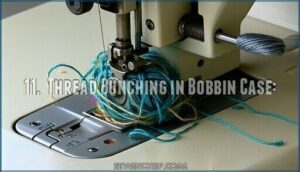
11. Thread Bunching in Bobbin Case:
Thread bunching in your bobbin case creates a frustrating tangle that resembles a bird’s nest. This common issue stems from debris accumulation and improper bobbin handling. Your sewing machine suffers when lint buildup combines with incorrect insertion techniques.
When lint meets lousy bobbin technique, your machine creates tangles that’ll make you want to scream.
Three main culprits cause this problem:
- Lint buildup around the bobbin case area
- Case damage from forceful bobbin removal
- Thread quality issues creating excess fibers
Check your bobbin tension and clean the case thoroughly. Poor thread quality amplifies knotting problems substantially.
Knotting, Birdnesting, and Also Bunching– is All of It The Exact Same Thing?
You might think knotting, birdnesting, and bunching are different problems, but they’re actually variations of the same thread issue.
These terms describe what happens when your machine’s top and bobbin threads don’t work together properly, creating tangled messes that stop your stitching.
Knotting:
Knotting happens when your top thread and bobbin thread fail to connect properly during stitching.
You’ll notice tangled messes forming on your fabric’s underside, where the bobbin keeps pulling and jamming while gathering excess thread. This creates frustrating loops and knots that ruin your project’s appearance.
A common cause is thread bunching, which can occur on either the top or bottom of the fabric.
| What You See | Where It Happens | Root Cause |
|---|---|---|
| Tangled thread mess | Back of fabric | Poor thread connection |
| Large loops | Under your project | Bobbin pulling issues |
| Jammed stitching | Needle area | Thread jamming problems |
| Uneven seams | Throughout project | Tension issues |
Birdnesting:
Birdnesting creates a messy tangle of thread underneath your needle plate that looks exactly like its name suggests.
This specific type of thread jamming happens when your sewing machine’s hook timing gets disrupted during stitch formation.
Unlike regular knotting, birdnesting pulls your fabric down into the bobbin area, creating a frustrating mess that can damage your project.
When thread looping goes wrong beneath the needle plate, it creates tension issues that affect your machine’s fabric feed mechanism.
You’ll notice broken threads, skipped stitches, and uneven seams.
The bobbin thread basically creates a nest under your work surface, trapping everything in its path.
Don’t ignore birdnesting problems – they’ll only get worse.
Clean out every thread scrap and fabric piece from underneath your needle plate immediately.
Even tiny remnants can trigger future jams and disrupt your machine’s delicate threading system.
Bunching:
Bunching differs from birdnesting by appearing on your fabric’s top surface rather than underneath.
When your sewing machine creates thread tangles above the needle plate, you’re dealing with bunching. This frustrating issue can ruin your project’s visible side and stems from similar culprits affecting stitch formation.
Here are five signs you’re experiencing bunching:
- Thread clusters gathering on fabric’s surface
- Uneven fabric feed causing puckered seams
- Presser foot struggling to advance material
- Poor thread quality creating loose fibers
- Tension issues disrupting proper bobbin interaction
So What Can I Do?
Now that you understand the difference between these thread issues, let’s tackle the solutions. Start with needle replacement if your current one is dull or bent. Follow proper rethreading steps by removing all thread and starting fresh, ensuring you catch every guide and the take-up lever.
Make your tail length at least 5 inches to prevent thread from pulling back into the machine. Check your bobbin insertion by consulting your manual – incorrect bobbin placement causes most birdnesting problems.
Next, focus on tension adjustment. Test different settings on fabric scraps until top and bottom threads lock perfectly in the fabric’s center. Don’t forget thread quality matters too. Cheap thread creates lint and breaks easily.
To enhance your sewing experience, consider how workspace traffic patterns can impact efficiency. For thorough sewing machine troubleshooting, clean your machine regularly and oil it according to manufacturer instructions. These simple steps solve most knotting headaches.
Frequently Asked Questions (FAQs)
How to fix knotting on a sewing machine?
Smooth stitches versus tangled messes—you’ll conquer knotting by rethreading your machine correctly, changing dull needles, adjusting tension settings, ensuring proper bobbin placement, and keeping thread tails at least five inches long.
What is the knotting of the thread in machine sewing?
Thread knotting happens when your machine’s top and bobbin threads tangle instead of interlocking properly.
You’ll see messy loops, bunched fabric, or "bird’s nests" underneath, disrupting smooth stitching and creating frustrating sewing interruptions, which can be described as sewing interruptions.
Why does my sewing machine knot?
Your machine’s turning into a tangled mess because you’ve got tension troubles, dull needles, or threading mishaps.
Check your bobbins, replace that worn needle, and adjust tension settings to match your fabric type, addressing tension troubles to resolve the issue.
What happens if you knot your thread while sewing?
Knotting your thread while sewing creates tension imbalances that cause loops, tangles, and poor stitch quality.
You’ll get uneven seams, fabric puckering, and potential needle breaks.
It’ll also waste thread and make your stitching look unprofessional.
Knotting your thread can lead to a range of issues, including tension imbalances.
Why does my thread keep knotting when I sew?
Your thread’s knotting because of tension imbalance, dull needles, incorrect threading, or short thread tails.
Check your bobbins placement, adjust tension settings, replace the needle, and make certain thread tails are at least five inches long to prevent issues, ensuring a smooth process with correct threading.
How can I prevent knots on a sewing machine?
Keep your needle sharp, thread tails long, and tension balanced.
Clean your bobbin area regularly, rethread correctly, and test settings on scrap fabric.
These simple steps will banish those frustrating knots for good.
Why does my sewing machine keep knotting underneath?
Ever wonder why your bobbin area becomes a tangled mess?
You’re likely dealing with incorrect bobbin threading, wrong tension settings, or improper bobbin placement.
Check your bobbin case insertion and adjust tension to match your fabric type.
How to fix a sewing machine that keeps jamming?
Check your threading first, then replace the needle and clean lint from the bobbin area.
Adjust tension settings for your fabric, make certain of proper bobbin placement, and oil your machine regularly, which involves regularly checking and maintaining these parts to ensure smooth operation.
Why does my sewing machine keep nesting?
Your machine’s creating bird’s nests because tension isn’t balanced between top and bobbin threads.
Check if you’ve threaded correctly, inserted the bobbin properly, and adjusted tension settings to match your fabric type.
Why does my sewing machine thread keep getting tangled?
Thread tangles happen when your needle’s dull, threading’s incorrect, or tension’s mismatched.
You’ll also see knots if thread tails are too short or your bobbin’s inserted wrong.
Replace needles, rethread properly, and adjust tension settings to fix the issue, which often involves rethreading to ensure everything works smoothly.
Conclusion
Troubleshooting your sewing machine keeps knotting doesn’t require a telegraph to the manufacturer.
Most thread tangles stem from simple threading mistakes, incorrect tension settings, or wrong needle choices.
Check your bobbins placement, verify even thread tension, and match your needle size to your fabric weight.
Keep your machine clean and properly oiled for smooth operation.
Start seams correctly by holding thread tails initially, and with these fixes, you’ll transform frustrating knots into perfect stitches every time, achieving professional results.
- https://sewingmachinebuffs.com/sewing-machine-birdnesting-causes-and-solutions
- http://wp.me/P5JCk7-fw
- http://www.threadsmagazine.com/2008/11/02/understanding-thread-tension
- https://ohyoucraftygal.blogspot.com/2013/10/sewing-lesson-10-how-to-fix-tension-on.html
- https://www.techsew.com/us/support/loose-stitches-or-knots-on-the-underside-of-the-material

