This site is supported by our readers. We may earn a commission, at no cost to you, if you purchase through links.
Start by unplugging your machine and removing the motor cover.
Check carbon brushes first—they’re usually the culprit when motors run poorly.
Look for worn brushes, loose wires, or dust buildup around the motor housing.
Replace brushes if they’re shorter than half an inch.
Clean debris with compressed air and tighten any loose connections.
Test the motor before reassembling everything.
This sewing machine motor repair guide covers safety steps, troubleshooting methods, and replacement procedures.
Most repairs take under an hour, but knowing which specific symptoms point to deeper electrical issues can save you from costly mistakes.
Table Of Contents
Key Takeaways
- You can fix most sewing machine motor problems yourself in under an hour by checking carbon brushes first—they’re usually the culprit when motors run poorly and should be replaced if they’re shorter than half an inch.
- You’ll prevent costly breakdowns by unplugging your machine before any repair work, wearing protective gear, and maintaining proper ventilation to avoid electrical shock and motor overheating.
- You should clean your motor monthly with compressed air to remove lint buildup, oil designated points with manufacturer-recommended lubricant, and check belt tension to extend motor life significantly.
- You can identify motor problems through unusual noises like grinding or clicking, burnt smells that signal fire hazards, overheating during use, and intermittent power loss that indicates worn brushes or loose connections.
Sewing Machine Safety
Always unplug your sewing machine from the power outlet before starting any motor repair work.
Safety first: Disconnect power completely before touching any internal motor components.
You’ll protect yourself from electrical shock and prevent accidental machine startup while your hands are inside the mechanism.
Unplugging The Power Cord
Before diving into any sewing machine motor repair, you must prioritize electrical safety by disconnecting the power cord from the wall outlet. This fundamental safety precaution prevents electrical shock and protects you during repair work.
Follow these essential steps for proper cord inspection and outlet safety:
- Check the power cord for fraying or damage before unplugging
- Grasp the plug firmly when removing from outlet, never pull the cord
- Verify complete disconnection by testing the machine’s power button
Safe habits start with emergency unplugging procedures. Always unplug your sewing machine before opening any covers or accessing internal components, ensuring proper cord inspection and maintaining outlet safety.
Wearing Protective Gear
Once you’ve unplugged the power cord, it’s time to focus on safety equipment. Always wear eye protection to guard against flying debris. Choose gloves that let you grip small parts but keep your hands safe.
Consider a ventilation mask if dust is present. Proper clothing safety means no loose sleeves. It’s also important to think about specialized sewing goggles for maximum protection.
Here’s a quick guide:
| Eye Protection | Glove Selection | Clothing Safety |
|---|---|---|
| Safety goggles | Nitrile gloves | Fitted shirt |
| Face shield | Cotton gloves | No loose sleeves |
| Side shields | Grip gloves | Closed shoes |
| Anti-fog lenses | Cut-resistant | No jewelry |
This guide emphasizes the importance of proper clothing safety and the use of specialized sewing goggles for maximum protection, while also considering ventilation mask needs and providing a list of essential items like safety goggles and nitrile gloves.
Ensuring Proper Ventilation
After putting on your protective gear, focus on ventilation. Good airflow optimization keeps you safe and helps with motor overheating prevention.
Place your machine near a window or use a fan for better ventilation placement.
Keep vents and motor cooling fans clear of lint to boost sewing machine motor maintenance. Regular lint removal supports motor troubleshooting and effective sewing machine motor repair.
Using Proper Tools and Equipment
Once your workspace has good airflow, focus on tool selection and safety gear.
Always use the right sewing machine repair tools for each job. A multimeter helps check wiring. You can find a sewing machine multimeter online.
Needle-nose pliers and screwdrivers are essential tools. Wear gloves and eye protection as safety precautions.
For advanced repairs, practice soldering techniques. Keep your workspace setup organized for safer, smoother sewing machine motor repair.
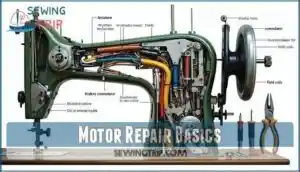
Motor Repair Basics
You’ll need to remove the drive belt cover and disconnect motor wires before replacing your sewing machine’s drive motor.
These basic steps require careful attention to wire connections and proper screw removal to access the motor components safely.
The process demands complete concepts be understood to ensure the replacement is done correctly.
Removing The Drive Belt Cover
Start your sewing machine motor repair by locating the belt cover screws. Most covers use Phillips head screws, though some machines feature flathead variants.
Remove the front and bottom screws first using appropriate cover removal tools. Belt cover materials vary from plastic to metal, so handle carefully.
Once all screws are out, lift the cover to access the drive belt underneath, which is a crucial step in the repair process, requiring careful handling of the belt cover.
Disconnecting Motor Wires
Before motor removal begins, you’ll need to disconnect the electrical connections safely.
First, locate the terminal block where motor wires connect to the machine’s electrical system.
Take a photo of the motor wiring diagram for reference during reassembly.
Remove the terminal block mounting screws carefully.
Disconnect each motor wire from the terminal block using proper wire identification techniques.
Replacing The Drive Motor
Your old motor’s time is up, so let’s replace sewing motor with precision. Remove mounting screws completely, then slide out the faulty unit.
Position your new drive motor replacement carefully, checking motor compatibility with your machine’s specs. Secure with proper screw tightness for ideal belt tensioning.
This motor replacement process requires attention to wiring diagrams before post-install testing begins.
Motor Installation Guide
You’ll connect the new motor wires to the terminal block.
This process requires careful attention to wire connections and proper motor alignment to guarantee your sewing machine runs smoothly, and you’ll position the motor in the mounting bracket.
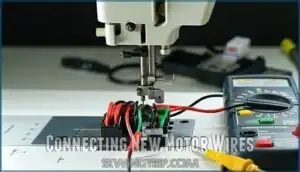
Connecting New Motor Wires
Looking at these motor wires can feel like untangling Christmas lights, but don’t worry.
First, match the wire gauge to your original motor specifications.
Check connector type options for proper fit.
Strip wire ends carefully for clean terminal block wiring connections.
Verify polarity using your multimeter—red to positive, black to negative.
Timely replacement of worn motor brushes prevents motor damage.
These insulation safety measures prevent shorts during sewing machine repair.
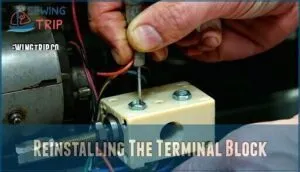
Reinstalling The Terminal Block
Now you’ll secure the terminal block back into position. Line up the terminal block orientation with the marked screw holes.
Insert mounting screws and tighten to proper screw tightness torque specifications. Don’t overtighten – snug is enough.
Check that all motor wires sit firmly in their terminals. A loose terminal block creates resistance and heat.
Your sewing machine motor parts need solid connections for reliable operation.
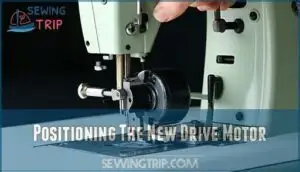
Positioning The New Drive Motor
Place your new sewing machine motor onto the mounting bracket with steady hands.
Align the motor pulley with the drive belt path for proper motor alignment. Insert the motor mounting screws loosely to allow adjustment.
Check motor positioning against the hand wheel before tightening. Proper screw torque prevents vibration dampening issues during operation, ensuring smooth machine performance.
Common Motor Problems
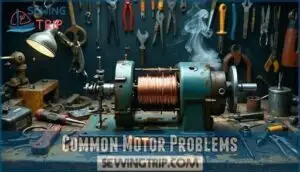
You’ll encounter three main motor problems when your sewing machine stops working properly.
These issues include overheating and power loss, unusual noises and stalling, and burnt smells that signal motor failure.
Overheating and Power Loss
Your sewing machine motor’s overheating and power loss usually stem from five common culprits.
These issues permanently reduce motor lifespan and create performance problems that worsen over time.
- Lint Buildup blocks airflow and traps heat around motor components
- Ventilation Problems prevent proper cooling during extended use
- Worn Brushes cause intermittent power delivery and excessive heat
- Wiring Issues create resistance that generates damaging heat
- Speed Controller malfunctions disrupt consistent power flow
Like other motors, sewing machine motors can also be affected by voltage imbalance, which increases operating temperatures.
Unusual Noises and Stalling
Why does your sewing machine motor sound like a dying elephant?
Grinding noises indicate worn bearings needing lubrication. Clicking sounds suggest loose belt tension or motor alignment issues.
High-pitched whining requires bearing lubrication immediately.
Stalling occurs when carbon brushes wear thin or debris clogs the housing.
Regular brush inspection and commutator cleaning prevent most unusual noises during sewing machine motor troubleshooting.
Burnt Smell and Motor Failure
A burnt smell from your sewing machine motor signals serious trouble that demands immediate attention. This acrid odor typically indicates overheating or winding failure, both fire hazards requiring swift action. Turn off your machine instantly when you detect this warning sign.
Your sewing machine’s burnt smell isn’t just unpleasant—it’s a fire hazard screaming for immediate action.
Overheating can also stem from issues with sewing machine motor problems.
- Overload causes include prolonged heavy-duty sewing without cooling breaks
- Component replacement becomes necessary when internal windings burn out completely
- Professional inspection prevents dangerous situations and guarantees proper motor troubleshooting
Preventive Maintenance Tips
You can prevent most motor problems by following simple maintenance steps every few months.
Clean your motor regularly and check all electrical connections to keep your sewing machine running smoothly for years.
Regular Cleaning and Lubrication
Clean your sewing machine motor monthly to prevent costly breakdowns.
Remove lint with compressed air or a soft brush from motor housing and ventilation areas. Apply manufacturer-recommended oil to designated oiling points and moving components.
Focus on dust prevention by keeping your workspace clean. Regular cleaning and component lubrication extend motor life substantially while maintaining peak performance. This helps in preventing breakdowns and ensures the motor runs smoothly, which is crucial for costly breakdowns prevention.
Checking Electrical Connections
Your sewing machine motor’s electrical connections are its lifeline. Faulty wiring can turn your reliable machine into a frustrating puzzle. Regular inspection prevents costly breakdowns and keeps you stitching smoothly.
Follow these essential steps for proper electrical connection maintenance:
- Inspect motor wires for loose connections and damaged insulation around terminals
- Perform voltage testing and continuity checks using a multimeter on all connections
- Check for grounding issues by examining wire routing and connection integrity
Replacing Worn Carbon Brushes
Motor brushes replacement becomes essential when your sewing machine motor shows brush wear signs like smoking or reduced power.
Remove the bottom cover to access brush holders. Extract worn carbon brushes and check spring tension.
Clean the commutator surface before installing new brushes. Verify proper brush seating process for peak performance.
Quality aftermarket brush quality matters for longevity. Overheating can occur due to shorted stator turns, so inspect the motor’s condition.
Troubleshooting Steps
You’ll need to test each motor component to find the exact problem. Start by checking your carbon brushes for wear and then examine all wiring connections for damage.
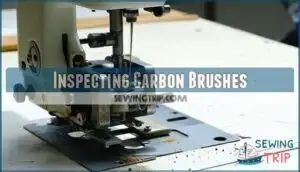
Inspecting Carbon Brushes
After addressing maintenance basics, focus on your motor brushes replacement needs.
Remove the motor housing to access carbon brushes. Look for brush wear signs like shortened length or cracked surfaces.
Check spring tension – weak springs cause poor contact. Examine the commutator condition for scoring or carbon buildup.
Sparking during operation indicates worn brushes requiring immediate sewing machine motor troubleshooting and motor testing.
Preventative maintenance includes assessing brush material to guarantee superior performance.
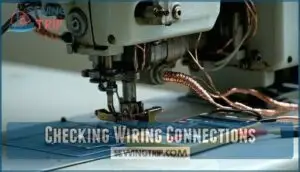
Checking Wiring Connections
After checking carbon brushes, examine your sewing machine motor’s wiring connections carefully.
Look for loose wires that wiggle when touched, and check damaged insulation around wire coverings.
Use a multimeter for voltage testing at connection points, and perform continuity checks on each wire path.
Tighten all secure connections with proper tools, as bad wiring causes most sewing machine motor troubleshooting headaches during electrical repairs.
Advanced Repair Techniques
You’ll tackle the most complex motor repairs that require specialized knowledge and precise technical skills.
These advanced techniques include replacing timing belts, adjusting motor pulleys, and repairing electrical components that demand careful attention to detail, utilizing precise technical skills.
Replacing The Timing Belt
Timing belt replacement requires precision timing marks alignment.
First, you’ll remove the old belt and note pulley alignment positions.
Choose correct belt size and belt material for your sewing machine motor.
Install the new drive belt while maintaining proper belt tension.
This sewing machine repair guide step demands careful tension adjustment to prevent motor replacement issues later.
Adjusting Feed Dogs and Motor Pulleys
Precise feed dog height determines proper fabric feeding through your sewing machine.
Adjust the height screw beneath the needle plate until fabric moves smoothly without bunching.
Check motor pulley alignment by loosening mounting screws and repositioning the sewing machine motor.
Proper belt tension between drive belt pulleys prevents slipping during operation.
Test stitch length control and motor speed impact after adjustments.
Repairing Electrical Components
Electrical component repair demands steady hands and sharp focus. Your multimeter becomes your best friend when testing capacitors and identifying faulty resistors.
Follow these critical steps:
- Test motor capacitor check voltage readings
- Inspect all electrical connections for corrosion
- Apply proper soldering techniques for wiring repairs
- Verify component testing results before reassembly
Wiring safety prevents costly mistakes. Regular cleaning can prevent overheating and damage to ensure proper soldering and electrical connections are maintained.
Frequently Asked Questions (FAQs)
Can you replace a motor on a sewing machine?
Yes, you can replace a sewing machine motor yourself.
First, unplug the machine for safety.
Remove the belt cover, disconnect wiring, and slide out the old motor.
Install the new one following reverse steps.
How do you repair a sewing machine motor?
Ever wondered if that stuttering motor can be saved?
First, unplug your machine for safety.
Check carbon brushes for wear, clean the commutator, tighten loose connections, and lubricate bearings with proper machine oil.
How to take care of a sewing machine motor?
Clean your motor regularly with compressed air to remove lint buildup.
Oil moving parts monthly with manufacturer-recommended lubricant.
Check belt tension periodically and tighten electrical connections.
Monitor temperature during use to prevent overheating damage.
How do I choose the right sewing motor?
Finding the right motor isn’t rocket science—consider your project’s demands first.
You’ll need servo motors for precision work, clutch motors for heavy-duty tasks.
Match amperage to your machine’s requirements and check compatibility specifications.
How long does it take to replace a sewing machine motor?
Replacing a sewing machine motor typically takes 30-60 minutes for experienced users.
You’ll need basic tools and careful attention to wiring connections.
First-time repairs might take 90 minutes with proper preparation and safety precautions.
How do I know if my sewing machine has a motor problem?
Strange sounds often signal trouble brewing in your motor’s core.
You’ll notice burnt smells, unusual noises, slow speeds, or complete power loss.
Check for overheating, intermittent operation, and excessive vibration during use.
How do I know if my sewing machine motor is bad?
Check for unusual noises, burning smells, or intermittent operation. Test if your motor stalls, runs inconsistently, or won’t start. Look for sparks, excessive heat, or complete power failure during use.
Why is my sewing machine motor not working?
Your sewing machine motor hits a brick wall when carbon brushes wear out, wiring connections loosen, or the commutator gets dirty.
Check power supply, inspect brushes, and clean components to restore life.
Can I reverse a sewing machine motor?
Most standard sewing machine motors can’t be reversed safely.
You’d need to swap the motor’s internal wiring connections, but this often damages the motor.
Instead, consider purchasing a reversible servo motor designed for bidirectional operation.
Can I oil my sewing machine motor?
Yes, you can oil your sewing machine motor, but use only manufacturer-recommended lubricants.
Apply a few drops to designated oil points on motor bearings.
Don’t over-oil, as excess attracts lint and debris, this is a critical point to avoid.
Conclusion
Like a skilled craftsman who knows every tool in their workshop, you now possess the knowledge to tackle most motor issues head-on.
This sewing machine motor repair guide has equipped you with essential troubleshooting techniques and safety protocols.
You’ve learned to identify carbon brush problems, clean debris, and replace worn components.
Regular maintenance prevents costly breakdowns and most repairs take less than an hour when you follow proper procedures.
Your sewing machine will run smoothly for years with these troubleshooting skills.

