This site is supported by our readers. We may earn a commission, at no cost to you, if you purchase through links.
 A bent needle can ruin hours of work in seconds. Most sewers blame their machines when fabric puckers or threads snap, but the real culprit sits in that tiny metal clamp above the presser foot.
Your sewing machine needle isn’t just a pointed stick—it’s a precision tool engineered with grooves, eyes, and points designed for specific fabrics and threads. Match a ballpoint needle to silk, and you’ll stretch the weave. Force a universal needle through leather, and you’ll hear the motor strain.
This sewing machine needle guide for fabrics breaks down the anatomy, sizing systems, and type-to-fabric pairings that transform frustrating projects into clean, professional seams.
Table Of Contents
- Key Takeaways
- Sewing Machine Needle Anatomy Explained
- How Needle Sizes Work for Fabrics
- Choosing The Right Needle Type
- Fabric and Thread Matching Guide
- Technique-Specific Needle Selection
- Needle Maintenance and Troubleshooting
- Essential Needle Selection Tips for Success
- Frequently Asked Questions (FAQs)
- Conclusion
Key Takeaways
- Needle anatomy matters beyond the point—the shank locks into your machine, the groove protects thread from friction, the scarf creates space for the hook to catch loops, and the eye size determines whether thread flows smoothly or shreds during stitching.
- Matching needle size to fabric weight prevents most sewing failures—lightweight fabrics need 60/8 to 75/11 needles, medium-weight materials work with 80/12 to 90/14, and heavy fabrics like denim require 100/16 or larger to penetrate without bending or breaking.
- Needle type determines fabric compatibility more than size alone—universal needles handle woven and light knits, ballpoint needles slide between knit fibers without causing runs, sharp needles cut cleanly through dense weaves, and specialty needles like leather (wedge-shaped) or embroidery (enlarged eyes) solve specific material challenges.
- Replace needles every 6-8 hours of sewing or at the start of new projects to avoid skipped stitches, thread breakage, and fabric snags—dull or bent needles cause popping sounds, puckering, and permanent fabric damage that no pressing can fix.
Sewing Machine Needle Anatomy Explained
A needle isn’t just a pointed piece of metal—it’s a precision tool with multiple parts working together to create clean stitches. Each component plays a specific role in how the needle pierces fabric and carries thread through your machine.
Understanding these parts helps you troubleshoot problems and choose the right needle for your project.
Key Needle Components and Their Functions
Think of a sewing machine needle as a precision tool with five critical parts working together: the butt anchors into your machine’s clamp, the shank slides into the needle bar, the shoulder transitions to the blade (or shaft), the blade carries your thread down through its groove, and the eye—positioned just above the point—lets thread pass through to form each stitch.
Each needle component plays a distinct role:
- Shank and Butt: Secure the needle firmly in your machine’s clamp
- Shaft Groove: Guides thread smoothly toward the fabric
- Scarf Function: Creates space for the hook to catch your thread loop
- Needle Eye: Allows thread to pass through and form stitches
- Point Types: Determines how cleanly the needle penetrates fabric
Understanding needle anatomy helps you diagnose problems and choose the right needle for your project.
How Needle Structure Affects Stitch Quality
Once you know what each part does, you can see how needle structure directly shapes every stitch your machine creates. A properly sized eye prevents thread fraying, while groove depth protects thread from heat and friction as it travels down the shaft. The scarf function allows your machine’s hook to catch the thread loop at precisely the right moment.
Needle structure—from eye size to groove depth to scarf timing—determines whether every stitch forms cleanly or falls apart
Meanwhile, shank stability keeps the needle steady, and needle point type determines whether you’ll get clean penetration or fabric damage. When needle anatomy and structure work in harmony, stitch quality improves dramatically.
Needle Shank Types for Machine Compatibility
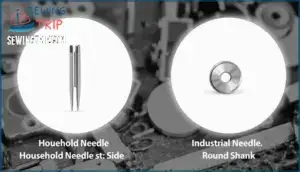
Your machine won’t accept every needle you find—shank design determines whether a needle fits your specific equipment. Household shanks have one flat side and one rounded side, creating sewing machine compatibility with most home models. Industrial shanks are fully round, fitting only commercial machines.
Check your needle shank types before purchasing—you’ll spot flat shank designs easily by sight. Some sewers use needle adapters, though switching to correct household shanks or industrial shanks guarantees better shank identification and performance.
How Needle Sizes Work for Fabrics
Needle size isn’t just a random number—it’s the key to matching your machine’s capability with your fabric’s needs. The sizing system uses two different scales that work together to tell you exactly what diameter needle you’re holding.
Understanding how these numbers translate to real-world fabric choices will save you from puckered seams, broken threads, and frustrated do-overs.
Decoding European Vs. American Sizing
European sizes measure needle diameter in hundredths of a millimeter—size 80 means 0.80 mm thick—while American sizes use a less precise numbering system from Singer’s historical origins. Dual labeling (like 80/12) appears on nearly all packaging today, pairing both systems for global clarity.
Conversion charts from manufacturers help you navigate between systems, though metric precision makes European sizing more accurate for technical applications. This sizing impact directly affects fabric compatibility and thread performance.
Choosing the right size involves matching the needle to the thread.
Matching Needle Size to Fabric Weight
Fabric weight acts like a compass for needle selection. Lighter materials call for finer needles (60/8 to 75/11), while heavier textiles demand thicker shafts (90/14 to 110/18) to push through without bending or breaking.
Medium-weight cotton and linens thrive with 80/12 needles, maintaining thread tension balance and stitch quality.
Proper needle selection prevents damage—too small creates puckering, too large leaves visible holes. Your fabric weight guide should consider both weave density and thread type for best needle size impact.
Double Number Sizing Explained (e.g., 80/12)
Those paired numbers on every needle package—like 80/12 or 100/16—aren’t there to confuse you; they’re giving you the same measurement in two different languages. The first number represents European sizing, measuring shaft diameter in hundredths of a millimeter. The second shows American sizing, which runs smaller numerically for finer needles.
Both indicate the same fabric thickness capacity, just through different number systems—think Celsius versus Fahrenheit for needle size conversion.
Choosing The Right Needle Type
Selecting the right needle type turns an average sewing project into one that looks professionally finished. Each needle design targets specific fabrics and techniques, from everyday cotton to stretchy knits and decorative topstitching.
You’ll find the right match by understanding what makes universal, specialty, and decorative needles different from each other.
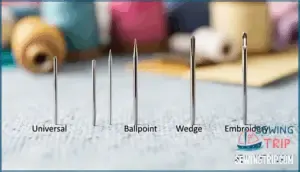
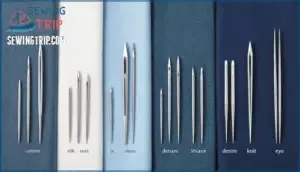
Universal, Sharp, and Ballpoint Needles
You’ll find three needle types sitting at the heart of most home sewing projects: universal, sharp, and ballpoint. Universal needles feature a slightly rounded point geometry that glides through woven and knit fabric types without damage. Sharp needles penetrate dense materials with precision, while ballpoint needles push between knit fibers, preserving stitch quality and needle longevity.
- Universal needles offer fabric compatibility across cotton and linen blends—your all-purpose workhorse for everyday projects
- Sharp needles deliver clean penetration through tightly woven fabrics, making them best applications for crisp seams on dress shirts
- Ballpoint needles prevent runs in jersey and rib knits by respecting the fabric’s natural structure
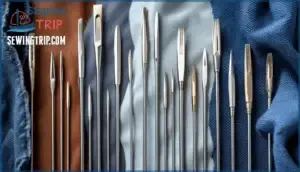
Specialty Needles: Quilting, Embroidery, Leather
When 18% of specialty needle sales go to quilting needles, it’s clear these tools matter. Quilting needles range from 75/11 to 90/14, with slightly rounded points that penetrate layered fabrics while maintaining stitch precision—they increase accuracy by over 20% compared to universal types.
Embroidery needles feature enlarged eyes that cut thread shredding by 60%, accommodating metallic and specialty threads with sizes spanning 60/8 to 110/18.
Leather needles use wedge-shaped points to slice through tough materials cleanly, with sizes from 100/16 to 120/20 for upholstery work. For sewing leather, it’s important to choose needles with sharp cutting blades.
When to Use Topstitch and Twin Needles
Topstitch needles transform thick decorative threads into crisp, professional-looking seams that universal needles simply can’t manage. Their extra-large eyes and deep grooves accommodate heavy threads for sewing projects on denim and canvas, improving topstitch clarity by 50% on heavy fabrics.
Twin needles create parallel seamlines in one pass, perfect for:
- Professional hems on knit fabric types using two thread spools
- Decorative stitching with varied needle gauge spacing (1.6mm to 6.0mm)
- Pintucks and reinforced seams on medium-weight topstitch fabrics
Fabric and Thread Matching Guide
Matching your fabric to the right needle and thread isn’t guesswork—it’s about understanding how weight, texture, and fiber content work together. Getting this pairing right prevents puckering, skipped stitches, and fabric damage before they happen.
Here’s how to match each fabric category with the needle size and thread that will give you clean, professional results.
Light, Medium, and Heavy Fabrics
Your fabric’s weight determines everything about needle selection. Choose wrong, and you’ll battle puckered seams, broken threads, and frustrated hours at your machine.
Light fabrics like chiffon need smaller needles (60/8 to 75/11) to prevent damage, while medium-weight cotton takes 80/12 to 90/14. Heavy materials—denim, canvas, upholstery—demand 100/16 or larger to penetrate layers without breaking.
Match fabric weight to needle size, and you’ll achieve clean stitch quality every time.
Thread Types and Their Needle Pairings
Once fabric weight is sorted, thread type and thickness become your next priority. Cotton thread pairs well with universal needles in sizes 70/10 to 90/14 for typical weight projects.
Polyester and specialty threads often need larger needle eyes—embroidery needles reduce fraying by 60% when working with decorative thread.
Heavy threads (Tex 40 and above) require 90/14 or bigger to maintain proper tension settings and avoid breakage, while fine silk thread works best with smaller sizes to prevent fiber damage.
Preventing Fabric Damage With Proper Selection
Picking the wrong needle doesn’t just affect your stitches—it can leave permanent marks, snag fibers, or punch holes that no amount of pressing will fix. That’s why needle-fabric synergy matters.
Ballpoint needle types glide between knit fibers without breaking threads, while sharp needle point types cut cleanly through woven fabric types.
Match your needle size to thread size—too large creates visible holes, too small causes breakage and fabric damage through friction.
Technique-Specific Needle Selection
Your sewing technique shapes which needle you need just as much as your fabric does. Topstitching demands a different eye than quilting, and specialty materials like leather or knits won’t cooperate with standard needles.
Let’s look at how to match your needle to the specific work you’re doing.
Topstitching and Quilting Needles: Eye Designs for Thick Threads
When thick decorative threads demand center stage, the eye of your needle becomes the gateway to perfect topstitching and quilting results. Topstitching needles feature enlarged eyes that accommodate heavy thread without friction, while quilting needles offer tapered points for precision through layers.
Choose wisely to obtain:
- Smooth thread flow through oversized needle eyes
- Sharp topstitch tension with minimal breakage
- Enhanced quilting stitch precision on layered fabrics
- Clean decorative threading on heavy fabrics
- Reduced thread shredding by matching thread thickness to eye size
Stabilizing Specialty Fabrics: Leather, Knits, and Synthetics
Leather, knit, and synthetic fabrics need distinct needle types and stabilizers to prevent damage. Leather needles with wedge-shaped tips pierce thick hides cleanly—pair them with fusible stabilizers on soft goat skins to reduce stretch.
Ballpoint needles protect knit fabrics by sliding between loops, while cut-away stabilizers prevent distortion after washing.
Microtex needles work with synthetics like ripstop nylon precisely, and water-soluble stabilizers dissolve cleanly after stitching.
Test your needle-stabilizer combo on scraps to cut fabrication issues by 65%.
Needles for Decorative and Precision Work
Embroidery needles with enlarged eyes transform delicate thread work into clean, professional designs, eliminating the frustration of constant shredding. For monogramming and heirloom sewing, fine needles with polished finishes glide through delicate fabrics without resistance. Specialty needles for decorative stitching reduce thread fraying by 60%, allowing decorative threads to shine in precision stitching projects that demand professional-looking results.
- Topstitch needles work with thick decorative threads, featuring extra-large eyes that prevent tension issues during bold contrast stitching.
- Metallic needles have elongated eyes and special finishes that minimize breakage when using fragile metallic and holographic threads.
- Embroidery needles in sizes 75/11 or 90/14 are ideal for rayon and polyester threads, enabling vibrant and detailed decorative work.
- Fine sharps (60/8 to 70/10) excel at monogramming and intricate heirloom techniques on lightweight fabrics like batiste and silk.
Needle Maintenance and Troubleshooting
Even the best needle won’t perform well if it’s dull, damaged, or poorly maintained. Knowing when to replace your needle and how to troubleshoot common problems saves you time and protects your fabric from unnecessary damage.
The following sections cover practical maintenance strategies that keep your sewing running smoothly.
When to Replace Your Needle
Think of your sewing machine needle like a kitchen knife—it dulls with use, and pushing through fabric with a worn blade creates more problems than perfect seams. Most experts suggest changing needles every 6-8 usage hours or on a project basis to avoid performance degradation.
Watch for damage signs like thread breakage or dull points—preventive replacement saves your fabric and guarantees consistent stitch quality throughout your work.
Spotting and Solving Skipped Stitches
How can you tell when skipped stitches stem from needle problems versus other issues? Start by examining the needle condition—a bent or dull tip disrupts hook timing, preventing proper thread loop formation.
Next, check these factors:
- Needle Selection – Wrong type for fabric (ballpoint for knits, sharp for wovens) causes hook timing failures
- Thread Quality – Cheap or old thread creates tension issues that mimic skipped stitches
- Fabric Feed – Improper presser foot pressure prevents consistent stitch formation
- Tension Issues – Incorrect upper tension settings interfere with loop capture
Replace the needle first when troubleshooting—it’s the simplest fix that resolves most skipped stitch problems.
Preventing Thread Breakage and Fabric Snags
Thread breakage and fabric snags don’t just ruin your project—they signal a mismatch between your needle and the materials you’re working with. A worn needle signs itself through friction marks on thread or pulled fabric threads. Check for needle-thread mismatch first—oversized thread in small eyes creates excess friction and heat buildup.
| Problem | Primary Cause |
|---|---|
| Thread breakage | Needle too small for thread weight |
| Fabric snags | Dull or bent needle tip |
| Shredded thread | Lint buildup in needle groove |
Clean lint regularly and match needle size to your thread diameter for smooth fabric grain awareness.
Storage and Care Tips for Longevity
Your needles deserve better than a cluttered drawer where bent tips and mystery sizes turn every project start into a guessing game. Store needles in labeled containers to track sizes and usage hours. Wipe needles after each project to remove oil and lint buildup that accelerates rust. Replace needles before starting new projects to maintain stitch quality.
Proper needle maintenance protects your investment:
- Store needles in airtight containers with silica packets to prevent rust formation
- Label each needle type and track hours used to know when replacement is needed
- Dispose of bent or dull needles safely in a magnetic pin cushion or sealed container
- Build an organized needle inventory so you always have the right size ready
Essential Needle Selection Tips for Success
You’ve learned the fundamentals of needle care and troubleshooting, but selecting the right needle from the start makes all the difference. Smart needle choices stem from three key areas: stocking a varied collection, avoiding typical pitfalls, and applying selection principles that guarantee consistent results.
Here’s how to bring everything together for professional-quality sewing every time.
Building an Essential Needle Inventory
A well-stocked needle collection isn’t about owning every type on the market—it’s about having the right tools ready when inspiration strikes or a project demands precision. Start with universal needles in sizes 70/10, 80/12, and 90/14, then add ballpoint and stretch needles for knits. Include a few specialty options like quilting and embroidery needles.
Label your needle storage containers clearly and budget for regular replacement every six to eight hours of sewing to maintain your essential needle inventory.
Common Mistakes and How to Avoid Them
Even with the right needles on hand, it’s easy to stumble into avoidable pitfalls that compromise your stitches and frustrate your progress. Size mismatch ranks high—pairing heavy fabric with a delicate needle invites thread breakage and bent needles. Universal overuse causes skipped stitches on knits.
Ignoring signs like popping sounds signals needle problems that demand immediate troubleshooting. Wrong type selection guarantees fabric snags.
Regular needle maintenance prevents most issues before they start.
Maximizing Stitch Quality for Every Project
Once you’ve sidestepped the common traps, the real work begins: fine-tuning every element—needle, thread, fabric—so your stitches come out clean, balanced, and exactly as you envisioned. Think of needle precision as the foundation, fabric feed as the rhythm, and thread quality as the finishing touch.
- Match needle sizes to fabric types for consistent stitches
- Test best tension settings before starting your project
- Replace needles regularly to maintain needle selection accuracy
Frequently Asked Questions (FAQs)
Can I use embroidery needles for regular sewing?
Sew what—can embroidery needles pinch-hit for everyday sewing? While embroidery needles feature enlarged eyes that accommodate specialty threads beautifully, their design creates thread fraying risks and stitch quality compromises on standard fabrics, making dedicated needle selection smarter for typical projects.
How do I know my needle is dull?
Listen for popping or thumping sounds during sewing—those signal trouble. Check for stitch imperfections like puckering, skipped stitches, or fabric damage such as snagging.
Thread breakage increases with dull needles. Needle inspection and replacement frequency matter for needle maintenance and proper needle replacement.
What causes needle to break while sewing?
Broken needles don’t just happen—they’re usually the machine’s way of saying you messed up. Needle breakage stems from Incorrect Installation, pulling fabric while sewing (Operator Error), poor Machine Timing, hitting pins, Fabric Thickness mismatches, thread tension issues, or Needle Defects that cause skipped stitches and other needle problems.
Do metallic threads require special needle types?
Metallic threads demand metallic needles with larger needle eyes and special coatings that minimize thread fraying prevention.
These needles feature elongated eye designs and groove structures that accommodate the thread thickness while reducing friction, making needle selection critical for decorative work.
Can one needle work for multiple projects?
Think of needle adaptability like a Swiss Army knife—it can manage several tasks, but you’ll hit fabric limits eventually.
Universal needles work across beginner projects and medium-weight fabric types, offering cost savings without major project compromise in needle selection.
Conclusion
Precision picks pay off—this sewing machine needle guide for fabrics transforms trial-and-error into targeted technique. Your needle’s point, eye, and size aren’t afterthoughts; they’re the foundation of every clean seam, smooth topstitch, and skip-free run.
Match your metal to your material, swap needles before they bend, and watch fabric damage disappear. The difference between puckered silk and perfect stitches? A five-second swap that honors what you’re actually sewing.
- https://www.thecreativecurator.com/types-of-sewing-machine-needles/
- https://www.jjneedles.com/needles-guide
- https://www.maggieframes.com/blogs/embroidery-blogs/quilting-needle-size-mastery-optimize-stitch-quality-and-fabric-performance
- https://backpackinglight.com/forums/topic/fabric-weight-typical-thread-sizes-needle-sizes/
- https://en.wikipedia.org/wiki/Sewing_machine_needle

