This site is supported by our readers. We may earn a commission, at no cost to you, if you purchase through links.
 Your sewing machine pressure control determines how firmly the presser foot holds fabric against the feed dogs.
You’ll find this adjustment as a dial, screw, or electronic control on your machine.
Higher pressure works for lightweight fabrics like chiffon, while lower pressure suits heavy materials like denim or leather.
When pressure’s wrong, you’ll see puckering, skipped stitches, or fabric that won’t feed properly.
Most machines have a numbered dial – start at medium settings and adjust based on your fabric’s behavior.
The sweet spot creates even stitches without fabric distortion or feeding problems, and finding it becomes second nature once you understand the simple relationship between fabric weight and pressure needs.
The key to achieving this balance is to recognize that fabric weight plays a crucial role in determining the optimal pressure setting.
By adjusting the pressure control according to the type of fabric being used, sewers can achieve professional-looking results with ease.
Table Of Contents
Key Takeaways
- Match pressure to fabric weight – You’ll need higher pressure for lightweight fabrics like chiffon to prevent slipping, and lower pressure for heavy materials like denim to avoid crushing them.
- Start with medium settings and test first – You should begin at your machine’s middle pressure setting (usually 3-4) and always test on fabric scraps before starting your actual project.
- Watch for telltale warning signs – You’ll know your pressure’s wrong when you see puckering, skipped stitches, uneven feeding, or fabric that won’t move smoothly through the machine.
- Learn your machine’s adjustment method – You’ll find pressure controls as dials, screws, or electronic settings on your machine, and understanding how yours works lets you make quick adjustments between fabric types.
Presser Foot Basics
Your sewing machine’s presser foot holds fabric firmly against the feed dogs, creating the foundation for every stitch you make.
When you set the right pressure, fabric moves smoothly through your machine, but incorrect settings turn simple projects into frustrating battles with puckered seams and skipped stitches.
Presser Foot Functions
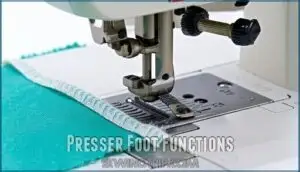
Your presser foot acts as fabric’s steady anchor during sewing.
It holds material firmly against the feed dogs, creating the perfect sandwich for stitch formation.
This pressure guarantees your fabric doesn’t slip or shift on the sewing surface.
The presser foot works with feed dog interaction to control fabric movement, while proper foot compatibility guarantees smooth fabric feed control throughout your project.
Many options exist, including specialty presser feet for advanced techniques to ensure smooth fabric feed control.
Presser Foot Tension Importance
Your sewing machine’s tension balance directly impacts every stitch you create.
Proper presser foot pressure guarantees smooth fabric feeding while maintaining consistent stitch quality.
When you achieve the right pressure balance, your fabric moves effortlessly through the machine.
Poor sewing machine pressure disrupts fabric feed control, causing uneven stitches.
Mastering presser foot tension adjustment gives you complete sewing precision control over your projects, ensuring consistent stitch quality.
Effects of Incorrect Tension
When your sewing machine’s pressure isn’t right, you’ll quickly notice these telltale signs that signal trouble ahead:
Your machine’s throwing you warning signs when pressure settings go wrong.
- Skipped stitches – needle can’t penetrate fabric properly with insufficient pressure
- Puckered fabric – excessive pressure crushes delicate materials and distorts seams
- Uneven feeding – layers move at different speeds causing fabric slippage
- Thread tangling – improper fabric tension creates loops and knots underneath
Incorrect sewing machine tension affects every aspect of your project’s quality.
Adjusting Pressure Settings
Your sewing machine’s pressure dial or screw controls how firmly the presser foot holds fabric against the feed dogs.
Understanding these adjustment mechanisms lets you fix feeding problems and stitch quality issues across different fabric types.
Dial Pressure Adjusters
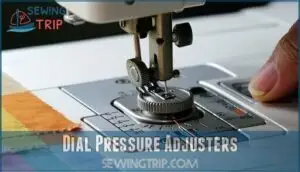
You’ll find dial pressure adjusters on your machine’s top, front, left side cover, or back panel.
The dial location varies between sewing machine models, but adjustment ease remains consistent across brands.
Turn the dial to your desired pressure level using clear pressure indicators, like a volume knob, this presser foot pressure control offers intuitive operation.
The sewing machine pressure dial simplifies pressure adjustment for different fabrics, and regular dial maintenance keeps your pressure adjustment system functioning smoothly.
Screw Pressure Adjusters
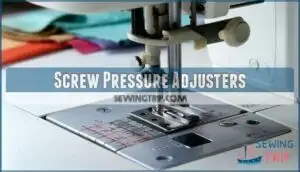
Unlike dial systems that offer intuitive adjustments, screw mechanism adjusters require a screwdriver for pressure modifications. You’ll find these screw adjusters positioned on top of your machine by the presser bar.
Turn the screw clockwise to increase presser foot pressure for lightweight fabrics, counterclockwise to decrease pressure for heavier materials. Higher screw tightness directly correlates with stronger pressure impact on your fabric.
These adjustment methods lack numerical markers, so you’ll need to test settings on fabric scraps. For maintenance tips, keep screws clean and avoid over-tightening.
A replacement presser foot screw might be needed if the original is damaged. When troubleshooting screws that won’t turn, apply gentle pressure while checking your sewing machine pressure control functionality.
Pressure Control Mechanisms
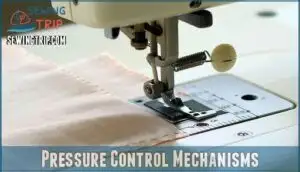
Your sewing machine’s pressure control mechanism determines how firmly the presser foot holds fabric against the feed dogs during stitching.
Understanding these controls helps you switch between delicate silks and heavy denim without missing a beat, utilizing the full potential of your sewing machine for various fabrics, including delicate silks.
Electronic Pressure Controls
Electronic controls revolutionize presser foot pressure with Automated Control systems that respond instantly to fabric changes.
These advanced systems use Sensor Integration for Real-time Adjustment, maintaining ideal pressure automatically.
Programmable Settings let you store fabric-specific configurations, while Adaptive Pressure technology adjusts continuously during sewing, eliminating manual tweaking for consistent results.
Adjusting the pressure is essential for proper fabric feeding with different materials, using Real-time Adjustment for optimal sewing performance.
Manual Pressure Adjustment
Most machines offer manual controls for hands-on pressure adjustment. You’ll find dial adjustment systems with numbered settings, screw adjustment mechanisms requiring clockwise turns for increased pressure, and pop darner regulators with spring-loaded posts.
These manual systems give you direct control over pressure calibration without relying on electronic components. Remember that fabric type matters when adjusting the pressure.
- Dial Adjustment: Turn numbered dial clockwise to increase presser foot pressure for lightweight fabrics, counterclockwise for heavy materials
- Screw Adjustment: Located near presser bar, tighten screw clockwise for more pressure, loosen counterclockwise for reduced pressure
- Pop Darner: Press center post down to increase pressure (marked 1-4), press outer ring to release pressure upward
- Regulator Location: Find adjustment controls above needle area, on machine top, or near presser foot assembly depending on model
- Pressure Calibration: Test settings on fabric scraps before starting projects to guarantee the best adjustable pressure foot performance
Advanced Pressure Control Systems
Modern sewing machines feature electromagnetic controllers that deliver precision you can’t achieve with manual adjustments.
These closed-loop systems use sensor integration to monitor fabric thickness and automatically adjust presser foot pressure in real-time.
Software modules let you program specific pressure settings for different fabrics, while adaptive controllers learn from your sewing patterns to optimize performance automatically.
Some models even include automatic thread cutters for increased efficiency.
Fabric Specific Pressure Needs
Different fabrics require specific pressure settings to prevent sewing problems and achieve professional results.
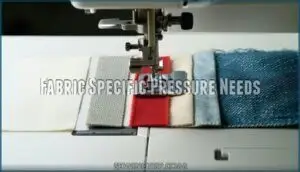
You’ll need to adjust your machine’s presser foot pressure based on fabric weight, thickness, and texture to guarantee smooth feeding and consistent stitches.
Lightweight Fabric Requirements
Delicate fabrics like silk and chiffon demand higher presser foot pressure than you’d expect.
Lightweight fabric handling requires increased tension to prevent fabric slipping during stitch formation, which is a counterintuitive approach that guarantees proper tension balance for sheer fabric sewing.
This approach prevents puckering while maintaining control, and it is essential to consider using fine, sharp needles to avoid snags.
Adjust your pressure adjustment settings upward for consistent fabric handling results, ensuring that you achieve the desired outcome with your lightweight fabrics.
Heavyweight Fabric Requirements
Heavy-duty fabric wrestling requires increased presser foot pressure to tame stubborn materials.
Denim pressure settings of 3-4 prevent fabric slippage when sewing multiple layers.
Canvas tension demands maximum pressure for thick seams and industrial-strength control.
Your fabric thickness adjustment should match the material’s density—heavier fabrics need stronger pressure to maintain consistent feeding through the machine.
Many sewers find a heavy fabric presser helpful for these tasks, particularly when working with heavy fabric and requiring consistent feeding.
Specialized Fabric Pressure Needs
Sheer fabrics like organza need maximum presser foot pressure to prevent slipping during stitching.
Vinyl sticking requires reduced pressure to avoid surface damage, while knits stretching benefits from lighter settings to maintain fabric integrity.
Denim layers demand higher pressure for proper feeding through thick seams.
Consider fabric pressure products to assist with specific needs.
Each fabric weave responds differently to pressure adjustment, requiring testing on scraps before sewing your project.
Troubleshooting Pressure Issues
When your sewing machine acts up, pressure problems are usually the culprit behind fabric slippage, puckering, or skipped stitches.
You can quickly identify and fix these issues by recognizing the warning signs and making simple adjustments to your presser foot pressure settings.
Recognizing Pressure Problems
Your sewing machine’s trying to tell you something when things go wrong.
Watch for these telltale signs that your presser foot pressure needs tweaking. Skipped stitches and uneven feeding mean you’re fighting an uphill battle with incorrect pressure settings.
- Fabric puckering signals excessive pressure crushing delicate materials
- Needle breaks from fabric resistance indicate pressure adjustment problems
- Tension issues create loops and loose stitches from poor fabric control
Resolving Fabric Slippage Issues
Fabric slippage occurs when presser foot pressure is too low for your fabric types.
Turn your pressure dial clockwise or adjust the screw mechanism to increase foot height contact with the material. Check that feed dog adjustment matches your needle size and thread type requirements.
Higher surface friction between the presser foot and fabric prevents unwanted fabric movement during stitching.
Test pressure changes on scraps before continuing your project to verify proper fabric feeding without crushing delicate materials, ensuring proper fabric feeding and avoiding unwanted fabric movement with the right feed dog adjustment.
Adjusting Pressure for Smooth Sewing
When proper tension balance meets ideal pressure, your machine transforms into a precision tool that handles any project with confidence.
Achieving sewing precision requires understanding how presser foot pressure affects fabric feeding and stitch consistency across different materials. A common issue is fabric slipping away, indicating the need for adjustment.
- Test pressure settings on fabric scraps before starting your project to guarantee smooth feeding without puckering or skipped stitches.
- Adjust gradually using your machine’s pressure adjustment guide, making small changes between test runs for accurate results.
- Match pressure to fabric types – lighter pressure for thick materials, increased pressure for thin fabrics to maintain proper sewing machine settings.
Frequently Asked Questions (FAQs)
How to adjust pressure on a sewing machine?
Locate your machine’s pressure control mechanism – typically a dial, knob, or screw near the presser foot.
Turn clockwise or press down to increase pressure for lightweight fabrics; counterclockwise or up decreases pressure for heavier materials.
What is a pressure regulator on a sewing machine?
Picture a tiny gatekeeper controlling fabric flow beneath your needle.
The pressure regulator adjusts how firmly your presser foot grips fabric, preventing slipping with light materials or crushing with heavy ones, which can be considered a complete concept in managing fabric flow.
What should your tension be set at on a sewing machine?
Thread tension should be set to 4 for most fabrics.
You’ll need to adjust it based on your specific fabric type and thread weight.
Test on scraps first to find the perfect setting.
Why would you adjust presser foot pressure?
Like a gentle handshake, presser foot pressure determines how firmly your machine grips fabric.
You’ll adjust it to match different materials—lighter pressure for thick fabrics prevents crushing, while heavier pressure stops thin fabrics from shifting during stitching.
Can you adjust pressure while sewing continuously?
Most sewing machines don’t allow real-time pressure adjustments while stitching.
You’ll need to stop sewing, lift the presser foot, adjust the pressure setting, then continue.
Some advanced industrial machines offer dynamic adjustment capabilities.
How often should pressure settings be recalibrated?
You should recalibrate pressure settings whenever you switch fabric types, change thread weights, or notice stitch quality issues like puckering or skipping. Reset to standard setting 3 between projects.
Does needle type affect optimal pressure settings?
Yes, needle type substantially affects ideal pressure settings.
Heavier needles like leather or denim needles require increased pressure to penetrate thick fabrics effectively, while lightweight needles for delicate fabrics need reduced pressure to prevent fabric damage.
Can incorrect pressure damage my sewing machine?
Can incorrect pressure actually wreck your machine’s delicate mechanisms?
Generally no, but consistently using extreme pressure settings can cause premature wear on feed dogs, presser foot mechanisms, and motor components over time, which can lead to premature wear.
What pressure works best for decorative stitches?
For decorative stitches, you’ll want moderate pressure settings around 3-4 to guarantee proper thread tension and consistent stitch formation.
This prevents skipped stitches while allowing intricate patterns to form cleanly without fabric puckering or distortion.
Conclusion
Mastering your sewing machine pressure control transforms frustrating fabric issues into smooth, professional results.
You’ve learned to match pressure settings with fabric weight, recognize common problems, and make precise adjustments.
Whether you’re working with delicate silk or sturdy canvas, proper pressure control guarantees even stitches and prevents fabric damage.
Remember to start with medium settings and adjust gradually based on your fabric’s behavior, and with practice, you’ll instinctively know the right pressure for any project, making every sewing session more enjoyable and successful.

