This site is supported by our readers. We may earn a commission, at no cost to you, if you purchase through links.
Your straight stitch handles most construction work, while zigzag prevents fraying and adds flexibility.
Triple stretch stitches create bulletproof seams for activewear that won’t snap when you move.
For knits, you’ll need stretch stitches that move with the fabric instead of fighting against it.
Decorative options like feather and satin stitches transform plain projects into showstoppers.
The key is matching your stitch to both fabric type and project goals – cotton behaves differently than silk, and hemming jeans requires different treatment than appliqué work.
Smart stitch selection separates homemade-looking projects from professional results that make people ask where you bought it.
Table Of Contents
Key Takeaways
- You’ll need to match your stitch choice to fabric type – stretch stitches for knits prevent popped seams, while straight stitches work best on stable woven fabrics like cotton and linen.
- Master the three essential categories first – utility stitches for construction, stretch stitches for flexible seams, and decorative stitches for embellishment before moving to advanced techniques.
- Proper machine setup prevents 80% of stitch problems – check threading, match needle size to fabric weight, and test tension settings on scraps before starting your project.
- You can create professional-looking results by combining stitches strategically – layer decorative elements, use specialty stitches for specific tasks, and practice stitch length adjustments for different fabric weights.
Basic Sewing Stitches
When you’re just starting out with sewing, mastering basic stitches is your first step to creating beautiful projects.
These fundamental stitches form the backbone of every sewing project, from simple hems to complex garments, and are essential for beautiful projects.
Straight Stitch Explained
Think of the straight stitch as your sewing machine’s bread and butter—it’s the foundation for almost everything you’ll create.
Every stitch you master opens doors to bigger, bolder sewing adventures.
This versatile workhorse runs from point A to point B in a perfectly straight line, making it ideal for basic seams, hems, and topstitching.
The straight stitch is your sewing foundation—simple, reliable, and endlessly versatile for any project
You can adjust stitch length from tiny reinforcement stitches to long basting stitches, while needle positioning options let you sew precisely where needed for professional results.
Locking Stitch and Its Uses
Locking stitch creates invisible knots at your seam’s start and finish, eliminating backstitching entirely.
This automatic knotting feature saves time while delivering rock-solid stitch security.
Your seams won’t unravel, even under stress.
The lockstitch mechanism works behind the scenes, producing clean, professional-looking invisible ends that keep your projects looking sharp and lasting longer.
Triple Stretch Stitch Benefits
Through its unique back-and-forth motion, triple stretch stitch delivers unmatched seam strength for stretch fabrics like activewear and swimsuits.
This powerhouse stitch prevents thread breakage when fabric elasticity puts stress on seams.
You’ll love how it maintains stitch tension while allowing natural stretch, perfect for high-stress areas like armpits, this stretch stitch keeps your garments looking professional while following proper sewing tips, utilizing its ability to provide seam strength.
Decorative Stitch Options
You’ll find decorative stitches transform ordinary projects into something special.
These fancy options include feather stitches that look like tiny leaves, satin stitches for shiny appliques, and hand-look stitches that mimic old-fashioned sewing.
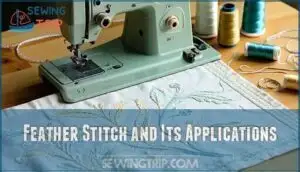
Feather Stitch and Its Applications
Anyone can master feather stitch—it’s like drawing tiny branches with thread. This versatile decorative technique creates elegant borders and adds texture to any project.
You’ll love how it transforms plain fabric edges into stunning embellishments. The feather stitch method is also known as briar stitch technique which has been used historically in various embroidery applications.
| Application | Visual Effect |
|---|---|
| Quilt borders | Creates flowing, organic lines that soften geometric patterns |
| Garment edges | Adds sophisticated detail to sleeves, collars, and hems |
| Nature motifs | Mimics vines, coral, and botanical elements perfectly |
This stitch variation works beautifully for both machine and hand embroidery effects, making your sewing tips arsenal complete with elegant borders and sophisticated detail.
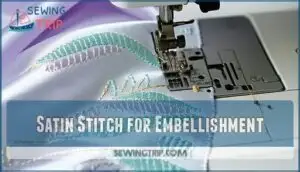
Satin Stitch for Embellishment
When you’re ready to add some pizzazz to your projects, satin stitch becomes your go-to embellishment tool.
This dense zigzag creates glossy, raised lines perfect for appliqué work and monogramming.
You’ll want to adjust your stitch density based on fabric choices – lighter fabrics need gentler settings to avoid puckering.
Practice on scraps first, because mastering decorative edges takes patience but delivers stunning results.
Hand-Look Stitches for Decorative Edges
While satin stitches add polish, handlook stitches bring that homemade charm you can’t fake.
Blanket stitch and whip stitch create beautiful applique edges that look hand-sewn. These decorative stitches work magic on hems and fabric edges.
Your fancy stitches will fool everyone into thinking you spent hours hand-stitching. Perfect for decorative hems on pillowcases or kitchen towels.
Mastering decorative edges requires practice and patience to achieve professional-looking results.
Stretchy Fabric Stitches
When you’re working with stretchy fabrics like knits and spandex, you’ll need special stitches that can flex without breaking.
These specialty stitches move with your fabric instead of fighting against it, preventing those annoying popped seams that happen when regular straight stitches can’t handle the stretch.
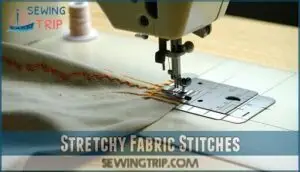
Stretch Stitch for Knit Fabrics
Why struggle with seams that snap when you stretch?
Stretch stitch for knit fabrics creates flexible seams that move with you.
This zigzag pattern prevents broken threads on jersey, spandex, and cotton knits.
Adjust your sewing machine’s stretch modes and zigzag settings for proper fabric tension.
The result? Perfect seam elasticity that won’t fail during wear or washing.
Overlock Stitch for Preventing Fraying
Why worry about frayed edges when overlock stitch has your back? This powerhouse mimics professional serger results, wrapping thread around fabric edges for bulletproof fray prevention.
Here’s what makes overlock stitch your fabric protection hero:
- Edge Finishing – Creates clean, professional seam edges
- Seam Security – Reinforces high-stress areas with multiple threads
- Stretch Compatibility – Works beautifully with knits and stretchy materials
- Overlock Techniques – Pairs perfectly with overedge foot for best results
Ladder Stitch for Invisible Closures
When you need invisible seams that disappear like magic, the ladder stitch becomes your secret weapon.
Master these invisible seams and watch your sewing transform from amateur to absolutely stunning
This clever technique creates invisible closures by catching tiny bits of fabric from each side, hiding the thread completely inside.
Perfect for closing pillow openings or finishing stuffed animals, this blind hem stitch makes your fabric joining look professionally done.
Your closure techniques just got an upgrade! Mastering the ladder stitch technique is essential for achieving professional-looking results.
Choosing Right Stitch Type
You’ll need to match your stitch choice to both your fabric and your project goals for the best results.
The right stitch can make the difference between a professional-looking finish and a frustrating sewing experience that leaves you wondering what went wrong.
Project-Based Stitch Selection Guide
Your project type determines which stitch will work best. Different sewing projects need different approaches, and picking the right stitch saves you time and frustration.
Here’s your quick guide for common project-based stitch selection:
- Seaming garments: Straight stitch for woven fabrics, stretch stitch for knits
- Finishing edges: Overlock or zigzag to prevent fraying and add durability
- Decorative elements: Satin stitch for appliques, feather stitch for embellishment
- Repairs and alterations: Darning stitch for holes, ladder stitch for invisible fixes
Understanding the stitch selection guide is essential for achieving professional results in various sewing projects.
Fabric Type and Stitch Selection
Your fabric choice drives everything—from Thread Choice to Tension Control. Cotton and linen work great with standard straight stitches, while stretchy knits need stretch stitches for Fabric Stretch.
Fabric compatibility makes or breaks your project!
| Fabric Type | Best Stitch | Why It Works |
|---|---|---|
| Cotton/Linen | Straight stitch | Stable weave holds seams well |
| Knits/Jersey | Lightning stitch | Moves with Fabric Stretch |
| Denim/Canvas | Triple stretch | Extra strength for heavy use |
| Silk/Chiffon | Short straight (1.5mm) | Prevents snags and holes |
| Fleece/Wool | Wide zigzag | Accommodates bulk and movement |
Stitch Density matters too—tight weaves handle decorative sewing machine stitch types better than loose ones.
Stitch Length and Width Adjustments
Getting your stitch length and width just right is like finding the perfect seasoning—too little and it’s bland, too much and it’s overwhelming.
Start with your machine’s default settings, then fine-tune based on fabric weight and thread control needs.
Lighter fabrics need shorter stitch lengths for better fabric guidance, while heavier materials can handle longer stitches.
Adjust stitch density through width settings for decorative effects.
Understanding proper machine settings through resources like machine settings is essential for superior sewing results.
Setting Up Sewing Machine
Getting your machine ready for different stitches isn’t rocket science, but it does make the difference between smooth sailing and a tangled mess.
You’ll need to adjust a few simple settings like stitch selection, tension, and presser foot – then you’re ready to create everything from basic seams to fancy decorative touches.
How to Set Up Machine for Different Stitches
Setting up your machine doesn’t have to feel like rocket science. Start by adjusting your Thread Tension dial—usually between 3-5 for most fabrics.
Next, set your Stitch Length based on your project needs. Check your Needle Position if you’re edge-stitching or need precise placement.
Your Machine Calibration should match your fabric weight, and don’t forget proper Fabric Settings for ideal results. Understanding the proper machine setup guide is essential for achieving professional-looking stitches with the right machine setup and fabric settings.
Troubleshooting Common Stitch Issues
Even with perfect setup, stitch errors happen. When your thread breakage or tension issues strike, don’t panic—most problems have simple fixes. Machine malfunctions often stem from basic setup oversights, while fabric puckering usually signals incorrect stitch length or width settings.
- Check your threading first – Improper threading causes 80% of stitch problems, so rethread both top and bobbin
- Match your needle to fabric – Wrong needle size creates skipped stitches and thread breakage on different materials
- Test tension on scraps – Adjust upper tension gradually until stitches look balanced on both fabric sides
- Clean your machine regularly – Lint buildup around tension discs disrupts smooth thread flow and stitch quality
To resolve common issues, understanding thread quality issues is essential for achieving superior stitch results.
Maintaining Sewing Machine for Optimal Performance
Regular machine cleaning keeps your stitches smooth and prevents thread jams.
Oil your machine monthly following manufacturer guidelines.
Replace needles after every project—dull needles cause skipped stitches and fabric damage.
Clean your bobbin case weekly, removing lint buildup that affects stitch quality.
Store bobbins properly and use quality thread.
Simple maintenance prevents most sewing machine stitch problems.
Proper sewing machine oil usage is essential for peak performance, ensuring your machine runs smoothly with proper care.
Advanced Stitch Techniques
Once you’ve mastered basic stitches, it’s time to explore advanced techniques that’ll make your projects look professionally finished.
These specialized methods combine multiple stitches and clever tricks to create extra-strong seams and eye-catching custom designs that’ll have everyone asking where you bought that amazing piece.
Double Overlock Stitching for Security
Your machine’s already set up perfectly – now let’s talk serious stitch reinforcement.
Double overlock stitching creates bulletproof seams that laugh at stress.
This powerhouse combines two overlock passes, wrapping multiple threads around fabric edges for maximum fabric protection.
Perfect for high-stress areas like bag straps or athletic wear, double overedge stitch prevents fraying while adding stretch.
It’s important to consult your machine’s manual for specific overlock settings.
Your overcasting stitch gets supercharged with this technique.
Combining Decorative Stitches for Custom Effects
You’ll discover creative possibilities when you layer fancy stitches together.
Stitch editing lets you build custom embellishments that look professionally made.
- Pattern Mixing: Combine feather stitches with satin borders for rich texture blending
- Decorative Overlays: Layer contrasting thread colors over base embroidery stitches
- Custom Combinations: Program stitch patterns into sequences for consistent decorative results
Using Specialty Stitches for Specific Tasks
Three specialty stitches tackle tough jobs beautifully.
Darning Repair fixes holes by weaving thread back and forth.
Chain Stitch creates flexible seams that stretch without breaking.
Shell Tuck adds elegant scalloped edges to delicate fabrics.
These Fancy Stitches solve specific problems regular straight stitches can’t handle.
Master Applique Edges for clean finishes on decorative patches, which is a key part of using these stitches to achieve professional-looking results with delicate fabrics.
Frequently Asked Questions (FAQs)
What are the different stitches on a sewing machine used for?
While complex embroidery stitches create stunning decorative effects, you’ll mainly use straight stitches for everyday sewing. They’re perfect for seams, hems, and basic construction on most fabrics.
What is fagoting in sewing?
Fagoting in sewing is an insertion stitch that joins two fabric pieces with decorative openwork between them.
You’ll create channels for elastic, ribbon, or simply add visual interest to seams and hems.
What is the best stitch for a beginner sewing machine?
The straight stitch is your best friend as a beginner. It’s simple, reliable, and handles most basic sewing tasks like seams and hems perfectly. You’ll master it quickly!
What are the five basic stitches?
Picture yourself at a sewing machine, ready to master the essentials.
The five basic stitches you’ll use most are: straight stitch for seams, zigzag for stretch fabrics, overlock for edge finishing, buttonhole for closures, and blind hem for invisible hems.
What thread types work best for each stitch?
You’ll want all-purpose polyester thread for straight stitches—it’s strong and versatile.
Cotton thread works great for decorative stitches on natural fabrics.
Use woolly nylon or stretch thread for zigzag and overlock stitches on knits.
Can I use decorative stitches on thick fabrics?
Tackling thick fabrics with decorative stitches is like threading a needle in a windstorm—challenging but doable.
You’ll need a heavy-duty needle, slower speed, and stabilizer.
Test on scraps first, as some delicate decorative patterns may skip or pucker on dense materials.
How do I prevent thread bunching underneath fabric?
Check your threading and tension settings.
Verify the top thread flows smoothly through all guides and the bobbin is wound evenly.
Clean lint from the bobbin area and use the correct needle size.
Whats the difference between computerized and mechanical stitches?
Despite seeming intimidating, computerized machines aren’t harder to use—they’re actually more consistent.
Mechanical machines use physical cams for stitch patterns, while computerized ones use digital programming, offering precise stitch control and customization options.
Which stitches work best for quilting projects?
You’ll want straight stitch for basic seams and piecing quilt blocks together. Zigzag stitch works great for appliqué work and securing raw edges without fraying or puckering.
What tension settings work best for different threads?
Cotton thread uses medium tension (3-4), while polyester needs slightly higher (4-5).
Silk and rayon require lower tension (2-3) to prevent breakage.
Heavy threads like topstitching thread need reduced tension (2-3) for smooth feeding.
Conclusion
Practice makes perfect when mastering sewing machine stitch types explained.
You’ve now got the roadmap to transform fabric into professional-looking projects.
Start with basic straight and zigzag stitches, then branch out to decorative options as your confidence grows.
Remember, the right stitch selection makes all the difference between amateur and expert results.
Don’t be afraid to experiment on scraps first.
Your sewing machine is waiting to help you create something amazing.
- https://maggieframestore.com/fr/blogs/maggieframe-news/feather-stitch-embroidery-mastery-techniques-variations-and-adaptations
- https://rsnstitchbank.org/stitch/feather-stitch
- https://www.needlenthread.com/2006/11/feather-stitch-video-tutorial.html
- https://pieceworkmagazine.com/a-stitch-in-time-feather-stitch/
- https://pubs.nmsu.edu/_c/C202/index.html

