This site is supported by our readers. We may earn a commission, at no cost to you, if you purchase through links.
The solution typically involves adjusting your upper tension dial, which controls about 80% of tension issues. Start by checking if your machine’s properly threaded with the presser foot up, then make small adjustments to find that "Goldilocks" zone where threads interlock perfectly.
Clean your tension discs regularly since lint buildup causes uneven thread flow, and always test adjustments on scrap fabric first.
Match your needle size to your fabric weight, and remember that thicker materials require higher tension settings while delicate fabrics need gentler handling, which is crucial for achieving the right "tension" and avoiding "puckered fabric" or "loopy stitches" to ensure a smooth sewing experience with the right "thread flow".
Table Of Contents
Key Takeaways
- Start with your upper tension dial – This controls 80% of tension issues, so adjust it in small increments while testing on scrap fabric before touching your bobbin settings.
- Clean your tension discs regularly – Lint buildup causes uneven thread flow and erratic stitching, so use a pipe cleaner with machine oil to remove debris monthly.
- Match your needle size to fabric weight – Using the wrong needle creates tension imbalances, so switch to heavier needles for thick materials and lighter ones for delicate fabrics.
- Always rethread completely when troubleshooting – Thread your machine with the presser foot up to properly engage tension discs, as improper threading causes most tension headaches.
Sewing Machine Tension Basics
Your sewing machine’s tension controls how tightly the upper and bobbin threads interlock to create strong, even stitches.
When tension isn’t balanced correctly, you’ll notice loops on one side of your fabric, puckered seams, or threads that break constantly, which can be caused by poor tension.
When tension goes wrong, your sewing turns into a frustrating mess of loops and breaks
Poor tension creates loops, puckered seams, and constant thread breaks that ruin your sewing flow.
Importance of Balanced Tension
When you achieve proper tension control, your stitches lock perfectly between fabric layers, creating strong seams that won’t pucker or break.
Think of it like Goldilocks – not too tight, not too loose, but just right.
Balanced thread tension guarantees your upper thread tension and bobbin tension work together harmoniously, delivering consistent stitch quality and sewing precision every time you stitch, ensuring strong seams that maintain quality.
Factors Affecting Tension
Several key factors determine your sewing machine’s tension balance.
Material thickness affects how tightly threads pull together—thicker fabrics need higher tension settings.
Thread type and weight create different tensions; mixing heavy and light threads causes sewing machine tension problems.
Needle size must match your fabric and combination, and poor bobbin winding creates uneven thread flow, while machine wear gradually affects tension adjustment mechanisms, requiring more frequent tension solutions, due to the impact of material thickness and the need for proper tension balance.
Common Signs of Tension Issues
You’ll spot tension imbalance through several telltale signs that scream "fix me now!".
Thread breakage happens when tension’s too tight, while loopy stitches underneath signal loose upper tension.
Fabric puckering occurs with excessive thread pull, and uneven stitch quality means your bobbin tension problems need attention.
These thread tension issues create frustrating sewing experiences that demand immediate tension adjustment guide solutions.
Identifying Tension Problems
You’ll spot tension problems by examining your stitches on both fabric sides—loops underneath mean loose top tension, while visible top thread on the bottom indicates tight needle thread.
Check for puckering, uneven stitches, or thread breakage, which signal your machine needs quick adjustments before continuing your project to fix tension problems.
Loopy or Puckered Stitches
When you notice loopy stitches on your fabric’s underside or fabric puckering along seams, you’re facing common thread tension issues.
These sewing errors typically stem from incorrect upper thread tension settings. Loopy stitches fix starts with slightly tightening your tension dial, while fabric puckering causes often involve mismatched thread weights or needle sizes for your material.
To achieve balanced stitches, understanding thread tension basics is essential for identifying and resolving these common issues.
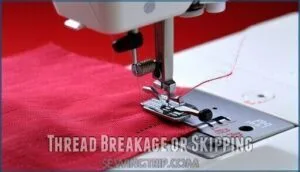
Thread Breakage or Skipping
Thread-snapping frustration signals your machine’s crying for help.
Don’t let broken threads derail your sewing dreams – your machine needs attention now!
Excessive upper thread tension creates breakage, while incorrect tension settings cause skipped stitches on thick fabrics.
Check thread types match your project—heavy threads need lower tension numbers.
Bobbin tension problems also trigger skipping issues.
Adjust your tension dial gradually, testing each change on scrap fabric before continuing your project, to avoid skipped stitches.
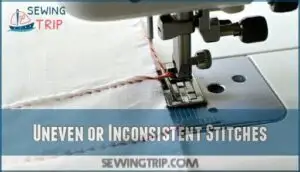
Uneven or Inconsistent Stitches
Identifying uneven stitches becomes easier when you understand stitch balance fundamentals.
These tension adjustment guide symptoms indicate your sewing machine tension problems need immediate attention:
- Stitch quality varies dramatically within single seams
- Thread tension creates alternating loose and tight formations
- Fabric puckering appears sporadically along stitching lines
- Seam consistency suffers from irregular thread loops
- Skipped stitches fix requires examining both upper and bobbin mechanisms
This uneven stitches solution targets looping stitches fix issues effectively.
Adjusting Tension Mechanisms
Once you’ve identified tension problems, you can fix most issues by adjusting your machine’s tension mechanisms step by step.
Start with the upper tension dial since it controls about 80% of tension problems, then move to bobbin adjustments only if needed.
Upper Tension Adjustment
Once you’ve identified tension problems, your sewing machine’s tension dial becomes your best friend.
Start with your presser foot up to relax the upper thread tension.
Turn the dial in small increments—higher numbers tighten tension, lower numbers loosen it.
Most machines work best around 4-5, but test on scrap fabric first.
The upper tension mechanism handles about 80% of stitch balance issues, making this your go-to adjustment for achieving perfect stitches through proper tension control settings is essential, which can be found at tension control settings, and understanding it is key to proper sewing machine operation.
Bobbin Tension Adjustment
After adjusting upper tension, you might need to fine-tune your bobbin tension mechanism.
Turn the bobbin case tension screw clockwise in tiny 1/8-turn increments to tighten, counterclockwise to loosen.
Test each adjustment on scrap fabric using the same thread weights as your project.
The drop test works well—your bobbin case should fall slightly when suspended by bobbin thread, then stop with a gentle tug.
Understanding the proper bobbin tension settings is essential for achieving balanced stitches and preventing common sewing issues, which requires proper tension adjustment and sewing techniques to ensure a successful project with quality results.
Using Tension Gauges
You’ll find tension gauges incredibly helpful for precise measurements when standard adjustments aren’t cutting it.
These gauge tools measure thread weights and tension settings with scientific accuracy, eliminating guesswork from your sewing machine tension problems solution.
Simply attach the gauge, pull your thread through, and read the measurement.
This precision adjustment method guarantees consistent tension calibration across different projects, making your stitching perfectly balanced every time.
Accurate sewing machine gauges require understanding of sewing machine gauges to achieve superior results.
Troubleshooting Tension Issues
When tension problems persist despite basic adjustments, you’ll need to dig deeper into three main culprits that often hide behind frustrating stitching issues.
Clogged tension disks, poor thread quality, and neglected machine maintenance account for most stubborn tension problems that won’t respond to simple dial tweaks, which can be considered complete concepts.
Clogged Tension Disks
Lint buildup turns your tension disks into stubborn troublemakers.
When thread debris clogs these metal disks, you’ll notice thread breakage and erratic stitching patterns.
Clean clogged tension disks using a thin pipe cleaner dipped in machine oil.
Work it gently between the disks to remove accumulated lint.
Regular disk cleaning prevents most tension problems solution scenarios from developing, which can be considered a complete solution.
Poor Thread Quality
Your thread’s the troublemaker here.
Poor thread quality causes up to 55% more tension problems than quality alternatives.
Low-grade synthetic fibers break easier, creating inconsistent thread weight and uneven fiber blends.
Cheap thread’s loose thread twist unravels during sewing, while inferior yarn quality produces fuzz that clogs your machine.
Switch to certified threads – they resolve over 80% of tension irregularities immediately.
Understanding proper thread tension settings is essential for resolving these issues and achieving balanced stitches.
You can find more information on resolving tension issues at thread tension settings, which is crucial for achieving balanced stitches.
Machine Maintenance Neglect
Regular sewing machine maintenance keeps tension mechanisms working smoothly.
When you skip cleaning sessions, lint accumulates in tension disks and bobbin areas, causing erratic thread flow.
Machine wear affects oil levels, requiring periodic lubrication of moving parts.
Check filter cleaning schedules, perform bobbin care routines, and conduct tension checks monthly.
Neglecting sewing machine maintenance leads to persistent tension related issues that simple dial adjustments can’t fix during sewing machine tension troubleshooting.
Regular maintenance is crucial to prevent issues, and following a routine can help keep the machine in good working order, ensuring smooth operation and reducing the need for troubleshooting.
Maintaining Optimal Tension
Once you’ve mastered tension adjustments, keeping your machine in peak condition becomes your next priority.
Consistent maintenance prevents most tension problems before they start, saving you hours of frustration and ensuring every project turns out beautifully.
Regular Cleaning and Oiling
Like a well-oiled machine, your sewing equipment needs consistent care to maintain proper tension.
Debris buildup in tension discs disrupts thread flow, while inadequate machine lubrication causes mechanical wear affecting stability.
- Clean tension discs monthly using lint-free cloths and appropriate cleaning tools to remove thread residue from the thread pathway
- Apply machine-specific oil types to designated lubrication points following manufacturer’s maintenance schedules
- Inspect bobbin areas regularly during sewing machine maintenance sessions, removing accumulated lint that affects tension balance
Regular maintenance also involves checking for daily cleaning routines to prevent debris buildup and guarantee smooth operation.
Proper Threading Techniques
Beyond maintaining a clean machine, your threading technique makes or breaks tension balance.
Follow the thread path exactly as your manual shows – skipping guides creates uneven drag. Thread with the presser foot up to properly engage tension disks.
Check needle alignment and make certain your upper thread flows smoothly through each guide. Bobbin insertion must be correct too, or you’ll fight threading issues constantly.
Remember: proper threading solves ninety-nine percent of tension-related troubleshooting headaches.
Choosing Correct Needle and Thread Types
Pairing the right needle with your fabric choice prevents 75% of tension headaches. Your needle type must match your fabric types and thread weights to maintain stitch quality.
- Universal needles (80/12) work for most woven fabrics with standard thread selection
- Ballpoint needles reduce snags on knits by 43% compared to sharp needles
- Heavy-duty needles (100/16) handle denim and canvas, preventing skipped stitches by 37%
Replace needles every 8-10 hours of sewing to avoid tension problems caused by dull points. Understanding proper sewing needle selection is vital for superior performance.
Frequently Asked Questions (FAQs)
How to avoid sewing machine tension issues?
Prevent tension headaches by using quality thread, cleaning your machine regularly, and testing settings on fabric scraps first. You’ll catch problems before they ruin your project and keep stitches balanced.
What is a sewing machine tension?
Tension controls how tightly your machine pulls the upper and lower threads together when forming stitches.
You’ll get balanced, even stitches when both threads meet perfectly between your fabric layers, creating strong seams.
How do you fix thread tension problems on a sewing machine?
First, rethread your machine completely with the presser foot up. Then adjust the upper tension dial incrementally—increase for loose stitches, decrease for tight ones. Test on scrap fabric.
Why does my sewing machine tension fluctuate?
Like a car engine sputtering from dirty fuel filters, your machine’s tension wavers when lint clogs the disks.
When you’re mixing different thread weights, it causes inconsistent stitch formation throughout your project.
What happens if tension ratios match in a sewing machine?
When your tension ratios match perfectly, you’ll get beautifully balanced stitches that look identical on both fabric sides.
The threads lock together between fabric layers, creating strong, professional-looking seams without puckering or loops, and this results in seams that are also professional-looking.
How do you increase tension on a sewing machine?
About 80% of sewing tension problems stem from upper thread issues, not bobbin complications.
To increase tension, turn your machine’s dial to a higher number—typically from 4 to 6 or 7, depending on your fabric thickness and thread weight.
How to fix tension issues on a sewing machine?
Rethread your machine completely, starting with the presser foot up.
Clean lint from bobbin area, then test on scrap fabric.
Adjust the upper tension dial incrementally—higher numbers tighten, lower numbers loosen.
What happens if sewing machine tension is too high?
When your machine’s tension is too high, you’ll see fabric puckering, thread breaking, and needle deflection.
The tight threads pull your fabric together, creating uncomfortable bunching that ruins your project’s appearance and durability.
How to fix your thread looping under the fabric?
Like a stubborn child pulling too hard on a kite string, your upper thread’s grip is too loose.
Increase your top tension dial slightly, rethread your machine completely, and test on scrap fabric first.
How do you fix tension when switching between different fabric weights?
Start with your machine’s default setting (usually 4-5) and test on scraps.
Increase tension for heavier fabrics, decrease for delicate ones.
Make small dial adjustments between weights and always rethread completely, ensuring that you rethread to maintain consistency.
Conclusion
Like a well-tuned orchestra, mastering your sewing machine tension problems solution requires practice and patience.
You’ve learned the key adjustments—from upper tension dials to bobbin calibration—that’ll transform frustrating stitching sessions into smooth sailing.
Remember to clean those tension discs regularly, match your needle to fabric weight, and always test on scraps first.
With these techniques in your toolkit, you’ll tackle tension issues confidently and get back to creating beautiful projects without the headaches.


