This site is supported by our readers. We may earn a commission, at no cost to you, if you purchase through links.

You’ll want French curves to shape those tricky necklines just right, and seam gauges become your best friend for getting measurements spot-on.
When your bust needs more room, a Full Bust Adjustment does the trick, but if you’re swimming in fabric up top, try a Small Bust Adjustment instead.
And here’s where the magic happens – move those darts around and watch your garment hug your curves like it was made just for you.
Those fancy measurement apps sound impressive, but here’s what really matters: knowing which fitting fix actually solves your problem.
Whether it’s a saggy shoulder or a tight waist, matching the right technique to your specific issue is what turns a so-so fit into something that feels custom-made.
Table Of Contents
Key Takeaways
- You’ll get professional-fitting garments by starting with accurate body measurements using a flexible tape measure held snug but not tight. Master three core adjustment techniques—slash and spread, dart manipulation, and size blending—to fix common fitting problems like bust adjustments and waist shaping. Use essential tools like French curves, seam gauges, and pattern paper to make precise alterations that transform commercial patterns into custom fits. * Test all major changes on muslin fabric first before cutting your good material to avoid costly mistakes and ensure perfect results.
Essential Tools for Pattern Fitting
You’ll need the right tools to transform any pattern into your perfect fit, and having them ready saves time when problems pop up.
A flexible measuring tape, pattern paper, and a few simple supplies turn fitting frustrations into quick fixes that’ll make your garments look professionally finished.
Must-Have Measuring Tools
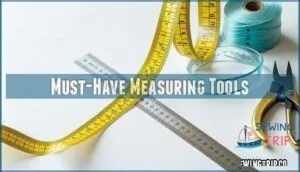
Pattern fitting success starts with the right measuring tools in your arsenal. Your flexible measuring tape handles body curves with precision, while these other essentials complete your modification toolkit.
- Flexible Tape – 60-inch cloth or fiberglass tape for body curves
- Tailors Square – L-shaped ruler for perfect right angles
- French Curve – Curved ruler for smooth armhole and neckline adjustments
- Seam Gauge – 6-inch ruler with sliding marker for precise seam allowances
- Digital Calipers – Electronic tool for exact fabric thickness measurements
These rulers and curve tools transform guesswork into precision.
Pattern Alteration Supplies
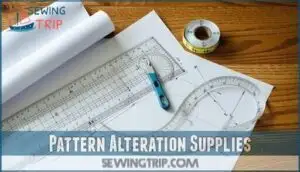
You’ll want to gather some key tools before diving into pattern modifications. Pattern paper lets you trace changes without damaging originals, and grading rulers ensure your adjustments stay proportional. French curves give you those smooth, professional armhole lines.
A tracing wheel makes transferring markings a breeze, and keep that seam ripper handy—trust me, you’ll need it.
Your measuring tape and muslin fabric pair well with a few specialized tools that make pattern work smoother. French curve rulers help you nail those professional armhole curves, while standard rulers keep your straight-line changes spot-on.
Digital and Mobile Solutions
Gone are the days of guessing your measurements with a tape measure. Mobile Pattern Apps now offer Virtual Fitting through 3D Body Scanning technology, revolutionizing how you approach Pattern adjustments. CAD software and Pattern drafting software provide Digital Pattern Storage with Automated Alterations capabilities. These patterns offer enhanced efficiency in fashion production.
- Mobile scanning apps collect 240+ body measurements in under two minutes
- AI-powered pattern generators achieve 95% accuracy in Digital Patterns creation
- Cloud-based platforms enable instant Sewing patterns collaboration and storage
- Virtual prototyping reduces fabric waste by 30% during sample production
- Smart size recommendation engines cut return rates by 20% through precise fitting
Taking Accurate Body Measurements
You can’t achieve a perfect fit without precise measurements, and even a quarter-inch error can throw off your entire garment.
Start with a flexible measuring tape and have someone help you measure while you stand naturally—trying to measure yourself is like attempting to cut your own hair with your eyes closed.
Trying to measure yourself is like attempting to cut your own hair with your eyes closed
Key Measurement Areas
With your tools ready, focus on these critical body measurements for accurate garment fit. Measure your Bust Point to position darts correctly. Check Torso Length from shoulder to waist for proper bodice proportions.
Capture Inseam Accuracy for pants that don’t bunch or drag. Record Shoulder Slope angle to avoid pulling across the back. Document Back Width between shoulder blades.
Getting these measurements right upfront saves you from wrestling with ill-fitting clothes later.
Tips for Precision and Consistency
Measurement accuracy starts with consistent workflows. You’ll get better results wearing the same undergarments each time and measuring at identical body poses. Keep your measuring tape snug but not tight—think "friendly hug" pressure.
Double-check each measurement twice, and use muslin mockups to verify pattern adjustments before cutting expensive fabric. Consistent seam allowances and grainline accuracy prevent fitting disasters.
Documenting and Tracking Changes
Smart sewers create digital measurement logs to track their body’s changes over time. Measurement trend tracking shows seasonal fluctuations in your measurements.
Use version control for your pattern alteration techniques—number each modification attempt. This change impact analysis reveals which sewing pattern adjustments actually work.
Keep collaborative fitting notes when others help with fittings. Your documentation transforms random pattern adjustments into systematic alteration techniques.
Pattern Adjustment Techniques Explained
Learning these three core techniques—slash and spread, dart manipulation, and size blending—means you can finally make any store-bought pattern work for your unique body shape.
These proven methods—slash and spread, dart manipulation, and size blending—turn frustrating fitting issues into simple fixes you can tackle with confidence.
Slash and Spread Method
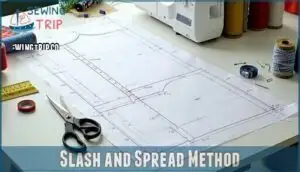
When your pattern feels too snug or short, the slash and spread method becomes your fitting lifeline. Simply cut your pattern along strategic lines, then spread the pieces apart to add volume or length.
This technique works perfectly for adding fullness to sleeves or making length adjustments to bodices. Always maintain fabric grain alignment during complex alterations. Master this pattern alteration skill for professional width adjustments.
Dart Manipulation Strategies
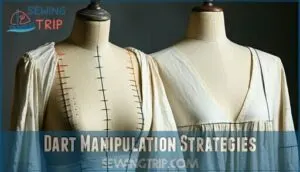
Understanding dart manipulation transforms your sewing patterns from basic to exceptional. You’ll create professional contouring techniques that improve fit and flatter your figure. Master these shaping methods to control fullness exactly where you need it.
- Dart Style Options: Move darts from bust to shoulder, waist, or armhole for different silhouettes
- Design Integration: Convert multiple small darts into one larger dart for cleaner lines
- Dart Placement: Reposition darts to follow your natural body curves and proportions
- Fullness Control: Add or reduce dart depth to accommodate varying bust or hip measurements
Blending Sizes and Pivoting
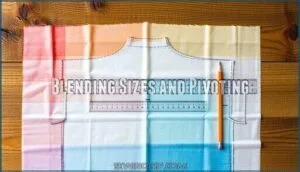
Sometimes you’ll need combining techniques for complex curves and awkward areas. Blending sizes means drawing smooth lines between different pattern sizes at your pivot points.
Start with your bust measurement, then blend to your waist size using the pivoting method. This creates fluid joins instead of awkward jumps.
Size blending tips: use a curved ruler for smooth lines and mark pivot point accuracy carefully.
Solving Common Pattern Fitting Issues
You know the drill with basic sewing, but those stubborn fit issues still drive you up the wall.
A gaping neckline here, pants that bunch weird at the crotch there—these targeted fixes will turn your sewing struggles into clothes that actually look professional.
Bust, Waist, and Hip Adjustments
Now you’ll tackle the three main body areas that make or break garment fit. Full Bust Adjustment (FBA) adds room when you’re fuller than the pattern’s B-cup assumption, while Small Bust Adjustment (SBA) removes excess fabric.
Waist Shaping Darts create that coveted hourglass silhouette.
Hip Curve Grading and Blending Sizes help when your measurements span multiple pattern sizes, ensuring smooth transitions without awkward pulling or bunching.
Swayback and Torso Length Solutions
Your back’s natural curve affects how garments hang. Swayback Adjustment addresses excess fabric that pools above your waist.
For Torso Lengthening, add horizontal strips between pattern pieces. Torso Shortening removes length strategically.
Pattern Balance depends on recognizing how Posture Impact creates fitting issues. These Length modifications transform awkward drape into professional-looking clothes that complement your body’s unique shape.
Pants Fitting and Crotch Alterations
Pants fitting starts with understanding your body’s unique curves. Crotch curve adjustments fix drag lines by lengthening or shortening the curve in 0.25-inch increments. Rise length variations address gaping or pulling issues. Seat adjustments tackle excess fabric through strategic darts. Leg shape alterations modify the hip curve and inseam for better drape.
Always start with fitting muslin pants to test changes before cutting your good fabric. Before beginning, it’s helpful to print a pants fitting worksheet to track any issues.
Frequently Asked Questions (FAQs)
How do armhole adjustments affect sleeve fit?
Armhole adjustments directly impact how your sleeves move and drape. Make the armhole bigger, and you’ll need wider sleeves to avoid pulling and bunching at your shoulders.
When should you use paper vs muslin fittings?
Use paper fittings for minor adjustments – they’re quick and save fabric. Choose muslin for complex changes, drape-dependent designs, or when you need to see the garment’s full behavior.
Can vintage patterns work with modern fabrics?
Vintage patterns work beautifully with modern fabrics, but you’ll need to adjust for fabric behavior differences. Test drape and stretch first, then modify ease and seam allowances as needed.
What causes shoulder seam placement problems?
Shoulder seam placement goes wrong when you’ve got incorrect shoulder width measurements, poor posture during fitting, or you’re working with the wrong pattern size.
It’s like trying to hang a picture on the wrong wall – everything shifts out of place.
How do you fix gaping necklines permanently?
Don’t let a gaping neckline rain on your parade!
You’ll need to remove excess fabric by taking deeper seam allowances, adding darts, or inserting elastic tape along the neckline edge for permanent control.
Conclusion
Want garments that actually fit your body instead of fighting against it? These sewing pattern fitting techniques will help you troubleshoot common issues and create clothes that look tailored just for you.
Remember that accurate measurements form your foundation, while targeted adjustments like bust modifications and dart manipulation create professional results.
Practice these techniques on muslin first, then apply them to your favorite fabrics. With patience and these proven methods, you’ll achieve that coveted custom-fit look every single time.
- https://www.mirrorsize.com/blogs/applications-of-3d-body-scanning-technology-in-apparel-industry
- https://3dlook.ai/content-hub/body-scanning-technology-for-apparel/
- https://pmc.ncbi.nlm.nih.gov/articles/PMC11480043/
- https://experts.umn.edu/en/publications/analysis-of-body-measurement-systems-for-apparel-2
- https://store.3dmakerpro.com/blogs/3d-scanner/revolutionizing-fashion-apparel-with-3d-scanning

