This site is supported by our readers. We may earn a commission, at no cost to you, if you purchase through links.
Your measuring tape doesn’t lie, but sometimes we do.
Create a muslin test garment first – it’s like a dress rehearsal for your fabric.
This saves you from turning expensive material into expensive mistakes.
Pay attention to your fabric’s personality too.
Stretchy knits behave differently than crisp cotton.
If something feels off, trust your instincts and adjust accordingly.
Remember, patterns are suggestions, not commandments.
The real magic happens when you understand why certain adjustments work and others create new problems entirely.
Table Of Contents
Key Takeaways
- Create a muslin test garment first – you’ll catch fit issues before cutting expensive fabric and save yourself from costly mistakes
- Double-check your measurements against the pattern’s finished dimensions – your measuring tape doesn’t lie, but rushing through this step creates fitting disasters
- Pay attention to fabric grain alignment – proper placement prevents twisted seams and ensures your garment hangs correctly with a professional drape
- Trust your instincts when something feels off – patterns are suggestions, not commandments, so make adjustments when needed rather than forcing a poor fit
Sewing Pattern Basics
You’ll encounter three main pattern troubles that can derail your sewing project before you even start stitching.
Getting your measurements right, picking compatible fabric, and avoiding layout mistakes will save you hours of frustration and wasted materials.
This approach emphasizes the importance of complete concepts in ensuring a successful sewing project.
Common Sewing Pattern Mistakes
You’ll avoid most pattern errors by double-checking measurements before cutting.
Common sewing mistakes include ignoring fabric grain, skipping pattern markings, and rushing through cutting mistakes.
These measurement errors create fitting disasters that’re harder to fix later.
Pattern alterations become necessary when you don’t read instructions carefully or choose incompatible fabric for your design.
Understanding sewing machine basics is essential for achieving professional results and avoiding common mistakes, which can be prevented by following sewing guidelines and using the right fabric.
Importance of Accurate Measurements
Taking accurate measurements isn’t just helpful—it’s the foundation of successful sewing pattern troubleshooting.
When you skip this step, you’re setting yourself up for garment fit disasters that’ll have you pulling your hair out.
Use quality measurement tools and record your body proportions carefully, accounting for potential fabric shrinkage.
Remember, sewing pattern mistakes often stem from rushed measuring, so take your time with this essential step.
Choosing The Right Fabric for Pattern
Your fabric selection directly impacts pattern success and garment fit.
Fabric weight affects drape and structure – lightweight cottons work differently than heavy denims.
Consider texture options and color matching with your thread choice, and match fabric types to pattern requirements to avoid common fabric choice mistakes.
Avoid common fabric choice mistakes by testing fabric vocabulary against pattern recommendations before cutting.
Pattern Layout Guidelines
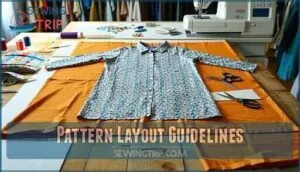
Proper pattern layout prevents costly mistakes and guarantees your finished garment looks professional.
You’ll save time and fabric by following placement rules, especially when working with directional prints that require careful alignment.
General Rules for Pattern Placement
You’ll save time and avoid headaches by following pattern placement fundamentals. Place pattern pieces on fabric’s lengthwise grain first, then crosswise grain pieces.
Pin patterns every 4-6 inches along edges, marking notches accurately for proper alignment. Check seam allowances match pattern requirements before cutting.
Smart fabric cutting starts with grain alignment—this prevents twisted seams and guarantees your garment hangs correctly, which is crucial for a professional finish and proper alignment.
Working With Directional Prints and Nap
With directional fabrics, you’ll need to plan your pattern placement carefully.
Print Placement becomes vital when working with stripes, plaids, or one-way designs.
Always lay pattern pieces in the same direction to maintain consistent fabric orientation.
For fabrics with nap like velvet or corduroy, run your hand across the surface to check directional cutting requirements.
This simple test prevents color variations and guarantees professional results.
Understanding the fabric nap direction is essential for achieving the desired texture and appearance in your sewing projects, ensuring you maintain the correct fabric orientation.
Grain Alignment for Better Drape
Proper grain alignment determines how your finished garment will hang and move on the body.
When you align pattern pieces with the fabric’s grain lines correctly, you’re working with the fabric weave rather than against it.
This creates natural drape control and prevents unwanted pulling or distortion.
Ignoring grain alignment causes fabric grain problems that lead to twisted seams and poor fit, making sewing pattern troubleshooting necessary later.
Understanding the fabric grain aligner tools is essential for achieving professional results in garment construction.
Troubleshooting Fitting Issues
You’ll encounter fitting problems with most commercial patterns, but spotting these issues early saves time and fabric.
Testing your adjustments on a muslin mock-up before cutting your final fabric prevents costly mistakes and guarantees a better-fitting garment, which is a key factor in achieving a better-fitting outcome.
Identifying and Fixing Bust Fitting Problems
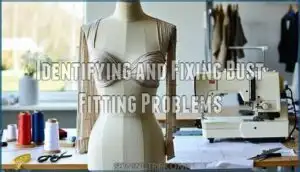
Bust fitting problems plague many sewists, but you can spot and fix them quickly.
Look for these telltale signs that scream "adjustment needed":
- Gaping necklines that create unflattering gaps at the bust area
- Pulling fabric that causes horizontal wrinkles across the chest
- Pointy or flat bust shapes from poorly placed darts
Most garment fitting problems stem from incorrect measurements or choosing pattern sizes based on other body areas.
Cup sizing matters more than you think – your bust measurement determines whether you need Full Bust Adjustments or Small Bust Adjustments.
Bust darts are your secret weapon for proper shaping.
Waist and Hip Fitting Adjustments
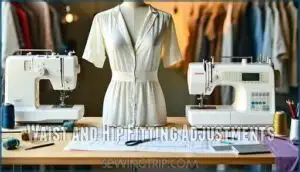
Waist and hip fitting problems plague most sewists, but you can fix them fast. Start with accurate measurements at your natural waist and fullest hip point.
For waist adjustments, add or remove fabric at side seams equally on front and back pieces.
Hip fitting requires redrawing the side seam curve and adding 2-4 cm ease for comfortable movement. Use the slash-and-spread method for hip width increases, or overlap pattern pieces to reduce width.
Small, incremental changes with frequent fittings prevent major alterations later.
Using Muslin Test Garments for Accuracy
Creating a muslin test garment acts like a dress rehearsal for your final project.
Test your pattern adjustments on cheap fabric before cutting the good stuff – it’s your safety net against expensive mistakes.
This inexpensive fabric lets you catch fit issues before cutting into your good material, reducing fitting errors by up to 75%.
Understanding muslin shrinkage factors is essential when working with this type of fabric.
- Cut your muslin using the same pattern pieces as your final garment
- Baste seams together with loose stitches for easy adjustments
- Try on frequently to identify areas needing pattern alterations
- Mark changes directly on the muslin with a fabric marker
Test garments save time, money, and frustration by revealing sewing pattern adjustments needed for proper garment construction.
Sewing Pattern Alterations
You’ll find that basic pattern alterations can solve most fitting problems without requiring advanced skills.
Simple techniques like lengthening or shortening pieces, adjusting dart positions, and making width changes at side seams will transform an ill-fitting pattern into your perfect match.
Basic Alteration Techniques for Beginners
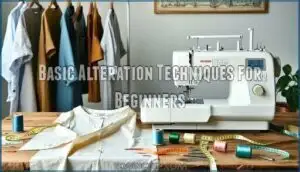
Start with simple length adjustments before tackling complex pattern alterations.
Shorten or lengthen garments at designated adjustment lines, typically marked on commercial patterns.
For width changes, add or remove fabric at side seams gradually.
Test your garment alteration skills on practice fabric first.
Remember that proper measurement tips and fabric choice impact your pattern fitting success substantially, and consider these factors to achieve the best results with your pattern fitting.
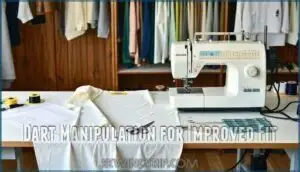
Dart Manipulation for Improved Fit
You’ll discover darts are like the tailors’ secret for shaping fabric to your body.
Move darts using slash and spread techniques to redistribute fullness where you need it most.
This simple dart manipulation transforms basic patterns into custom-fitted garments that actually flatter your silhouette.
Utilizing proper dart manipulation tools is essential for achieving a professional finish with the right tools.
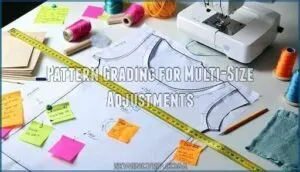
Pattern Grading for Multi-Size Adjustments
Pattern grading maintains proportional sizing across multiple sizes, transforming your single-size pattern into a complete size range.
You’ll follow specific grading rules that add or subtract precise measurements at key points. Size charts guide your grade rules, ensuring each scaled version fits properly.
This sewing pattern troubleshooting technique requires careful measurement and systematic pattern alteration advice for accurate multi-size adjustments. Understanding pattern grading techniques is essential for achieving well-fitting garments across various sizes.
Advanced Pattern Troubleshooting
You’ve mastered the basics, but now it’s time to tackle the trickier problems that can turn your sewing project into a frustrating puzzle.
These advanced troubleshooting techniques will help you identify and fix complex issues before they ruin your hard work.
Dealing With Puckered Seams and Skipped Stitches
Two main culprits cause puckered seams and skipped stitches: incorrect tension adjustment and poor needle selection.
Start with tension adjustment—loosen it for lightweight fabrics, tighten for heavy ones.
Replace dull needles immediately; they’re behind 80% of skipped stitches.
Match thread choice to fabric weight, ensuring proper seam alignment through careful stitch length settings for flawless sewing pattern troubleshooting results, which involves proper seam alignment.
Controlling Fabric Stretch With Stabilizers
Why does fabric stretch ruin your sewing projects?
Fabric stretch wreaks havoc on seams, causing puckering and distortion.
Cut-away stabilizers provide permanent support for stretchy fabrics, while tear-away options work for lighter knits.
Test your stabilizer choice on fabric scraps first.
Apply stabilizers to the wrong side using a pressing cloth.
Don’t over-stabilize—you’ll lose natural drape and flexibility.
Understanding fabric stabilizers is essential for achieving professional results in sewing projects, especially when working with stretchy fabrics and considering the importance of natural drape.
Preventing Unraveling Seams With Serging or Zigzag Stitch
Seams can fail without proper finishing.
Serging tips suggest using a 3- or 4-thread configuration for maximum durability on stretch fabrics.
Zigzag stitches work well on most home machines with 2.5mm length and 3-5mm width settings.
Test both seam finishes on fabric scraps first.
Serging trims and finishes simultaneously, while zigzag requires separate steps.
Secure thread ends with knots or seam sealant to prevent unraveling during wear.
To achieve professional results, mastering a seam finish technique is essential for garment durability and to ensure a long-lasting finish.
Frequently Asked Questions (FAQs)
What is the golden rule sewing pattern system?
What holds the key to solving your sewing struggles isn’t standard patterns—it’s the Golden Rule from Lutterloh System, which creates custom-fitted patterns using just two measurements.
You’ll draft perfect patterns in minutes.
What does "wrong side of pattern" mean in sewing?
The "wrong side of pattern" refers to the reverse or back side of your fabric where you don’t want visible stitching. You’ll place pattern pieces on this side for cutting.
What are the general guidelines for pattern layout?
Place pattern pieces on fabric’s straight grain, following layout diagrams. Check fabric width matches pattern requirements. Pin pieces efficiently to minimize waste. Mark notches and grain lines before cutting.
How do I transfer pattern markings to fabric?
Sarah struggled with crooked buttonholes until she learned proper pattern marking.
Use tailor’s chalk, fabric pens, or carbon paper to transfer notches, darts, and placement marks.
Test marking tools on fabric scraps first to verify they’ll wash out completely, ensuring a successful and proper application.
What causes pattern pieces to shift during cutting?
Pattern pieces shift during cutting when they’re not properly secured to fabric.
You’ll need to pin every few inches, use weights, or apply pattern weights at corners and edges to prevent movement while cutting.
Why dont my pattern pieces match up?
Over 60% of sewists report pattern piece misalignment issues.
Your pieces likely don’t match because you’re cutting inaccurately, skipping notch marks, or using incorrect seam allowances.
Double-check your pattern layout and cutting precision.
How do I adjust patterns for different heights?
For different heights, you’ll need to lengthen or shorten the pattern pieces between the waist and hem.
Add or remove length at designated adjustment lines, typically marked on commercial patterns.
Make the same adjustments to all related pieces like front, back, and sleeves.
Whats the best way to store cut patterns?
Like a well-organized treasure chest, store your cut patterns flat in large envelopes or folders.
Label each with project name and size.
Keep them in a dedicated drawer or hanging file system to prevent wrinkles and tears, and consider this as a complete method for organization.
Conclusion
As they say, "measure twice, cut once" – this wisdom applies perfectly to sewing pattern troubleshooting advice.
You’ve learned that successful pattern work starts with accurate measurements and muslin testing. Remember that fabric choice affects fit dramatically, and your instincts matter when something feels wrong.
Master these fundamentals: proper grain alignment, systematic fitting adjustments, and basic alteration techniques.
When you encounter problems like puckered seams or fitting issues, you now have the tools to diagnose and fix them quickly. Trust your skills and keep practicing.
- https://homesteading.com/how-to-thread-sewing-machine/
- https://courses.sewcanshe.com/courses/all-sewcanshe-printable-tutorials
- https://babylock.com/top-5-reasons-you-should-have-a-serger
- https://sewgoth.com/do-you-really-need-a-serger-overlocker/
- https://www.simplykyra.com/blog/easily-unravel-and-tie-off-your-serger-ends/

