This site is supported by our readers. We may earn a commission, at no cost to you, if you purchase through links.

Your sewing machine’s dial holds 20+ stitch options, yet most sewists stick to one or two familiar choices. That’s like owning a toolbox and only using a hammer—you’ll get things done, but not with the precision and durability your projects deserve.
The right stitch transforms how fabric behaves under your needle: it determines whether seams stretch with jersey knits or stay crisp on cotton, whether hems vanish into silk or hold firm through denim’s bulk. Mastering stitch selection isn’t about memorizing technical charts—it’s about understanding which mechanical patterns solve specific fabric challenges. Once you know how to match stitches to materials and project needs, you’ll stop second-guessing every seam and start creating garments built to last.
Table Of Contents
- Key Takeaways
- What Are Sewing Stitches and Why Do They Matter?
- Essential Stitches Every Sewist Should Know
- Matching Stitches to Your Fabric Type
- Choosing Stitches Based on Project Needs
- Machine Settings for Optimal Stitch Quality
- Troubleshooting Common Stitch Problems
- Frequently Asked Questions (FAQs)
- Conclusion
Key Takeaways
- Matching stitches to fabric type—straight stitch for wovens, zigzag stitch for knits, specialized needles for leather—prevents puckering, broken seams, and stretched-out hems that compromise garment longevity.
- Essential stitches like straight stitch, zigzag stitch, backstitch, blind hem, overcast, and basting cover nearly every sewing project, from basic seams to invisible hems and edge finishing.
- Machine settings—tension balance, needle size (60/8 for silk to 110/18 for denim), thread weight, and stitch length—must align with fabric thickness and stretch requirements for professional results.
- Most stitch problems (skipped stitches, puckering, thread breakage) stem from fixable issues: wrong needle size, improper threading, mismatched tension, or dull needles that require systematic troubleshooting.
What Are Sewing Stitches and Why Do They Matter?
Sewing stitches are the building blocks of every project you make, and choosing the right one can mean the difference between a garment that lasts years and one that falls apart after a few wears.
If you’re working with stretchy materials, learning how to serge knit fabric will help you create seams that move without breaking.
Choosing the right sewing stitch determines whether your garment lasts years or falls apart after a few wears
Understanding the basics of stitch types, settings, and selection gives you control over your results—whether you’re hemming curtains or constructing a custom jacket. Let’s start by breaking down what you need to know before you even thread your machine.
The Difference Between Hand and Machine Stitches
Hand stitches and machine stitches differ in stitch formation, tension control, and seam durability. Understanding these differences helps you choose the right approach.
- Hand stitching relies on manual knotting and individual thread tension you control entirely
- Machine stitches use presser feet and feed dogs for uniform tension automatically
- Hand work allows precise control for delicate repairs
- Machine accuracy delivers consistent stitch length and faster completion
- Hand sewing adds character; machines excel at strong, durable seams
How Stitch Selection Affects Your Project
Your stitch selection impacts fabric behavior, seam durability, and final aesthetics more than you might expect. Choose a stitch incompatible with your fabric type, and you’ll face puckering or broken seams.
Match stitch types to fabric compatibility, and you’ll preserve drape while preventing fraying. The right sewing techniques guarantee your projects look polished and withstand wear—wrong choices compromise both strength and appearance.
Understanding Stitch Length and Width Settings
Once you’ve matched your stitch to fabric, two machine settings seal the deal: stitch length and width.
Length controls spacing between needle penetrations—usually 2 to 3 millimeters for lightweight materials, longer for speed, shorter for strength.
Width determines zigzag spread, affecting fabric tension and thread balance.
Together, they govern seam integrity and stitch density.
Always test your sewing machine settings on scraps first.
Essential Stitches Every Sewist Should Know
You don’t need to master every stitch on your machine to start sewing successfully. A handful of core stitches will cover nearly every project you tackle, from basic seams to finishing touches.
Here are the six essential stitches that belong in every sewist’s toolkit.
Straight Stitch for Basic Seams
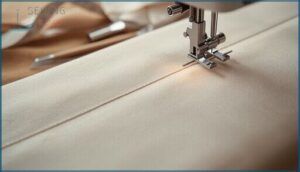
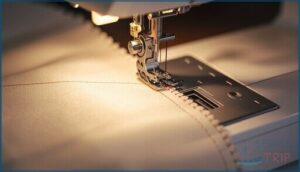
Think of the straight stitch as your workhorse—it creates a clean, straight line of stitches that holds most basic seams together.
You’ll set your stitch length between 2.0 and 3.0 millimeters for woven fabrics, maintaining consistent seam allowance and stitch tension. Match your thread color to the fabric grain, backstitch at both ends, and keep your sewing speed steady for professional results.
Zigzag Stitch for Stretch and Finishing
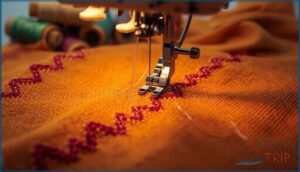
The zigzag’s angled path weaves across raw edges to prevent fraying—your go-to for edge finishing on woven fabrics. You’ll adjust width from narrow to medium and keep stitch length short for tight edge binding.
This adaptable option manages stretch seaming on knits, fabric hemming without bulk, elastic attachment at waistbands, and trim finishing on lightweight materials, making it essential in any sewing stitches guide for proper stitch selection.
When tension issues arise or you’re unsure which stitch to use, check this guide to common machine stitch uses for quick troubleshooting tips.
Backstitch for Strong Repairs
When repairs demand resilience, you’ll reach for the backstitch—a dense lock formed by sewing in reverse, then forward.
This fundamental handsewing technique creates interlocking loops that resist pulling apart at seams, making it your strongest option for seam strengthening and fabric durability.
Apply it at stress points using short to medium stitch length, securing starts and ends to prevent unraveling through wear.
Blind Hem Stitch for Invisible Hems
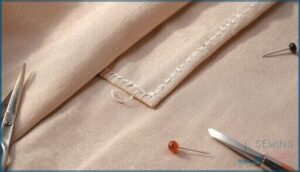
When you want a hem that disappears from view, the blind hem stitch becomes your essential technique. This nearly invisible garment hemming method uses a specialty foot and fabric folding method that catches only a few threads on each zigzag bite, keeping the straight stitch hidden inside the fold.
Master this stitch concealment strategy, and you’ll achieve professional hem finish techniques on pants, skirts, and curtains without visible stitching showing through. You can learn more about adjusting stitch width and length settings to guarantee your hem is both secure and invisible.
Overcast Stitch for Preventing Fraying
Raw edges on garments unravel quickly without proper fabric edge finishing, which is why the overcast stitch becomes essential for fray prevention. This edge finishing technique wraps thread around fabric edges, creating durable seam finishing that stops threads from pulling loose. Learning more about the overcast stitch technique for fray prevention can help you achieve cleaner, longer-lasting finishes on a variety of sewing projects.
Here’s how to apply overcast techniques for effective fabric stabilization:
- Position your fabric edge under the overcasting foot about 1/8 to 1/4 inch from the edge
- Set your machine to zigzag or overcast mode with 2-3mm width
- Stitch along raw edges to create seam reinforcement that prevents ongoing unraveling
You’ll find this stitch indispensable for hemming and finishing seam allowances on everything from cotton shirts to knit garments.
Basting Stitch for Temporary Holds
Think of basting stitches as scaffolding for your sewing—temporary holds that keep fabric aligned during fitting and construction. You’ll use long, loose stitches (hand or machine) to position seams, test garment fit, or align zippers before permanent stitching. Once you’ve confirmed everything sits right, baste removal is simple: snip and pull without distorting your fabric.
This foundation step in fabric preparation ensures your final seams land exactly where you planned them.
| Basting Techniques | Best For | Removal Method |
|---|---|---|
| Hand basting | Delicate fabrics, precise alignment | Gentle thread lift with scissors |
| Machine basting | Large projects, multiple layers | Seam ripper along stitch line |
| Diagonal basting | Preventing shift in both directions | Careful snipping at cross points |
Matching Stitches to Your Fabric Type
Your fabric choice should drive your stitch selection—not the other way around. Different materials respond to stitches in unique ways, and using the wrong combination can lead to puckered seams, broken threads, or stretched-out hems.
Let’s match the right stitches to five common fabric categories you’ll encounter in your sewing projects.
Best Stitches for Woven Fabrics
Woven fabrics like cotton, poplin, and linen thrive with the right stitch choices. Here’s what works best for seam finishing and edge treatment:
- Straight stitch for clean, strong seams on most woven fabric types
- Overcast stitch to lock edges and prevent fraying without a serger
- Blind hem stitch for invisible hems on trousers and skirts
- French seams for light wovens needing enclosed edges
- Topstitching to stabilize curves and add professional detail
Match your stitch density and fabric compatibility for impeccable results.
Stretch Stitches for Knits and Jersey
Knit fabric selection demands stretch stitch techniques that move with the material. Your machine’s narrow zigzag preserves jersey seam construction without splitting, while dedicated stretch stitches offer even better flex.
Use a ballpoint needle and polyester elastic thread options to prevent snagging. For knit hem finishing, test your stretch stitch on scrap fabric first—dial in slightly looser tension than you’d use for wovens, and you’ll nail professional results.
Handling Delicate Fabrics Like Silk and Chiffon
Moving from jersey to sheerer materials requires a gentler approach. Silk fabric care and chiffon sewing tips start with delicate stitching using fine needles—silk or micro-tex sizes prevent snagging. Keep your stitch length short for clean seams without fraying.
- Use a pressing cloth for gentle ironing on low heat to avoid scorching
- Test fabric handling techniques on scraps before committing to your project
- Choose French seams to hide raw edges and create a polished finish
Stitching Heavy Materials Like Denim and Canvas
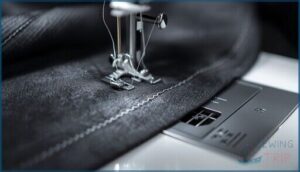
Heavy fabric demands a shift in your approach. Denim stitching and canvas sewing require sturdy needles—size 90/14 to 110/18—plus thick threads that won’t snap under stress.
Longer stitch lengths of 3.0 to 4.0 mm prevent perforation while keeping seams strong. Your straight stitch remains reliable here, but consider adding reinforcement stitches at stress points. Industrial machines handle these fabric types best, though a walking foot improves feeding on standard models.
Working With Leather and Vinyl
Leather and vinyl require specialized stitch selection and preparation. Use a wedge needle sized 90/14 to 110/18 with a walking foot to prevent slipping.
Stitch length should extend to 3.5 to 4.0 mm to avoid perforating these non-woven fabric types. Edge finishing with burnishing tools gives leather a polished look, while vinyl cleaning with mild soap preserves the surface after stitching completes your material selection.
Choosing Stitches Based on Project Needs
Your fabric matters, but so does what you’re actually trying to build. A hem needs different handling than a seam, and a stress point like an armhole requires extra muscle compared to a decorative accent.
Let’s break down which stitches work best for the specific jobs your project demands.
Seam Construction Stitches
When you’re building a seam, your stitch choice determines whether it’ll hold or fail under stress. Straight stitch creates clean, durable seams on woven fabrics with proper stitch tension.
Zigzag stitch adds fabric stretch accommodation for knits. Stretch stitches prevent breakage on jersey.
Overlock stitch mimics serged edges for seam finishing. Thread selection and seam reinforcement matter just as much as the stitch itself.
Hemming Stitch Options
Your hem finish depends on stitch visibility and fabric behavior.
Blind hem stitch keeps the right side nearly invisible on woven materials.
Straight stitch works for folded hems with visible topstitching.
Zigzag stitch or stretch stitches maintain elasticity on knits.
Edge binding requires narrow rolled hems on lightweight silk.
Each option balances durability with the clean finish you want.
Reinforcement Stitches for Stress Points
Stress zones like pocket corners and zipper ends demand more than a single seam.
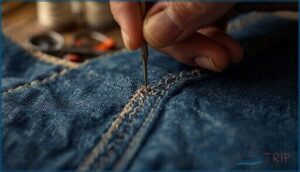
Box X stitch spreads load across multiple thread paths, while bartacks create dense anchors at belt loops.
Double stitching shares tension along parallel lines in underarm areas.
Bar tacks lock strap attachments, and cross stitch patterns stabilize joints.
Higher stitch density at these points prevents breakage when your garment works hardest.
Decorative Stitches for Embellishment
Embroidery stitches transform plain seams into artful details. You’ll find feather stitch creates flowing borders, while satin fill covers motifs with smooth, dense threads.
French knot and bullion knot add raised texture—perfect for flower centers or scattered accents. Cable stitch weaves thick decorative lines along edges.
These stitch types let you personalize everything from cuffs to collars with unique embellishment.
Buttonhole and Specialty Function Stitches
Buttonhole creation demands precision—you’re punching a hole in your fabric and asking it not to fall apart. Modern buttonhole stitches wrap dense zigzag patterns around the opening, while bartack techniques lock both ends against the stress of repeated buttoning.
Consider these buttonhole variants for different needs:
- Vertical buttonholes for standard shirt plackets and light-duty closures
- Horizontal buttonholes when buttons pull sideways under tension
- Keyhole buttonholes for coats and jackets with larger, heavier buttons
- Eyelet style for decorative stitches on belts or corset-style garments
Fabric allowance matters—your opening width should match button diameter plus 1/8 inch for smooth passage. Edge finishing with stabilizer prevents puckering on delicate weaves.
Machine Settings for Optimal Stitch Quality
Getting the right stitch isn’t just about choosing the pattern on your machine—it’s about dialing in the settings that make that stitch perform.
Your machine’s tension, needle, thread, and stitch length all work together to create clean, professional results. Here’s how to adjust each setting so your stitches come out perfect every time.
Adjusting Tension for Different Stitches
Your upper thread tension should balance with the bobbin thread so stitches lie flat on both sides. Start by testing on a fabric scrap that matches your project’s weight and weave.
Adjust in small increments—denser fabrics need higher tension, while knits benefit from lower settings to maintain stretch. Straight stitches use mid-level tension, but zigzag and decorative stitches often require slightly tighter calibration to prevent looping.
Selecting The Right Needle Type and Size
Your needle selection matters as much as tension. Match needle sizes to fabric thickness—size 60/8 for sheer silk, 90/14 for denim, 100/16 for canvas.
Needle material affects performance: titanium-coated types stay sharp longer in heavy fabrics, while stainless steel prevents snagging with metallic threads. Ballpoint needles prevent skipped stitches on stretch fabrics by sliding between fibers instead of piercing them.
Thread Weight and Compatibility
Thread selection goes hand in hand with needle sizing. A 40 weight thread works for most cotton fabric, while 30 weight suits denim seams.
Polyester resists stretching, making it ideal for knits, whereas cotton gives natural fabrics better hand. Match thread weight to fabric density—heavier thread on canvas, lighter on silk—to maintain stitch balance and prevent tension control problems on your sewing machine.
When to Change Stitch Length and Density
Stitch optimization changes as fabric thickness increases. For woven cotton, a 2.5 mm stitch length balances seam durability with clean appearance.
When you shift to denim or canvas, lengthen to 3.5 mm so you don’t stress the needle. Increase stitch density on knits to prevent gapping, or loosen it for basting. Your stitch selection depends on thread weight and project demands—test first.
Troubleshooting Common Stitch Problems
Even experienced sewists hit roadblocks when stitches don’t cooperate.
The good news is that most stitch problems stem from a handful of fixable issues—and once you know what to look for, you can troubleshoot them quickly.
Let’s walk through the most common stitch malfunctions and how to get your machine back on track.
Fixing Skipped or Uneven Stitches
When gaps appear along your seam line, you’re likely dealing with skipped stitches caused by a bent or dull needle, improper needle size, or incorrect threading. Start your stitch correction by replacing the needle and rethreading completely.
For uneven stitches, check your needle alignment and make sure proper fabric feeding occurs through the presser foot. Machine calibration and troubleshooting these basic elements solves most stitch density problems before tackling tension issues.
Resolving Thread Tension Issues
Balance is everything when tension issues create loose loops or tight bunches in your stitches.
Start troubleshooting by checking your bobbin adjustment and tension settings—make certain both upper thread and bobbin thread pass smoothly through all guides.
Improper tension disc seating causes uneven stitches more often than actual dial settings.
Rethread completely with compatible thread weight, then test stitch balance on scrap fabric before adjusting dials.
Preventing Fabric Puckering
Puckers form when fabric tension exceeds stitch regulation, creating ripples that mar your seam balance. Lower your presser foot pressure on lightweight fabric types to prevent compression during feeding.
Choose shorter stitch density settings—longer stitches (3-4mm) allow fabric relaxation on delicate materials. Wrong tension issues cause puckering more than skipped stitches or uneven stitches.
Always test your settings on scraps before committing to your final piece.
What to Do When Stitches Break or Loop
Thread breakage signals your needle eye has roughness or your tension’s cranked too tight for the fabric weight. Check for burrs along the needle shaft and replace immediately—damaged needles shred thread under stress.
Loop prevention tips start with proper threading through every guide. Balance your tension adjustment techniques between upper and lower threads to eliminate stitch breakage and skipped stitches completely.
Frequently Asked Questions (FAQs)
How to choose what stitch to use?
You’d think stitch selection involves mystical divination, but it’s actually straightforward: match your stitch to fabric type, project purpose, and seam requirements.
Consider stretch needs, edge finishing, and stress points before threading your machine.
What does the stitch selection do on a sewing machine?
The stitch selection dial or button determines which stitch type your sewing machine forms—straight, zigzag, or decorative—controlling how fabric pieces join, how edges finish, and which sewing technique suits your fabric compatibility needs best.
What are the 7 types of stitches?
Your machine offers dozens of stitches, yet only seven basic stitches handle nearly every sewing task you’ll encounter.
These fundamental stitch types—straight, zigzag, backstitch, blind hem, overcast, basting, and buttonhole—form the foundation of all machine stitches and hand stitches.
What is the stitch pattern selector in sewing?
Your sewing machine’s dial or digital control lets you choose from built-in stitch designs—straight, zigzag, decorative—and automatically adjusts needle movement, presser foot position, and thread path for each pattern.
How to fix uneven stitches on fabric?
When your seams look like a roller coaster, start with tension adjustment and needle replacement.
Rethread completely, test stitch density on scraps, and master fabric handling to eliminate skipped stitches and tension issues.
What causes skipped stitches while sewing?
Your needle mismatch is often the culprit. Incorrect thread tension, bobbins issues, improper fabric feed, and poor machine maintenance also create skipped stitches.
Check each element systematically to resolve uneven stitches effectively.
How to sew delicate fabrics without damage?
Delicate materials demand precision handling—think of them as fragile glass requiring gentle handling.
You’ll need ultra-sharp needles size 60-70, fine thread use, and reduced thread tension to prevent fabric snags and distortion on sheer fabric types.
What stitch works best for stretchy lace?
A narrow zigzag stitch works best for stretchy lace—set it to 5–5mm length and 3–4mm width. This stretch stitch preserves elasticity while preventing edge fraying on delicate stretch fabrics.
How to prevent puckering on lightweight fabrics?
Balance thread tension and choose a longer stitch length to reduce compression.
Pre-wash your fabric, use a fine needle, and test on scraps first—this prevents puckering while maintaining seam stability.
Can I use decorative stitches on heavy fabrics?
You can use decorative stitches on heavy fabrics like denim or canvas if you add fabric stabilizers underneath.
Choose lower stitch density patterns, sharp needles, and sturdy thread selection to prevent puckering and guarantee clean results.
Conclusion
No one expects you to memorize every stitch on that dial—but knowing which ones solve real problems? That’s the difference between wrestling with your machine and working in quiet partnership with it.
This sewing stitch selection guide gives you the confidence to open a pattern, assess the fabric, and dial in the exact mechanical response your project demands. Stop guessing. Start stitching with intention, and watch every seam prove you made the right choice.
- https://www.schmetzneedles.com/needle-know-how/
- https://www.singer.com/blog/sewing-tips-and-techniques/understanding-thread-tension
- https://thriveworkwear.com/blogs/resources/reinforced-stitching-workwear
- https://www.best-dressed-bears.com/blogs/news/choosing-the-right-sewing-machine-needle-for-your-project
- https://www.gloryallan.com/blogs/news/the-ultimate-list-of-essential-sewing-tools-for-home-sewists

