This site is supported by our readers. We may earn a commission, at no cost to you, if you purchase through links.
Start by shortening your stitch length to 2-2.5mm for better control around curves.
Pin strategically, matching notches and center points before you begin.
Sew slowly—rushing curves is like taking a sharp turn at highway speed.
For outer curves, clip perpendicular to the seam line every half-inch.
Inner curves need small triangular notches to prevent bunching.
Press carefully with a tailor’s ham to maintain that perfect curve shape.
The right presser foot makes all the difference, and there’s a surprising trick with stay tape that’ll change everything.
Mastering these techniques will help you achieve a professional finish, making your projects go from wonky to wow.
Table Of Contents
Key Takeaways
- Shorten your stitch length to 2-2.5mm – You’ll gain better control around curves and prevent that wonky, angular look that screams amateur.
- Clip strategically after sewing – Cut perpendicular to outer curves every half-inch and make small triangular notches on inner curves to eliminate bunching and allow fabric to lay flat.
- Sew slowly and pivot frequently – You can’t rush curves without creating distortion, so lift your presser foot every few stitches while keeping the needle down for precise fabric control.
- Press with a tailor’s ham – This curved pressing tool maintains your seam’s natural shape and prevents flattening, transforming your curved seams from homemade to professional-looking.
Sewing Curved Seams Basics
Sewing curved seams perfectly starts with three essential foundations that’ll make or break your project.
You’ll need the right stitch length, proper fabric stabilization, and the correct tools to transform those tricky curves from frustrating challenges into smooth, professional-looking seams.
The correct combination of these elements will help you achieve professional-looking results.
Setting Stitch Length
The perfect curve stitch length makes all the difference between smooth, professional results and puckered disasters.
Here’s your roadmap to curved seams sewing success:
- Sharp curves: Use 1.8-2.0mm stitch length for maximum control
- Gentle curves: Standard 2.4-2.6mm works perfectly
- Test first: Always try different settings on scrap fabric testing
- Avoid extremes: Very short stitches cause puckering and make easing removal difficult
Shorter stitches give you gradual direction shifts, preventing that angular look that screams "amateur hour".
Stabilizing Fabric
After setting your stitch length, you’ll need fabric stabilization to prevent stretching during sewing curved seams.
Staystitch benefits include maintaining fabric shape—sew just inside seam allowances on bias cuts.
For interfacing types, choose lightweight fusible for structured areas. Knit tape works perfectly on stretchy fabrics, while starch application adds temporary stability.
Remember, bias stability decreases when fabric’s pulled diagonally, so staystitching becomes your safety net against unwanted stretching.
For knit fabrics, seam stabilization is particularly important to prevent premature stretching.
Choosing Right Tools
Now that your fabric’s stable, let’s talk sewing tools for sewing curved seams. The right gear can make sewing curved fabric feel less like wrestling a stubborn noodle.
Here’s what helps:
- Presser Foot Types—open-toe or clear for better visibility.
- Specialty Shears—pinking or small scissors for clean trimming.
- Tailors Ham—essential for pressing smooth, pro-level curves.
For ideal visibility, consider using an open toe presser.
Mastering Convex Curves
Convex curves curve outward like the rounded edge of a collar or pocket flap, and they’re actually easier to sew than you might think.
You’ll master them quickly by following three simple steps: marking your seam line clearly, sewing with control, and clipping strategically to eliminate bulk.
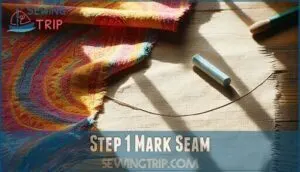
Step 1 Mark Seam
Before you begin sewing curved fabric, grab your fabric markers and create a roadmap for success.
Mark your seam allowance precisely using marking tools—think of it as drawing a GPS route for your needle.
Accurate marking prevents wonky curves and guarantees precision stitching every time.
Whether you’re tackling challenging convex curves or planning complex projects, clear seam lines become your best friend for flawless sewing curved seams results, ensuring successful outcomes.
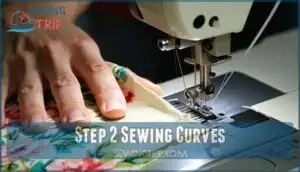
Step 2 Sewing Curves
Smooth sailing starts with gentle guidance—keep your hands steady to maintain fabric control as you sew curves.
Focus on needle position, following your marked line for a consistent allowance. Don’t rush; slow down to prevent bunching.
A little patience goes a long way with sewing curved seams. Remember, sewing curves tips always include steady hands, sharp eyes, and calm nerves!
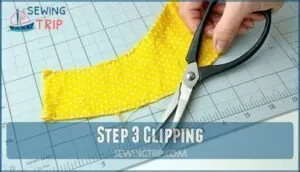
Step 3 Clipping
Once you’ve sewn your convex curve, grab those sharp fabric scissors for the next move.
Start clipping into the seam allowance every half-inch, cutting perpendicular to your stitching line. Each clip should stop just short of your thread—think of it as giving your fabric room to breathe.
This clipping technique releases curve tension and prevents that dreaded bunching when you turn your project right-side out. This is important for achieving crisp seams, which helps in preventing errors.
Sewing Concave Curves
Concave curves dip inward like a bowl, creating one of sewing’s trickier challenges since you’re working with less fabric on the inner edge.
Don’t worry though—with the right technique of adding proper seam allowances, marking center points, and carefully easing the fabric, you’ll master these inward curves just like the pros.
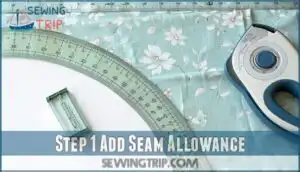
Step 1 Add Seam Allowance
Now you’ll tackle concave curves, which require a different approach than their convex cousins.
Start by adding a 1/4-inch seam allowance to concave pieces rather than the standard 5/8-inch used for convex curves.
This narrower Seam Allowance Width prevents bunching and creates smoother results.
Use Accurate Marking Tools like a Curved Ruler to maintain Consistent Seam Allowance measurements throughout your project.
Pattern Adjustment Tips suggest checking your seam allowance twice before cutting—it’s easier than fixing wonky sewing curves later.
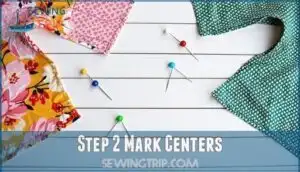
Step 2 Mark Centers
Accurate marking begins with finding the midpoint of both curved pieces.
Divide each curve evenly by folding or measuring, then mark these center points with chalk or pins.
These matching notches become your alignment guides, ensuring proper pin placement when joining the pieces.
This simple step prevents wonky seams and saves you from the headache of uneven curved seams later.
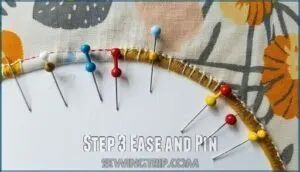
Step 3 Ease and Pin
Now you’ll distribute fabric evenly along your marked seam line.
Place pins perpendicular to the curve every quarter-inch, easing the convex piece gently into the concave one. This prevents puckers by securing layers without stretching.
Match your marked centers first, then work outward, pinning strategically, using directional sewing techniques to maintain symmetry.
Use these techniques to work from the same side on matching pieces, which helps prevent fabric stretching during construction.
Top 8 Sewing Tools
You’ll need the right tools to tackle curved seams like a pro, and these eight essentials will transform your sewing experience from frustrating to fabulous.
Having these specific tools in your arsenal makes the difference between lumpy, amateur-looking curves and smooth, professional results that’ll make you proud to show off your work.
1. White Fusible Knit Stay Tape
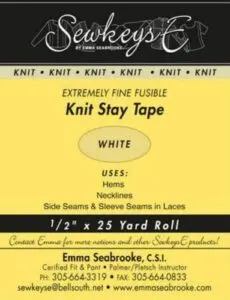
Nothing beats white fusible knit stay tape for keeping curved necklines and armholes perfectly stable.
You’ll apply this 1/2-inch wonder to your fabric’s wrong side before sewing, pressing gently in small increments to follow the curve’s natural shape.
Its knit construction flexes with your fabric while the fusible backing creates lasting hold.
Test it first on scraps—your curves will thank you later.
This invisible hero prevents stretching and maintains professional-looking seams through countless wears and washes.
Best For: Sewers working with knit fabrics or lightweight materials who need professional-looking curved seams that resist stretching and distortion.
- Requires testing on fabric scraps first to ensure proper heat settings and compatibility with specific materials
- Must be precisely aligned and applied in small increments for curves, making application more time-consuming than straight seams
- Not necessary for stable knits like interlock, limiting its usefulness to only certain fabric types
- Provides invisible stabilization that maintains fabric flexibility while preventing stretching in high-stress areas like necklines and armholes
- Easy application with fusible backing that creates lasting hold through repeated washing and wearing
- Knit construction allows smooth shaping along tight curves without puckering or adding bulk to delicate fabrics
2. Open Toe Appliqué Presser Foot
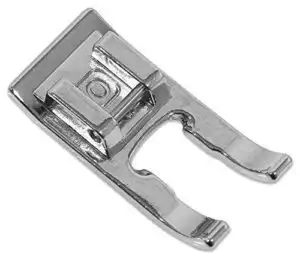
You’ll discover that this specialized foot becomes your secret weapon for sewing precise curved seams.
The open toe design gives you crystal-clear visibility of your needle’s path, eliminating the guesswork that often leads to wobbly curves.
Its wide channel underneath glides smoothly over dense decorative stitches without jamming, making it perfect for appliqué work and intricate sewing.
This foot transforms tricky curved seams into manageable tasks, giving you the confidence to tackle even the most challenging projects with professional-looking results.
Best For: Sewists who need clear visibility and control when handling detailed appliqué, embroidery, or intricate curved seams.
- Open toe design delivers a clear view for accurate needle placement.
- Wide channel prevents jams on dense decorative stitches.
- Enhances confidence and precision for complex projects.
- Compatibility must be checked for specific machine models.
- Requires occasional cleaning to maintain smooth operation.
- Not ideal for basic straight stitching or all-purpose needs.
3. Clear Open Toe Embroidery Foot
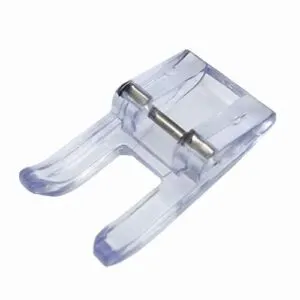
This transparent foot transforms your curved sewing experience by offering crystal-clear visibility of every stitch.
You’ll navigate tight curves with confidence as the open design lets you see exactly where your needle enters the fabric. The tunnel underneath prevents jamming when crossing dense embroidery or multiple fabric layers.
Compatible with most low-shank machines, it’s perfect for appliqué work and decorative stitching on curved seams.
The marked guidelines help maintain parallel rows, while the channel design guarantees smooth fabric feeding over bulky areas—making even the trickiest curves manageable, with smooth fabric feeding.
Best For: Precision-focused sewists who need superior visibility and control when working with curves, appliqué, or decorative stitches on low shank machines.
- Open toe and transparent design maximize stitch visibility for accurate curve navigation.
- Tunnel underside and marked guidelines help ensure smooth, jam-free stitching and precise parallel rows.
- Snap-on compatibility with most low shank machines means quick, easy foot changes for different techniques.
- Not compatible with high shank sewing machines or some Singer models without an adaptor.
- Lacks included accessories or information about materials and long-term durability.
- No warranty or maintenance guidance provided.
4. Open Toe Walking Foot with Guide
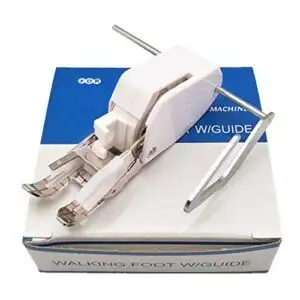
When tackling challenging curved seams, you’ll find the Open Toe Walking Foot with Guide becomes your best friend for maintaining consistent stitching.
This screw-on presser foot works with all low shank machines and enables smooth curved sewing without constantly straightening fabric.
The adjustable guide lets you watch the fabric edge against the seam guide instead of focusing on the needle, making straight seams effortless.
Perfect for topstitching, decorative work, appliqué, and quilting projects requiring precision.
Best For: Quilters and sewists who need precise, consistent stitching on curved seams, topstitching, appliqué, and decorative projects using a low shank, top-loading sewing machine.
- Only compatible with low shank, top-loading drop-in bobbin machines
- Requires proper attachment and adjustment for best results
- Regular maintenance and cleaning needed to keep performance optimal
- Enhanced visibility and control for accurate stitching
- Adjustable guide ensures even, parallel rows
- Universal fit for most low shank sewing machines
5. Yalis Sewing Clips Assorted Colors
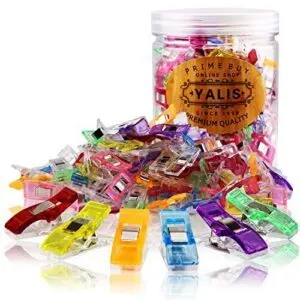
When you’re wrestling with tricky curved seams, these colorful 100-piece sewing clips become your secret weapon.
Unlike pins that can slip or poke, Yalis clips grip multiple fabric layers securely with their wide opening design.
The measurement markings at 5mm, 7mm, and 10mm help you maintain consistent seam allowances around those stubborn curves.
Their flat base feeds smoothly under your presser foot, while the bright colors let you organize complex projects, and they’re child-safe – no more dodging flying pins during late-night sewing sessions, making them a great tool for a smoothly working environment.
Best For: Anyone who wants a safer, more precise, and organized alternative to pins for sewing, quilting, and crafting, especially when working with curves or projects involving children.
- Random color assortment means you can’t choose specific colors
- Clips may be bulky for extremely delicate or small projects
- May not completely replace pins for very intricate or tight corners
- Securely holds multiple fabric layers with a wide opening and flat base for smooth machine feeding
- Measurement markings help maintain consistent seam allowances and accuracy
- Child-safe design and bright colors improve project organization and safety
6. Fiskars SoftGrip Pinking Shears Fabric Shears
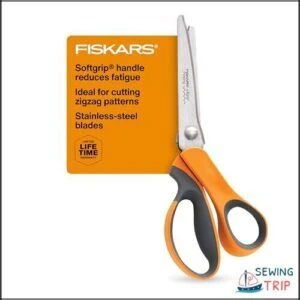
The zigzag edge from pinking shears prevents fabric fraying—a lifesaver when working curved seams that need clean finishes.
You’ll appreciate the Fiskars SoftGrip’s bent handle design that keeps your fabric flat while cutting, making it easier to trim seam allowances precisely.
The stainless steel blades cut through everything from cotton to light leather, while the ergonomic grip reduces hand fatigue during long sewing sessions.
These shears work beautifully for finishing curved edges before pressing.
Best For: Crafters, quilters, and sewists who need clean, zigzag cuts to prevent fabric fraying on various materials.
- Comfortable SoftGrip handle reduces hand fatigue.
- Stainless steel blades offer lasting sharpness and precision.
- Cuts a clean zigzag edge ideal for seam finishing.
- Not suitable for extremely thick materials.
- May require occasional sharpening for best performance.
- Larger size can be unwieldy for small, detailed cuts.
7. SINGER Pinking Shears Zig Zag Fabric
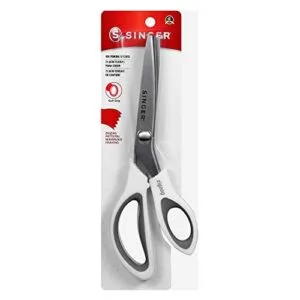
These vintage 9-inch stainless steel shears create precise zigzag cuts that naturally prevent fabric fraying – no serger required.
The heavy-duty construction handles multiple fabric layers while the specialty sawtooth blades maintain their sharpness project after project.
You’ll find these particularly effective on stable woven fabrics where the zigzag pattern keeps seams flat without additional finishing.
While they’re not essential for every curved seam, they’re invaluable when working with fabrics prone to unraveling during construction, making them a great tool for preventing fabric fraying.
Best For: Crafters and sewists who want to finish woven fabric edges with a clean zigzag cut that prevents fraying.
- Most effective only on stable fabrics; not always ideal for knits.
- Not necessary for every sewing or crafting project.
- Can be harder to use on tight curves or delicate materials.
- Heavy-duty stainless steel blades stay sharp and cut smoothly through multiple layers.
- Sawtooth design minimizes fraying and keeps seams flat without extra finishing.
- Comfortable grip makes cutting pain-free, even on big projects.
8. Prym Blue Tailors Ham for Pressing
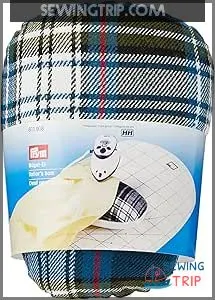
Revolutionize your curved seam pressing with the Prym Blue Tailors Ham, measuring 20cm x 14cm x 10cm.
This dual-surfaced tool features cotton on one side for high-heat fabrics and wool for delicate materials.
Its firm filling maintains shape under steam, perfectly supporting princess seams, darts, and necklines.
Simply match your seam’s curve to the ham’s contour, press in sections, and watch flat surfaces become beautifully shaped, it’s like having a professional tailor’s secret weapon in your sewing room.
Best For: Home sewers and professional tailors who regularly press curved seams and want professional results.
- Supports precise shaping for curved areas like necklines, darts, and princess seams.
- Dual surfaces handle a wide range of fabric types and ironing temperatures.
- Durable, long-lasting construction with dense filling holds shape under heavy use.
- Not suitable for pressing large, flat sections.
- Needs careful handling to avoid damaging the shell or seams.
- Bulkier to store than a standard flat pressing board.
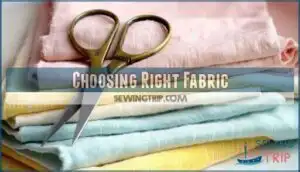
Choosing Right Fabric
You’ll find that cotton fabrics are your best friend when sewing curved seams because they’re forgiving and hold their shape beautifully.
Skip the heavyweight materials and slippery fabrics – they’ll fight you every step of the way and turn your smooth curves into a wrestling match.
Cotton Fabrics
Cotton’s natural fiber properties make it your go-to choice for sewing curves.
Cotton weaves offer stability while remaining pliable enough to ease around corners without fighting you.
Medium-weight cotton prints provide excellent feedback under your presser foot, letting you feel when fabric wants to shift.
Cotton blends add just enough stretch for forgiving curved seams, while pure cotton sourcing guarantees consistent results across your sewing techniques, making cotton a great choice for sewing due to its natural fiber properties.
Avoiding Heavyweight Materials
Heavy fabrics like denim, canvas, and thick wool create unnecessary bulk around curves, making smooth sewing nearly impossible.
These fabric types resist bending and create stiff, unflattering seam finishes.
Instead, choose lightweight alternatives with better fabric drape—cotton poplin, quilting cotton, or lightweight linen.
Proper fabric handling starts with smart fabric selection.
For example, natural fibers offer breathability, making them ideal for curved seams.
When pattern adjustments call for curves, your interfacing choice should complement, not compete with, your fabric’s natural flow and flexibility.
Selecting Fabric for Smooth Curves
Your fabric choice can make or break your curved seams. Selecting the right material sets you up for success.
Choose fabrics that cooperate with your sewing machine and respond well to pressing.
Here’s what works best for sewing curved seams:
- Stable cottons with tight weave density – quilting cottons and poplins hold their shape without excessive fabric stretching
- Medium-weight fabrics with good fabric drape – they conform smoothly around curves without bulk or resistance
- Natural fiber content materials – cotton and linen accept pressing and fabric manipulation better than synthetics
Consider print scale and color considerations when selecting fabric types.
Small prints hide minor imperfections in curved seams, while solid colors showcase your precision.
Always test fabric stabilization methods on scraps first.
For smoother results, consider adjusting the stitch length.
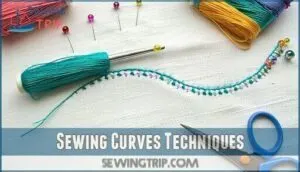
Sewing Curves Techniques
You’ll master curved seams by controlling three key elements that make the difference between amateur and professional results.
These techniques transform tricky curves into smooth, polished seams that lie flat and look crisp.
Slow Sewing Speed
When you’re sewing curves, three-quarters of your success comes from simply slowing down your sewing machine speed.
Racing through curved seams leads to fabric slippage and wonky stitches that’ll have you reaching for the seam ripper. Control precision improves dramatically when you ease off that pedal, allowing gentle guiding of fabric around bends.
| Speed Setting | Best For |
|---|---|
| Slow (1-2) | Tight curves, beginners |
| Medium (3-4) | Gentle curves, experienced sewists |
| Fast (5+) | Straight seams only |
| Variable | Complex curve combinations |
Preventing distortion becomes second nature when you maintain stitch consistency at lower speeds, creating smooth curved seams every time.
Pivoting Frequently
Precise Pivoting becomes your secret weapon when sewing curves.
Lift your presser foot every few stitches, leaving the needle down for fabric control. This technique lets you adjust your fabric’s position gradually, creating smooth curves instead of sharp angles.
Think of it like steering around a winding road—small adjustments prevent you from veering off course. Your needle placement stays accurate while maintaining seam accuracy throughout those challenging curved sections, ensuring you maintain fabric control.
Using Right Presser Foot
Your sewing machine presser foot can make or break curve precision. Standard feet often block your view, making sewing curved seams feel like sewing blindfolded.
Specialty feet solve this challenge by enhancing visibility benefits and reducing fabric slippage through proper foot pressure adjustment. A zigzag foot is versatile for various stitches.
Three game-changing specialty feet for sewing curves:
- Open toe appliqué foot – Clear front view lets you see exactly where your needle hits, preventing wonky seam lines
- Clear embroidery foot – Transparent sole provides 360-degree visibility for intricate curve work
- Walking foot with guide – Even fabric feeding prevents layers from shifting on stretchy materials
Finishing Curved Seams
Once you’ve sewn your curved seam, the real magic happens in the finishing touches.
Proper clipping, notching, and pressing transform a bumpy, puckered mess into a smooth, professional-looking curve that’ll make you proud to show off your work.
Clipping Inner Curves
Once you’ve slowed down for tight curves, it’s time to start clipping inner curves.
Grab your scissors and snip small, evenly spaced cuts into the seam allowance—about every half inch works well.
This releases fabric tension, giving your curved seam flexibility and preventing puckering.
For specialized tools, consider exploring options for products for this task.
Clipping curved seams is your secret weapon for smooth sewing concave curves, so don’t skip it!
Notching Outer Curves
When you’re sewing convex curves, notching curved seams is your secret weapon for a smooth finish.
Snip small V-shaped notches into the seam allowances—think every 1/2 inch for tight curves.
Angle matters: sharp notches reduce bulk, prevent fraying, and keep your curves looking crisp.
Careful notch spacing means less bunching and easier turning, making bulk reduction a breeze.
Some sewers prefer pinking shear alternatives for this task.
Pressing Seams
After notching, proper pressing transforms your curved seams from amateur to professional.
Use a tailors ham for pressing curved seams – it supports the fabric’s natural shape while preventing distortion.
Apply steam usage with an up-and-down iron motion, never dragging.
Seam grading reduces bulk by trimming layers to different widths.
The tailors ham’s curve shaping maintains your seam’s integrity, making sewing pressing techniques effortless and results flawless.
Advanced Sewing Tips
When you’re ready to level up your curved seams, try hand basting, steaming, and rolling your fabric for extra control and crisp results.
You mightn’t win a sewing trophy, but these advanced tips will help your curves look smooth and polished every time.
Hand Basting Curves
When finishing curved seams isn’t enough for complex projects, handbasting becomes your secret weapon. This old-school technique gives you incredible fabric control and accuracy assurance before committing to permanent stitches. Think of it as your safety net for tricky curved seams.
- Use contrasting basting thread for easy removal after machine sewing
- Stitch slightly outside your seam line to avoid catching basting in final seams
- Keep stitches loose enough to adjust fabric positioning without puckering
Hand basting prevents shifting during machine sewing, especially on challenging curves like armholes or necklines. Your sewing tips arsenal isn’t complete without mastering this preventing shifting technique for perfect curved seams every time.
Using Steam for Pressing
Steam transforms your curved seams from amateur to professional.
Set your iron to the correct steam temperature for your fabric type—cotton handles high heat while delicate materials need gentler settings.
Use up-and-down iron motion on your sewing ham to prevent distortion.
The steam relaxes fibers, helping smooth curved seams settle naturally, creating perfectly shaped curves without flattening, which is a result of using the correct steam temperature and proper ironing technique, allowing for a professional finish with smooth curved seams.
Pinching and Rolling Fabric
Pinching and rolling fabric creates the magic that makes curved seams behave.
When working with sewing curves, gently pinch convex curve control points while rolling the fabric between your fingers.
This fabric manipulation technique helps distribute bulk evenly along concave seam shaping areas.
The rolling motion releases tension that causes puckers, while pinching secures alignment.
This bulk reduction method improves seam definition dramatically, making it a crucial step in achieving professional-looking results with curved seams.
Perfecting Curved Seams
You’ve mastered the basics, but these final three techniques will transform your curved seams from good to gorgeous.
Think of this as the difference between a homemade cake and a bakery masterpiece—it’s all in the finishing touches.
Matching Grainline
Proper grainline matching prevents fabric distortion and guarantees your curved seams lie flat without unwanted stretch or pulling.
When pattern pieces don’t align with the fabric’s natural grain, you’ll battle puckering and twisted seams that scream "homemade" instead of professional.
Here’s how to master grainline matching for sewing curves:
- Mark grainlines clearly – Transfer pattern markings to fabric using chalk or washable markers before cutting for cutting accuracy
- Check bias considerations – Position curved pieces strategically during pattern layout to avoid stretchy bias edges meeting stable grain areas
- Verify alignment twice – Double-check grainline importance by measuring from selvage to pattern markings at multiple points before cutting
Easing Outer Curve
When easing curved seams, you’ll gently stretch the outer curve piece to match the inner curve’s shorter edge.
This fabric manipulation prevents puckers and creates smooth, professional results.
For best results with delicate fabrics, consider using French seam techniques.
| Technique | Method | Result |
|---|---|---|
| Curve Matching | Pin every 1/4 inch along seam allowances | Even distribution without bunching |
| Tension Control | Use fingertips to guide fabric gently | Prevents stretching and distortion |
| Avoiding Puckers | Ease gradually while sewing slowly | Smooth seam without gathered fabric |
| Clipping Strategy | Make small cuts perpendicular to curve | Allows fabric to lay flat naturally |
Pressing With Tailor’s Ham
Place your curved seam over the tailor’s ham, matching the seam’s shape to the ham’s contour.
This sewing machine ham creates professional finish results by preventing fabric distortion during pressing.
The ham shaping technique maintains curves without flattening them, while steam benefits help relax fibers.
For curve maintenance, press gently from both sides, ensuring your curved seams hold their natural shape for superior sewing ironing results.
Frequently Asked Questions (FAQs)
My Curved Seams Puckered After Sewing. How Can I Fix This?
When threads go awry, patience pays off.
Clip into concave curves every half-inch, allowing seam allowances to spread naturally.
Press seams with steam over a tailor’s ham, avoiding stretching motions that worsen puckering.
How do you sew a curved seam without puckering?
Stitch slowly with 0mm length, use stay-stitching to prevent stretching, clip inner curves strategically, and press with a tailor’s ham to achieve smooth, professional results.
What is the best presser foot for sewing curves?
An open-toe or clear-view presser foot gives you the best visibility for following curved seam lines accurately.
These feet let you see exactly where your needle enters, helping you navigate tight curves smoothly without guesswork, and this is crucial for accurately following the seam.
How to fix puckering on finished curved seams?
Like a wrinkled shirt needing attention, puckered curved seams need gentle care. Press with steam over a tailor’s ham, then carefully clip additional notches into seam allowances to release tension.
What thread type works best for sewing curves?
Quality all-purpose polyester thread works best for curves since it’s strong, stretches slightly, and handles tension changes well.
Cotton thread can work but may break under stress.
Avoid cheap thread that shreds easily.
How to repair a stretched-out curved seam edge?
Carefully trim away stretched sections with sharp fabric scissors, then apply lightweight fusible interfacing to stabilize the area. Re-stitch using a 2mm stitch length for control.
Can curved seams be sewn with decorative stitches?
Imagine your stitches dancing along a winding path—yes, you can sew curved seams with decorative stitches.
Just test on scrap fabric first, slow down, and use shorter stitch lengths for control.
Your curves will look stunning!
How to finish raw edges on curved seams?
Finish curved seam edges with serging, zigzag stitching, or bias tape binding.
Pink shears work for woven fabrics that don’t fray heavily.
French or Hong Kong seams create professional enclosed edges.
Conclusion
Ironically, mastering sewing tips for curved seams might seem intimidating, but you’ve just discovered it’s actually straightforward with the right approach.
You’ll create professional-looking garments when you combine proper stitch length, strategic pinning, and careful pressing techniques.
Remember to sew slowly, clip outer curves perpendicular to seam lines, and notch inner curves to prevent bunching.
Your tailor’s ham becomes your best friend for achieving those perfect curved shapes that’ll make your projects look store-bought.
- https://www.pinterest.com/ageberry/
- https://homemadeemilyjane.com/sewing-curves/
- https://blog.wholecirclestudio.com/using-starch-to-make-piecing-your-quilts-easier-tips-and-a-tutorial/
- https://meadowmistdesigns.blogspot.com/2020/11/how-to-glue-baste-curves.html
- https://so-sew-easy.com/how-and-where-to-use-knit-stay-tape/

