This site is supported by our readers. We may earn a commission, at no cost to you, if you purchase through links.

Cotton forgives mistakes and loves universal needles with medium stitch lengths. Silk demands fine needles, slow stitching, and French seams to prevent fraying. Denim fights back—use heavy-duty needles and reinforce those seams. Knits stretch unpredictably, so use ballpoint needles and gentle handling.
Your machine settings matter too: adjust tension and stitch length based on fabric weight. Pre-wash everything to avoid shrinkage surprises later.
Table Of Contents
Key Takeaways
- You’ll achieve professional results by matching your needle, thread, and machine settings to each fabric’s specific needs—universal needles for cotton, ballpoint for knits, and fine needles for silk with adjusted tension and stitch length accordingly.
- You can’t skip pre-washing because different fabrics shrink at different rates (cotton up to 5%), and this step prevents your finished garments from becoming unwearable disasters later.
- You’ll master edge finishing by choosing the right technique for each material—cotton handles zigzag stitches well, silk requires French seams, and denim needs reinforced seaming to prevent fraying and ensure durability.
- You’ll troubleshoot common problems like puckering and slippage by using stabilizers for support, adjusting fabric tension, and employing walking feet to feed multiple layers evenly through your machine.
Choosing The Right Fabric for Projects
You’ll save yourself countless headaches by picking the right fabric from the start, since each material has unique properties that affect your sewing success.
Consider your project’s purpose, durability needs, and care requirements before you fall in love with that gorgeous silk that’s completely wrong for your workout gear.
Natural Vs. Synthetic Fibers
When you’re choosing between natural fibers and synthetic fibers, think of it as picking your project’s personality. Natural fibers like cotton offer breathability and comfort but require more TLC. Synthetic fibers like polyester bring durability and easy care to the table.
Cotton uses massive water resources, while polyester contributes to emissions. For eco-friendliness, choose organic cotton or recycled polyester.
Understanding the differences between natural fiber types can help you make informed decisions for your sewing projects.
Fabric Weights and Structure
Understanding fabric weight transforms your sewing game completely. You’ll handle lightweight chiffon differently than heavyweight denim, and here’s why it matters:
- Lightweight fabrics (under 4oz) need delicate needles and shorter seam allowances
- Medium-weight materials (4-8oz) offer versatility with standard machine settings
- Heavyweight fabrics (over 8oz) require stronger needles and wider seam allowances
Fabric density affects thread count and weave patterns, influencing how your fabric drapes and distributes weight across seams.
Blended Fabrics and Their Benefits
Blended fabric types merge natural comfort with synthetic durability, creating textile innovation that solves common sewing challenges. These hybrid yarns combine cotton’s breathability with polyester’s wrinkle resistance, giving you the best of both worlds.
When sewing different fabrics together, synthetic blends offer consistent fabric weight and predictable behavior. Your fabric combinations become more forgiving, requiring fewer adjustments to sewing techniques while maintaining professional results across various fabric types.
Essential Tools and Materials for Every Fabric
You’ll need the right tools before you tackle any fabric, because wrestling with silk using a denim needle is like trying to thread a bowling ball through a keyhole.
Your needle choice, thread weight, and cutting tools make the difference between professional results and a frustrating mess that’ll have you questioning your life choices.
Must-Have Needle Types
Your fabric choice sets the stage, but your needle makes the magic happen. Universal needles handle most cotton projects, while ballpoint needles glide through knits without snagging fibers.
Sharp needle tips pierce tightly woven fabrics like silk cleanly. Denim needles power through heavy materials without breaking.
Match your needle size to fabric weight—size 9 for lightweight, size 16 for heavyweight. The right needle choice prevents skipped stitches and fabric damage.
Thread Selection for Different Fabrics
Your thread choice can make or break your project. Match thread weights to fabric weight—lightweight cotton needs fine thread, while denim demands heavy-duty options.
Cotton thread works perfectly with natural fibers, but polyester thread manages synthetic fibers and stretchy knits better.
Color matching prevents visible stitches, though contrasting threads create decorative effects. Consider your needle size and adjust thread tension accordingly for smooth stitching.
Fabric Markers and Cutting Tools
Once you’ve selected your thread, proper marking and cutting become your next power moves. Quality fabric markers disappear when heated or washed, while cheap ones might stain permanently. Sharp cutting tools prevent frayed edges that’ll haunt you later.
- Fabric Markers: Use water-soluble or air-erasable markers that won’t damage delicate silk or leave marks on dark denim
- Cutting Mats: Self-healing mats protect your rotary tools and provide grid lines for accurate measurements
- Rotary Tools: Sharp blades slice through multiple fabric layers cleanly, especially helpful for cotton quilting projects
- Craft Blades: Keep spare blades handy since dull tools create ragged cuts that affect seam quality
Fabric Preparation and Cutting Techniques
You’ll transform raw fabric into professional-looking pieces once you master proper preparation and cutting techniques. Think of this step as laying the foundation for your entire project—skip it, and you’ll likely end up with wonky seams and disappointing results that’ll make you question your sewing skills.
Pre-Washing and Shrinkage Prevention
Three golden rules prevent fabric disasters: always check care labels first, test a small swatch, then prewash everything.
Cotton shrinks up to 5%, silk needs gentle cold water treatment, and denim bleeds color like crazy. Fabric relaxation through proper prewashing saves your sanity later.
Skip this step and watch your perfect dress become a crop top. Shrinkage control starts before you cut.
Cutting Tools and Methods
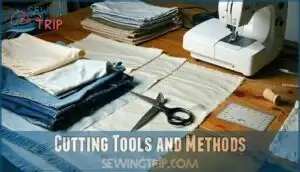
Sharp fabric shears make all the difference when cutting your precious materials. Invest in quality scissors and keep them razor-sharp through regular scissor sharpening.
Rotary cutting works beautifully on cutting mats with rulers for straight lines and curves. Pinking shears prevent fraying on fabrics prone to unraveling.
Match your cutting techniques to fabric weight and textures for professional results.
Securing and Aligning Fabric Layers
Once you’ve made clean cuts, keeping your fabric layers perfectly aligned prevents wonky seams and wasted material. Use pattern weights or pins every 4-6 inches along edges for fabric layering stability. Pin perpendicular to cutting lines for cutting accuracy.
Heavier fabric weight requires more pinning techniques to prevent shifting during cutting. Check seam allowance markings match across all layers.
Sewing Techniques for Specific Fabric Types
You’ll need different approaches for each fabric type, since what works perfectly for cotton can turn silk into a wrinkled mess. Think of it like cooking different proteins – you wouldn’t grill salmon the same way you’d sear a steak, and the same logic applies when your sewing machine meets delicate silk versus sturdy denim.
Just like cooking different proteins requires unique techniques, sewing machines need fabric-specific approaches to prevent cotton success from becoming silk disaster
Sewing Cotton, Silk, Denim, and Knits
Each fabric demands its own approach when you’re sewing different fabrics successfully. Cotton care involves gentle handling and proper needle size selection. Consider these essentials:
- Cotton Care: Use universal needles and medium-weight thread for crisp seams
- Silk Handling: Switch to fine needles; let fabric weight guide your sewing machine speed
- Denim Stretch: Heavy-duty needles tackle thick seams; knit fabric needs ballpoint needles
Master these sewing techniques for perfect garment finishing every time.
Stitch Length, Tension, and Machine Settings
Beyond fabric selection lies machine calibration—your sewing machine’s secret weapon. Stitch control starts with matching stitch length to fabric weight: lightweight fabrics need 2.0-2.5mm, while denim demands 3.0-4.0mm. Tension adjustment prevents puckering—set lighter fabrics at 2-4, heavier at 4-6. Thread selection and needle optimization complete your setup. Understanding the right sewing machine settings is key for achieving professional results.
| Fabric Type | Stitch Length | Tension Setting | Needle Size |
|---|---|---|---|
| Lightweight | 2.0-2.5mm | 2-4 | 60/8-70/10 |
| Medium-weight | 2.5-3.0mm | 4-5 | 80/12 |
| Heavy | 3.0-4.0mm | 4-6 | 90/14 |
Edge Finishing and Seam Construction
Once you’ve nailed your machine settings, it’s time to lock in professional-looking edges. Different fabric types demand specific edge finishing techniques. Cotton loves a simple zigzag stitch or overlock finishing to prevent fraying. Silk requires delicate seam binding or French seams for elegance. Denim needs sturdy seam reinforcement with edge stitching.
Your seam allowance determines which sewing techniques work best—fabric interfacing adds structure when needed.
Troubleshooting and Advanced Sewing Tips
Even experienced sewers hit snags when fabric fights back with puckering seams, slippery silk that won’t stay put, or cotton that bunches no matter how carefully you guide it.
You’ll master these challenges by adjusting your machine settings, choosing the right stabilizers, and learning when to press versus steam for professional-looking results.
Preventing Puckering and Slippage
Nothing’s more frustrating than watching your beautiful fabric bunch up like an accordion. Puckering and slippage happen when fabric tension gets out of whack or your machine can’t handle different fabric weights smoothly.
Here’s your battle plan against fabric rebellion:
- Adjust fabric tension – Match your machine’s tension to your fabric’s personality
- Install walking feet – These magical attachments feed layers evenly
- Use seam stabilizers – Add support under tricky areas
- Check seam allowances – Consistent width prevents uneven seams
- Test stitch settings – Prevent skipping stitches with proper needle-thread combos
Master these puckering solutions and slippage control techniques to achieve professional results every time.
Using Stabilizers and Interfacing
When your fabric lacks backbone, stabilizers and interfacing become your secret weapons. These fabric support heroes transform flimsy materials into professional-looking garments that won’t buckle under pressure.
Fusible interfacing
Sew-in interfacing
Tear-away stabilizers
Cut-away stabilizers
Choose your stabilizer materials based on fabric weights and project needs. Lightweight cottons need gentle support, while heavy denims require extra reinforcement.
Pressing Techniques for Crisp Seams
Perfect pressing transforms your seams from amateur to pro. Set your iron’s temperature based on fabric type—cotton withstands high heat, silk needs gentle warmth.
Press seam allowances open for flat results, or to one side for strength. Steam helps relax fibers without direct contact.
Professional finishing means pressing after every sewing step, not just at the end. Your sewing techniques deserve crisp folding that showcases proper stitch length and machine settings.
Frequently Asked Questions (FAQs)
How to sew with velvet without matting?
Velvet’s like a temperamental artist—it demands respect. Use a walking foot and shorter stitch length.
Press with steam, never directly on fabric. Keep your iron moving gently to avoid crushing the pile.
Whats the best way to hem stretch fabrics?
Use a ballpoint needle and zigzag stitch for stretch fabrics. Don’t pull the fabric while sewing—let the machine feed it naturally. Test tension settings first to avoid puckering.
How do you attach zippers to different fabrics?
Picture wrestling with a zipper on slippery satin that keeps shifting. You’ll need stabilizer tape for delicate fabrics, heavy-duty needles for denim, and a zipper foot for precision stitching.
Can you mix fabric types in one project?
You absolutely can mix fabric types! Match weights and stretch levels for best results. Test combinations first with scraps. Consider how each fabric will behave during washing and wear.
How to prevent fabric fraying during storage?
Store fabric edges with pinking shears cuts or serged finishes. Keep pieces flat in drawers with tissue paper between layers. Seal cut edges with fray check liquid for delicate fabrics.
Conclusion
Practice makes perfect in mastering sewing tips for different fabrics. You’ve got the tools and techniques—now it’s time to put them to work.
Start with simple projects using forgiving cotton, then challenge yourself with silk’s finicky nature or denim’s toughness. Every expert was once a beginner who kept trying.
Your fabric stash is waiting, and those professional-quality results are just a few stitches away.
- https://icefabrics.com/blogs/news/cutting-and-sewing-guides-for-cotton-fabrics
- https://www.seamwork.com/fabric-guides/the-ultimate-guide-to-sewing-with-silk
- https://merchantandmills.com/uk/blog/denim-guide
- https://blog.closetcorepatterns.com/tips-for-sewing-with-knits/
- https://mellysews.com/how-to-sew-leather-tips-and-tricks/


