This site is supported by our readers. We may earn a commission, at no cost to you, if you purchase through links.
You’ve chosen the perfect pattern, matched your fabric beautifully, and you’re ready to start sewing—but then your collar goes limp, your waistband buckles, or your tote bag slouches like it’s had a long day. The secret ingredient you’re missing? Interfacing.
This unsung hero of the sewing world is the difference between a project that looks homemade and one that looks professionally crafted. Think of interfacing as the backbone of your fabric—it gives structure where you need it, prevents stretching in all the wrong places, and helps your creations hold their shape through countless wears and washes.
Whether you’re working on a crisp shirt collar, a structured handbag, or reinforcing buttonholes, mastering a few essential sewing with interfacing tips will transform your projects from floppy to fabulous.
Table Of Contents
- Key Takeaways
- What is Interfacing in Sewing?
- Types of Interfacing Explained
- Fusible Vs. Sew-in Interfacing
- Choosing The Right Interfacing
- Interfacing Weights and Their Uses
- Essential Tips for Applying Interfacing
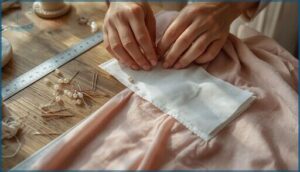
- How to Apply Fusible Interfacing
- How to Attach Sew-in Interfacing
- Interfacing Tips for Bagmaking
- Top 4 Interfacing Products for Sewing
- Frequently Asked Questions (FAQs)
- Conclusion
Key Takeaways
- Interfacing is the hidden stabilizer that transforms homemade projects into professional-looking pieces by adding structure to collars, cuffs, waistbands, and bags without visible bulk.
- Choose your interfacing type based on fabric weight and stretch—woven for structured garments, knit for stretchy fabrics, and fusible for speed or sew-in for delicate materials that can’t handle heat.
- Apply fusible interfacing by pressing firmly with an iron for 10-15 seconds without sliding, using a press cloth to prevent bubbles and adhesive mess, while sew-in types require careful pinning and stitching within seam allowances.
- Match interfacing weight to your fabric (lightweight for silk, medium for cotton, heavyweight for bags) and always test on scraps first to avoid shrinkage, bubbling, or damage to your final project.
What is Interfacing in Sewing?
If you’ve ever sewn a collar that flopped or a tote bag that sagged, you were probably missing one key ingredient: interfacing. It’s that hidden layer sewn or ironed onto the back of your fabric to give it shape, structure, and a bit of backbone.
Interfacing is the hidden hero sewn or ironed onto fabric to give it shape, structure, and backbone
Let’s break down what interfacing really does and where you’ll use it most.
Purpose of Interfacing
Interfacing brings structural magic to your sewing projects by giving fabric the backbone it needs to shine. Think of it as the invisible hero that makes collars crisp, waistbands sturdy, and necklines hold their shape beautifully.
Here’s what interfacing benefits bring to your work:
- Fabric stability in areas prone to stretching or sagging
- Garment structure that maintains professional-looking finished details
- Fabric reinforcement protecting stress points like buttonholes and pocket openings
For bag linings, interfacing is used to create a distinct shape and provide extra support.
How Interfacing Supports Fabric
Beyond adding that professional finish, interfacing works behind the scenes to protect your fabric in surprisingly powerful ways. It reinforces areas under stress—think buttonholes, shoulder seams, and necklines—preventing stretching and tearing over time. The right type maintains flexibility control while boosting shape retention and improved stiffness exactly where you need it. To further strengthen the material, consider stitch reinforcement techniques.
Different types of interfacing offer varying support levels, so applying interfacing methods correctly ensures your fabric gets the backup it deserves without feeling stiff or uncomfortable.
| Fabric Structure and Support | How It Works |
|---|---|
| Enhanced Durability | Increases breaking strength and tear resistance |
| Stress Reinforcement | Stabilizes high-tension areas like plackets |
| Shape Retention | Prevents sagging in collars and waistbands |
| Flexibility Control | Knit types preserve stretch while adding body |
| Improved Stiffness | Creates three-dimensional form without bulk |
Common Uses in Sewing Projects
Now that you understand how interfacing aids fabric, let’s look at where you’ll actually use it. The common uses of interfacing span almost every sewing project you can imagine, from garment reinforcement to bag structure and beyond.
Here’s where interfacing application makes the biggest difference:
- Garment areas like collars, cuffs, buttonholes, and waistbands that need crispness
- Bag exteriors and straps requiring structure to stand upright without sagging
- Quilting projects where stretchy t-shirt fabrics need quilting stability
- Home decor items including curtains, pillow covers, and upholstered pieces
- Specialty applications like costume pieces, appliqués, and fitted blazers
Types of Interfacing Explained
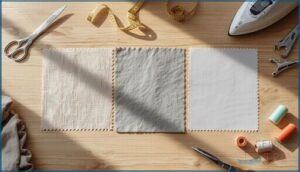
Not all interfacing is created equal, and knowing your options makes all the difference in your finished project. The three main types—woven, non-woven, and knit—each bring something unique to the table depending on your fabric and what you’re making.
Let’s break down how each one works and when you’ll want to reach for it.
Woven Interfacing
Think of woven interfacing as fabric’s structured cousin—it looks like regular cloth with a visible grain that you’ll need to match up with your fashion fabric. This type maintains your fabric drape beautifully while adding firmness exactly where you need it, like collars and cuffs.
| Feature | What It Means for Your Project |
|---|---|
| Grain Alignment | Match the interfacing grain to your fabric grain for professional results |
| Weight Selection | Choose lightweight for shirts, medium for jackets and structured pieces |
| Fusible vs Sew-in | Fusible bonds with heat; sew-in works better for delicate fabrics |
| Seam Stability | Prevents stretching and keeps edges crisp through wear and washing |
You’ll find woven interfacing comes in both fusible and sew-in versions. The fusible type has adhesive on one side that bonds when you press it with your iron, making application quick and secure. Cotton or cotton-polyester blends give this interfacing its fabric-like feel, and chemical treatments add the stiffness you’re after.
When you’re working with woven fabrics, this is your go-to choice. It stabilizes without making things stiff or cardboard-like. Your garment keeps its natural movement, which is exactly what you want in fitted pieces.
The key is trimming your seam allowances on the interfacing about half an inch smaller than your fabric pieces—this eliminates bulk and gives you smooth, professional seams.
Non-Woven Interfacing
Here’s a sewing revelation: nonwoven interfacing doesn’t have grain direction, so you can cut it any way you like. Created through fiber bonding rather than weaving, this cost-effective option feels slightly paper-like but works beautifully for quick projects.
You’ll love its versatility—perfect for bags, crafts, and garment areas needing structure. Most types of interfacing application techniques work here, especially fusible methods for speed.
Knit Interfacing
If your fabric moves, knit interfacing moves with it. Made by knitting fibers together, this stretchy option prevents puckering on jersey, ponte, or any stretch fabrics that need a little backbone.
It stretches crosswise while keeping lengthwise stability—perfect for collars, cuffs, and necklines.
You’ll find it in lightweight to medium knit weights, offering performance benefits that rigid interfacing types simply can’t match.
Fusible Vs. Sew-in Interfacing
Now that you know the main types of interfacing, it’s time to understand the two application methods: fusible and sew-in. Each one works differently and has its own best uses, so picking the right one matters for your project.
Let’s break down what sets them apart and when to reach for each option.
Key Differences
When you’re standing in the aisle comparing these two types of interfacing, a few major differences will guide your choice. Here’s what sets them apart:
| Aspect | Fusible Interfacing | Sew-in Interfacing |
|---|---|---|
| Application Speed | Fast—just iron it on | Slower—requires basting and stitching |
| Fabric Texture | May flatten napped or textured fabrics | Preserves original drape and softness |
| Structural Support | Firm bond, adds stiffness quickly | More durable, maintains fabric integrity |
| Handling Challenges | Risk of bubbling or adhesive residue | Demands precise stitching and placement |
Project suitability really depends on your fabric and timeline.
When to Use Fusible Interfacing
You’ll reach for fusible interfacing when speed matters and your fabric can handle the heat. It’s perfect for woven cottons, linens, and most polyester blends that need quick stabilization. Here’s when it shines:
| Situation | Why Fusible Works |
|---|---|
| Collars, cuffs, and waistbands | Bond strength adds structure fast |
| Medium to heavyweight fabrics | Application speed saves time |
| Projects needing firm support | Heat activates reliable adhesion |
Just avoid heat-sensitive fabrics and heavily textured materials—the adhesive won’t play nice with velvet or sequins.
When to Use Sew-in Interfacing
Think of sew-in interfacing as your safety net for fabrics that can’t take the heat. Velvet, lace, sequins, and vinyl need this gentler approach since fusible adhesives either won’t stick or will damage the surface. You’ll also want it for fitted jackets where natural drape matters more than speed.
| Fabric Type | Why Choose Sew-in | Best Application |
|---|---|---|
| Textured Fabrics (velvet, fur) | Adhesive won’t bond properly | Collars, garment support areas |
| Delicate Fabrics (lace, sheer) | Avoids heat damage | Necklines, lightweight projects |
| Heat-Sensitive Materials | Prevents melting or distortion | Anywhere structure’s needed |
| Open-Weave Textiles | Better stability without bubbling | Mesh overlays, decorative panels |
Attaching nonfusible interfacing takes more time than fusible, but it’s worth it. Pin carefully within seam allowances, then stitch close to edges. This method gives you total control and prevents the bubbling issues that sometimes plague fusible types after washing.
For projects needing that soft, professional finish—think fitted shirts or structured jackets—sew-on interfacing delivers natural drape without stiffness. It’s also your go-to when working with fabrics that might shrink or distort under an iron’s pressure.
Choosing The Right Interfacing
Picking the right interfacing can feel like a puzzle at first, but it’s easier than you think once you know what to look for. The key is matching your interfacing to your fabric and project so everything works together smoothly.
Let’s walk through the main things you’ll want to think about before you make your choice.
Matching Interfacing to Fabric Weight
When you’re pairing interfacing with fabrics, think of it like finding the perfect dance partner—they need to match their strength. The weight of interfacing should equal or be slightly lighter than your fabric to preserve that beautiful fabric drape.
GSM Explained: lightweight fabrics (under 150 gsm) need featherweight interfacing, while heavyweight fabrics demand sturdier support for a professional finish without compromising knit compatibility.
Considering Project Type
Beyond fabric weight, your project itself guides which interfacing you’ll grab. Garment interfacing stabilizes those collars and cuffs, while bag interfacing demands heavyweight support for structured purses.
Here’s what different projects need:
- Home decor uses woven types in 85% of curtain and cushion projects for lasting body
- Fashion trends lean toward lightweight, flexible choices for 2025’s oversized silhouettes
- Specialized projects might require tricot for lingerie or fitted coats
Choose based on your end goal, not just the fabric.
Color and Texture Considerations
Fabric compatibility goes beyond weight—color matching prevents shadowing under sheer fabrics. You’ll want white or cream interfacing for light textiles, black for dark ones. About 62% of projects show strong color harmony, while mismatches create visible lines through loosely woven materials.
Texture effects matter too; your interfacing’s weave influence should complement the fabric’s surface, avoiding bubbles or stiffness that compromises drape.
Interfacing Weights and Their Uses
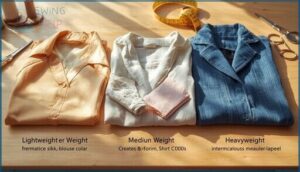
Interfacing comes in different weights, and choosing the right one makes all the difference in how your project turns out. Think of it like picking the right fabric—you wouldn’t use heavy denim for a delicate blouse, right?
Let’s break down the three main weight categories and where you’ll want to use each one.
Lightweight Interfacing Applications
When you’re working with delicate fabrics like silk or chiffon, lightweight interfacing becomes your best friend. It adds just enough support without weighing down the material or changing how it moves.
You’ll find fusible benefits include quick application for collars and cuffs, while sew-in advantages shine with specialty fabrics that can’t handle heat. This garment reinforcement maintains that soft, flowing feel you want.
Medium and Heavyweight Interfacing
When your project needs more structure, medium-weight interfacing (150-350 GSM ratings) works beautifully with quilting cotton and ponte fabrics, offering fabric compatibility without losing flexibility.
Heavyweight interfacing, over 350 GSM, brings outerwear support and bag stability to canvas or heavy denim.
These interfacing types provide durability features like tear resistance, maintaining shape through repeated use—perfect for structured coats, handbag panels, and anything needing serious reinforcement.
Selecting Weight for Garments Vs. Bags
Choosing interfacing for garments versus bagmaking comes down to understanding how weight distribution affects your finished piece. Garments need drape preservation, while bags demand structural integrity.
- Garment fabrics: Match interfacing weights to fabric GSM—lightweight for silk, medium for cotton shirting
- Bagmaking: Stack heavyweight interfacing using layering techniques for panels and straps
- Weight of the interfacing: Keep it equal to or lighter than your fashion fabric
- Structural needs: Bags require firmness; garments prioritize comfort and movement
Essential Tips for Applying Interfacing
Getting your interfacing to bond smoothly with your fabric isn’t rocket science, but a few smart habits make all the difference. The way you cut and prepare your pieces before fusing can save you from wrinkles, bubbles, and frustration later.
Let’s walk through two key techniques that’ll set you up for success every time.
Cutting and Pinning Techniques
Getting your interfacing cut and pinned right sets you up for success. The trick? Fuse first, then cut. Block interfacing means ironing a larger piece of interfacing onto your fabric before cutting both layers together with your pattern—this avoids shrinkage surprises and keeps everything perfectly aligned.
| Technique | Why It Matters |
|---|---|
| Cutting Grain | Align woven interfacing with fabric grain for stability |
| Pin Placement | Position pins perpendicular every 2 inches to prevent shifting |
| Curve Accuracy | Cut straight edges first, then tackle curves with sharp scissors |
| Shrinkage Allowance | Leave 3/4 inch around edges before fusing to prevent adhesive mess |
| Tool Selection | Use rotary cutters for straight lines, small scissors for curves |
When pinning, place your pins with heads at the cut edge so you can whisk them out easily while sewing. For slippery fabrics, pin parallel to the seamline instead. Clean, sharp pins are your friends—they won’t snag delicate materials or leave unwanted holes. Press your fabric flat before you start pinning, and you’ll notice how much easier alignment becomes.
These small steps prevent puckering and those frustrating seam breaks that make you want to restart your whole project.
Trimming Seam Allowances
After fusing, trim your interfacing seam allowances about 1/4 inch narrower than your fabric edges—this bulk reduction trick prevents lumpy seams and stiff corners.
Grading layers works wonders when you’ve got multiple thicknesses: trim each layer progressively shorter.
For corner trimming, snip diagonally across points, and try curve clipping on rounded edges.
These seam allowance considerations create professional finish effects you’ll notice immediately.
How to Apply Fusible Interfacing
Fusible interfacing is all about the heat—you’ll use your iron to bond it to your fabric, and it’s easier than you might think. The key is knowing which side goes down, how to press without making a mess, and what tricks keep everything smooth and bubble-free.
Let’s walk through the process step by step so you can get perfect results every time.
Identifying The Adhesive Side
Before applying fusible interfacing, you need to spot the adhesive side—it’s usually shiny or slightly sticky to the touch. Look for a subtle grid pattern or plastic-like coating. If you’re unsure, test a small corner on scrap fabric with your iron.
Attaching fusible interfacing backwards is a common mistake that causes bonding issues, so this quick adhesive detection step saves frustration later.
Using a Press Cloth and Iron
A press cloth acts like a shield between your iron and fabric, protecting both from heat damage and stray adhesive. Place it over your interfacing, then press firmly for 10-15 seconds—don’t slide the iron around.
Use steam application with cotton muslin or canvas press cloth materials for best interfacing adhesion.
Match your iron temperature to your fabric type, and always test on scraps first to avoid scorching.
Preventing Wrinkles and Bubbles
Bubbles and wrinkles happen when heat settings don’t match your fabric or when you rush the pressing process. To prevent this, pre-press your fabric to remove existing wrinkles before interfacing application. Apply steady, even pressure without sliding your iron-on fusible interfacing.
Let everything cool completely flat—this step locks in proper adhesive control and prevents fabric shrinkage. Your bubble prevention success depends on patient, methodical pressing techniques with correct heat settings.
How to Attach Sew-in Interfacing
Sew-in interfacing takes a bit more time than fusible, but it’s worth it for delicate fabrics or pieces that need a softer finish. You’ll stitch it directly to your fabric layer, treating it almost like another piece of material in your project.
Let’s walk through the best ways to align, attach, and work with sew-in interfacing so your project turns out beautifully.
Aligning and Pinning Interfacing
Before you stitch, aligning your sew-in interfacing properly makes all the difference. Start by cutting the interfacing using your garment pattern, then pin it perpendicular to the fabric edges around the perimeter. This pinning technique prevents shifts and keeps everything flat.
Even on tricky bias edges, careful pin placement maintains alignment. For extra insurance, you can use a fusible tack in the center before securing the rest with pins.
Stitching Methods for Stability
Once your interfacing is pinned in place, it’s time to secure it. The right stitching method determines how well your project holds up. Straight stitching within the seam allowance (about 2.0–3.0 mm stitch length) works great for most applications, keeping everything stable without adding bulk.
Here are your go-to techniques for rock-solid results:
- Stay stitching prevents curved necklines and armholes from stretching out of shape
- Edge stitching reinforces high-stress areas like collars and cuffs beautifully
- Zigzag stitching maintains stretch on knit fabrics while securing interfacing firmly
Best Practices for Delicate Fabrics
When working with sheers, silks, and other lightweight fabrics, fabric testing becomes your best friend. Try your interfacing on scraps first—temperature control matters since delicate materials can scorch quickly.
Here’s what works:
| Technique | Why It Works |
|---|---|
| Shorter stitch length (2.0–2.5mm) | Prevents puckering and fabric stress |
| Hand-basting first | Secures slippery fabrics before machine sewing |
| French seam finishes | Keeps edges clean without fraying |
Stabilizer types like tear-away paper underneath prevent shifting beautifully.
Interfacing Tips for Bagmaking
Making bags is a whole different ballgame with regard to interfacing. You’ll need materials that can stand up to wear and tear while keeping your bag looking crisp and professional.
Let’s walk through the key tips that’ll help you choose and use interfacing for bag projects that actually hold their shape.
Choosing Interfacing for Bag Linings
Bag linings need interfacing that balances structure without turning your project into cardboard. Weight considerations matter most—quilting cotton linings pair beautifully with lightweight to medium interfacing like Pellon SF101, while larger bags benefit from heavier options like Peltex 70.
Fusible vs. sew-in depends on your fabric matching needs and project type. Minimizing bulk? Trim interfacing seam allowances slightly smaller than fabric pieces for smoother results.
Using Foam and Stabilizers
When rigidity meets structure, foam stabilizers transform ordinary bags into standout pieces. Fusible fleece works beautifully for smaller projects, bonding quickly with heat. For larger totes, sew-in foam like Pellon Flex-Foam adds dimensional support without heat risks. Polyurethane foam types offer lightweight cushioning, while EVA foam suits craft-level work.
These stabilizers for bags provide fabric support that prevents sagging while maintaining flexibility you’ll appreciate with every stitch.
Avoiding Bulk and Wrinkles
Before you fuse or stitch, you’ll want to master fabric pre-treatment and pressure application tips to banish those pesky wrinkles. Seam bulk reduction starts with smart trimming interfacing choices—cut close to seam allowance lines before applying.
Here’s what works:
- Press your fabric thoroughly before interfacing repositioning attempts
- Use firm, downward pressure when fusing, not sweeping motions
- Allow fused pieces to cool completely before fabric manipulation
- Choose quality products—tool quality impact matters for wrinkle-free results
Top 4 Interfacing Products for Sewing
With so many interfacing options on the market, it helps to know which products actually deliver. I’ve rounded up four tried-and-true Pellon products that cover most of your sewing needs, from lightweight garments to sturdy bag projects.
Let’s look at what makes each one worth having in your stash.
1. Pellon Flex Foam Sew In Stabilizer
If you’re looking for cushioned support in your projects, Pellon Flex Foam Sew-In Stabilizer (FF77) is a superb choice. This foam stabilizer uses a lightweight polyurethane core sandwiched between polyester fabric layers, making it perfect for bags, totes, and even costumes.
You’ll appreciate its washing durability—it’s machine washable and tumble dry safe. When sewing with interfacing like this, use a size 14 needle for layering techniques involving multiple fabrics.
Unlike fusible interfacing types, this sew-in interfacing stitches right into your seams, providing project stability without adding stiffness.
Best For: Sewers and crafters who want to add soft, cushioned structure to bags, totes, and accessories without making them stiff or heavy.
- The polyurethane foam core adds body and support while staying lightweight and flexible, so your projects look professional without feeling bulky.
- It holds up well to regular use and washing—machine washable and dryer safe means your finished items stay looking good over time.
- Works great with thin fabrics that need extra stability, and you can sew through it with a regular machine using the right needle size.
- Sewing through multiple layers can be tricky and may require a heavier needle, especially when topstitching thick seams.
- Since it’s sew-in only (not fusible), it can shift around while you’re working with it, making positioning more difficult than with iron-on alternatives.
- Some users report visible fold marks or occasional stains that can affect the final look of lighter-colored projects.
2. Pellon Lightweight Fusible Interfacing Bolt Value
When you need interfacing for multiple projects, Pellon’s SF101 Lightweight Fusible Interfacing Bolt delivers serious bulk advantages. At roughly $83 for 48 yards, the cost-per-yard beats smaller packages hands down.
This non-woven fusible interfacing works beautifully with light to medium fabrics—think cotton quilts, tote bags, and garments. While quality consistency can vary slightly between batches, most sewers appreciate how it adds structure without stiffness.
Brand comparison shows Pellon holds its own among interfacing types, especially for everyday sewing where you don’t need ultra-firm stabilization. Project suitability? Perfect for high-volume crafters.
Best For: Frequent sewers and quilters who need large quantities of lightweight interfacing for projects like tote bags, garments, and quilts without breaking the bank.
- Cost-effective bulk pricing at around $83 for 48 yards beats buying smaller packages
- Easy to apply with a household iron and adds structure without stiffness or bulk
- Versatile for light to medium fabrics including cotton, linen, and knits
- Quality and width can vary between batches or suppliers
- Some users report adhesive issues with the glue not sticking well or lifting during sewing
- May not provide enough stability for heavy-weight fabrics or high-structure projects
3. Pellon Peltex Ultra Firm Stabilizer White
When your project demands serious structure—fabric bowls, hat brims, or sturdy tote bags—Pellon Peltex Ultra Firm Stabilizer White delivers the ultra firmness you’re after. This 100% polyester stabilizer comes in 20″ x 10-yard rolls and offers remarkable sewing techniques flexibility since it’s non-woven with no grain.
Unlike lighter stabilizers or fusible options like Pellon SF101, Peltex is sew-in only, making it ideal for project applications requiring maximum rigidity. You’ll love its washing durability—machine washable and dry cleanable without flattening.
One cutting tip: trim it slightly smaller than your fabric to reduce bulk at seams.
Best For: Sewers and crafters who need maximum structure and firmness for projects like fabric bowls, hat brims, sturdy tote bags, and home decor items that must hold their shape.
- Ultra-firm support that won’t flatten or distort even after steam pressing, washing, or repeated use
- No grain means you can cut it in any direction without worrying about fabric bias or distortion
- Easy to sew through on a machine, even when sandwiched between multiple fabric layers
- Sew-in only with no fusible option, which takes more time than iron-on stabilizers
- Can feel too stiff or bulky for projects that need any flexibility or drape
- Requires trimming slightly smaller than your fabric pieces to avoid thick, awkward seams
4. Pellon Shape Flex Cotton Fusible Interfacing
When you’re working with natural fabrics like cotton or linen, Pellon Shape-Flex (SF101) feels like the perfect match—it’s 100% cotton fusible interfacing that breathes with your fabric instead of against it. This woven option comes 20″ wide and delivers crisp support without the stiffness you’d get from synthetic alternatives, making it ideal for collars, cuffs, and bag linings.
The cotton fusible benefits really shine in washing considerations—it holds up beautifully through machine cycles. Shape-Flex applications work well with chambray, gingham, and quilting cottons, and the fabric compatibility extends to polyester blends too.
For application techniques, use medium heat with steam, pressing firmly without sliding your iron.
Best For: Sewers working with natural cotton or linen fabrics who need crisp support for collars, cuffs, bag linings, or embroidery projects without sacrificing softness or breathability.
- 100% cotton construction maintains natural fabric drape and breathes with your project instead of stiffening it like synthetic interfacings
- Holds up reliably through machine washing and drying without the adhesive breaking down or creating bubbles
- Works across a wide range of fabrics from quilting cottons to chambray and even polyester blends
- Some users report receiving bolts slightly narrower than the advertised 20″ width
- Not the best choice for very heavy or thick fabrics that need more substantial support
- Requires proper pre-washing to prevent shrinkage issues after you’ve already fused it to your project
Frequently Asked Questions (FAQs)
How to use interfacing when sewing?
Interfacing transforms even the floppiest fabric into a structured masterpiece.
Position the adhesive side against your fabric’s wrong side, matching grain direction carefully. Press firmly with heat, preventing shifting, or stitch sew-in types for delicate materials.
What is the rule for choosing interfacing?
Match your fabric weight to the interfacing guide—lighter fabrics need lightweight support.
Consider project needs, texture sensitivity, and fusible vs sew-in types of interfacing.
Always test compatibility on scraps before choosing interfacing for best results.
Should you iron or press on interfacing?
Think of sliding an iron like dragging a brush through wet paint—it smears and bubbles. You should press fusible interfacing, not iron it.
Lift and hold with firm pressure, heat, and a press cloth for 10-15 seconds to bond properly.
What is the main reason for using sew in interfacing?
The main reason for using sew-in interfacing is to stabilize heat-sensitive fabrics and delicate materials without damaging them.
It offers enhanced control in tailoring applications while preserving natural drape better than fusible options.
How to remove interfacing adhesive from fabric?
You’ll want to gently heat the adhesive with your iron, then peel while warm.
For stubborn residue, try rubbing alcohol or a damp cloth with repeated pressing—just test first on hidden fabric!
Can interfacing be reused if removed?
Unfortunately, fusible interfacing can’t be reused once removed—the adhesive degrades after heating and loses its bonding strength.
Sew-in interfacing might work for non-critical projects if it’s still structurally sound, but experts recommend using fresh interfacing.
How to prevent interfacing from bubbling?
When heat hits different shrinkage rates between fabric and fusible interfacing, bubbles appear like trapped air pockets.
Pre-shrink both materials, press firmly without sliding your iron, and match interfacing weight to your fabric’s density for smooth adhesive bonding.
What fabrics are unsuitable for interfacing?
Textured fabrics, heat-sensitive materials like vinyl, stretch fabrics, sheer fabric, and heavyweight fabrics often can’t handle fusible interfacing. The adhesive won’t bond properly, or heat damages the fabric structure, making sew-in types of interfacing better choices.
How to store and organize interfacing?
Rolling techniques work best—wrap interfacing around tubes to prevent creases.
Store scraps in labeled bags by types of interfacing.
Use folder systems and bin organization at your fabric store selection for quick access while avoiding issues.
Can interfacing be removed after applying it?
You can remove fusible interfacing by reheating it with an iron and peeling it off while warm, though adhesive residue often remains. Sew-in interfacing simply requires cutting stitches away carefully.
Conclusion
Sure, you could skip interfacing and watch your collar droop like a wilted houseplant—or you could embrace sewing with interfacing tips and create projects that actually hold their shape.
The difference between “I made this” and “Wow, where did you buy that?” often comes down to this single layer. With the right type, weight, and application method in your toolkit, you’re not just sewing—you’re engineering garments and accessories that’ll stand the test of time.

