This site is supported by our readers. We may earn a commission, at no cost to you, if you purchase through links.
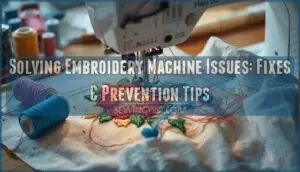
But here’s the thing—most embroidery machine problems aren’t random gremlins in your equipment. They’re predictable patterns with specific causes, from dull needles and mismatched stabilizers to tension imbalances that throw your entire workflow off track.
Once you understand what’s actually going wrong, solving embroidery machine issues becomes less about guesswork and more about targeted fixes that get you back to creating quality work.
Table Of Contents
Key Takeaways
- Most embroidery machine problems, like thread breaks and fabric puckering, come from predictable causes such as poor tension, mismatched materials, and dull needles.
- Regular cleaning, oiling, and timely needle and bobbin replacements prevent most stitch quality issues and extend your machine’s lifespan.
- Choosing the right stabilizer, hooping technique, and needle-thread combination is key to avoiding design misalignment and fabric distortion.
- Investing in quality supplies and ongoing operator training dramatically reduces downtime, defects, and troubleshooting headaches.
Identifying Common Embroidery Machine Problems
Most embroidery machine problems fall into a few predictable categories once you know what to look for. You’ll usually spot the issue in how your thread behaves, how your fabric sits in the hoop, or how your stitches form on the material.
Let’s walk through the telltale signs of each problem so you can pinpoint what’s going wrong with your machine.
Recognizing Thread Breakage and Shredding
Why does your thread keep snapping mid-project? Thread breakage and shredding account for up to 43% of machine stoppages. Watch for fraying along the thread path, frequent breaks during stitching, or visible shredding near the needle.
Poor thread quality, dull needle condition, or incorrect tension settings generally cause these thread issues. Addressing improper thread tension is essential for preventing these disruptions.
High machine speed and improper threading worsen thread breaks, disrupting your entire workflow.
Diagnosing Fabric Puckering and Shifting
Puckering and shifting often follow thread problems. Look for bunched fabric around stitches, wavy edges, or designs that drift off-center.
Fabric type and stabilizer choice play major roles—lightweight materials under 140 gsm pucker 65% more without proper support. Incorrect hooping tension, high stitch density, and design complexity worsen these fabric puckering issues.
Mismatched tension settings create alignment problems that compound with every pass. Fabric distortion can be prevented with proper fabric stabilization.
Spotting Looping and Stitch Quality Issues
When your stitches show visible loops on the fabric surface or back, you’re dealing with tension problems that affect about 70% of machines. These thread loops signal needle issues, maintenance impact, or incorrect settings that compromise stitch quality.
Watch for these looping problems in embroidery:
- Loops appearing consistently on top or bottom surface
- Dense designs creating irregular stitch formation
- Incorrect tension causing bobbin thread visibility
- Dirty thread paths increasing defect rates by 15%
Design density and poor maintenance worsen looping causes.
Addressing Alignment and Registration Errors
Beyond thread and tension troubles, alignment and registration errors impact up to 30% of your embroidery projects. Design shifting happens when hooping misalignments move patterns by 0.5 inches or more.
Poor hoop stabilization, digitizing errors, and needle alignment faults create visible gaps between stitches.
Fabric distortion from uneven tension balance causes pattern alignment issues, exposing underlying material where filled areas should meet perfectly.
Troubleshooting Thread and Tension Issues
Thread and tension problems are the number one headache for embroidery machine operators, but they’re also the easiest to fix once you know what to look for.
Most issues trace back to just a handful of causes that you can tackle yourself without calling in a technician.
Here’s how to diagnose and solve the most common thread and tension challenges you’ll face.
Adjusting Upper and Bobbin Thread Tension
If your stitches look uneven or the fabric puckers, tension imbalance is likely the culprit. Start by adjusting bobbin tension first—turn the screw in small quarter-turn increments and test on scrap fabric.
For rayon thread tension, aim for 100–130 grams using a tension gauge. Specialty fabric tension may require tighter settings, while thread storage impact can alter elasticity over time, affecting your tension settings.
Preventing Bobbin Thread From Showing on Top
When bobbin thread peeks through the top surface, you’re dealing with tension balance that’s off-kilter. Start with tension adjustment on the upper thread—dial it up incrementally—then inspect bobbin tension if needed.
Switch to a dedicated 60wt bobbin thread to reduce visibility by 75%. Double-check needle selection (75/11 or 80/12 work best) and stabilizer choice to support dense designs without thread and bobbin issues surfacing.
Resolving Thread Nesting and Jamming
Nothing stops a project faster than thread nesting under your fabric. This tangled mess—responsible for 45% of machine stoppages—usually stems from incorrect upper threading or loose bobbin tension.
Rethreading both top and bobbin threads resolves 87% of these jams on the first try. Clean out lint buildup, verify your presser foot is engaged, and always raise the bobbin thread before you start stitching.
Selecting Proper Needle and Thread Types
Your needle and thread must match, or you’re inviting breakage and skipped stitches. The 75/11 needle size accommodates 90% of projects with standard 40wt polyester thread.
Lightweight fabrics need 60-100wt thread paired with 65/9 to 80/12 needles, while heavy materials demand 30wt thread with 90/14 needles.
Specialty threads require corresponding needle types—metallic threads need larger eyes to prevent shredding and maintain thread compatibility throughout dense designs.
Perfecting Hooping and Fabric Stabilization
Think of hooping and stabilizing as the foundation that everything else builds on—get it wrong, and even perfect thread tension won’t save your design.
Your fabric needs the right support to stay put during stitching, and how you secure it in the hoop makes all the difference.
Let’s walk through the key techniques that’ll keep your fabric stable and your designs looking crisp.
Choosing The Right Stabilizer Type and Weight
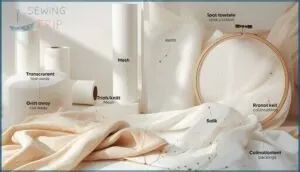
Your stabilizer choice makes or breaks your project. Match stabilizer type and weight to your fabric compatibility and stitch density needs. Cut-away works for stretch fabrics and high-density designs, while tear-away suits stable wovens.
For design complexity above 25,000 stitches, use heavyweight backing. Insufficient stabilization causes puckering in 68% of projects.
Consider washability needs too—cut-away stabilizers preserve registration through repeated laundering.
Mastering Proper Hooping Technique
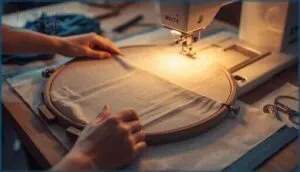
Think of hooping technique as setting your foundation—get it wrong, and everything shifts. Incorrect hooping technique triggers puckering and misalignment, but perfecting hooping technique transforms your results.
- Hoop size should match your design closely—proper fit reduces fabric movement by 60%
- Fabric alignment with the grain cuts distortion by 41%
- Hoop tension needs drum-tight firmness to prevent defects
- Slippage prevention through correct stabilizer pairing drops errors by 70%
Operator training standardizes these steps consistently.
Preventing Fabric Buckling and Misalignment
Fabric puckering and alignment challenges in embroidery stem from three factors you control: stabilizer selection, tension balance, and fabric prep. Choosing cut-away stabilizers for knits reduces distortion by 70%, while adhesive types prevent design shifting problems by 60%. Wrong stabilizer choice causes 90% of fabric buckling in high-stitch-density designs.
Pre-starching fabric and testing compatibility prevents fabric distortion in 79% of projects. Preventing fabric problems starts before your first stitch.
Using Magnetic Hoops for Stability
Magnetic hoops bring game-changing stability to your embroidery projects. They cut fabric distortion reduction by 70% and slash hooping time by 90%. Preventing damage to delicate materials, these tools deliver consistent tension that improves stitch quality dramatically.
Here’s what magnetic embroidery hoops do for you:
- Eliminate hoop burns on silks and fine fabrics
- Reduce setup strain during extended work sessions
- Cut defect rates by 92% on jackets and beanies
- Handle speeds up to 600 stitches per minute reliably
User acceptance stays high among beginners and pros alike. Just remember their limitations—magnets can weaken over time, and some models struggle with complex garment shapes.
Maintaining and Servicing Your Embroidery Machine
Your embroidery machine won’t run forever without a little TLC. Regular maintenance keeps your equipment running smoothly and prevents most problems before they start.
Here’s what you need to do to keep your machine in top shape.
Cleaning and Oiling Key Machine Components
After every few hours of stitching, you need to tackle lint removal from the bobbin case and needle area. Clean these machine components daily to reduce thread breakage by up to 19%.
Oiling frequency matters too—lubricate critical wear points every 3-4 bobbin changes using only approved oils. This lubrication and cleaning routine cuts repair costs by 15% while keeping your machine running smoothly.
Inspecting and Replacing Needles and Bobbins
Beyond cleaning, your needle and bobbin need regular inspection to prevent most stitch problems. Check your needle every 6-8 hours for bent tips or burrs—needle damage signs like these cause 72% of quality issues. Replace it after 1 million stitches or when you hear clicking sounds.
Bobbin tension checks matter too, since tension discrepancies create 60-70% of stitch complaints. Change bobbins every 1-2 projects.
Calibrating and Updating Machine Software
While many technicians overlook it, machine calibration and software updates directly impact your stitch quality and equipment lifespan. Industrial embroidery machines need calibration every 3–6 months to maintain alignment accuracy above 97%. Regular updates deliver these calibration benefits:
- 18–22% improvement in stitch quality through enhanced material handling algorithms
- 30% reduction in thread breakage rates across multi-material projects
- Error reduction of up to 25% when following ISO-compliant calibration protocols
- Lifespan extension of 3–5 years with consistent machine maintenance and digitizing software compatibility
Quarterly firmware updates keep your machine settings current and prevent the compatibility issues that cause 17–21% of failed job starts.
Establishing a Regular Maintenance Routine
Creating a structured maintenance schedule keeps your machine running smoothly and cuts downtime by up to 75%. Daily cleaning, rotary hook lubrication every 4–8 hours, and weekly thread path inspections form the foundation of machine performance.
Digital logs help track tasks and train operators to spot issues 40% faster. Consistent maintenance procedures extend equipment longevity by over 40% and reduce major breakdowns by 30%.
Preventing Future Embroidery Machine Issues
You’ve learned how to troubleshoot and fix embroidery machine problems, but the best approach is stopping issues before they start. Prevention isn’t complicated—it comes down to making smart choices about materials, staying ahead of maintenance needs, and ensuring your operators know what they’re doing.
The best way to avoid embroidery machine problems is preventing them through smart material choices, proactive maintenance, and proper operator training
Let’s look at four practical strategies that’ll keep your machine running smoothly and save you time and money in the long run.
Matching Fabric, Thread, and Design Appropriately
Think of fabric, thread, and design as a three-legged stool—one weak leg and everything topples. Thread weight must match fabric stability, meaning 40wt for medium cotton, 60wt for delicate silk. Design density demands proper needle selection and material compatibility.
Heavy denim needs 30wt thread, while complex patterns require stable fabric weave. Mismatched choices increase thread breakage by 35%, so respect fabric selection, thread type, and design complexity equally.
Implementing Predictive Maintenance Strategies
AI integration transforms reactive troubleshooting into proactive machine maintenance. You can cut downtime by 48% using IoT sensors that predict machine problems before they halt production.
These systems monitor tension, vibration, and temperature in real-time, achieving over 90% accuracy in failure prediction.
The result? Cost savings of 18-25%, uptime improvement of 15%, and stronger quality control through consistent machine performance.
Investing in Quality Supplies and Accessories
Premium supplies aren’t just extras—they’re the backbone of consistent embroidery. Thread quality matters for durability, and needle condition directly impacts stitch precision. You’ll cut breakage incidents by 50% with high-quality thread, while branded needles last up to 300,000 stitches versus just 100,000 for standard types.
Smart investments deliver measurable returns:
- Thread Quality Matters: Premium thread survives 50+ wash cycles without fading
- Stabilizer Benefits: Quality stabilizers reduce puckering in 30% more projects
- Accessory ROI: Businesses report 35% less downtime after upgrading components
Choosing the right bobbin and stabilizer type means fewer jams and smoother tension throughout production.
Training and Educating Operators for Best Practices
Your operator training shapes every stitch that leaves the machine. Structured training reduces user errors and machine issues dramatically—new operators supervised for 90 days cut defect rates from 10% to under 3%.
Skills standardization through certification benefits everyone: certified operators troubleshoot 30% faster and catch 70% of quality control problems before bulk runs.
Ongoing education keeps your team sharp on machine maintenance and new troubleshooting techniques, boosting operator engagement and production consistency.
Frequently Asked Questions (FAQs)
What are some common embroidery machine problems?
Thread breakage, fabric puckering, stitch quality issues, alignment errors, and machine failures top the list of common embroidery problems. These troubleshooting challenges affect both hobbyists and professionals working with embroidery machines.
How do I troubleshoot embroidery problems?
If your embroidery project looks like a tangled mess, don’t panic. Start with tension troubleshooting, check stabilizer selection, inspect for needle issues, and review thread quality.
Machine maintenance is key—most common embroidery issues vanish with these troubleshooting techniques.
What should I do if my embroidery machine is not working?
If your machine isn’t working, start with immediate troubleshooting—power off, check for jams, and review error codes. Take safety precautions before any emergency repairs.
For stubborn common embroidery issues, machine maintenance or seeking expert help is often essential.
Why is my embroidery machine not working?
Check for power issues, blown fuses, or error codes first—these can trigger sudden shutdowns or emergency stops.
Initial diagnostics should include inspecting for sensor malfunctions, thread breaks, poor maintenance, and simple needle or bobbin problems before deeper troubleshooting.
What should I do if my embroidery machine is misaligned?
If you’re facing alignment problems or design shifting, start with Needle Inspection and Hooping Techniques. Revisit your Stabilizer Choice, confirm Tension Balance, and run a Calibration Process.
These steps tackle pattern alignment issues and keep elements in correct position.
How do I know if my embroidery machine is bad?
If you notice stitch quality issues, frequent thread breaks, error code analysis pointing to mechanical issues, abnormal machine noises, or fabric handling problems, your embroidery machine likely needs maintenance.
These signs help you diagnose deeper machine problems before costly repairs.
How do I fix skipped stitches in embroidery?
Isn’t it funny how skipped stitches always show up when you’re on a roll? Start with needle replacement and tension adjustment. Focus on fabric stabilization and machine cleaning. Using the correct needle solves most skipped stitches and stitch quality problems.
What causes embroidery machine motor overheating issues?
Embroidery machine motor overheating often stems from Mechanical Overload, Electrical Irregularities, Inadequate Cooling, Environmental Stressors, and Maintenance Deficiencies.
Poor machine maintenance, blocked vents, or high ambient temperatures can trigger machine noise and other mechanical issues.
Why does my design shrink after stitching?
It’s no coincidence your design shrinks after stitching—fabric properties, thread tension, digitization errors, and design complexity all play a part.
Post-stitch care, fabric puckering, and poor pattern design can cause distortion, shifting, and registration errors.
How often should I replace embroidery machine belts?
Belt replacement frequency depends on use—expect to swap belts every 2-3 years or 10,000-15,000 hours. Watch for cracks, fraying, and stretching.
Preventative maintenance and proper machine care extend belt material lifespan despite environmental impact.
Conclusion
Think of your embroidery machine as a seasoned orchestra—each part must play in harmony for impeccable results. When one instrument falters, the whole performance suffers.
By mastering the art of solving embroidery machine issues, you’re not just patching up problems; you’re conducting a smoother, more reliable workflow. Every adjustment, every preventive measure, turns chaos into control.
With the right knowledge and care, your machine becomes a trusted partner, ready to help you create with confidence and precision.
- https://happyemb.com/files_education/hcd_ch4_124.pdf
- https://www.aquadigitizing.com/troubleshooting-table-for-embroidery-machines-fix-common-issues-fast/
- https://maggieframestore.com/blogs/maggieframe-news/inbro-embroidery-machine-error-codes-complete-troubleshooting-guide
- https://www.caydo.com/blogs/trends/troubleshooting-table-for-embroidery-machines
- https://www.textileschool.com/28883/textile-machinery-maintenance-and-downtime-calculations/

