This site is supported by our readers. We may earn a commission, at no cost to you, if you purchase through links.
Check your machine’s tension dial regularly; incorrect settings create that dreaded puckering effect. Cotton thread breaks easily under stress, so save it for stable fabrics only. Temperature changes affect thread strength, so work in consistent conditions when possible.
Master these basics and you’ll see a real difference in your work quality. The next step? Learning how different fabrics behave and adjusting your approach accordingly.
Table Of Contents
Key Takeaways
- You’ll prevent thread stretching by matching your needle size to thread weight and controlling machine tension between 3-6 for balanced stitches. Choose polyester thread over cotton since it’s got natural stretch that works with fabrics instead of fighting them, especially for stretch materials. Keep your thread lengths manageable at 18-24 inches and use thread conditioner to reduce friction and eliminate tangling before you start sewing. * You can avoid puckering by adjusting tension gradually, maintaining consistent needle angles at 90 degrees, and working at moderate speeds to prevent heat buildup.
Why Thread Stretches During Sewing
When you pull thread through fabric repeatedly, the mechanical friction creates tension that stretches the fibers beyond their natural elasticity.
Thread material composition and thickness determine how much distortion occurs, with synthetic fibers like polyester showing different stretch characteristics than natural cotton or silk threads.
Common Causes of Thread Stretching
When your thread starts stretching during sewing, a few culprits are usually to blame. The thread itself plays a big role—natural fibers like cotton naturally have more give than synthetic alternatives.
But the real troublemakers often come down to your machine settings. Tension that’s cranked too tight puts unnecessary strain on every stitch, while running your machine at high speeds creates heat that actually weakens the thread as you work.
Mix in a needle that doesn’t match your thread weight, and you’ve got a recipe for stretchy, unreliable seams.
- Incorrect thread tension – Too tight creates excess strain
- Mismatched needle size – Wrong fit damages Fabric Interaction
- Poor thread quality – Weak fibers compromise durability and seam integrity
- Machine maintenance issues – Dirty parts affect Troubleshooting Sewing Issues
- Temperature changes – Heat reduces thread strength during stitching
Effects of Thread Distortion on Projects
Thread distortion wreaks havoc on your projects, turning smooth fabrics into puckered messes. When thread stretches unevenly, you’ll see fabric distortion that compromises sewing accuracy and creates embroidery damage.
Thread breakage becomes inevitable as tension control fails. Project durability suffers when thread tangling disrupts proper elasticity, leaving you with amateur-looking results instead of professional finishes.
Impact of Thread Material and Thickness
Different thread materials behave uniquely under tension. Polyester offers 10-15% stretch ability, making it ideal for stretch fabrics, while cotton lacks elasticity. Synthetic threads resist breakdown better than organic cotton.
Thread properties vary based on three key factors: weight, fiber type, and finish. The thickness of your yarn directly influences how it handles stress and tension.
Your material choice also plays a role in whether threads tangle frequently during use.
Understanding Textile Science helps you match thread characteristics to your project’s demands for ideal results. Choosing the right thread type, such as best sewing threads, is essential for achieving professional-looking results.
Choosing The Right Thread and Needle
You’ll prevent most thread stretching problems by pairing the correct thread weight with your fabric’s density and selecting a needle size that creates clean punctures without excess friction.
Polyester threads offer exceptional strength and minimal puckering compared to cotton alternatives, while matching your needle’s eye diameter to your thread thickness ensures smooth passage through fabric fibers.
Matching Thread Type to Fabric
When fabric meets thread, compatibility becomes your secret weapon against puckering. Polyester thread works well with synthetics and blends, while cotton thread pairs seamlessly with natural fibers.
Weight considerations matter—matching thread thickness to your fabric prevents aesthetic issues. For stretch fabrics requiring project durability, specialized threads reduce thread tension and prevent thread tangling through better thread management.
Color matching affects your project’s final look, while proper thread type selection minimizes static cling during sewing. Understanding the importance of thread and fabric compatibility is essential for successful sewing projects.
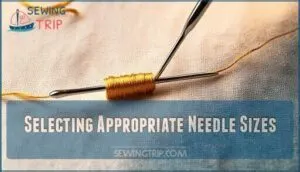
Selecting Appropriate Needle Sizes
Matching needle size to your thread weight prevents excess friction that causes stretching. Proper needle selection controls tension, preventing thread tangling during hand sewing operations.
Your needle size guide should align with fabric thickness match principles – heavier fabrics need larger needles. Thread compatibility depends on point style matters too.
Universal needle use works for most projects, but specialty needles reduce thread tension issues.
Benefits of Specialized Threads
The right thread makes all the difference in your sewing projects. When you pick threads designed for your specific fabric and technique, you get stronger seams that won’t pucker or break.
Your stitches glide smoother, colors stay true longer, and those frustrating tangles become rare. It’s one of those small changes that delivers big results.
- Maxi Lock Stretch Thread provides 100% textured nylon elasticity for knits
- Corespun polyester/cotton delivers highest breaking load and elongation
- Hand sewing thread benefits from conditioner treatment for smoother stitching
- Polyester threads minimize seam puckering compared to cotton alternatives
- Specialized threads reduce maintenance issues and boost overall performance
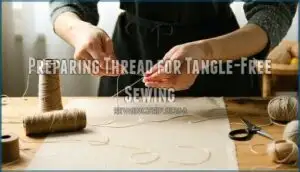
Preparing Thread for Tangle-Free Sewing
You’ll dramatically reduce thread tangling by properly preparing your strands before you start stitching.
Cut thread to 18-24 inches, condition it with beeswax or thread conditioner, and gently stretch it between your hands to align the fibers and eliminate natural twist that causes knots.
Optimal Thread Length for Hand and Machine Sewing
Thread length directly impacts your sewing success. For hand sewing, use 18-24 inches to prevent excessive tangling while maintaining control.
Machine sewing threads should match your project size – longer pieces for large quilts, shorter for detailed work. This length vs. tangling balance reduces thread waste and minimizes tension issues.
Proper thread length keeps your stitches smooth and your fabric pucker-free.
Using Conditioners and Beeswax
Conditioning your thread works like moisturizer for dry skin—it tames static cling and reduces friction.
Thread Heaven and commercial conditioners coat fibers smoothly, while DIY beeswax applications create natural lubrication.
Simply draw thread through conditioner or rub lightly with beeswax before threading your needle.
These application techniques prevent tangling and extend thread longevity, making tangle-free hand sewing simple.
Techniques for Straightening Thread Before Use
Before you start stitching, grab both ends of your thread and give it a gentle pull. This simple trick helps relax the fibers and reduces any twist that builds up during storage. You’ll also eliminate static cling while getting your thread ready for smooth sewing.
Think of it as giving your thread a mini spa treatment. Thread conditioner like Thread Heaven works even better than dryer sheets for cutting down on static electricity.
Techniques to Prevent Thread Stretching
You’ll master thread control by adjusting machine tension settings and using proper hand techniques that maintain consistent thread alignment.
These methods prevent the uneven pulling that creates puckered seams and loose stitches in your finished projects.
Controlling Thread Tension in Sewing Machines
Proper tension troubleshooting starts with your tension dials. Set upper thread tension between 3-6 for balanced stitches. Check bobbin tension by testing thread resistance through tension discs.
Thread tangles? Make small adjustments to your tension settings. Big changes often create new problems instead of fixing the original one.
Regular machine maintenance keeps mechanisms smooth. Use contrasting threads when troubleshooting to spot seam integrity issues immediately.
Hand Sewing Methods to Minimize Stretching
While machine tension gets the spotlight, hand sewing demands your personal touch for stitch tension control. Keep your needle insertion angle consistent at 90 degrees to prevent thread fiber alignment issues.
Use gentle pulling methods—don’t yank like you’re starting a lawnmower. Apply thread conditioner before threading your needle.
Practice avoiding over-tightening by maintaining steady pressure. Master these tanglefree hand sewing techniques for professional results.
Preventing Puckering and Loose Stitches
Balanced tension adjustment prevents fabric puckering while maintaining seam integrity. Set your machine’s tension dial to match your fabric weight—lighter fabrics need reduced tension.
Use appropriate stitch types for different materials. Stabilizer use aids delicate fabrics during stitching. Check feed dogs aren’t pulling unevenly against the fabric grain.
Thread conditioner reduces tangling, preserving thread elasticity throughout your project.
Finishing and Caring for Embroidery Projects
You’ve completed your embroidery, but proper finishing techniques prevent thread distortion and fabric puckering that can ruin hours of careful work.
Damp blocking, thorough cleaning, and correct framing methods preserve your project’s crisp appearance and structural integrity for years.
Damp Stretching and Blocking Techniques
Blocking transforms wrinkled embroidery into professional-looking artwork. Use clean embroidery blocking surfaces like cork boards with guidelines for squaring embroidery accurately.
Pin your damp fabric using proper pinning techniques, working from the center outward. This damp stretching process ensures wrinkle removal while maintaining thread integrity.
Clean your fabric first, then apply gentle tension for perfect finishing results.
Cleaning and Maintaining Finished Work
Once your embroidery’s properly stretched, you’ll want to keep it spotless. Accidents happen, but swift action saves your hand sewing thread’s integrity. The golden rule is to act quickly when dealing with stains:
- Stain Removal: Use tepid water and a pea-sized amount of Dawn dish soap, gently rubbing in circular motions
- Long-Term Care: Store flat in acid-free boxes with tissue paper barriers
- Restoration Techniques: For stubborn stains, soak in cold water with detergent for 30 minutes minimum
- Hand embroidery fabric care: Use a hand steamer to remove wrinkles between washes rather than pressing
- Thread Durability: Dab stains gently with soft cloth—never scrub delicate threads
Storage Solutions matter as much as cleaning. Your Display Considerations start with proper Embroidery finishing techniques.
Best Practices for Framing and Displaying Embroidery
Success in displaying finished embroidery requires strategic planning. Choose acid-free mounting boards and UV-protective glass to preserve your work’s integrity. Professional framing materials prevent deterioration over decades.
| Framing Materials | Conservation Methods |
|---|---|
| Acid-free matting | UV-filtering glass |
| Museum-quality backing | Climate control storage |
| Archival mounting tape | Regular condition checks |
Control lighting exposure to prevent fading. Exhibition ideas include rotating displays and protective cases for valuable pieces.
Frequently Asked Questions (FAQs)
How do humidity levels affect thread stretching?
Like a sponge absorbing water, threads react to humidity changes. High humidity makes natural fibers swell and stretch, while low humidity causes them to contract and become brittle, affecting your project’s tension.
Can thread age impact stretching behavior?
Yes, older thread becomes more brittle and loses elasticity over time. You’ll notice aged thread snaps easier and doesn’t stretch as much before breaking.
Store thread properly in cool, dry places to maintain its stretching properties longer.
What role does thread storage play?
You’ll protect your threads from stretching when you store them correctly. Keep spools in cool, dry places at room temperature – extreme heat or humidity weakens fibers and destroys elasticity permanently.
Do different stitch patterns cause stretching?
Different stitch patterns absolutely affect thread stretching. Dense stitches like satin create more tension than simple running stitches.
Complex patterns with frequent direction changes pull thread harder, increasing stretch risk.
Choose lighter stitch densities for delicate threads.
How does sewing speed influence stretching?
Flying fingers on high-speed machines create a nightmare scenario. Excessive tension yanks thread like a rubber band.
Sewing too fast causes uneven stretch, snapping, and thread distortion that’ll ruin your seams.
Conclusion
Thread stretching can turn sewing into a nightmare. But here’s the thing – once you nail the basics, your stitches look professional every time.
Start with tension control and the right needle for your fabric. Match your thread type too – polyester threads have built-in stretch while cotton needs a lighter touch.
Master tension control first—polyester threads stretch naturally with fabric while cotton fights it, so match your thread choice to your project’s needs
Stick to these habits: keep thread lengths reasonable, grab some thread conditioner when things get tricky, and check your machine settings before you start. Do this consistently and you’ll get clean, even stitches without any puckering or weird pulling. Smart thread management makes all the difference.
- https://ir.library.oregonstate.edu/downloads/z029p7629
- https://www.unbrakousa.com/images/pdf/fatigue.pdf
- https://ieomsociety.org/proceedings/2024dubai/311.pdf
- https://www.servicethread.com/blog/article/why-sewing-thread-is-lubricated-finished-reasons
- https://blog.chesterton.com/lubrication-maintenance/non-metallic-thread-lubricants/

