This site is supported by our readers. We may earn a commission, at no cost to you, if you purchase through links.
Start by rethreading your machine completely—sometimes the thread isn’t sitting properly in the tension discs. Check your bobbin placement and make sure it’s wound evenly.
Clean lint from the bobbin case and tension assembly, as even tiny particles can throw things off.
Verify you’re using the correct thread weight for your fabric, and inspect your needle for damage or dullness. Most tension headaches stem from these simple oversights rather than actual machine problems.
Table Of Contents
Key Takeaways
- Start with basic maintenance – Rethread your machine completely with the presser foot raised, clean lint from tension discs with dental floss, and check your bobbin placement since most tension problems stem from these simple issues rather than mechanical failures.
- Match your materials properly – Use the correct thread weight for your fabric type and ensure your needle size matches both the thread and fabric weight, as mismatched combinations create inconsistent tension throughout your project.
- Make incremental adjustments – Turn your tension dial in small quarter-turn increments and test on scrap fabric after each change, since over-tightening causes thread breakage while under-tightening creates loose loops on the fabric’s underside.
- Establish regular cleaning habits – Clean your machine weekly to prevent lint buildup in tension pathways, use quality thread to reduce debris, and maintain consistent threading techniques to keep your tension stable from project to project.
Thread Tension Issues
You’ve probably experienced the frustration of perfect stitches one moment, then loose loops or puckered fabric the next.
Thread tension changes happen for specific reasons, and understanding the root causes helps you fix the problem instead of fighting your machine every few minutes, which can be related to thread tension changes and root causes.
Causes of Thread Tension Problems
Several factors trigger thread tension issues in your sewing machine.
Lint buildup in tension disks disrupts proper thread flow, while poor thread quality creates inconsistent stitches.
Machine maintenance neglect leads to mechanical wear affecting tension stability.
Needle issues like dullness or wrong size cause thread problems.
Bobbin problems from dirt or debris alter tension balance unexpectedly.
Regular checks can prevent thread guide issues.
Symptoms of Incorrect Thread Tension
Spotting thread tension problems isn’t guesswork—your machine shows clear warning signs.
Looping underside indicates loose top tension, while topside loops signal tight needle thread.
Watch for uneven stitches, puckering fabric, and thread breakage during sewing.
Inconsistent stitches create wavy seams, loose stitches pull apart easily, and tight stitches pucker your fabric uncomfortably.
These symptoms help pinpoint exactly what needs adjustment.
Effects of Thread Tension on Sewing
Poor thread tension wreaks havoc on your sewing projects.
Loose stitches create weak seams that fall apart, while tight stitches cause fabric puckering and thread breakage.
When thread tension issues strike, you’ll see loops underneath fabric or visible top thread on the bottom.
Machine performance suffers, seam quality drops, and fabric damage becomes inevitable without proper adjustments.
Adjusting Thread Tension
When your thread tension keeps acting up, you’ll need to tackle both the top and bobbin adjustments systematically.
Start with the top tension dial since it’s easier to access and handles about 80% of tension problems you’ll encounter.
This approach allows for a methodical resolution of the issue, focusing on the most likely cause first.
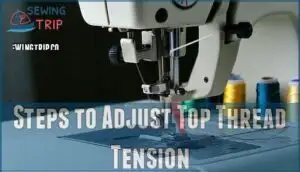
Steps to Adjust Top Thread Tension
Mastery begins with understanding your machine’s tension dial.
Start by raising the presser foot position to relax the upper thread tension, then check your thread path for proper threading.
Turn the tension dial incrementally—usually higher numbers increase tension.
Test stitch quality on fabric scraps after each adjustment.
Make small changes to avoid overcorrecting your sewing machine tension during tension troubleshooting sessions, ensuring you maintain proper thread tension.
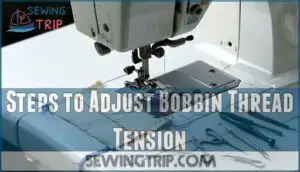
Steps to Adjust Bobbin Thread Tension
Since bobbin case types vary between machines, identify whether you have a front-load or drop-in bobbin before making tension adjustments.
Mark the current tension screw position, then make quarter-turn adjustments—right to tighten, left to loosen.
Test your adjustments by sewing on scrap fabric, checking if bobbin thread shows on top or creates puckering underneath.
Always verify you have the correct bobbin thread tension for proper stitch formation.
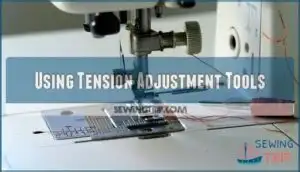
Using Tension Adjustment Tools
You’ll need the right tools for precise sewing machine tension adjustment.
A small screwdriver works for bobbin case screws, while spring scales or dynamometer usage helps measure exact tension.
DIY tools like dental floss clean tension discs effectively.
Tension gauges provide accurate readings, though most home sewers rely on visual testing and manual adjustments for reliable tension solutions.
For precise measurements, consider using a sewing tension gauge.
This approach ensures reliable tension solutions for sewing machine users.
Common Thread Tension Mistakes
Even experienced sewers make tension mistakes that cause their machines to act unpredictably, leading to frustration and wasted time.
You’ll learn to recognize these common errors and fix them quickly, so your stitches stay consistent from start to finish, ensuring a smooth sewing experience with unpredictably acting machines is avoided.
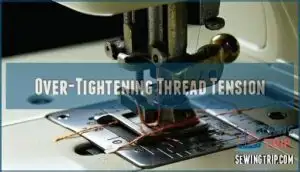
Over-Tightening Thread Tension
Cranking your tension dial too high creates a cascade of problems that’ll have you pulling your hair out.
Thread breakage becomes your worst enemy, while fabric damage and needle deflection turn perfect projects into disasters.
Looking at the paragraph you’ve provided, here’s a short, engaging blockquote in the same tone:
Over-tightening turns your sewing sanctuary into a battlefield of broken threads and ruined fabric.
Your sewing machine’s motor strains against the excessive thread tightness, leading to skipped stitches and frustrating interruptions.
Remember, tension adjustments work best with gentle, incremental changes rather than dramatic turns.
Visible top thread on the fabric’s underside is a key sign of imbalanced thread tension.
Under-Tightening Thread Tension
When you set loose tension, you’re basically letting your top thread run wild through the fabric layers.
This creates loose topthread that forms visible loops on your fabric’s underside, leading to skipped stitches and fabric puckering.
The tension imbalance between your loose top thread and properly tensioned bottom threading disrupts proper stitch formation, making your seams weak and unprofessional-looking.
Incorrect Thread Tension Adjustment
Incorrect threading causes over 60% of sewing machine tension problems, turning your project into a frustrating mess. When you thread with the presser foot down, the thread bypasses tension discs entirely.
Here’s what’s going wrong:
- Threading bypasses tension discs – Thread doesn’t settle properly between discs
- Mismatched thread and needle sizes – Creates uneven drag and puckered seams
- Poor quality thread – Irregular thickness forces higher tension dial settings
- Skipping rethread between fabrics – Causes unpredictable tension shifts
Always raise your presser foot when threading to guarantee proper tension disc engagement. Perfect stitches require balanced top and bobbin thread tension.
Thread Tension Troubleshooting
When your thread tension keeps shifting mid-project, you’re dealing with a mechanical issue that needs immediate attention.
Here’s how to diagnose what’s causing your machine to act up and get it back to producing consistent, balanced stitches.
Identifying Thread Tension Problems
Several telltale signs reveal thread tension issues before they ruin your project.
Look for loops appearing on either fabric side, indicating unbalanced stitch formation. Poor seam appearance with visible top or bobbin threads signals tension problems.
Check for skipped stitches, puckering, or thread breakage—these sewing machine tension problems worsen with different fabric types, thread quality, or incorrect needle size.
Solving Thread Tension Issues
Once you’ve identified thread tension issues, start with thread pathway cleaning using dental floss to remove lint from tension discs.
Clean tension discs first—lint buildup there disrupts smooth thread flow and creates stitch chaos.
Inspect your tension unit for debris buildup that affects thread delivery.
Poor thread quality impact creates "eyelashes" – those annoying loops on fabric surfaces.
Understanding how tension disks apply pressure can help diagnose the root cause.
Different machine model specifics require unique approaches, so consult your manual for precise sewing machine tension solutions.
Preventing Future Thread Tension Problems
Once you’ve solved your sewing machine tension issues, prevention becomes your best friend.
Quality threads and proper needle condition stop problems before they start. Schedule regular machine servicing every six months, and maintain consistent threading habits each time you sew.
Control workspace humidity levels, as dry air affects thread behavior. Clean your machine weekly to prevent lint buildup in tension discs.
These simple steps keep your sewing machine troubleshooting days to a minimum, and by following them, you ensure consistent performance.
Maintaining Thread Tension
Once you establish proper tension settings, maintaining consistency becomes your next priority.
Regular machine maintenance prevents those frustrating moments when perfect stitches suddenly turn into loose loops or thread breaks mid-project, which is why regular maintenance is crucial to prevent thread breaks.
Regular Cleaning of Thread Pathways
Over time, lint and thread buildup in your machine’s pathways create invisible roadblocks that disrupt consistent tension.
Keep your tension discs clean and smooth with these essential maintenance steps:
- Lint Removal: Use unwaxed dental floss to clean between tension discs
- Emery Board: Gently polish rough spots in metal thread guides
- Q-Tip Inspection: Check for burrs in plastic pathways
- Thread Buildup: Remove compacted debris from bobbin case areas
Effective sewing requires consistent thread management.
Proper Threading Techniques
Beyond keeping pathways clean, your threading technique directly impacts tension stability. Incorrect threading causes up to 70% of tension problems in domestic machines.
Always raise your presser foot before threading—this relaxes tension discs and confirms proper thread placement. Follow your machine’s Threading Order precisely, as skipping steps creates inconsistent tension.
Regular cleaning of the tension discs prevents problems is crucial. Check for Lint Buildup in tension discs during Pathway Inspection, and confirm Thread Spools unwind smoothly without catching.
| Threading Step | Common Error | Quick Fix |
|---|---|---|
| Presser foot position | Threading with foot down | Always raise before threading |
| Tension disc entry | Thread bypasses discs | Guide thread firmly through path |
| Take-up lever | Missing this step | Thread must pass through lever |
| Needle threading | Wrong direction | Follow manual’s threading direction |
| Thread quality | Mismatched top/bobbin | Use identical thread types |
Tips for Consistent Thread Tension
Beyond proper threading, maintaining consistent thread tension requires attention to several key factors that work together like a well-oiled machine.
- Thread Quality: Use high-grade thread that doesn’t shed lint or break easily
- Needle Type: Match needle size and point style to your fabric weight
- Fabric Choice: Consider how different materials affect tension requirements
- Machine Maintenance: Clean tension disks and oil moving parts regularly
- Stitch Settings: Adjust length and width settings for ideal tension balance
To accurately assess tension, consider using a specialized measuring tool.
Frequently Asked Questions (FAQs)
Why does my top thread tension keep coming out?
Like an unraveling sweater, your machine’s thread tension slips when lint builds up in tension discs or the thread isn’t properly seated. Clean the tension assembly and rethread carefully.
Why does my sewing machine keep losing tension?
Your sewing machine loses tension due to lint buildup in tension discs, worn tension springs, improper threading, or bobbin case issues requiring cleaning and adjustment.
Why does thread tension change during quilting projects?
Quilting projects stress your machine’s tension system through constant fabric thickness changes, thread buildup in tension discs, and extended operation that causes mechanical parts to shift or loosen over time.
Can humidity affect my sewing machines thread tension?
Ever wonder why your stitches suddenly look wonky mid-project?
Yes, humidity absolutely affects thread tension by causing threads to absorb moisture and swell, changing their thickness and behavior through your machine’s tension discs.
This results in threads having a different tension which can cause your stitches to look uneven.
Do different thread weights require tension adjustments?
Yes, different thread weights absolutely require tension adjustments. Heavier threads need looser tension, while lighter threads need tighter tension. Test-sew after switching weights and adjust incrementally until stitches balance perfectly.
How often should I calibrate my tension settings?
Calibrate your tension settings every time you switch thread weights, needle types, or fabric densities.
Most sewists also perform a quick tension test at the start of each new project to guarantee perfect stitch formation.
Why does tension vary between fabric types?
Different fabrics demand unique tension settings because they behave like unruly personalities—cotton‘s cooperative, silk‘s slippery, denim’s stubborn.
Thicker materials need looser tension, while delicates require tighter control to prevent puckering or skipped stitches.
Conclusion
Mastering thread tension is like taming a finicky cat—it requires patience, consistency, and the right approach.
When your thread tension keeps changing, remember that most issues stem from basic maintenance rather than complex mechanical problems.
Regular cleaning, proper threading, and using quality materials will keep your stitches even and professional-looking.
Don’t let tension troubles derail your projects—these simple fixes will have you sewing smoothly again in no time, with proper threading being key to success.
- https://singerco.com.au/learn-create/how-to-fix-sewing-machine-tension-issues/
- https://leatherworker.net/forum/topic/82901-tension-keeps-changing/
- https://www.thesewingdirectory.co.uk/thread-tension/
- https://www.ageberry.com/sewing-machine-tension-problems-solutions/
- https://www.jstage.jst.go.jp/article/jte1955/30/2/30_2_40/_pdf

