This site is supported by our readers. We may earn a commission, at no cost to you, if you purchase through links.
Follow your machine’s color-coded threading path. Use tweezers to grab threads through tight spots. Keep thread lengths equal to avoid tangles.
Start with your machine turned off and presser foot up. Thread tension discs properly – skipping them creates poor stitches. Pull threads under the presser foot before starting.
Most threading problems happen when you rush or skip steps. The right technique makes all the difference between frustration and smooth sewing. Mastering these fundamentals opens up advanced serging techniques that transform your projects. The proper order and avoiding skipped steps are crucial for successful threading, ensuring a smooth sewing experience.
Table Of Contents
Key Takeaways
- Follow the correct threading order every time – You’ll thread your upper looper first, then the lower looper, and finally the needles (right then left). This specific sequence prevents tangles and ensures your serger runs smoothly.
- Use tweezers and keep thread lengths equal – You’ll need tweezers to thread through tight spots and small looper eyes. Cut all threads to 6 inches for consistent feeding and to avoid uneven stitches.
- Thread tension discs properly with the presser foot up – You can’t skip threading through tension discs, or your stitches won’t form correctly. Always lift your presser foot while threading, so the tension discs open properly.
- Test your threading before starting projects – You should chain off threads on fabric scraps to verify that everything’s working correctly. This prevents frustration and ensures balanced stitches before you begin your actual sewing project.
Serger Machine Basics
You’ll need to know your serger’s main parts before you start threading it. The upper looper, lower looper, and needles work together to create strong seams that finish fabric edges.
Key Components
Your serger has five main parts that work together like a team.
When your serger’s parts work as a team, every stitch becomes a victory.
The upper and lower loopers create the overlock stitch while needle types determine stitch formation.
Tension disks control thread flow, and the presser foot holds fabric steady.
Differential feed prevents puckering on stretchy materials.
Understanding these components makes serger threading guide steps much easier to follow, using the serger.
Threading Order
Now that you know your serger’s parts, the threading sequence becomes your roadmap to success.
Getting the order wrong means thread jams and frustration. Your serger threading guide follows a specific pattern that can’t be skipped.
The threading a serger process demands precision:
- Upper looper first – Always start here for proper tension balance
- Lower looper second – Creates the foundation for your thread path
- Needles last – Right needle, then left needle completes the order importance
Most machines feature color-coded guides that match this serger threading tutorial sequence.
Always test by chaining off threads to confirm proper function.
Thread Paths and Tension
Understanding thread paths keeps your serger running smoothly. Each thread follows a specific route through guides and tension discs. Proper tension balance creates even stitches while preventing thread breakage.
Check for path obstructions that block smooth thread flow. A serger machine often uses multiple threads for finishing raw fabric edges.
| Thread Type | Tension Setting | Common Issues |
|---|---|---|
| Upper Looper | 3-4 | Loose stitches, poor looper alignment |
| Lower Looper | 2-3 | Thread bunching, stitch formation problems |
| Needles | 4-5 | Thread quality issues, breakage |
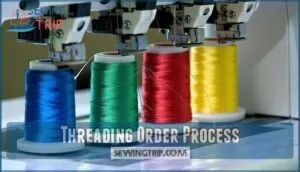
Threading Order Process
You’ll need to thread your serger in the right order to get perfect stitches every time. The correct sequence is upper looper, lower looper, right needle, then left needle.
Upper Looper Threading
Your serger machine threading journey starts with the upper looper. This component sits on top and creates the overlock stitch’s foundation.
Follow this threading guide for smooth results:
- Thread Path: Guide thread through designated points following your machine’s color-coded system
- Tension Disks: Seat thread properly between tension disks for even stitches
- Tweezers Technique: Use tweezers to thread the small upper looper eye
- Waxing Thread: Apply thread wax to stiffen ends for easier threading
Lower Looper Threading
After the upper looper, thread your lower looper next.
Turn the handwheel until you see the lower looper clearly.
Use tweezers for threading the small eye.
Pull thread through tension disks smoothly.
Check that thread flows without snags through all guides.
| Threading Step | Tool Needed | Key Point |
|---|---|---|
| Turn handwheel | Hands | See lower looper |
| Thread eye | Tweezers | Use small opening |
| Check tension | Fingers | Smooth flow only |
| Test guides | Eyes | No snags allowed |
To ensure smooth flow, follow these steps carefully.
The lower looper and tension disks are critical components.
Needle Threading
Threading your needles comes next in the serger threading steps. Start with the right needle, then move to the left.
Use tweezers if the needle eye seems tight. Pull thread through the guide in front of the needle bar first.
For double needles, make certain the left needle sits higher than the right. Manual techniques work better than automatic threaders for most serger needle threading tasks.
To improve visibility, consider using white paper behind the needle to simplify the threading process.
Thread Length and Tension
After threading your needles, cut each thread to match at 6 inches for length consistency.
Your serger tension settings need balance for smooth stitching. Set tension dials to 3 for most thread types and fabric compatibility.
Poor tension causes loose loops or puckered seams. When threading a serger, matching thread lengths prevents uneven feed.
Test balanced stitching on scraps before starting your project.
Threading Steps and Techniques
Now you’ll learn the specific steps to thread your serger machine correctly. These techniques will help you avoid tangles and get smooth stitches every time.
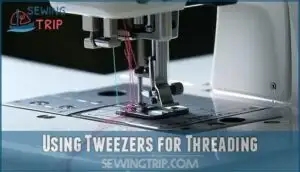
Using Tweezers for Threading
Tweezers make threading a serger much easier.
Choose thin-tip tweezers for better looper access.
Hold them with firm grip strength for steady control.
Insert the thread through small holes without forcing it.
Use tweezers for needle threading when fingers won’t fit.
Keep tweezers handy during the entire process.
This simple tool saves time and frustration when threading tight spaces.
Consider purchasing serger threading tweezers for ideal use.
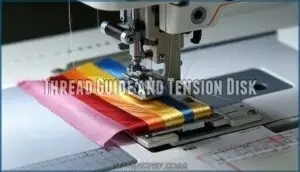
Thread Guide and Tension Disk
Understanding tension discs is like learning the heartbeat of your serger.
These metal components control thread flow and create balanced stitches.
When threading a serger, lift your presser foot so tension discs open properly.
Clean thread guides regularly since lint affects tension adjustment tools.
The guide material impact determines stitch quality.
Proper thread path optimization through tension discs prevents loose, uneven serging results, ensuring a smooth and efficient serging process.
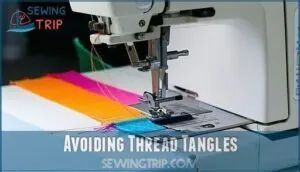
Avoiding Thread Tangles
Your serger’s thread quality depends on proper spool placement and smooth threading speed.
Keep spools aligned and feed thread steadily to prevent knots. Check tension balance regularly – loose threads create tangles while tight ones snap.
Regular cleaning removes lint buildup that causes snags. When threading a serger, move deliberately through each guide.
These serger threading tips prevent most tangling issues and ensure a smooth operation with proper thread quality.
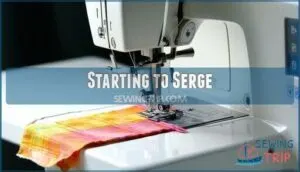
Starting to Serge
Once your threads flow smoothly without tangles, you’re ready to fire up your machine.
Place a small fabric scrap under the presser foot before starting – this prevents threads from pulling back into the machine.
Here’s your serger threading for beginners startup checklist:
- Position fabric under presser foot – Even a tiny scrap works
- Lower the presser foot – This engages the tension properly
- Turn the handwheel slowly – Check all threads move together
- Start sewing at medium speed – Let the machine find its rhythm
Troubleshooting Common Issues
Even with perfect threading, you’ll face problems like jammed threads or broken stitches. These issues happen to everyone and you can fix them with simple steps.
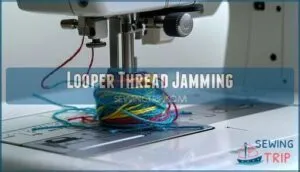
Looper Thread Jamming
Even with perfect threading, your upper looper and lower looper threads can still jam or break.
Check your tension settings first – improper tension problems cause most jams. Always keep your presser foot up while threading to release tension discs.
If your serger knife blade chews fabric instead of cutting cleanly, replace it immediately. Poor thread quality also causes frequent jams during serger maintenance.
Many users seek a looper thread solution to address this, looking for a way to fix improper tension and poor thread quality issues, and to understand the importance of serger maintenance and tension settings.
Poor Stitch Quality
Spotting poor stitch quality on your serger? You’re not alone. Tension imbalance and skipped stitches plague many sewers, but quick fixes exist.
- Loosen needle tension – Test sew after adjusting tension settings
- Change needle size – Match needle to your fabric compatibility needs
- Check thread type – Use quality serger thread for consistent results
- Verify stitch tension – Examine fabric backside for unbalanced stitches
Using the correct thread can greatly improve your project, so consider serger thread options.
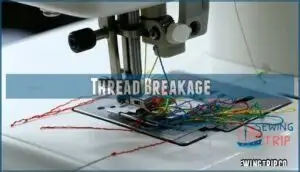
Thread Breakage
When your serger’s threads snap like guitar strings under pressure, it’s usually a threading order problem.
Follow the correct sequence: upper looper, lower looper, then needles.
Check your thread path for doubled guides and verify tension settings.
Poor thread quality or incorrect needle condition also causes breaks.
Regular serger maintenance prevents most tension balance issues in your serger troubleshooting guide.
Addressing thread tension problems is essential for smooth serger operation.
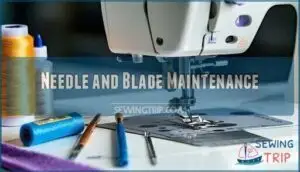
Needle and Blade Maintenance
Your serger machine needs regular upkeep to run smoothly.
Replace needles every 8-10 hours of sewing or when stitches skip. Change the cutting blade when fabric gets chewed instead of cleanly cut.
Clean lint from threading paths weekly. Oil mechanisms monthly following your manual.
Store your serger in a dry place for rust prevention and peak performance, ensuring regular upkeep is maintained.
Optimizing Serger Performance
Once you’ve mastered threading your serger, you’ll want to fine-tune the machine settings for best results.
Proper tension, stitch length, and feed adjustments make the difference between okay stitches and perfect ones.
Tension Settings and Adjustment
Start with all tension dials at neutral position, usually around 4 or 5.
Test swatches help you find balanced stitches for different fabric compatibility and thread types.
Adjust one tension disc at a time for proper stitch tension.
Too tight creates puckering, too loose makes weak seams.
Tension troubleshooting requires patience and small tension adjustments until your stitches look perfect.
Stitch Length and Width Settings
After dialing in your tension settings, you’ll want to adjust your stitch dimensions.
Your serger’s stitch length dial controls how far apart each stitch sits, while the stitch width dial determines how much fabric gets trimmed.
For rolled hem settings, use shorter lengths. Flatlock stitch settings need wider widths. Decorative stitch options require experimenting with both dials.
Differential Feed Settings
Your differential feed dial controls how fabric moves through your serger.
Set it to "1.0" for normal sewing.
Numbers below 1.0 stretch fabric, perfect for gathering fabrics or creating a wave stitch effect.
Numbers above 1.0 compress fabric, preventing seam puckering on knits.
Different fabric types need different feed ratios – experiment to find what works best for your project.
Presser Foot Pressure and Adjustment
Your presser foot pressure controls how firmly fabric feeds through the machine. Adjust pressure settings based on material thickness – lighter pressure for delicate fabrics, heavier for thick materials.
Most sergers have adjustable tension dials near the presser foot. Test sew on fabric scraps first.
Balanced tension benefits seam strength and stability. Proper foot compatibility and pressure settings improve seam quality and prevent fabric puckering during sewing techniques.
Frequently Asked Questions (FAQs)
How do you thread a serger machine?
Thread your serger in this order: upper looper, lower looper, right needle, left needle.
Follow the color-coded guides on your machine. Use tweezers for tight spots.
Keep threads about six inches long when finished.
How many threads does a serger use?
A serger typically uses 2, 3, or 4 threads depending on your project needs.
Most home sergers handle 3-4 threads for overlocking seams and finishing edges.
You’ll choose based on stitch type and fabric weight.
How do you use a serger?
First, thread your machine in the correct order: upper looper, lower looper, left needle, right needle.
Place fabric under the presser foot, then guide it through while the machine creates finished seams automatically.
How do you use a serger on a sewing machine?
Using a serger isn’t rocket science, but it’s trickier than regular sewing.
You’ll thread multiple spools in order: upper looper, lower looper, left needle, right needle.
Practice makes perfect with this finicky machine.
How do you thread a serger spool?
Place your thread cone on the spool pin with the thread feeding from the top.
Add a spool cap to keep it secure.
For smaller spools, use thread cone inserts to prevent wobbling and guarantee smooth feeding.
How do you thread a hammer Serger?
Looking for "hammer serger" threading instructions, but this appears to be a typo.
You’ll need to identify your serger’s actual brand and model first.
Most sergers follow the same basic threading order: upper looper, lower looper, then needles.
How to thread an overlocker step by step?
Thread your overlocker in this order: upper looper, lower looper, right needle, then left needle.
Follow your machine’s color-coded guides carefully.
Pull each thread through tension discs and guides completely before moving to the next one, ensuring you follow your machine’s instructions.
Which thread is the upper looper on a serger?
Like a conductor leading an orchestra, the upper looper thread sits on top of your fabric during stitching.
You’ll typically find it’s the leftmost thread on your serger’s spool pins, creating the visible overlock stitch formation, with the upper looper thread being a key part of the overlock stitch.
Do you need 4 spools of thread for a serger?
You don’t always need four spools for your serger.
Most machines can run on two or three threads, depending on your stitch type.
Four-thread overlock gives the strongest seam, but simpler stitches work fine.
Do you thread the upper or lower looper first?
Believe it or not, you’ll thread the upper looper first when setting up your serger.
This sequence prevents tangles and guarantees smooth operation.
Follow with lower looper, then right needle, and finally left needle for best results.
Conclusion
Mastering this threading a serger machine guide seems complex at first. Yet following these simple steps makes it straightforward.
You’ll thread your serger quickly once you know the proper order. Start with the upper looper, then lower looper, and finish with needles.
Use tweezers for tight spots. Keep threads equal length. Check tension discs carefully.
Practice these steps regularly. Soon you’ll thread your machine without thinking. Your serging projects will run smoothly with proper threading technique.
- https://threadsmonthly.ck.page/
- https://www.mhthread.com/blog/products/thread-serger
- https://threadistry.com/blog/serger-troubleshooting/?srsltid=AfmBOoqQm1nXq4XsRZn4UqZD7MuYHb9N9vleFfeRb4ITyqw7ssmuNo2R
- https://www.youtube.com/watch?v=yUVL36bc60g&pp=0gcJCdgAo7VqN5tD
- https://sweetredpoppy.com/wp-content/uploads/2021/09/Serger-Troubleshooting-Guide.pdf

