This site is supported by our readers. We may earn a commission, at no cost to you, if you purchase through links.
Your tape measure doesn’t lie, but sometimes we misread it.
Look for telltale signs: horizontal pull wrinkles indicate insufficient width, while vertical wrinkles signal excess length.
Diagonal drag lines? You’ll need both width and length adjustments.
Test critical changes on muslin first – it’s like a dress rehearsal that saves your good fabric from disaster.
Check dart placement, crotch depth, and ease allowances carefully.
Remember, fabric stress creates drag lines that point directly to problem areas.
The secret lies in reading these wrinkle patterns like a roadmap to perfect fit.
Table Of Contents
- Key Takeaways
- Double-Checking Measurements Before Adjusting Patterns
- Diagnosing Common Fitting Issues in Patterns
- Troubleshooting Pants Width Adjustment Problems
- Solving Pants Length and Rise Fit Challenges
- Addressing Curve and Shape Discrepancies in Fit
- Correcting Dart Placement and Amount for Structure
- Optimizing Shoulder and Armhole Adjustments
- Managing Activity Ease and Movement Restrictions
- Resolving Structural Errors Despite Accurate Patterns
- Frequently Asked Questions (FAQs)
- Conclusion
Key Takeaways
- You’ll save time and fabric by reading wrinkle patterns like a roadmap—horizontal pulls mean you need more width, vertical wrinkles signal excess length, and diagonal drag lines require both adjustments.
- You should always test critical changes on muslin first before cutting expensive fabric, as this dress rehearsal reveals exactly where your pattern needs tweaking without costly mistakes.
- You can diagnose fit problems by cross-referencing your body measurements against the pattern’s finished dimensions, checking dart placement, crotch depth, and ease allowances carefully.
- You’ll achieve better results by making small, targeted adjustments one at a time rather than attempting multiple fixes simultaneously, ensuring each change addresses the specific stress points your fabric reveals.
Double-Checking Measurements Before Adjusting Patterns
Before you start cutting into expensive fabric, double-check your pattern measurements against both your body dimensions and the garment’s finished size to catch potential disasters early.
Measure twice, cut once—your wallet and sanity will thank you later
You’ll save hours of frustration by verifying that your ease allowances match the pattern’s intended fit and testing critical adjustments on a muslin first, which helps prevent potential disasters.
Comparing Body and Pattern Measurements
Your pattern’s measurements might look spot-on, but body proportions tell the real story.
Accurate measurements using proper measuring tools reveal fit discrepancies that cause sizing challenges, making pattern adjustments essential for eliminating persistent fit issues.
- Cross-reference your bust, waist, and hip measurements against the pattern’s finished dimensions to spot potential trouble zones before cutting
- Compare your torso length and back measurements to the pattern pieces using a flexible measuring tape for precision
- Check high bust versus full bust measurements to identify if you’ll need a full bust adjustment later
Verifying Ease Allocation for Comfort
Ease allocation transforms patterns from flat drawings into comfortable, wearable garments.
You’ll need adequate movement ease beyond your body measurements for natural comfort and functionality.
| Garment Type | Minimum Ease | Movement Considerations |
|---|---|---|
| Fitted Blouse | 2-4 inches | Arm lifting, shoulder rotation |
| Straight Skirt | 1-2 inches | Sitting, walking stride |
| Custom Jacket | 4-6 inches | Layering, professional movement |
| Athletic Wear | 3-5 inches | Full range of motion |
| Evening Dress | 1-3 inches | Dancing, formal postures |
Check your pattern’s finished measurements against body measurements plus required ease.
Insufficient ease creates pulling and restriction, while excessive ease produces unflattering bulk.
Consider your fabric choice—knits need less ease than wovens due to stretch properties.
Using Muslin Test Garments for Fit
Creating a muslin test garment lets you catch fit problems before cutting expensive fabric.
This practice fabric reveals how your pattern adjustments translate to real wear, showing you exactly where tweaks are needed.
- Choose lightweight cotton muslin that drapes similarly to your final fabric selection
- Baste seams loosely for quick adjustments during multiple fitting sessions
- Mark problem areas directly on the muslin with fabric markers or pins
- Test movement by sitting, walking, and reaching to identify restriction points
- Transfer corrections to your paper pattern before cutting good fabric
Diagnosing Common Fitting Issues in Patterns
When your carefully adjusted pattern still creates an ill-fitting garment, the fabric itself reveals what went wrong through telltale signs.
You’ll spot three main culprits: drag lines that show where fabric stretches under stress, excess fabric that pools in unwanted places, and areas so tight they restrict your movement.
Identifying Drag Lines and Wrinkles
Fabric stress reveals itself through telltale drag lines and wrinkles that act like a roadmap to fitting disasters.
Horizontal lines scream "too tight," while vertical wrinkles whisper "too long."
Diagonal drag lines demand both width and length adjustments.
Your muslin test garment becomes a crystal ball, showing exactly where pattern adjustment issues lurk before you touch expensive fabric.
Understanding these signs is essential for making effective pattern adjustments to achieve a perfect fit.
Recognizing Excess Fabric and Pooling
While drag lines show where fabric pulls too tightly, excess fabric creates the opposite problem.
You’ll spot fabric pooling when material bunches or gathers where it shouldn’t, creating unflattering bulk.
This excess ease appears as sagging at the bust, baggy areas around the waist, or drooping fabric at the shoulders.
Garment shaping suffers when pattern alterations don’t account for your body’s curves, leaving you swimming in fabric that lacks proper fit.
Spotting Tightness and Restricted Movement
Looking beyond the obvious, tightness signals trouble brewing in your garment’s fit.
When tight sleeves restrict arm movement or fabric stretch limits body curves, you’ve spotted classic fit issues.
Troubleshooting patterns means recognizing these movement restrictions early, watching for pulling fabric that fights against natural motion—your body’s telling you exactly where pattern adjustments need attention.
Troubleshooting Pants Width Adjustment Problems
When pants pull horizontally across your abdomen, seat, or thighs, you’re dealing with classic width shortage that creates uncomfortable tension lines.
These telltale wrinkles point directly to where your pattern needs more room, making the fix straightforward once you know what to look for, and the solution involves addressing the width shortage.
Horizontal Pull Wrinkles at Abdomen
When horizontal pull wrinkles stretch across your abdomen, you’re dealing with insufficient pattern width.
These fabric tension lines scream "too tight!"
Your waist adjustment needs more room through the front pieces.
Reading wrinkles correctly saves your sanity—abdomen fitting requires adding width at side seams and center front.
Pattern alteration through slashing and spreading eliminates abdominal wrinkles while maintaining proper body proportion.
Understanding proper pants fitting is essential for a comfortable and well-fitted garment, and it requires a good understanding of abdomen fitting.
Horizontal Pull Wrinkles at Seat
When pull wrinkles stretch across your seat area, you’re dealing with insufficient back leg width.
These horizontal lines spell trouble – your pants need more room through the hip and seat circumference.
Reading wrinkles here reveals fabric tension from inadequate crotch depth or narrow back rise measurements.
Seat fitting requires adding width at back side seams and inseam for proper pant adjustments and comfort.
Horizontal Pull Wrinkles at Thigh and Side Seam
When fabric strains across your thigh area, you’re dealing with insufficient width that creates uncomfortable horizontal pull wrinkles.
These wrinkles typically appear when the thigh circumference exceeds the pattern’s allocated space.
Side seam adjustments offer the most effective solution for thigh adjustments. Add width by slashing the pattern at the fullest thigh point, spreading pieces to accommodate your measurements.
Wrinkle analysis reveals whether you need bias wrinkles correction or simple seam shaping modifications to eliminate fabric tension completely.
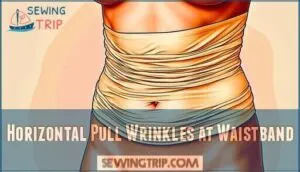
Horizontal Pull Wrinkles at Waistband
When your waistband pulls tight across your middle, you’re dealing with insufficient waist circumference in your pattern.
This classic waistband fitting issue creates horizontal stress lines that scream "too small!"
Check your waist and hip adjustments first—you’ll need to add width through side seams or center back seaming techniques.
Pattern alterations should account for body proportions, ensuring your fabric choice works with the final fit adjustments.
To achieve a comfortable fit, consider using waistband expansion methods to adjust the garment.
Solving Pants Length and Rise Fit Challenges
Getting pants to fit perfectly means addressing length and rise issues before you even cut your fabric.
You’ll spot problems like horizontal folds, knee wrinkles, or uneven hems by double-checking measurements and making small, targeted adjustments on your pattern.
Horizontal Folds at Back Waist
Back fitting got you puzzled?
Horizontal folds at the back waist often signal excess fabric pooling between your waist and hips—a classic case for waist adjustments.
These fit discrepancies usually stem from swayback posture or patterns drafted too long at the center back.
Master pattern alterations like fish-eye darts or center-back adjustments for precision.
Fine-tuned pattern adjustments quickly fix stubborn back folds, making waist adjustments a key solution.
Horizontal Folds Under Seat
When those horizontal folds show up under the seat, it’s your signal that Seat Depth or Pant Rise needs a tweak.
Too much fabric pooling? Check your Crotch Curve and consider an Inseam Adjustment.
Here’s what helps:
- Compare pattern to your shape.
- Test seat depth with a muslin.
- Redraw crotch curve.
- Pin out excess fabric.
Bias Pull Wrinkles From Knee Area
When you think you’ve solved fabric pooling under the seat, yet knee wrinkles or bias folds appear at an angle from the knee, it’s a sign.
Wrinkle direction points to pants fitting problems: you likely need a knee adjustment.
Tweak your pattern adjustments with subtle shifts at the inseam or side seam to smooth out fabric distortion and banish these fitting issues.
To address these common problems, understanding crotch length adjustments is essential for achieving a perfect fit.
Rise and Hem Length Corrections
No two pants fitting problems feel as personal as rise and hem length issues.
Check your crotch depth and waist rise before you touch scissors.
To fix inseam adjustment or pant break, alter crotch length at the pattern’s rise line, and true up the hem alignment.
Precision here stops length issues from ruining the look—or your day, which is why checking these measurements is crucial for a perfect fit.
Addressing Curve and Shape Discrepancies in Fit
You’ll spot curve and shape discrepancies fast when seams won’t follow your body’s natural lines or fabric bunches in odd places.
Fixing these issues calls for precise line redrawing and thoughtful contour adjustments, so every piece matches your real shape.
Vertical Pull Wrinkles on Front Crotch
If you’re seeing vertical pull wrinkles on the front crotch, your pants are signaling that the crotch depth or front rise needs tweaking.
These vertical pulls point to a crotch adjustment—often meaning the crotch length is too short for your body.
Dial in your pant fitting by adding length to your pattern, smoothing vertical wrinkles, and reading wrinkles to fine-tune fit.
Horizontal Fold Wrinkles on Front Crotch
A tailor’s sharp eye spots horizontal fold wrinkles on your front crotch—usually a red flag for excess Crotch Depth or improper ease allocation.
Fine-tune your pattern adjustment by shortening the crotch curve or tweaking ease. Successful Fold Analysis and Wrinkle Removal often hinge on understanding fabric characteristics.
Quick Pattern Alteration leads to fast Fit Correction, restoring comfort and clean lines. Understanding crotch length problems is vital for making accurate adjustments to achieve a perfect fit.
Horizontal Pull Wrinkles Under Seat
When those horizontal pull wrinkles show up under the seat, it’s not just a cosmetic issue—it’s your pants calling for help.
Tightness here often means you need to adjust crotch depth or add width at the back thigh.
Check for fabric pooling or distortion along the hip curve.
Small inseam adjustments can make a big difference in solving seat fitting problems.
Correcting Dart Placement and Amount for Structure
If your darts aren’t in the right spot or the wrong size, you’ll end up with puckers or flattened curves instead of smooth shaping.
Fixing dart placement and amount gives your garment structure—think of it as tuning your pattern for a sharp, clean finish.
Judging Dart Depth and Position
Getting Dart Placement right means less drama with bust fitting problems and more clothes that actually fit.
Measure twice—dart depth makes a difference in seam alignment and fabric tension.
Use dart manipulation or rotation for curve fitting that hugs the body, not crumples it.
Pattern drafting isn’t guesswork; try your pattern adjustments on muslin first to see how those darts behave and fine-tune as needed.
Accurate dart placement requires understanding dart placement tools to achieve professional results with proper dart placement and dart manipulation.
Modifying Darts to Eliminate Chest and Back Wrinkles
After pinpointing ideal dart depth and position, focus on nuanced dart adjustment.
Tweak dart placement by shifting shoulder slopes or angling in the direction of the bust apex for better chest fit and back shaping.
Adjusting dart intake and tip location smooths chest wrinkles and back wrinkles, which comes from thoughtful dart manipulation—not just eyeballing trouble spots but using methodical, data-backed tweaks for lasting results.
Optimizing Shoulder and Armhole Adjustments
When you fine-tune shoulder and armhole adjustments, you’ll correct everything from awkward sleeve movement to fabric pulling across the chest.
Get precise by checking the shoulder slope and armhole curve so your next make sits right and feels comfortable every time.
Detecting Shoulder Slope and Armhole Curve Issues
Gravity’s no friend to shoulder slopes or armhole curves.
Check the Shoulder Fitting by laying your pattern on a flat surface—notice if the slope matches your natural angle.
For precise Slope Adjustment, tweak the Shoulder Fitting on your pattern and redraw the armhole.
Curve Modification impacts Armhole Depth and Arm Mobility, so focus on clear lines to prevent structural problems or odd dart placement in pattern making.
Relieving Wearing Tension in Sleeves
When wearing tension hits your sleeves, look at Sleeve Ease and fabric stretch first.
A tight sleeve cage or skipped Bicep Adjustment often strangles arm mobility. Adjust the armhole curves and shoulder slopes to stop seam tension without adding bulk.
A little dynamic wearing—like circling your arms—will quickly show if mobility is right, or if you need more slack for real comfort.
To achieve a professional finish, consider mastering sleeve alteration techniques to guarantee a perfect fit.
Managing Activity Ease and Movement Restrictions
You need to build in enough activity ease so your clothes move with you, not against you.
If you’re feeling like a tightly wrapped burrito every time you reach or bend, it’s time to check your pattern’s slack and mobility zones.
Adding Activity Slack to Patterns
When you’re after peak arm mobility or flexible kneeling, don’t skimp on activity slack during pattern adjustment.
Analyze movement and pinpoint where fabric needs room, then tweak ease allocation for a truly dynamic fit.
Even a small boost in slack, matched to fabric elasticity, transforms garment fit—solving pattern adjustment issues and supporting dynamic wearing without compromise.
Understanding activity slack calculators is vital for making informed decisions about ease allocation and fabric selection, utilizing activity slack tools to achieve superior results.
Differentiating Static Vs. Dynamic Ease Needs
A sharp Fit Analysis starts with knowing the difference between static ease and dynamic ease.
Static wearing covers basic comfort—like sitting still—while dynamic fitting guarantees movement ease for daily life.
Successful ease calculation means you’ll allocate just enough for garment fit without bagginess.
For precise pattern adjustments, balance ease allocation based on real activity, not generic charts.
Understanding garment ease principles is essential for achieving the perfect fit.
Adjusting Sleeve Cage and Crotch for Mobility
As you fine-tune ease for real movement, you’ll want sleeve mobility and crotch depth that rise to the challenge—no more getting stuck reaching or sitting.
Zero in on these fitting corrections:
- Widen the sleeve cage for armhole fit
- Deepen crotch for comfort
- Check fabric stretch for movement
- Allocate ease where mobility’s needed most
Pattern adjustment issues solved!
Resolving Structural Errors Despite Accurate Patterns
You might follow a pattern exactly, yet end up with seams that simply won’t match or a garment that hangs awkwardly.
By pinpointing subtle structural errors, you can quickly identify why the fit feels off despite using the right pattern.
Why Patterns Look Right but Fit Wrong
Even after you nail activity ease, patterns can fool you.
A pattern might look spot-on, but fit discrepancies creep in thanks to grain alignment or mismatched body proportions.
Ease allocation that doesn’t match your true shape leads to hidden fitting issues and pattern errors.
Accurate pattern adjustment still falls short when fabric choice or standard fit rules don’t line up with real life.
Distinguishing Fabric Issues From Structural Problems
When you’re stumped between fabric distortion and structural problems, check fabric grain alignment and texture issues before blaming your pattern adjustment issues.
Certain weaves, like bias-cut or loose fiber behavior, will stretch or warp unpredictably.
Misreading grain lines can sideline garment fit, no matter how flawless your piecework is.
Every fabric characteristic, from weave problems to drape, shapes fit as much as your pattern does.
Frequently Asked Questions (FAQs)
How do you fix pants fitting problems?
Read wrinkles like a roadmap to identify fit issues.
Horizontal pulls mean you need more width, while folds indicate excess fabric.
Make small adjustments at side seams and test with muslin first.
What happens during a pattern fitting test?
You’ll transform into a detective, hunting down every fitting flaw before disaster strikes.
During pattern fitting tests, you’ll pin fabric pieces together, try on the mock-up, and identify problem areas needing adjustments.
What are the essential tools for modifying sewing patterns?
You’ll need measuring tape, gridded ruler, French curves, tracing paper, and muslin fabric for testing.
These tools guarantee accurate measurements, smooth curved lines, pattern preservation, and fit verification before cutting your final fabric.
How do you lengthen a sewing pattern?
Like stretching a rubber band to reach further, you’ll slash your pattern horizontally at designated lengthening lines.
Spread the pieces apart by your desired measurement, then tape paper underneath to bridge the gap.
What are common pants fitting problems related to length?
You’ll spot pants that are too short when they ride up uncomfortably or expose your ankles.
Too-long pants bunch at the ankles, creating horizontal folds that make you look sloppy and trip-prone.
Why should you learn sewing alterations?
Like Goldilocks finding the perfect fit, you’ll master garment construction by learning alterations.
You’ll save money, achieve custom fits, extend clothing life, and gain confidence.
It’s your pathway to perfectly crafted pieces that flatter your unique body shape.
What is a pattern adjustment?
A pattern adjustment modifies commercial sewing patterns to fit your unique body shape and measurements. You’ll alter length, width, dart placement, or curves to achieve proper fit before cutting fabric.
What are the common fitting problems in bodice?
You’ll encounter gaping necklines, pulling fabric across the bust, pointy or flat bust shapes, tight sleeves, shoulder misalignment, and drag lines revealing stress points where fabric lacks proper shaping.
How to fix pants that give wedgies?
Check your crotch length first – it’s likely too short.
Add fabric at the inseam or lengthen the back rise.
Also examine seat width; insufficient fabric creates pulling that rides up uncomfortably.
How do I adjust the size of a pattern?
Use the slash-and-spread method to increase width or overlap pieces to reduce size.
Test adjustments on muslin first, make incremental changes, and true seam lines to maintain proper fit and proportions.
Conclusion
Perfect fit isn’t luck—it’s methodical problem-solving.
You’ve learned to read fabric’s language through wrinkles, drag lines, and stress points.
When troubleshooting pattern adjustment issues, trust your measurements, test with muslin, and address one problem at a time.
Remember that fabric doesn’t lie; it shows exactly where adjustments are needed.
Master these diagnostic skills, and you’ll transform frustrating fitting sessions into confident pattern modifications.
Your next garment will fit like it was made just for you, with a perfect fit.

