This site is supported by our readers. We may earn a commission, at no cost to you, if you purchase through links.

You’ll master fabric-and-needle pairing essentials like matching lightweight fabrics with 70/10 needles and using ballpoint needles for stretchy knits to prevent those annoying thread breaks.
Advanced methods include French seams that encase raw edges beautifully, mitered corners that look mathematically perfect, and invisible zipper installations that rival store-bought finishes.
Working with tricky materials becomes manageable when you know to let knit fabrics settle 24 hours before cutting and use tissue paper for manipulating slippery satin weaves.
These professional finishing techniques separate amateur sewists from true craftspeople who create garments with that elusive ready-to-wear quality.
Table Of Contents
- Key Takeaways
- Choosing The Right Fabric and Needles
- Why Fabric Stretch Matters
- How Weave Type Affects Sewing
- Unique Edge Finishing Techniques
- Advanced Seam Techniques for Professionals
- Creative Zipper and Placket Methods
- Innovative Garment Alteration Methods
- Mastering Elastic and Gathering Techniques
- Decorative and Embellishment Techniques
- Sewing Without Patterns and Customization
- Frequently Asked Questions (FAQs)
- Conclusion
Key Takeaways
- Master fabric-needle pairings to eliminate thread breaks and puckering—match lightweight fabrics with 70/10 needles and use ballpoint needles for knits to prevent skipped stitches and fabric damage.
- Use French seams and mitered corners to achieve professional finishes that rival store-bought garments—these techniques encase raw edges beautifully and create mathematically perfect intersections.
- Let knit fabrics settle for 24 hours before cutting and use tissue paper under slippery fabrics like silk to prevent shifting during construction, ensuring accurate cuts and smooth sewing.
- Apply invisible zipper installations and proper seam finishing techniques based on fabric weight—heavyweight fabrics need zigzag edges while delicate fabrics require French seams or binding for durability without bulk.
Choosing The Right Fabric and Needles
Getting your fabric and needle pairing right saves you from puckered seams, skipped stitches, and that moment when your expensive silk turns into expensive confetti.
Your machine needle isn’t just a sharp stick—it’s the bridge between your thread and fabric, and choosing wrong turns even simple projects into wrestling matches.
Fabric Types and Their Properties
When choosing fabrics, you’re basically picking your project’s personality.
Natural fibers like cotton breathe beautifully but wrinkle easily, while synthetic blends offer durability with less maintenance fuss.
Check fiber content labels—they’re your roadmap to success.
Woven fabrics provide structure, knit fabrics give stretch, and fabric drape determines how your finished piece will hang and move with you.
Understanding the fabric selection process is vital for achieving the desired outcome in your sewing projects, and it helps you make informed decisions about the fabric selection.
Machine Needle Selection
The right machine needle makes or breaks your project—it’s that simple.
Match needle types to your fabric’s personality, and you’ll avoid puckered seams, broken threads, and frustration.
- Universal needles work for most woven fabrics, while ballpoint needles slip between knit fibers
- Needle size matters—use 70/10 for lightweight fabrics, 90/14 for medium weights, 110/18 for heavy materials
- Sharp needles pierce cleanly through tightly woven fabrics, preventing fabric damage and ensuring smooth stitching
Understanding the correct sewing machine needles is essential for achieving professional results.
Fabric Weight and Seam Construction
When dealing with heavyweight fabrics like denim, you’ll need wider seam allowances and stronger seam construction than delicate fabric handling requires.
Lightweight fabrics need careful fabric layering and precise thread tension to prevent puckering.
Here’s your fabric weight guide:
| Fabric Weight | Seam Allowance | Interfacing Methods |
|---|---|---|
| Lightweight (chiffon) | 3/8" or less | Fusible tricot |
| Medium (cotton) | 5/8" standard | Woven interfacing |
| Heavyweight (canvas) | 3/4" or more | Hair canvas |
Proper seam finishing prevents fraying and adds durability to your projects, ensuring a professional finish with delicate fabric handling.
Why Fabric Stretch Matters
When you’re working with stretchy fabrics, understanding fabric stretch changes everything about your sewing approach.
Knits and other stretchy materials behave differently than woven fabrics, requiring special techniques to prevent puckered seams and wonky hems that’ll make your project look homemade in all the wrong ways.
Working With Knit Fabrics
Knit fabrics behave differently than woven materials because their looped structure creates natural stretch and recovery.
When you’re working with knits, your sewing machine becomes your dance partner—you’ll need to adjust your rhythm and technique. The fabric’s stretch direction affects how seams lay and how garments fit your body.
- Knit Fabric Selection: Choose stable knits like cotton jersey for beginners, avoiding super stretchy fabrics until you’ve mastered basic techniques
- Stretch Stitching: Use a ballpoint needle and zigzag or stretch stitch instead of a straight stitch to prevent thread breakage when fabric stretches
- Fabric Drape Management: Let knit fabrics hang naturally before cutting—they’ll settle into their true drape within 24 hours
- Knit Seam Reinforcement: Add clear elastic to shoulder seams and necklines to prevent stretching out during wear
- Textured Knit Effects: Experiment with twin needles for professional-looking hems and decorative topstitching on knit garments
Preventing Distortion in Stretchy Materials
Several tricks help you tame stretchy materials before they misbehave.
Use sharp pins sparingly and keep fabric flat during cutting. Let your presser foot do the work—don’t pull or push stretchy knit fabric through your machine.
A walking foot prevents the notorious "fabric sandwich" effect where layers shift. For slippery fabric, place tissue paper underneath seams, then tear it away afterward.
These distortion prevention methods keep your projects looking professional.
Stabilizing Stretch Fabrics
Successfully stabilizing stretch fabrics prevents puckering and maintains garment shape throughout wear.
Your sewing arsenal needs these knit fabric stabilization methods:
- Stretch interfacing reinforces necklines and buttonholes without losing fabric flexibility
- Clear elastic sewn into seams provides invisible support for shoulders and waistlines
- Stay tape applied to stress points prevents stretching during construction
- Fabric tension control using walking feet guarantees even feeding through your machine
These stretch stitch techniques transform tricky knit fabrics into professional-looking garments using proven sewing methods.
How Weave Type Affects Sewing
Understanding your fabric’s weave structure is like reading its personality—it tells you exactly how it wants to be sewn.
Different weaves behave uniquely under your needle, requiring specific techniques to achieve professional results without fighting the fabric’s natural tendencies, which is crucial for a successful sewing project that respects the fabric’s tendencies.
Plain Weave Characteristics
Plain weave’s stability makes it your best friend for beginners.
The over-under yarn pattern creates excellent weave stability and predictable fabric behavior. You’ll find consistent thread count and yarn density across the grain, making cutting and sewing straightforward.
Warp tension stays even, preventing puckering. Cotton broadcloth exemplifies these reliable fabric properties perfectly.
Understanding fabric weave basics is essential for selecting the right fabric for your sewing projects, and plain weave is a key concept to grasp, as it offers excellent weave stability and predictable fabric behavior, making it ideal for beginners to work with cotton broadcloth.
Twill Weave Techniques
Twill fabric’s diagonal weave creates durable, wrinkle-resistant material that requires specific handling techniques.
Unlike plain weave, twill’s warp threads and weft interlocking pattern demands adjusted sewing methods for professional results.
Here are key twill sewing techniques:
- Use sharp size 90/14 needles – prevents skipped stitches on dense weaves
- Extend stitch length to 2.5-3mm – manages thickness without puckering
- Apply flat-felled seams – increases durability in heavy fabrics
- Adjust presser foot pressure – guarantees even feeding through thick layers
- Finish raw edges immediately – twill frays more than other woven fabrics
These fabric characteristics make twill ideal for structured garments and workwear applications.
Sewing With Satin Weave
Satin weave creates lustrous, smooth fabrics that demand careful handling techniques.
You’ll need sharp pins and fine needles to prevent snags in the delicate surface. Work with tissue paper underneath for fabric manipulation – it prevents the slippery material from shifting while you cut.
Use a straight stitch with reduced presser foot pressure for sewing satin seams without puckering. Understanding the properties of satin fabric types is essential for achieving professional results in sewing projects, which requires careful consideration of the fabric’s behavior to ensure successful sewing.
Unique Edge Finishing Techniques
Professional edge finishing transforms ordinary seams into polished, durable details that elevate your sewing projects from homemade to handmade.
You’ll master three essential techniques that solve common construction challenges while adding sophisticated touches to garments and home decor items, giving your work a professional edge.
Sewing Scalloped Edges
Scalloped edges create elegant curves that elevate garments from ordinary to extraordinary.
Start by marking even intervals using templates—consistency makes the difference between amateur and professional results.
Use short stitches (1.6mm) for smooth curves, pivot manually at each apex, and clip valleys carefully.
Grade seam allowances before turning, then press with point turners for crisp definition.
This scalloped hem finish transforms collars, cuffs, and hems beautifully.
How to Sew Mitered Corners
Creating perfect mitered corners transforms your sewing from amateur to professional.
You’ll fold fabric at precise 45-degree angles using Angular Stitching and Precision Folding techniques.
These Corner Cutting Tips guarantee sharp, clean intersections where seams meet.
Start by marking your corner points, then fold diagonally before stitching.
The Mitered Seam technique prevents bulk while maintaining crisp edges.
Master this Fabric Molding method for tablecloths, napkins, and binding applications.
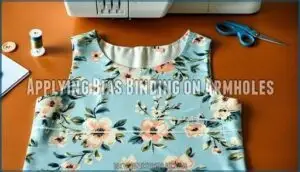
Applying Bias Binding on Armholes
Armhole finishing with bias binding creates smooth, professional curves on sleeveless garments.
Cut bias tape 1½ inches wide for flexibility around curves.
Pin binding to armhole’s right side, easing around the deepest curve points, then use a straight stitch ¼ inch from edge.
Fold binding over raw edge, and hand-stitch or topstitch to secure this essential edge stabilization technique.
Advanced Seam Techniques for Professionals
You’ll elevate your sewing game substantially when you master professional seam techniques that create durable, polished finishes.
These advanced methods separate hobby sewists from professionals, transforming ordinary projects into high-quality garments that rival store-bought items, and create a polished finishes.
How to Sew French Seams
French seams create a professional finish by encasing raw edges completely.
Start with wrong sides together, stitch a quarter-inch seam allowance using straight stitch.
Trim seam allowance to an eighth-inch, then flip fabric so right sides face together.
Press flat along the fabric grain.
Stitch again with three-eighths-inch seam allowance, enclosing raw edges inside, which prevents fraying beautifully and creates a polished look.
Sewing Slippery Fabrics
Slippery fabrics like silk and polyester can turn your project into a wrestling match, but the right approach tames them.
Don’t let silk and polyester turn your sewing machine into a fabric wrestling ring
Use fine needles and slow machine speed to prevent snagging and maintain control throughout construction.
Essential Slippery Fabric Handling Tips:
- Cut single layers – prevents shifting and maintains grain alignment
- Use clips instead of pins – reduces fabric movement by 28%
- Apply stabilizers underneath seams – tissue paper or wash-away sheets prevent slippage
- Choose shorter stitch length (1.5-2mm) – increases seam accuracy substantially
- Try antistatic spray before cutting – stabilizes surfaces for smoother handling
These Smooth Cutting Techniques and Fabric Stabilization Methods guarantee your Delicate Seam Construction stays precise. Master these fundamentals before tackling complex seaming methods.
Seam Finishing for Different Fabrics
Different fabrics need specific seam finishes to prevent fraying and guarantee durability.
You’ll want to match your finishing method to the fabric’s weight and weave structure for professional results.
| Fabric Type | Best Seam Finish | Why It Works |
|---|---|---|
| Heavyweight fabrics (denim, canvas) | Zigzag stitching or serged edges | Handles bulk without adding thickness |
| Lightweight fabrics (chiffon, silk) | French seams or fabric binding | Prevents fraying on delicate fibers |
| Knit fabrics | Edge stitching with twin needle | Maintains stretch while sealing edges |
Match your interfacing methods to fabric weight—fusible for medium weights, sew-in for delicates.
Fray prevention starts with proper seam sealing techniques during construction, not as an afterthought, to ensure durability and prevent damage.
Creative Zipper and Placket Methods
Zippers and plackets don’t have to be intimidating once you learn these professional methods. You’ll master invisible installations, create functional leg openings, and construct perfect sleeve plackets that look store-bought.
Adding Zippers to Pants Leg Openings
Three main zipper installation methods work perfectly for pant leg closures.
First, measure your seam opening length to match your zipper exactly—this prevents puckering.
Use a zipper foot for precise stitching close to teeth.
Stabilize stretch fabrics with interfacing before attaching zippers.
Add seam reinforcement at stress points with bar tacks for durability, and ensure to follow these steps carefully for a durable outcome.
Sewing Invisible Zippers
Invisible zippers disappear seamlessly into seams when installed correctly.
These zippers require special techniques and tools that differ from regular zipper installation methods.
- Use an invisible zipper foot that guides the coil perfectly under the needle
- Press zipper tape flat before installation using a cool iron setting
- Position zipper teeth exactly at seam line for proper alignment
- Stitch close to coil without catching teeth in your seam
- Complete regular seam below zipper stop for clean finish
How to Sew Placket on a Sleeve
A crisp, professional placket transforms an ordinary sleeve into a polished garment feature.
Start by reinforcing your placket area with interfacing methods that prevent stretching. Cut your continuous placket strip on the straight grain for stability.
Mark your sleeve opening precisely, then slash carefully—there’s no going back! Stitch the placket strip using a narrow seam, keeping edges aligned.
Press thoroughly, then fold and topstitch for that sharp, refined finish that screams professional craftsmanship.
Innovative Garment Alteration Methods
Garment alteration isn’t just about making clothes smaller or longer—it’s about transforming pieces to fit your body perfectly.
You’ll discover how to resize oversized items, add professional linings, and create custom hems that look like they came straight from a tailor’s shop.
How to Alter Big Clothes
Transforming oversized garments into perfect-fitting pieces requires strategic alteration methods that maintain original proportions.
You’ll master size reduction through targeted garment reshaping techniques that preserve design integrity while achieving custom fit modification.
- Side Seam Reduction: Pin and trim excess fabric along side seams for balanced proportion adjustment across torso and hips.
- Strategic Dart Placement: Add darts at bust, waist, or back areas to remove bulk while maintaining garment structure and flow.
- Gathering Fabric Techniques: Use controlled gathering at waistlines or sleeves to redistribute excess material without losing design elements.
Sewing Lining Into a Dress
Adding lining to a dress transforms comfort and structure while extending garment life.
Choose your lining fabric carefully—lightweight cotton or silk work best.
Pin the lining to your dress’s facing construction, matching seam allowances precisely, then attach at shoulders and side seams first, then secure at armholes, creating professional DIY garments.
This sewing technique rivals store-bought quality when following proper sewing tutorials.
Hemming Pants for a Custom Fit
Perfect pants start with precise measurements. Measure twice, cut once—your legs will thank you for the extra attention to detail.
Understanding the basics of hemming pants techniques is vital for achieving a custom fit.
Essential Pant Hemming Tips for flawless results:
- Mark the perfect length while wearing your go-to shoes—heels change everything
- Create clean folded hems by pressing crisp creases before stitching
- Master cuffed hems for that polished look that screams "I know what I’m doing"
- Tackle hemming denim with heavy-duty needles and matching topstitching thread
Mastering Elastic and Gathering Techniques
Elastic and gathering techniques transform flat fabric into fitted, comfortable garments with professional-looking results.
You’ll master these essential skills using simple tools like bodkins and safety pins to create even gathers and smooth elastic casings, which will help you achieve professional-looking results.
How to Sew Elastic Casing
Creating elastic casing transforms loose-fitting garments into perfectly fitted pieces.
Start by measuring your elastic against the waist, subtracting two inches for comfort. Fold your fabric to create a channel slightly wider than your elastic.
Stitch parallel lines using basic stitches, leaving a small opening. Thread elastic through using casing stitch techniques, ensuring even distribution for professional results on any slippery fabric.
To achieve a professional finish, understanding the proper use of an elastic sewing kit is essential for mastering elastic techniques.
Gathering Fabric Evenly
Smooth gathering transforms fabric pieces into beautiful fabric ruffles and professional even pleats. Your sewing techniques improve when you master these gathering methods for perfect shirring techniques.
Here’s how to achieve consistent ruffled edges:
- Set two parallel basting lines – Stitch ¼ inch and ⅜ inch from raw edges using longest machine stitch
- Pull bobbin threads simultaneously – Gather from both ends, sliding fabric along threads for uniform distribution
- Pin and distribute evenly – Match gathering to desired length, adjusting fabric transformation spacing before final stitching
This fabric transformation creates stunning results when you take time with thread tension and spacing consistency.
Using a Bodkin or Safety Pin
When your bodkin goes AWOL during a project, grab a trusty safety pin instead.
These versatile sewing aids excel at threading elastic through casings and guiding ribbons through narrow channels.
Bodkin tips: choose the right size for your elastic width.
Safety pin uses extend beyond emergencies—they’re perfect for gathering fabric and manipulating drawstrings in tight spaces, which makes them a great tool for emergencies.
Decorative and Embellishment Techniques
Decorative techniques transform plain fabric into stunning statement pieces that showcase your personal style.
You’ll discover how heat transfer vinyl, machine embroidery, and built-in decorative stitches can turn basic projects into professional-looking masterpieces that friends will think you bought at a boutique.
Heat Transfer Vinyl Appliqué
Heat transfer vinyl transforms ordinary fabric into personalized masterpieces with the right techniques.
You’ll need proper heat press settings—typically 305-320°F for 10-15 seconds—and quality transfer tape for precise placement.
Master weeding techniques by removing excess vinyl with sharp tools, leaving clean appliqué designs.
HTV works beautifully alongside embroidery for layered embellishments that pop.
Intricate Embroidery Designs
Advanced embroidery transforms plain fabric into artistic masterpieces using specialized techniques.
You’ll master French knots for textured centers and chain stitches for flowing outlines.
Stabilizing fabric in embroidery hoops prevents puckering during intricate work.
- Crewel work uses wool thread on linen for dimensional florals
- Thread painting blends silk thread colors like watercolor techniques
- Sashiko creates geometric patterns with running stitches on indigo fabric
- Goldwork adds metallic threads for luxurious surface texture
- Shadow work employs sheer fabrics for subtle, translucent effects
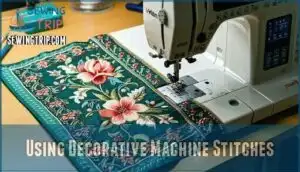
Using Decorative Machine Stitches
Beyond intricate embroidery designs, your machine’s decorative stitching capabilities can transform plain seams into stunning focal points.
Modern machines offer dozens of stitch variations, from simple zigzag to complex floral motifs.
Experiment with stitch combining techniques—layer a blanket stitch over satin edging for ornate trimming effects.
These machine embellishments work beautifully on decorative edging projects, adding professional polish to basic sewing techniques.
Sewing Without Patterns and Customization
You don’t need commercial patterns to create amazing garments when you master the art of designing and adjusting patterns yourself.
Learning to customize existing patterns or create your own opens up endless possibilities for truly unique projects that fit your vision perfectly, and this skill allows you to achieve truly unique results.
Sewing Without a Pattern
When you ditch the pattern, you’re embracing freehand sewing at its finest.
Start by draping fabric directly on your body or dress form, pinning as you go.
This improvisational sewing method lets you create adaptive clothing that fits perfectly.
Use fabric manipulation techniques like gathering and pleating to shape your design.
Hand sew basting stitches to test fit before committing to permanent seams.
Customizing Digital and Paper Patterns
Everyone loves tweaking patterns to fit perfectly!
Digital pattern design offers incredible flexibility – you can adjust measurements on-screen before printing, reducing waste.
For digital drafting, use Pattern Scaling and Grading Techniques to resize elements precisely.
Paper patterns respond well to slash-and-spread Modification Methods for width adjustments.
Try pattern swaps between similar styles for creative custom sewing patterns.
Pattern Adjustments for Unique Projects
Successful pattern customization transforms store-bought patterns into perfect fits through Grading Curves and Block Drafting.
Pattern Hacking lets you modify sleeve shapes or necklines for unique looks. Fit Analysis helps identify where adjustments matter most.
Try Draping Techniques on a dress form to visualize changes before cutting. These pattern customization methods turn basic sewing pattern options into personalized garments that fit like they were made just for you.
Understanding pattern alteration guide techniques is essential for achieving professional results in sewing projects, using pattern alteration to create the best fit.
Frequently Asked Questions (FAQs)
How to sew curved seams without puckering?
To sew curved seams without puckering, clip notches along the seam allowance perpendicular to the stitching line.
Use a shorter stitch length and sew slowly, easing the fabric gently as you guide it through curves.
What are flat-fell seams used for?
Flat-fell seams create strong, finished edges by encasing raw fabric edges within the seam itself.
They’re virtually indestructible and look professionally polished, which makes them ideal for certain applications.
You’ll find them on jeans, workwear, and bedding where durability matters most.
How to create professional buttonholes by hand?
Mark your buttonhole placement with pins, then create parallel guidelines using chalk or removable fabric marker.
Cut the opening carefully between these lines, making it slightly shorter than your button’s diameter.
Work dense, closely-spaced blanket stitches around the raw edges, keeping consistent stitch depth and tension throughout, using dense stitches to ensure a secure finish.
When should you use stay stitching?
Like a safety net beneath a tightrope walker, stay stitching prevents fabric from stretching out of shape.
You’ll use it on curved seams, bias edges, and necklines before construction.
It’s your invisible guardian against warped pieces.
How to sew rolled hems on lightweight fabrics?
Fine-tune your machine’s rolled hem foot tension to prevent puckering.
Use lightweight thread matching your fabric’s weight.
Practice feeding the fabric gently—no tugging—while maintaining consistent speed for professional-looking edges.
Conclusion
Mastering these unique sewing techniques and methods transforms your craft from hobby to art form.
You’ve discovered the secrets that separate weekend sewers from true artisans—proper fabric-needle pairings, professional seam finishes, and invisible zipper installations that’ll fool even experienced seamstresses.
These skills become muscle memory with practice.
Your next project will showcase techniques that once seemed impossible, creating garments with that coveted ready-to-wear quality that makes people ask, "Where did you buy that?
- https://4h.okstate.edu/projects/design-and-construction/site-files/files/curriculum-and-patterns/2023-sample-technique-cards-a.pdf
- https://www.mygoldenthimble.com/essential-sewing-techniques-you-should-master/
- https://quiltlizzyayden.com/blogs/quilt-lizzy-ayden-blog/hand-sewing-vs-machine-sewing-pros-cons-and-when-to-use-each
- https://commons.emich.edu/cgi/viewcontent.cgi?article=1049&context=mcnair
- https://www.dutchlabelshop.com/en_us/blog/mastering-advanced-sewing-techniques/


