This site is supported by our readers. We may earn a commission, at no cost to you, if you purchase through links.
 Most sewers learn to cut fabric with regular scissors, but that’s where the fraying headaches begin. One crooked snip along a delicate silk edge or a cotton seam that unravels before you even thread the needle—you’ve been there. Pinking shears solve this problem with their signature zigzag teeth, but only if you know how to use them on project work correctly.
The technique matters more than the tool itself. Many beginners assume it’s just about squeezing the grips and cutting, but the blade angle, fabric positioning, and even which layer you cut first can mean the difference between clean, fray-resistant edges and a mess that looks worse than before.
Once you master the fundamentals, you’ll finish seams faster and add decorative touches that improve any sewing project.
Table Of Contents
Key Takeaways
- Pinking shears cut fabric with zigzag teeth that prevent fraying by distributing tension across the weave rather than creating a straight line where threads unravel, but the technique—blade angle, fabric positioning, and cutting motion—matters more than the tool itself.
- Proper preparation is essential: pre-wash fabric to prevent shrinkage, press it flat to eliminate wrinkles, mark cutting lines for accuracy, and cut single layers at a time to maintain clean edges and prevent the blade from chewing through material.
- Beyond finishing seams, pinking shears serve creative purposes like trimming decorative appliqué edges, cutting felt flowers that won’t fray, and creating fabric swatches, though they’re unsuitable for knits, stretch fabrics, or thick materials that dull the blades.
- Regular maintenance extends their lifespan: clean blades after each use to remove lint, store them in dry conditions to prevent rust, sharpen annually or when cuts become ragged, and replace them when persistent dullness or damage affects cutting performance.
What Are Pinking Shears?
Pinking shears might look like fancy scissors, but they’re actually precision tools designed to solve a very specific problem: fraying fabric.
If you’ve ever wondered what makes them different from regular shears or whether those zigzag blades really matter, you’re in the right place.
Let’s break down exactly what pinking shears are, how they work, and why you’ll find them in nearly every sewing kit.
How Pinking Shears Work
The zigzag magic happens when the shears’ notched blades meet and cut together—each triangular tooth on one blade fitting into the space on the opposite blade to slice fabric into that signature sawtooth pattern.
This blade angle and edge geometry create shear force that cleanly cuts fibers while the serrated blades leave small triangular peaks.
Those peaks are your secret weapon for fray prevention—they distribute tension across the weave instead of creating one straight line where threads can unravel easily.
Types of Pinking Shears (Zigzag, Scallop, Wave)
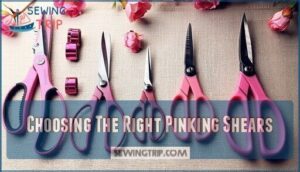
Not all pinking shears are created equal—you’ll find three main blade patterns, each suited for different projects. Zigzag pinking shears feature those classic saw-toothed blades (usually 7–10 mm) that excel at zigzag fray reduction on woven fabrics. Scallop blades create soft, curved half-moon edges about 3 mm deep, perfect for scallop edge uses in decorative work. Wave blades produce a continuous undulating pattern, offering unique wave decorative effects for felt and paper crafts. These are especially useful as pinking scissors for children.
When choosing types of pinking shears, consider:
- Blade material (stainless steel lasts longer than carbon steel)
- Ergonomic considerations like grip comfort for extended cutting
- Tooth depth and pattern suited to your fabric weight
- Blade length (8–9 inches is standard for most sewing)
Pinking Shears Vs Regular Scissors
You might wonder why you’d need specialized shears when regular scissors seem to do the job—but the difference goes well beyond the zigzag edge. Pinking shears feature serrated blades designed specifically for cutting fabric without fraying, while regular sewing scissors create a straight cut that unravels quickly on woven materials.
The intended purpose matters: standard shears excel at precision cuts, but pinking shears prevent raveling and reduce bulk in seam allowances—something regular shears can’t achieve regardless of user skill or cost comparison.
Common Misconceptions and Look-Alikes
Many people mistake paper edgers for pinking shears or assume all serrated scissors work on fabric—but these look-alikes can actually damage your projects if you use them interchangeably. Paper edgers dull quickly on fabric and create uneven cuts.
True pinking shears use precise blade spacing to prevent fraying, while scallop shears and novelty rotary blades offer decorative edges but don’t stop unraveling the same way zigzag blades do.
Choosing The Right Pinking Shears
Not all pinking shears are created equal, and choosing the right pair can make the difference between clean zigzag edges and frustrating, ragged cuts. You’ll want to think about blade quality, how the grips feel in your hand, and what type of fabric you work with most often.
Let’s break down what matters when you’re shopping for a pair that won’t let you down.
Blade Material and Sharpness
The blade material in your pinking shears determines how long they’ll stay sharp and how cleanly they’ll cut through fabric—stainless steel models can hold their edge more than twice as long as carbon steel versions.
You’ll notice the difference in cutting performance right away: sharper blades slice through multiple fabric layers without chewing or snagging.
When your serrated blades start tugging instead of cutting cleanly, it’s time to sharpen pinking shears or consider blade maintenance.
Ergonomic Handle Design
If you’ve ever felt your hand cramping after just a few minutes of cutting, the grip design on your pinking shears might be the culprit. Look for ergonomic sewing tools that support fatigue reduction, especially if you have hand arthritis or plan extended cutting sessions.
- Cushioned grips that mold to your palm
- Offset grips that keep your knuckles clear of fabric
- Soft-touch coatings on grip materials for better grip comfort
- Spring-loaded mechanisms that reduce repetitive strain
- Loop sizing that fits your hand comfortably
User feedback consistently shows that proper ergonomic design transforms cutting tools from painful to pleasant.
Best Shears for Different Fabrics
Choosing the right shears for your fabric types makes all the difference between clean edges and frustration. Woven fabrics like cotton, linen, and polyester blends work beautifully with standard pinking shears, reducing fraying by up to 80%. Skip pinking on knit fabrics and stretch fabrics—they’ll create holes and unravel faster.
Heavy fabrics need professional-grade blades, while delicate textiles require finer teeth to prevent snagging. For non-fabric materials like vinyl, use dedicated craft shears to preserve blade sharpness. These shears feature ergonomic handle design for comfortable use.
Preparing Fabric for Pinking
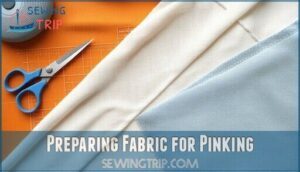
Getting a clean, professional cut with pinking shears starts long before you make the first snip. The right prep work ensures your fabric won’t shift, fray unevenly, or give you a jagged edge that ruins the whole purpose.
Let’s walk through the key steps that set you up for success every time.
Understanding Fabric Grain
Before you make that first cut, you need to understand how fabric grain affects your pinking results—cut against it, and you’ll end up with a ragged mess instead of clean zigzag edges. The grainline follows the warp threads (lengthwise) and weft threads (crosswise) in woven fabric, creating a stable structure.
Cutting parallel to the grain direction prevents excessive fabric fraying and keeps your zigzag pattern crisp. Bias cutting—slicing at a 45-degree angle—creates stretch but reduces fabric stability, making pinking less effective for pattern matching.
Pre-washing and Pressing
Skipping the pre-wash might seem like a time-saver, but shrinkage after your first cut can throw off your entire project and leave you with puckered, uneven edges. Wash before cutting to prevent fabric shrinkage and color bleeding that can ruin your work.
After washing, press your fabric flat—wrinkle prevention makes all the difference when you’re trying to achieve clean raw edges and preventing fabric fraying along those zigzag cuts.
Marking Cutting Lines for Accuracy
Even the steadiest hand can wander without a clear guide, so marking your cutting lines before you start prevents crooked edges and wasted fabric. Use marking tools like tailor’s chalk or fabric pens along the seam allowance, then stabilize fabric with pattern weights—not pins, which shift when using pinking shears.
Accurate marking means cutting fabric with shears becomes predictable, and your fabric edges stay exactly where you planned them.
Tips for Single-Layer Cutting
Most sewing guides recommend cutting one layer at a time with pinking shears, and once you try it yourself, you’ll see why—the zigzag edge stays crisp and even instead of chewing or skipping teeth along the fabric.
Single-layer cutting keeps fabric stable under the blade, preventing chewing and letting you control blade angle and best pressure. Your pinking shears usage improves when the fabric edges don’t bunch or shift, delivering that clean zigzag every time.
How to Use Pinking Shears on Projects
Now that your fabric is prepped and ready, it’s time to put your pinking shears to work. The right technique makes all the difference between a clean, professional finish and a ragged edge that thwarts the purpose.
Let’s walk through the core methods you’ll use on nearly every project, from basic seam finishing to adding that signature zigzag flair to your crafts.
Step-by-Step Cutting Technique
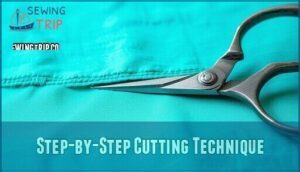
Hold your pinking shears the way you’d grip regular scissors, but position them so the blade sits fully flat against your fabric before you make that first decisive snip.
Here’s how to get clean, professional results every time:
- Keep consistent pressure through each cut—hesitation creates ragged edges instead of crisp zigzag points
- Cut in one smooth motion through each tooth pattern, avoiding stopping mid-snip when using pinking shears
- Maintain proper blade alignment parallel to your cutting line, especially when cutting curves or trim seam allowances
- Control fabric tension with your free hand to prevent shifting that ruins your zigzag edge
Proper cutting angles make all the difference in avoiding mistakes.
Trimming Seam Allowances and Grading
Once you’ve mastered the basic cutting motion, you can use pinking shears to trim seam allowances after stitching—a quick way to reduce bulk and stop fraying without extra steps. Grading techniques involve cutting each layer at a different width so bulky seams lie flat against your fabric. When you trim seam allowances on curved seams, pinking shears create notches automatically while finishing edges—saving you time on layer reduction.
| Seam Type | Seam Allowance Width | Grading Method |
|---|---|---|
| Standard straight | ⅝" top, ¼" bottom | Cut underlayer narrower |
| Curved seams | ½" both layers | Pink both for flexibility |
| Bulky seams | ⅝" outer, ⅜" inner | Stagger your cuts |
| Collar/cuffs | ½" facing, ¼" garment | Reduce facing bulk first |
| Lightweight | ⅜" standard | Pink one layer only |
This approach transforms thick, lumpy seam finishes into professional-looking results.
Finishing Curved and Straight Edges
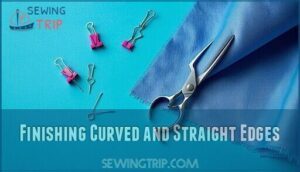
Curved edges demand a little extra finesse, but your pinking shears manage them just as well as straight cuts when you keep the fabric relaxed and cut at a steady pace. For straight edges, align your blades parallel to the grain to avoid distortion—especially important when you’re working with layered fabrics that shift easily.
- Curved seams: Move slowly around tight corners, letting the zigzag pattern follow the natural arc without forcing the fabric
- Straight lines: One clean pass beats multiple choppy cuts for a consistent edge finish
- Layered fabrics: Pin or clip layers together so they won’t slide and create uneven seam finishes
- Tight corners: Reposition your shears mid-cut rather than twisting your wrist—you’ll get cleaner results and less hand strain
Creating Decorative Edges for Crafts
Transforming plain fabric into something special starts with one decisive snip—and your pinking shears turn functional edges into design details that catch the eye. Felt crafting and scrapbooking accents benefit from zigzag borders that won’t fray, while gift wrapping and paper crafts gain texture through layered decorative edges. Mixed media projects shine when you combine scalloped fabric with cardstock, creating depth in collages and handmade cards.
These crafting techniques work whether you’re making a felt flower for a headband or finishing quilt blocks—just remember that pinking shears for crafting perform best on fabrics that cooperate, not thick leather or vinyl.
| Craft Project | Technique | Best Shear Type |
|---|---|---|
| Felt flower petals | Cut single layers | Zigzag or scallop |
| Fabric bunting | Edge entire strip | Standard zigzag |
| Appliqué shapes | Trace then cut | Wave or zigzag |
| Ribbon ends | Angle cut at 45° | Zigzag blade |
| Gift bag toppers | Stack 2-3 layers | Scallop shears |
Creative Projects With Pinking Shears
Pinking shears aren’t just for preventing frayed edges—they’re also a creative tool that opens up new possibilities in your sewing projects.
From professional garment finishing to playful craft details, these zigzag blades add both function and flair.
Here’s how you can put your pinking shears to work across four popular project types.
Finishing Garment Seams
One of the smartest ways to give your garments a polished, professional look is to pink those seam allowances—it stops fraying and keeps the inside as tidy as the outside.
Try these techniques for clean seam finishing:
- Trim and pink after stitching: Cut seam allowances to about ⅜ inch using pinking shears for bulk reduction and fray prevention.
- Grade layered seams: Pink each layer at different widths so they lie flat without creating ridge lines on the garment’s right side.
- Finish curved seams smoothly: Pink around necklines and armholes instead of clipping notches—the zigzag edge lets fabric curve naturally without puckering.
Making Felt Flowers and Embellishments
Felt’s no-fray magic makes it the perfect playground for pinking shears—you can snip petals, leaves, and decorative details without worrying about raw edges unraveling.
Stack felt scraps in different colors, then pink along the edges to create layered felt designs with dimensional felt art. Use the zigzag edge to add embellishment textures that make felt flowers pop—secure attachments with a few hand stitches or fabric glue for decorative edges on craft projects.
| Felt Flower Element | Pinking Technique |
|---|---|
| Petals | Cut circles, then pink edges for soft texture |
| Centers | Layer small pinked rounds for dimension |
| Leaves | Pink teardrop shapes for natural definition |
Decorative Appliqué and Quilt Edges
Pinking shears turn ordinary appliqué shapes into eye-catching design elements—that zigzag edge adds just enough visual interest to make fabric patches stand out without fraying or flipping up at the corners. Pink around appliqué edges before hand-stitching them to garments or quilts, or use them to finish quilt squares with decorative edges that won’t unravel during assembly. Fabric scraps become instant quilt border designs when you pink their edges and layer them for dimensional fabric layering effects.
- Pink sheer fabric edges for delicate appliqué projects that need subtle texture without bulk
- Trim finished quilt squares with pinking shears to prevent fraying while maintaining sharp corners
- Layer multiple fabric scraps with pinked edges to create dimensional appliqué designs
- Use decorative seam finishes on visible quilt borders by pinking the allowance before topstitching
- Combine different appliqué edge types—pinked, raw, and turned—for visual contrast in sewing projects
Crafting Fabric Swatches and Samples
When you’re building a fabric library or organizing your stash, pinking shears make cutting clean, labeled swatches faster than fumbling with scissors and worrying about every edge coming apart. You can test fabric drape and color matching without losing material to fraying—especially useful when you’re planning sewing projects that need fabric identification before you commit.
Keep sample size consistency by cutting uniform squares with pinked edges, then attach them to index cards or binders for professional swatch presentation that integrates smoothly into your project planning.
Caring for and Maintaining Pinking Shears
Your pinking shears will last longer and cut better when you care for them properly. Think of maintenance as an investment in your craft—good habits now mean clean cuts and less frustration later.
Here’s what you need to know to keep your shears in top shape.
Cleaning and Storing Properly
Your pinking shears won’t do their job well if you let dust, lint, and fabric fibers build up between the teeth—so a quick wipe-down after each project keeps them cutting clean. Use a soft cloth for blade cleaning, removing lint from each zigzag.
Store them closed in a dry spot—moisture prevention is key to avoiding rust. A drop of lubricant or oil on the pivot point keeps movement smooth when caring for pinking shears.
Sharpening Techniques and When to Sharpen
Even the sharpest blades lose their edge over time, so knowing when and how to address dullness keeps your cuts crisp. High-quality shears need sharpening roughly once a year with heavy use, but if you notice frayed edges or feel hand strain, it’s time to act.
Quick home sharpening methods for maintaining pinking shears:
- Aluminum foil: Fold several layers and make long cuts—use sparingly, just a few times before professional servicing
- Fine-grit sandpaper (400-600): Cut through it to smooth minor burrs and marginally hone edges
- Diamond sharpener: Stroke blades at their factory angle (0–10 degrees) for precise touch-ups
- Professional services: Restore factory sharpness when home methods fail or blade damage appears
- Replacement signs: Persistent nicks, recurring dullness after sharpening, or loose grips mean it’s time to upgrade
Home techniques offer temporary fixes but won’t correct misalignment or restore a truly blunt edge—professional blade sharpening preserves the lap line and ensures even honing for long-term performance.
Preventing Hand Fatigue and Safe Use
Sharp blades are only half the story—cutting for hours with poor form or awkward grips will leave your hands aching long before your project is done. Choose ergonomic pinking shears with cushioned grips and lighter shear weight to reduce grip strength demands.
Take cutting breaks every 10–15 minutes to prevent strain, and use a protective cover when storing blades. Maintaining pinking shears properly aids injury prevention and keeps your hands comfortable through any project.
When to Replace or Upgrade Shears
No matter how carefully you maintain your shears, every pair eventually reaches the end of its cutting life—and knowing when to let go saves you from ragged edges and frustration.
Replace your pinking shears when:
- Blade dullness persists even after you sharpen pinking shears professionally
- Grip comfort declines due to cracked grips or loose hinge screws
- Rust prevention fails, leaving corrosion that compromises cutting performance
Upgrading to scissors with new features like comfortable grips or stainless steel blades can transform your weaving and fabric work.
Alternatives for Edge Finishing (Rotary Cutters, Sergers)
Sometimes the best edge finish doesn’t involve pinking shears at all—alternative seam finish methods offer flexibility when your scissors won’t cut it.
| Tool | Best For | Key Advantage |
|---|---|---|
| Rotary cutter with pinking blade | Straight edges on quilting cotton, leather, silks | Clean cuts with accuracy, though rotary blade types dull faster than shears |
| Serger (overlock machine) | Woven and knit fabrics needing professional finish | Sews, trims, and wraps edges simultaneously; serger thread usage involves 3-5 cones running at up to 1,500 stitches per minute |
| Zigzag stitch settings on regular machine | Moderate fraying on wovens | Adjustable width and length customize coverage; apply close to raw edge before trimming |
| Bias tape options (bound seams) | Thick or delicate fabrics, unlined jackets | Encases edges with minimal bulk; double-fold tape is most common for home weaving projects |
For a clean finish, fabrics like lightweight wovens respond well to turn-fold-and-stitch techniques—fold the raw edge under, press, then secure with a straight stitch for a refined interior look.
Frequently Asked Questions (FAQs)
Can pinking shears be used on materials other than fabric?
Ever wondered if your trusty pinking shears can tackle more than just cotton and linen? Absolutely—pinking shears work beautifully on felt, leather, vinyl, thin plastics, and other nonwoven fabrics, making them perfect for paper crafting and mixed media projects beyond traditional sewing.
How can I achieve a clean cut with pinking shears?
A clean cut starts with sharp blades and proper technique. Cut single layers slowly, maintaining consistent fabric tension and blade alignment. Keep shear angle perpendicular to fabric while cutting parallel to grain.
Regular maintenance matters—sharpen pinking shears when edges fray instead of crisp zigzags.
Can pinking shears be used for intricate or detailed designs?
Like adjusting a delicate compass needle, precision becomes tricky when pinking shears meet intricate curves. Design limitations arise because the sawtooth blade creates zigzag edges that can overwhelm tiny details.
Pattern matching and appliqué edges work better with gentle curves rather than tight turns, where edge precision suffers and fabric choice matters most.
Are pinking shears suitable for left-handed users?
Most pinking shears work for both hands, though left-handed models with ergonomic adaptations offer better cutting accuracy and comfort.
Blade orientation in standard scissors can affect control, so user reviews help identify truly ambidextrous shears.
Can pinking shears cut through multiple fabric layers?
Think you can just stack fabric and keep cutting? Pinking shears work with two layers of lightweight fabric reasonably well, but cutting accuracy drops with fabric thickness.
Layer limitations matter—bulky seams and fabric weight cause shear strain, producing ragged edges instead of clean zigzags. For best edge quality on seam allowances or cutting curves, stick to single-layer cuts.
How do you fix pinking shears that jam?
When pinking shears jam, first check the pivot point for trapped threads or fabric bits.
Clean the hinge area thoroughly, then apply a small drop of oil or lubricant to restore smooth blade alignment and spring tension.
What fabrics should you avoid cutting with them?
Before picking up those blades, remember: not every fabric responds well to that iconic zigzag. Avoid delicate fabrics like chiffon or silk charmeuse that snag easily, knitted fabrics or spandex that stretch, thick fabrics like heavy canvas, coated fabrics with waterproofing, and nonwoven fabric.
Also skip cutting on the bias grain—it’ll distort edges even on woven synthetic blends.
Can you use pinking shears on leather materials?
Leather won’t fray like woven fabric, so pinking shears aren’t necessary for a raw fabric edge. However, thin leather can be cut with sharp pinking shears for decorative zigzag aesthetics, though thick leather dulls blades quickly.
How often should you oil pinking shear blades?
You’ll want to oil pinking shear blades every few months, or whenever the scissors feel stiff.
Apply a small drop of sewing machine oil at the pivot point, wipe away residue, and test-cut scrap fabric to confirm smooth performance.
Conclusion
The theory that pinking shears are just "fancy scissors" falls apart the moment you finish your first seam allowance with them—suddenly, edges stay put instead of fraying into tangled threads. Once you learn to use pinking shears on project work with the right technique, you’ll wonder how you ever managed without them.
The zigzag teeth don’t just trim fabric; they buy you time, reduce bulk, and turn raw edges into something cleaner and more professional. Master the basics, and you’ll manage everything from silk hems to felt embellishments with confidence.

