This site is supported by our readers. We may earn a commission, at no cost to you, if you purchase through links.
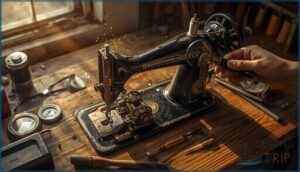
A Singer 201 from 1952 hums to life after sixty years of silence, its straight-stitch precision still unequaled by modern machines—but only if you know how to bring it back. Vintage sewing machines weren’t designed for obsolescence; they were engineered as lifelong tools, with cast-iron frames and metal gears that outlast their plastic descendants.
Yet most sit abandoned in attics because their owners lack the technical documentation needed to diagnose a skipped stitch or a frozen hand wheel. The difference between a $20 garage-sale paperweight and a $300 workhorse often comes down to whether you can locate the right manual, identify which spring has lost tension, and follow the precise adjustment sequence these machines demand.
Armed with exploded diagrams, service handbooks, and systematic troubleshooting methods, you can resurrect these mechanical marvels and discover why sewists still prefer their reliable performance over computerized alternatives.
Table Of Contents
- Key Takeaways
- Understanding Vintage Sewing Machine Manuals
- Essential Books for Sewing Machine Repair
- Troubleshooting Vintage Sewing Machines
- Preparing for Repair
- Disassembly and Diagnosis
- Repairing and Rebuilding Vintage Sewing Machines
- Common Sewing Machine Troubles
- Deciding Whether to Repair or Replace
- Preserving and Enjoying Your Restored Machine
- Frequently Asked Questions (FAQs)
- Conclusion
Key Takeaways
- You’ll resurrect most vintage sewing machines by locating the right manual—whether it’s a user guide for threading, a service handbook for timing adjustments, or exploded diagrams that reveal every screw and spring—because these documents turn guesswork into methodical repair.
- Before you suspect mechanical failure, rethread your machine completely with the presser foot raised, since incorrect threading causes roughly 85% of all sewing malfunctions, from tension problems to skipped stitches.
- Your restoration investment makes economic sense when repair costs stay under half the machine’s replacement value, but rare models and those with documented historical significance justify higher expenses because their collector value and irreplaceable character transcend pure function.
- Proper maintenance schedules—monthly lubrication every 8-10 hours of use, climate-controlled storage below 45% humidity, and systematic cleaning of tension disks and bobbin areas—preserve your restored machine’s performance for decades while preventing the rust and wear that sideline most vintage equipment.
Understanding Vintage Sewing Machine Manuals
Before you can properly repair your vintage machine, you need the right manual in hand—whether it’s a user guide, a service manual, or an exploded diagram showing every screw and spring.
Different manuals serve different purposes, and knowing where to find them can save you hours of guesswork.
Let’s look at the types you’ll encounter, how to download free copies, and where to track down those hard-to-find editions.
Types of Sewing Machine Manuals
Before you tackle any vintage machine, you’ll encounter three types of technical documentation. Instruction manuals guide threading, tension, and basic troubleshooting—your starting point for understanding normal operation.
Service handbooks contain repair procedures, timing adjustments, and diagnostic flowcharts that let you dig deeper into mechanical issues.
Parts catalogs display exploded diagrams with reference numbers, making component identification straightforward. Think of this manual classification as your repair library: each document unlocks a different layer of your machine’s complexity.
To find the necessary manuals, you can search for vintage sewing resources online.
Downloading Free Sewing Machine Manuals
Locating instruction manuals, service manuals, and parts diagrams for your vintage machine doesn’t require guesswork. Start by identifying your model number—usually stamped on the nameplate—then explore these manual sources:
- Manufacturer portals like Singer, Brother, and Janome offer free downloads of PDFs for legacy models alongside current lines.
- Archive access through Internet Archive and ISMACS provides hundreds of public-domain scans dating back decades.
- Digital repositories such as ManualsLib and FreeSewingMachineManuals.com aggregate instruction manuals and troubleshooting guides across brands.
Check copyright rules before sharing older materials; pre-1923 U.S. publications usually qualify as public domain. For effective maintenance, consulting the official sewing machine manuals is highly recommended.
Obtaining Rare Sewing Machine Manuals
When free downloads prove incomplete, tracking down rare booklets requires strategic effort. Start by cross-referencing your machine’s serial number with online databases that link production years to specific instruction manuals and service manuals—this narrows your search considerably.
Online auction sites list over 1,700 antique manuals at any given time, with common models priced between $5 and $30, though scarce editions command premium rates. Reproduction parts diagrams for industrial machines often appear around $17, while original 1940s Singer booklets may surface in quantities of fewer than ten copies per model.
Tap into collector networks through specialized forums where members share manual digitization projects and archive access. International sewing machine societies maintain catalogues covering 126 domestic Singer models from 1865 to 1982, bridging gaps left by manufacturer archives. For vintage sewing machine repair success, persistence pays off.
Essential Books for Sewing Machine Repair
You can’t fix what you don’t understand, and the right reference book puts decades of mechanical wisdom at your fingertips. Whether you’re adjusting timing on a Singer Featherweight or rebuilding a shuttle assembly on a White rotary, specialized repair literature bridges the gap between guesswork and confident restoration.
Below, you’ll find three categories of essential books that cover maintenance fundamentals, model-specific techniques, and the historical context that makes vintage machine repair both practical and rewarding.
Maintenance and Repair Guides
What separates a quick fix from lasting restoration? The right maintenance and repair guides. You’ll find detailed Routine Maintenance schedules, Oil Change Tips, and precise Troubleshooting Steps that demystify vintage sewing machine repair.
These resources lay out tool choices, Part Replacement strategies, and real-world Repair Costs, so you’re not left guessing. Whether you’re tackling sewing machine maintenance and troubleshooting or planning a full restoration, model-specific manuals turn uncertainty into methodical progress, equipping you to restore your classic machine with confidence.
Specialized Repair Books for Vintage Machines
When general repair guides fall short, specialized repair books give you the precision vintage sewing machine repair demands. These focused texts deliver restoration techniques for specific machine families—Robinson’s Sewing Machine Service Manual, for instance, covers approximately 300 pages of diagnostic procedures for pre-1958 domestic vibrating-shuttle models, while the Tools for Self Reliance guide walks you through tension assemblies, timing adjustments, and virtually every moving part on Singer 66, 99, 15K, and 201 machines.
You’ll find Mathew Levy’s 1962 “How to Service and Repair Your Sewing Machine” structures troubleshooting for garment-industry operators, and the “Complete Guide to Treadle Sewing Machines” details foot-powered machine restoration.
Many vintage manuals circulate second-hand through collector resources and ISMACS networks, though some—like the free Tools for Self Reliance PDF—remain accessible online, turning decades of sewing history into actionable service manuals that support authentic machine restoration.
Historical and Specific Machine Type Guides
Historical guides reveal the DNA of your machine, connecting restoration work to decades of manufacturing evolution. When you study Singer’s progression from the 1865 New Family fiddle-bed treadles through the 1908 Class 66 electrics to the legendary Featherweight 221 portables—with U.S. production topping 1.75 million units—you’re mastering vintage sewing machine repair through documented lineage.
European innovations tell equally rich stories: Elna’s 1940 Grasshopper pioneered free-arm portables across 65,000 units, while Pfaff’s 1922 rotary-hook zigzag and Bernina’s eleven-year 830 reign defined premium domestic engineering.
These heritage preservation resources decode serial numbers, identify shuttle types, and explain why antique sewing machines were built to specific tolerances—transforming your sewing machine restoration from parts-swapping into informed craftsmanship rooted in restoring antique sewing machines authentically.
Troubleshooting Vintage Sewing Machines
Before you tear into your vintage machine, you need to figure out what’s actually wrong. Most troubleshooting boils down to three areas: what broke on its own, what someone did to cause the problem, and what didn’t get done to prevent it.
Let’s walk through each category so you can pinpoint the real culprit.
Common Causes of Malfunctions
Mechanical failure accounts for only a fraction of vintage sewing machine problems—roughly a quarter of machines brought to repair workshops trace their issues to worn gears, bent needles, or timing faults. Far more common are preventable causes you can fix yourself through proper maintenance and troubleshooting.
Most malfunctions stem from:
- Tension problems caused by improper threading, worn discs, or mismatched thread-and-needle combinations
- Lint accumulation in bobbin areas, hooks, and motor ventilation, choking thread movement and triggering overheating
- Electrical issues including frayed wiring, degraded motor brushes, and poor connections that prevent smooth operation
- Incorrect setup such as misrouted thread paths, wrong needle types, or bypassed tension guides
- Motor overheating from blocked airflow, worn components, or extended use without proper lubrication
Checking for User Error
Nearly every thread-related complaint you’ll encounter—and technicians report this accounts for close to 100% of service calls—traces back to incorrect threading rather than mechanical failure. Before you reach for your toolkit, walk through these troubleshooting steps methodically:
Rethread with the presser foot raised so thread seats properly in tension discs. Check that you haven’t left the machine in bobbin-winding mode—a surprisingly common oversight that prevents stitch formation entirely. Verify your needle matches your thread weight: size 90/14 for heavy fabrics, 80/12 for medium-weight materials, 70/10 for lightweight shirting. Confirm your bobbin sits correctly in its case with thread passing through the tension spring.
These presser foot issues, needle errors, and bobbin problems cause the vast majority of malfunctions. Simple rethreading resolves most sewing machine repair concerns without internal adjustments.
Verifying Proper Maintenance
Your machine’s performance tells the story—consistent tension, smooth feeding, and quiet operation confirm adequate maintenance. Use these Performance Metrics to verify proper care:
- Maintenance Schedules: Lubricate every 8–10 hours of use or monthly for regular sewers
- Cleaning Practices: De-lint bobbin area and feed dogs after each major project
- Lubrication Techniques: Apply 1–2 drops of clear sewing machine oil only at metal-to-metal contact points
- Storage Conditions: Keep machines in cool, dry spaces with breathable covers
- Performance Metrics: Test stitch quality across multiple fabric layers to confirm restoration success
Preparing for Repair
Before you start pulling apart your vintage machine, you need to prepare the workspace and the machine itself—think of it as setting the stage for a successful repair.
Proper cleaning removes decades of lint, oil residue, and grime that can obscure worn parts and interfere with accurate diagnosis.
The sections below walk you through cleaning techniques customized to different materials and finishes, ensuring you don’t damage delicate decals or original surfaces in the process.
Cleaning The Machine
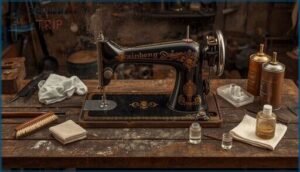
You can’t rebuild a vintage sewing machine properly without first removing years of accumulated grime—dust removal and lint prevention are your foundation for any mechanical repair. Light cleaning after each project prevents the buildup that ruins tension and accelerates wear. For deeper work, start by vacuuming loose debris, then wipe accessible parts with an oil-dampened cloth to lift old residues without harsh solvents that damage historical finishes.
Always spot-test any cleaner on inconspicuous areas first—shellac finishes soften under alcohol or ammonia, and water damages original coatings. Work from the top of the head downward to avoid recontamination, applying oil cleaning methods to seized linkages before attempting movement. This systematic surface protection approach sets you up for successful troubleshooting and sewing machine maintenance ahead.
| Cleaning Task | Recommended Frequency |
|---|---|
| Lint removal from bobbin area | After every project or 60–90 minutes |
| Interior cleaning and machine lubrication | Every 300–500 hours of use |
| Tension disk cleaning with alcohol-moistened thread | Monthly |
| Professional deep service for restoration | Annually under regular use |
Protecting Water-Slide Decals
After cleaning your machine, decal adhesion demands careful surface prep—any oil or wax residue can cut bonding strength by 40% on metal surfaces. Wipe every decal area with 70% isopropyl alcohol before applying fresh water-slide replacements, ensuring glossy, smooth finishes for ideal vintage sewing machine restoration.
These four steps protect decal durability:
- Soak decals 30–60 seconds in room-temperature water before sliding onto the prepared surface.
- Blot excess moisture immediately with lint-free cloths to prevent lifting.
- Apply 2–3 thin acrylic sealer coats, waiting 15–30 minutes between layers for complete mechanical repair and restoration.
- Store your restored machine away from UV exposure and humidity above 70% to prevent environmental factors from degrading vintage sewing machine parts and accessories.
Cleaning Machines With Varnish and Clear Coat
While decals need careful handling, many mid-century machines sport nitrocellulose lacquer or shellac clear coats that demand equal respect during vintage sewing machine restoration. Strong ketones, esters, and alcohols will soften or strip these finishes outright—denatured alcohol dissolves shellac completely.
Start your mechanical repair and restoration with gentle cleaning methods: a film of sewing machine oil on soft cotton lifts grime without attacking the clear coat protection underneath.
Cleaning Plastic Parts
Just as clear coats demand caution, the plastic knobs, housings, and covers on your vintage sewing machine require equally thoughtful handling during restoration. Many mid-century machines incorporate Bakelite, polycarbonate, or ABS components that account for 20–50% of visible parts—and these materials crack or craze when exposed to acetone, ketones, or aromatic solvents found in glass cleaners and heavy-duty degreasers.
Safe solvent alternatives center on mild dish soap diluted in cool water, applied with a soft cloth in small sections, then promptly rinsed and dried. This gentle cleaning method preserves plastics for decades while avoiding environmental stress cracking that shortens component life.
Disassembly and Diagnosis
Before you can fix what’s broken, you need to understand how your machine fits together and where the trouble lies. Successful diagnosis starts with knowing each component’s role, reading exploded diagrams like a roadmap, and spotting the telltale signs of wear or damage.
Let’s break down the three essential skills that will guide your disassembly and keep you from getting lost in the parts.
Understanding Machine Components
Think of your vintage machine as a mechanical orchestra—every component must play its part in perfect harmony to produce impeccable stitches. Before you attempt any sewing machine repair, you need to identify each player in this ensemble. Machine Frames, whether cast iron at 35-40 pounds or lighter aluminum alloys around 30 pounds, provide the rigid foundation. The needle bar drives vertical motion while feed mechanisms advance fabric in synchronized rhythm.
Start by locating these critical assemblies:
- Power components – Motor Types ranging from 0.7 to 1.5 amps, along with belt-driven systems that convert rotary motion into needle action
- Stitch-forming elements – Needle Bars, presser feet, and bobbin hooks that create interlocking threads
- Drive systems – Gear Systems, cams, and linkages that coordinate all moving sewing machine parts
This systematic machine maintenance approach transforms restoration from guesswork into precision engineering.
Exploded Parts Diagrams
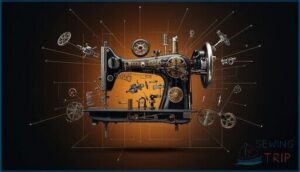
Your roadmap through vintage sewing machine repair begins with exploded parts diagrams—technical illustrations that separate every screw, lever, and gear along a clear assembly axis. Over 85% of post-1970 service manuals include these critical visuals, and they’re your key to confident disassembly strategies.
Modern Singer industrial documents often map 10–15 related models on a single diagram, revealing part compatibility across entire machine families.
Use these assembly guidance tools to trace thread-path faults to specific mechanisms, match numbered callouts to replacement components, and follow systematic disassembly sequences. This diagram interpretation skill transforms restoration from an overwhelming puzzle into methodical maintenance work.
Identifying Worn or Damaged Parts
Visual inspection reveals the truth about your machine’s condition. Hook race grooves deeper than 0.1 mm cause thread fraying—run your fingernail across the surface to feel them. Needle plates with burrs around the hole increase breakage rates during straight stitching.
Three critical wear indicators demand immediate attention:
- Feed dogs with rounded teeth reduce fabric feeding efficiency below factory minimums
- Deformed bobbin case springs create erratic tension variations on test charts
- Cracked plastic gears signal imminent failure, especially in mid-century machines
Component testing confirms what visual inspection suggests.
Repairing and Rebuilding Vintage Sewing Machines
Once you’ve identified the worn or damaged components, it’s time to roll up your sleeves and get your hands on the actual repair work. This phase requires patience, precision, and a willingness to learn as you go—some parts will need simple replacement, while others demand careful adjustment and rebuilding.
The following sections will walk you through the essential techniques you’ll use to bring your vintage machine back to life.
Replacing Worn or Damaged Parts
Your machine won’t perform miracles if its heart is failing—and worn parts are often the culprit. Before sourcing replacements for your vintage sewing machine repair project, conduct a thorough damage assessment. Inspect each component for wear patterns: check needles every 8–10 hours of use, examine feed dogs for rounded teeth, and test belts for cracks or stretching.
Finding the right sewing machine parts requires precision. Your model number unlocks access to compatible components through online specialty retailers, where hundreds of vintage pieces sell for $5–$60 each. For rare items, combine auction sites with restoration forums—this multi-channel strategy locates obsolete parts others can’t find.
| Replacement Type | Typical Cost Range |
|---|---|
| Needles & presser feet | $6–$15 |
| Tension assemblies & belts | $15–$60 |
| Motors & control boards | $100–$300+ |
Restoration tips from the field: document your sewing machine repair process photographically, and remember that replacement costs for basic tune-ups run $50–$85, while complex timing work reaches $75–$125 according to current repair manual guidelines and service data.
Rebuilding and Adjusting Machine Components
Rebuilding your vintage machine transforms worn mechanisms into precision instruments when you adjust each system to factory tolerances. Start your vintage sewing machine repair by cleaning and degreasing all moving parts, then focus on critical adjustments that determine stitch quality.
Master these essential repair techniques:
- Hook Timing: Position the hook point 0.05 mm to 0.15 mm from the needle scarf, capturing the loop 1.5 mm to 2.0 mm above the eye to prevent skipped stitches
- Feed Alignment: Set feed dog height 1.2 mm to 1.7 mm above the plate depending on fabric weight during sewing machine restoration
- Needle Height: Verify correct needle bar position at hook intersection to maintain proper loop formation
- Component Lubrication: Apply oil at every metal contact point for smooth machine maintenance
- Motor Efficiency: Rewind following best practices to preserve original performance levels
Test through hand cranking before powering up.
Common Sewing Machine Troubles
Even a well-maintained vintage machine can throw you a curveball now and then, and knowing how to recognize the root cause separates a quick fix from hours of frustration.
Most troubles fall into predictable patterns once you understand how thread, tension, and timing work together.
Here are the issues you’ll encounter most often and what’s actually going wrong under the hood.
Thread Breakage and Tangles
Broken threads reveal a machine crying out for systematic attention. Your first diagnostic step is verifying threading techniques through every guide and disk.
Excessive thread tension or needle wear cause most breakage, while lint buildup under the bobbin case triggers tangles that stop you cold. Check for fraying causes like burrs on the throat plate or presser foot. Replace brittle, aged thread immediately.
When needle breakage occurs repeatedly, size up your needle and rethread completely to resolve tension problems during troubleshooting.
Inconsistent Stitching
When your stitches alternate between tight and loose, you’re witnessing thread tension imbalance—the most frequent culprit behind inconsistent stitch formation. Vintage sewing machine repair techniques demand systematic troubleshooting, starting with these key factors:
- Thread Tension: Check for lint between tension discs; even small fragments cause fluctuating resistance and erratic stitching patterns
- Needle Condition: Replace dull or burred needles every 6–8 hours of sewing time—worn points skip stitches and create irregular penetration
- Fabric Feeding: Clean feed dogs thoroughly; accumulated debris disrupts material movement and produces variable stitch length
- Machine Timing: Verify needle-to-hook alignment; slight timing drift creates combinations of skipped stitches and uneven stitch balance
Master these threading techniques and watch your machine deliver uniform seams again.
Machine Jamming or Freezing
Beyond inconsistent stitching lies a more dramatic failure: your handwheel won’t budge. Jamming affects 40–60% of all domestic machine service calls, and you’ll find the usual suspects clustered around three systems.
Bobbin Issues—particularly miswound bobbins or unseated cases—account for over half of all jams, creating thread nests that freeze fabric movement instantly. Thread Tension errors, especially skipped guides or raised presser feet, produce massive tangles beneath your throat plate. Hook Timing drift allows needle-to-hook collisions that stop everything cold. Machine Lubrication failures increase friction until dried oil becomes the difference between smooth operation and seized gears.
Your troubleshooting sequence for vintage sewing machine repair techniques: rethread completely, clean the bobbin race, verify hook clearance, then oil specified points before testing.
Incorrect Tension or Thread Take-Up
Tension irregularities create more visible defects than any other malfunction—they account for 40–60% of all stitch quality complaints. When you see loops underneath or puckering along the seam, you’re witnessing the battle between upper tension and bobbin tension.
Start your diagnosis at the thread path. Verify every guide, disc, and the thread takeup lever captures your thread. A single skipped guide disrupts stitch balance immediately.
Your systematic tension adjustment checklist:
- Set upper tension between 4 and 4.5 as your baseline for standard thread weights
- Clean lint from between tension discs—buildup creates erratic grip
- Test bobbin tension by suspending the case; thread should pull with gentle resistance
- Verify presser foot raises before threading to open tension discs fully
Most vintage sewing machine repair tension problems resolve through patient, incremental adjustments rather than component replacement.
Deciding Whether to Repair or Replace
Not every vintage sewing machine is worth saving, and knowing when to walk away can spare you time, money, and frustration. Before you commit to a restoration, you need to weigh the machine’s physical state against the cost of parts and labor, while also considering whether it holds any special value beyond its function.
Let’s break down the key factors that will help you make a clear-headed decision.
Evaluating The Machine’s Condition
A thorough condition assessment separates machines worth saving from those better suited as parts donors. Start your cosmetic inspection by evaluating bed rust, decal integrity, and paint condition—collectors note that machines with over 80% original decals and intact finishes hold markedly higher value.
Next, check mechanical soundness by rotating the handwheel through a complete cycle; you shouldn’t feel binding, dead spots, or excessive wobble in shafts. Your rust assessment should distinguish between light surface oxidation on screws (easily remedied) and deep pitting on functional components like hooks or gears.
Finally, verify electrical safety by inspecting cords for cracking or exposed copper. This systematic condition grading determines whether your vintage sewing machine merits restoration investment.
| Inspection Area | Key Indicators |
|---|---|
| Cosmetic | Decal retention, paint integrity, frame cracks |
| Mechanical | Handwheel resistance, shaft play, stitch formation |
| Corrosion | Surface rust vs. deep pitting on critical parts |
| Electrical | Insulation condition, cord safety, motor function |
| Completeness | Bobbin case, presser feet, essential hardware present |
Assessing The Cost-Benefit of Repair
Once you’ve assessed the condition, crunch the numbers. Typical sewing machine repair runs $50–$100 for minor work, but vintage restoration often starts around $100 plus parts—sometimes matching your machine’s entire resale value of $50–$500. Apply the 50% rule: if repair costs exceed half of the replacement price, reconsider. For rare models valued at $500–$2,100, even extensive work preserves the investment. Balance repair costs against market value, parts availability, and your long-term maintenance savings.
Key Cost Analysis Steps:
- Compare repair estimates to current replacement prices for similar functional machines
- Calculate the 75% threshold—repairs exceeding three-quarters of market value rarely make economic sense
- Factor ongoing maintenance savings since professional service reduces future breakdown frequency
- Weigh sentimental and collector premiums that justify higher restoration expenses for irreplaceable models
Considering The Machine’s Historical Significance
Provenance research separates unremarkable machines from historically significant treasures. Singer production records document tens of millions of units manufactured between 1871 and 1899, yet first practical patents date to 1851—making pre-1870s examples genuinely rare. Antique classification applies to machines exceeding 100 years old, roughly pre-1925, which carry inherently greater sewing machine collectibility and value than mid-century mass-produced models.
Rarity assessment demands concrete data. A 1951 Singer Featherweight “AK” series produced 215,124 units, while certain 1953 “EJ” runs totaled only 5,000—scarcity drives historical pricing. Documented connections to textile mills, Industrial Revolution sites, or notable owners transform ordinary vintage sewing machines into museum-quality artifacts.
Restoration ethics favor preserving original patina over cosmetic idealism; antique sewing machine restoration that respects sewing machine history and evolution honors authenticity above function.
True restoration honors a machine’s authentic history—original patina tells the story better than cosmetic perfection ever could
Preserving and Enjoying Your Restored Machine
You’ve breathed new life into your vintage machine, but the work doesn’t end when the last screw is tightened. The real test of your restoration lies in how well you preserve that machine’s function and character over the years to come.
Let’s walk through the practical steps that will keep your restored treasure running smoothly and help you connect with others who share your passion for these mechanical marvels.
Proper Storage and Maintenance
A machine that’s survived decades deserves a retirement plan that honors its craftsmanship. Climate control and humidity management below 45% relative humidity protect internal metal components from corrosion during storage, while breathable fabric covers prevent moisture trapping that plastic alternatives create.
Your vintage sewing machine maintenance schedule should include monthly lubrication checks—approximately every 8–10 hours of use—and interior cleaning every two weeks to prevent lint accumulation that compromises tension and feed mechanisms.
Effective storage solutions for sewing machine repair and restoration include:
- Desiccant packs placed near vulnerable metal parts to actively absorb moisture in sealed containers
- Stable shelving in conditioned living spaces rather than basements where humidity often exceeds 70%
- Light oil coating on exposed steel surfaces before storage to create a hydrophobic rust prevention barrier
- Monthly tension disk cleaning using alcohol-moistened thread to remove embedded debris
These maintenance schedules preserve both function and value.
Sharing Your Restoration Experience
Your restoration journey deserves an audience—documenting vintage sewing machine repair with clear before-and-after photos and detailed storytelling techniques builds community engagement across forums and social media.
Share specific restoration tips: part numbers you sourced, tension adjustments that worked, restoration ethics you followed.
These project showcases inspire others tackling sewing machine restoration while connecting you with experienced members of the sewing machine community who’ve walked this rewarding path.
Joining Vintage Sewing Machine Communities
You’ll discover that sewing machine collecting thrives through connection—online forums like the 110,000-member Antique Sewing Machines group and formal societies such as ISMACS offer Community Benefits beyond troubleshooting.
These networks provide Member Profiles connecting vintage sewing machine enthusiasts worldwide, Event Calendars listing repair workshops, and Resource Sharing for obsolete parts.
The Vintage Sewing Society delivers weekly Zoom classes and annual multi-day camps, transforming solitary sewing machine restoration into collaborative mastery within a dedicated sewing machine community and forums.
Frequently Asked Questions (FAQs)
Can a Vintage sewing machine be repaired?
Yes—you can repair most vintage sewing machines. Community repair data show 73% of older mechanical models return to full service, especially all-metal designs with readily available parts and straightforward mechanical systems.
What is a sewing machine repair guide?
A sewing machine repair manual provides structured, step-by-step troubleshooting procedures and maintenance schedules for diagnosing mechanical issues, adjusting tension systems, and restoring machines to safe working condition—far beyond basic user operation instructions.
Where can I find Vintage sewing machine manuals?
You’ll find instruction manuals and service manuals through free downloads at online libraries like ISMACS, manufacturer sites for Singer and Brother, collector resources on Facebook groups, and vintage archives maintained by sewing machine repair communities.
Should you buy antique sewing machine parts?
Buying antique parts isn’t always the golden thread you’d hope—sourcing authentic components for vintage sewing machine restoration hinges on verifying compatibility and weighing restoration risks against economic feasibility, since rare models face steep antique costs and limited availability.
How can you learn about a Vintage sewing machine?
Start by locating your model number stamped on the faceplate, then download free manuals from the Internet Archive—home to over 2,000 vintage guides—while exploring online forums, restoration tips, and YouTube channels documenting antique sewing machine restoration techniques.
Where can I find a manual for a Vintage sewing machine?
Your best bet for instruction manuals lies with manufacturer sites—Singer, Bernina, Brother—offering free PDF downloads.
Online repositories, vintage archives, collector networks, and sewing forums help you track down rare service manuals for almost any vintage sewing machine.
How do I know if my antique sewing machine is damaged?
Your vintage sewing machine shows damage through stiff handwheels, skipped stitches, needle strikes, rust on steel parts, frayed electrical wiring, or cracks in castings—mechanical failure signs that distinguish true structural damage from simple user error.
Is it worth repairing an old sewing machine?
Repairing your vintage sewing machine makes economic and environmental sense when costs stay under half the replacement price—usually $75 to $100 restores decades of reliable performance in these durable, all-metal workhorses.
How old does a sewing machine have to be to be considered an antique?
Most collectors and customs officials set the antique threshold at 100 years old. If your machine dates before 1925, it’s officially antique—younger models from 1925–1970 fall into vintage status under accepted collector standards.
What is the number one problem when a machine doesn’t sew properly?
What stops your machine cold? Thread issues—especially incorrect threading—account for roughly 85% of sewing machine malfunctions.
Before suspecting mechanical failure, rethread completely, check your needle installation, verify tension settings, and confirm proper bobbin placement first.
Conclusion
Your Singer doesn’t need an app update—it needs your hands and the right vintage sewing machine repair guide. Each frozen hand wheel you free, each tension assembly you master, transforms mechanical archaeology into practical skill.
These cast-iron workhorses weren’t built for the landfill; they were engineered to outlast their owners. Now you possess the technical knowledge to honor that legacy, ensuring your restored machine delivers another sixty years of perfect straight stitches.
- https://www.repaircafe.org/en/sewing-machine-broken-repair-cafe-fixes/
- https://www.threadsmagazine.com/2018/08/02/vintage-sewing-machines-built-last-lifetime
- https://pubs.nmsu.edu/_c/C202/index.html
- https://www.quiltingboard.com/vintage-antique-machine-enthusiasts-f22/vintage-sewing-machine-not-stitching-very-generic-tutorial-t147275.html
- https://whip-stitch.com/sewing-machine-maintenance-a-sample-schedule/

