This site is supported by our readers. We may earn a commission, at no cost to you, if you purchase through links.
 Quilting in sewing is a creative process where you stitch together three layers—a top fabric, a middle layer of batting, and a backing fabric.
Think of it like making a sandwich, but way cozier! The top layer often includes patchwork designs or decorative patterns, while the stitching (called quilting) adds texture and holds everything together.
People use quilting to create anything from bedspreads and jackets to decorative wall art. It’s both an art and a craft, perfect for anyone who loves combining practicality with creativity.
Ready to try it? Start small—you’ll be surprised how fun and rewarding quilting can be!
Table Of Contents
Key Takeaways
- Quilting is stitching together three layers—a decorative top, batting for warmth, and backing fabric—to create cozy or decorative items.
- It’s both functional and artistic, letting you express creativity while making practical, personalized pieces.
- You’ll need tools like a sewing machine, pins, scissors, and markers, with quilting cotton being the best fabric choice for beginners.
- Start with simple techniques like patchwork and straight-line stitching, and practice to refine your skills while enjoying the process.
Quilting Basics
Quilting’s basics start with understanding the fundamental elements that bring a quilt to life.
At its core, quilting involves sewing together three distinct layers: the decorative top fabric, middle batting for warmth, and backing fabric.
Your stitch types, whether straight-line or free motion, will determine your quilt’s texture and visual appeal.
Fabric selection is essential—quilting cotton works best due to its tight weave and stability.
The layering order must be precise for proper construction.
While modern quilting embraces new techniques, its rich history dates back centuries, with quilts serving both practical and artistic purposes.
Essential Quilting Tools
Now that you understand quilting basics, let’s look at what you’ll need in your toolbox.
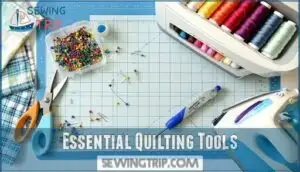
Every quilter needs five must-have tools: pins to hold fabric layers together, a seam ripper for fixing mistakes, good fabric scissors for clean cuts, an iron for pressing seams flat, and a sewing machine (unless you’re hand quilting).
You’ll also want a rotary cutter and self-healing cutting mat for precise fabric cutting, quilting rulers for accurate measurements, fabric markers for pattern transfer, and a walking foot attachment for your machine when stitching multiple layers.
For hand sewing, consider using beeswax for stronger thread, which helps prevent tangles.
How to Make a Quilt
You’ll create your first quilt by combining three essential layers: a decorative top, warm batting middle, and sturdy backing fabric.
Once you’ve assembled these layers into what quilters call a "quilt sandwich," you’ll secure them together with stitching patterns that both strengthen and beautify your finished project, using techniques that require complete concepts to ensure a professional finish.
Patchwork Quilt Top
Now that you have your quilting tools ready, it’s time to create your patchwork quilt top – the colorful, designed layer that will be the star of your finished quilt.
Creating a beautiful patchwork quilt top is like assembling a fabric puzzle. Begin by selecting your fabric collection with a cohesive color palette that speaks to you. Cut your quilt fabric according to your pattern, always maintaining a precise ¼-inch seam allowance for proper piecing.
Your quilt blocks form the foundation of your design:
Assembling a patchwork quilt top is crafting a fabric puzzle where each piece tells a story through color and design.
- Simple blocks like squares and strips are perfect for beginners
- Pre-cut fabric bundles can save time and guarantee color coordination
- Block arrangement can dramatically change your quilt’s final appearance.
Sew your blocks together in rows, pressing seams as you go. This methodical approach helps manage design complexity and creates a flat, professional-looking quilt top that’s ready for the next step.
Quilt Sandwich
After completing your patchwork top, you’ll need to create the quilt sandwich – the three-layer foundation of every quilt. This step brings your creation one step closer to completion.
The quilt sandwich consists of three main layers: the top, middle, and bottom. The purpose of each layer is crucial for the overall structure and functionality of the quilt.
| Layer | Material | Purpose |
|---|---|---|
| Top | Patchwork | Decorative surface |
| Middle | Batting | Provides warmth |
| Bottom | Backing | Covers batting |
| Edges | Even | Prevents shifting |
| Assembly | Basted | Holds layers together |
For proper sandwich stability, lay your backing fabric wrong side up first, smooth out wrinkles, add your batting in the middle, then position your quilt top face up. Selecting the right batting impacts warmth and overall quilt texture. Secure all three layers using pins or basting spray before quilting.
Using Quilting Stencils
Elevate your quilt designs by exploring the magic of quilting stencils! These handy tools are perfect for adding intricate patterns and detailed motifs to your projects.
Stencil materials, like thin plastic or cardstock, guarantee durability and ease of use. To start, transfer your desired pattern onto the fabric with water-soluble markers or chalk for clean removal later.
Want a personal touch? Use custom stencils to craft one-of-a-kind designs. If you’re on a budget, stencil alternatives like cardboard or repurposed household items work just as well.
Keep quilting tools nearby, like Nickel Safety Pins for basting and a Clover Protect Grip Thimble, so you’re ready for precision work. Organize your stencil collection with proper stencil storage—this makes finding designs easier next time.
With practice, these quilting techniques transform your quilt into a masterpiece!
Hand Quilting Techniques
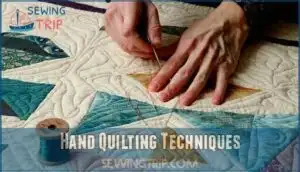
Hand quilting is incredibly rewarding, giving your work a personal touch that’s hard to replicate.
It starts with your quilt sandwich secured—nickel safety pins or thread basting will do the trick! From there, grab the right tools and enter into the meditative process of hand stitching.
Here’s a quick checklist for success:
- Running Stitch: A classic, steady stitch perfect for beginners.
- Quilting Needles: Short and sharp, ideal for piercing through layers.
- Quilting Frame: Keeps your project taut and manageable, especially for large pieces.
- Thread Tension: Balance is key—too tight causes puckering, too loose lacks stability.
- Hand Binding: Adds a polished, handmade finish your project deserves.
Selecting the right quilting needle options is essential for comfort and stitch quality. Patience is your best friend here. With practice, your stitches will become as unique as your creative vision!
Machine Quilting Techniques
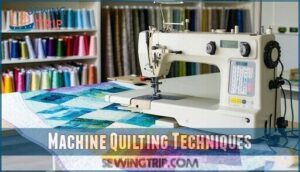
Machine quilting opens up a world of creative possibilities. With tools like a Walking Foot for consistent layers or a Free-Motion foot for curvy designs, even beginners can create striking patterns.
Start simple—straight-line quilting stitches are reliable. Longarm Quilting machines or options with Quilting Automation and Stitch Regulation bring professional results home.
Free motion quilting takes patience, but practice makes the process fun. A specialized presser foot can greatly improve results.
A sturdy workspace, good thread, and solid machines like Janome with extension tables make quilting techniques manageable and enjoyable, allowing for a fun and creative experience with striking patterns.
Binding Your Quilt
Binding your quilt is like giving it the perfect finishing touch—it ties everything together, literally and stylistically.
Whether you choose machine or hand-binding, both methods have their charms.
- Machine Binding: Quick and precise, ideal for larger quilts or when time’s tight. A straight stitch along the fabric edges gives a sharp, professional look.
- Hand Binding: A bit slower but offers creative flexibility. Smaller seam allowances let you adjust on the fly for curves or intricate corners.
- Corner Techniques: Mastering those miters makes all the difference. Stop stitching 1/4 inch before the corner, pivot, and fold for smooth, crisp edges.
Carefully pressing seams and generously pinning binding fabric guarantees it stays aligned. Take your time—it’s worth the effort!
Quilt as You Go Method
If binding feels challenging, the Quilt as You Go (QAYG) method makes joining blocks a breeze.
With QAYG, you quilt individual pieces before connecting them—perfect for tackling larger projects.
This technique simplifies section completion and allows greater freedom with fabric selection and design options.
QAYG Benefits Traditional Quilting
Experiment with quilting stitches and quilting patterns—you’ll love the manageable creativity!
Easy Quilt Blocks for Beginners
Starting quilting? Easy blocks like Simple Squares or Half-Square Triangles are perfect for practice! Focus on accuracy and experiment with quilting techniques like strip piecing or patchwork quilting.
Mastering basics like the Four Patch and Nine Patch will boost your confidence. Enjoy the journey, one stitch at a time!
- Start with bright, contrasting fabrics for excitement.
- Practice with scrap fabric—it’s cost-effective!
- Invest in a quarter-inch presser foot for clean seams.
- Pin layers generously to avoid slipping.
- Use simple quilt patterns for structure.
- Embrace imperfections—mistakes grow skills, and remember to focus on accuracy and have fun with quilting techniques.
Beginner-Friendly Quilt Patterns
If you’re just stepping into the colorful world of quilting, beginner quilt patterns like Simple Squares, Strip Quilts, and Rail Fence are perfect starters.
Panel Quilts add charm without overwhelming you, while Charm Packs simplify fabric choices.
Explore a quilt design like the Nine Patch Block or Flying Geese to develop confidence with quilting stitches.
Start small with lap quilts or mini quilts; they’re manageable and rewarding. With every stitch, you’ll transform fabric into a meaningful quilt project—practice truly makes perfect!
Exploring The World of Quilting
Quilting connects you to a rich history spanning centuries and continents.
Quilting weaves together stories, traditions, and creativity, bridging time and culture through every stitch and fabric choice.
It’s more than sewing stitches through fabric—it’s storytelling.
From the rustic charm of American log cabins to the intricate art of Japanese sashiko, every quilt piece whispers traditions.
For inspiration, look to modern quilting blends where old designs merge with cutting-edge ideas.
The quilt community is a welcoming circle, keen to share wisdom, patterns, and laughs.
They remind us quilting isn’t just craft; it’s connection.
Whether you’re piecing vibrant scraps or following a curated design, every choice in fabric selection and pattern adds personal flair.
So, grab that fabric, join the conversation, and stitch your way into this timeless art form—one quilt at a time!
Frequently Asked Questions (FAQs)
What is the difference between sewing and quilting?
Sewing stitches fabric pieces together to make practical items like clothes.
While quilting layers fabric with batting for warmth and decoration.
Think of sewing as the solo act and quilting as the full orchestra!
What is quilting & how does it work?
Imagine layering a sandwich—fabric top, batting middle, and backing—then stitching them together in decorative patterns.
That’s quilting! You create cozy blankets or artful designs, combining creativity with function, one stitch at a time.
What is quilting used for?
You can use quilting to make cozy blankets, home décor, or even wearable art.
It’s perfect for personalizing gifts, upcycling fabric scraps, or creating stunning designs that combine warmth, functionality, and a touch of creativity.
What is machine quilting?
It’s like giving your quilt a gym membership.
Machine quilting stitches layers together using a sewing machine, offering speed, precision, and endless design possibilities.
You’ll turn fabric sandwiches into cozy works of art effortlessly.
How do you make a quilt?
To make a quilt, start by piecing a patchwork top.
Layer it with batting and backing, then stitch through all layers to secure.
Finish by adding a neat binding for polished edges.
How does a quilting machine work?
A quilting machine stitches through three fabric layers—top, batting, and backing—using precise, even stitches.
It’s like a sewing machine but with advanced features like wider throats and walking feet to handle thicker materials effortlessly.
What makes a quilting machine different from a sewing machine?
A quilting machine stands out with its larger throat space, specialized walking foot, and stitch regulators.
It’s designed for layering and stitching thick quilts effortlessly, making your creative projects smoother and more enjoyable than regular sewing machines, with features that facilitate stitching.
Can you use any sewing machine for quilting?
You can quilt on most sewing machines, but some features make it easier.
A larger throat space, walking foot, and free-motion quilting foot help handle layers and precise stitching, especially for bigger, bulkier projects.
Can you quilt a large quilt on a regular sewing machine?
Of course, you can quilt a large quilt on a regular sewing machine.
It just takes patience, careful fabric handling, and some support—think extra tables or chairs—so the weight doesn’t pull everything askew.
What’s the difference between sewing and quilting?
Sewing is about joining fabric pieces to make clothes or décor, while quilting layers fabric with batting for a cozy finish.
In short, sewing’s functional, quilting’s creative—like painting versus framing the masterpiece.
Conclusion
Quilting in sewing is like painting with fabric—each stitch brings your vision to life.
Whether you’re creating a cozy quilt for your bed or a decorative piece for your wall, this craft blends creativity and functionality.
Start small, take your time, and enjoy the process. With practice, you’ll master techniques like patchwork and binding.
Don’t overthink it—just get started and have fun exploring what quilting in sewing can offer. You’ll be stitching memories in no time!


