This site is supported by our readers. We may earn a commission, at no cost to you, if you purchase through links.

The good news? Most causes are simple fixes that take minutes to resolve once you know what to check.
Table Of Contents
Key Takeaways
- Most unexpected zigzag stitches stem from three fixable culprits: incorrect tension settings, worn or mismatched needles, or accidentally bumped stitch selector dials.
- Thread tension imbalances cause roughly 70% of zigzag problems, requiring you to rethread completely (top and bobbin) and test on scraps after each adjustment.
- Needle replacement every 8-10 hours prevents 90% of thread breakage issues, especially when you match needle size to fabric weight (size 11 for lightweight, 14 for medium, 16 for heavy).
- Fabric preparation with stabilizers reduces puckering by 75% on lightweight materials, while proper pressing afterward transforms amateur work into professional-looking seams.
Zig-Zag Stitch Troubleshooting
Zig-zag stitches can go sideways fast when tension’s off, fabric puckers, or threads snap mid-seam.
The good news? Most problems have straightforward fixes once you know what you’re looking at. Here’s what commonly goes wrong and how to get your machine back on track.
Loose Stitches
Why do your zig-zag stitches look sloppy? Thread tension is usually the culprit. Start by rethreading your machine—top and bobbin—then adjust tension settings until both threads interlock properly in the fabric layers. Test on scrap fabric after each adjustment to verify stitch quality improves.
Key checkpoints for fixing loose zig-zag stitches:
- Match needle size to your thread weight and fabric type—wrong combinations cause poor stitch formation
- Balance top and bobbin tensions—uneven settings prevent threads from locking correctly
- Verify stitch length and width settings—extreme adjustments can compromise thread tension
- Check your fabric preparation and machine calibration—stabilizers help prevent distortion while proper sewing techniques guarantee consistent results
Regular machine maintenance checks can help identify and resolve issues before they affect stitch quality. Once you’ve dialed in the right combination, your zig-zag stitch should form crisp, even patterns without gaps or looseness.
Puckered Fabric
Puckered fabric often signals tension problems or material mismatches. High thread tension increases puckering severity—lightweight fabrics with low bending stiffness pucker more readily during zig-zag stitching. Understanding thread tension issues is essential for preventing puckers.
Here’s your troubleshooting roadmap:
| Problem Source | Solution |
|---|---|
| Thread Tension too high | Lower upper thread tension 15-20% for delicate materials |
| Fabric Structure incompatible | Use stabilizer or switch to heavier fabric types |
| Thread Compatibility mismatch | Match thread weight to fabric; mercerized cotton shrinks less than polyester |
| Sewing Speed excessive | Slow down—fast speeds compound pucker on test swatches |
Check your fabric prep first. Add tear-away stabilizer under lightweight weaves, adjust stitch length between 2-3mm, and verify your needle size matches both thread and material selection. Test on scraps before committing to your project.
Deformed Stitches
Distorted zig-zag stitches usually point to tension issues between your top and bobbin threads. When stitch formation looks wonky, you’ll want to check three culprits:
- Needle issues—wrong size for your fabric choice creates skipped stitches and irregular patterns
- Thread quality—cheap or old thread breaks down, affecting every zig zag stitch you sew
- Machine maintenance—lint buildup in the tension discs throws off balanced stitch formation
Test on scraps after adjusting your tension dial, swapping needles, or rethreading completely.
Top Thread Breaking
If your top thread snaps mid-seam, you’re dealing with one of the most frustrating hiccups in zig-zag stitching—but it’s usually a quick fix. Tension problems often show up when your thread path isn’t properly seated, while a dull or damaged needle creates friction that shreds thread fibers.
Check these common culprits first:
- Needle issues—wrong needle size for your fabric choice or a burred point tears thread during each stitch
- Thread quality—old, bargain-bin thread lacks the strength to manage zig-zag tension
- Threading problems—skipping the upper tension discs means uneven pressure breaks your thread
Rethread completely, swap in a fresh needle matched to your fabric, and test on scraps.
Tips for Troubleshooting Zig-Zag Stitches
When’s the last time you swapped your needle or checked your thread tension before blaming your machine? Most zig-zag stitch problems stem from a handful of fixable issues—improper thread tension, worn needles, or rushed adjustments. Here’s how to troubleshoot like a pro.
Start with machine maintenance. Lint buildup causes skipped stitches in about a third of service cases, so clean your bobbin area and needle bar regularly. Needle calibration matters too—bent or dull needles account for up to 90% of thread breakage issues.
- Rethread completely and verify your bobbin’s inserted the right direction (check your manual)
- Test stitch formation on scrap fabric after every tension adjustment
- Match your needle to your fabric—ballpoint for knits, universal for wovens
- Slow your roll—reducing speed improves consistency for 70% of sewers having zig-zag stitch troubles
Fabric selection plays a bigger role than you’d think. Lightweight materials benefit from stabilizers, which reduce puckering by 75%.
Prepare Your Fabric for Zig-Zag Stitching
Your fabric’s foundation determines whether you’ll get crisp, professional edges or a frustrating mess of puckers and pulled threads.
Start with fabric preparation—stitch your seams normally, then trim them to about ⅜ inch before switching to zigzag stitching. Thread selection matters: match your thread weight to your fabric weight for balanced thread tension.
For fabric crafting with finicky materials, pin a stabilizer underneath before you start. This simple sewing technique prevents distortion and keeps your zigzag stitching smooth. Test on scraps first—it’ll save you headaches later.
| Fabric Type | Stabilizer Options | Seam Trimming Method |
|---|---|---|
| Lightweight cotton | Tear-away or washaway | Pink or surge edges |
| Medium wovens | Fusible interfacing | Trim with rotary cutter |
| Heavy denim | None needed | Surge only |
| Delicate silks | Water-soluble topper | Pink carefully |
| Stretchy knits | Cut-away stabilizer | Serge or overcast |
How to Set Up Your Machine
Getting your machine dialed in takes three simple adjustments—and each one directly impacts whether your zigzag stitches look clean or chaotic. Start with thread tension: check your upper thread tension by running a test seam—if you see bobbin thread peeking through on top, loosen slightly. Next comes needle selection: match your needle size to your fabric weight (size 11 for lightweight, 14 for medium, 16 for heavy). Install an overcast or zigzag presser foot—it’s designed to prevent fabric from tunneling under the needle.
Now for stitch settings and machine calibration:
- Stitch length: Set between 2-3mm for clean edge finishing
- Stitch width: Keep it 2-3mm to prevent excessive fabric pull
Run a test on scrap fabric after your machine setup. If your bobbin setup seems off or stitches still look wonky, adjust your machine settings incrementally. Getting these fundamentals right beats troubleshooting later.
Attach The Overlock Foot
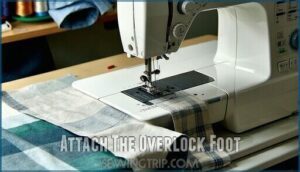
Swapping out your presser foot isn’t some optional upgrade—it’s the difference between clean edges and a tangled mess. Power off your machine first—safety beats speed every time. Lift the presser foot lever, then press the release button behind the foot attachment to pop off your standard foot. Slide the overlock foot into place until you hear a satisfying click.
This specialized foot guides fabric perfectly for zigzag stitch techniques, preventing edge curl and maintaining stitch regulation. Double-check it’s locked—give it a gentle tug to confirm.
Before you start stitching, verify your overlock settings match your fabric type. Quick machine calibration now saves hours of sewing machine troubleshooting later. Test on scrap fabric to confirm proper fabric guidance and stitch settings before touching your actual project.
Stitching The Seam Allowances
Position your fabric edge against the foot’s guide and stitch steadily—rushing through seam allowances is how you turn a clean finish into a frayed disaster. Keep your eyes on the fabric edge, not the needle, and maintain consistent speed throughout. Proper fabric preparation makes all the difference here.
Your zigzag stitching technique directly impacts seam finishing quality:
- Stitch length between 2.0–2.5mm prevents thread bunching while securing edges
- Stitch width at 3.5–4mm catches fabric edges without cutting through
- Thread tension balanced between top and bobbin eliminates puckering
Watch your seam allowance—usually 5/8 inch for most projects. Edge binding works best when you’re deliberate about stitch width adjustments. If you notice issues, stop immediately for sewing machine troubleshooting rather than powering through and ruining your fabric.
Press The Seams
A wrinkled seam after all that careful stitching is like leaving a masterpiece in the rain—you’re not finished until you press. Proper seam pressing transforms amateur work into polished results—it’s the difference between "I made this" and "where’d you buy that?" Your stitch length and width adjustments mean nothing if you skip this vital seam finishing step.
Grab your iron and set it to match your fabric—cotton tolerates high heat, while synthetics need lower temps to avoid melting. Use a pressing cloth on delicate materials to protect against scorch marks.
Press seams open or to one side depending on your project, applying firm downward pressure rather than dragging the iron sideways. This step locks in your zigzag stitching, flattens puckering, and gives seams a professional finish.
Connect With Other Sewers
No amount of perfect pressing can match the breakthroughs you’ll discover when you start swapping stories with fellow sewers who’ve battled the same zigzag demons. Sewing communities—whether online forums, social media groups, or local textile arts and crafts circles—offer real-world sewing tips and tricks you won’t find in any manual.
Here’s where to plug in:
- Join online forums where sewers share sewing projects and patterns plus troubleshoot sewing machine accessories that actually work.
- Follow sewing blogs that dissect common issues with detailed photos and honest product reviews.
- Hit up local sewing groups through shops or libraries—nothing beats hands-on demonstrations and borrowing that specialty presser foot.
These sewing community and resources connections transform frustration into mastery faster than any solo troubleshooting session ever could.
Frequently Asked Questions (FAQs)
Why is my sewing machine zig zag?
Your machine isn’t broken—it’s set to zigzag stitch mode. Check your stitch selector dial or settings; you’ve likely switched from straight stitch without realizing it.
Troubleshooting starts with understanding stitch formation and machine calibration basics.
Are You frustrated with your sewing machine’s zigzag stitch?
Zigzag stitch frustrations often stem from thread tension imbalances or machine calibration issues.
Troubleshooting skipped stitches and poor stitch formation means checking fabric selection and mastering zig zag stitch techniques through proper sewing techniques.
What is a zigzag stitch on a sewing machine?
Think of the zigzag stitch as your machine’s diagonal dance—it weaves back and forth to create stretchy, fray-proof seams.
This flexible stitch pattern suits different fabric types by adjusting width and length through your machine settings.
Can you repair your sewing machine’s zigzag stitch?
Like tuning a guitar that’s gone flat, you can absolutely bring your zigzag stitch back to life. Most zigzag stitch issues stem from tension adjustment problems, improper maintenance, or incorrect fabric selection—all fixable through basic troubleshooting.
Check your machine’s manual for model-specific sewing machine repair guidance and maintenance tips.
Why do sewing machines skip zigzag stitches?
Skipped stitches happen when your needle can’t properly catch the bobbin thread. Troubleshooting usually points to needle maintenance issues—a dull or bent needle, wrong needle size for your fabric, or poor thread tension affecting stitch formation during zigzag stitching.
How can I adjust the width and length on my zig-zag stitch?
Adjusting your Zigzag Stitch is like fine-tuning a radio—dial in the perfect frequency.
Look for Stitch Width and Stitch Length controls on your Machine Calibration panel. Turn them to change Zig Zag Settings based on Fabric Thickness, then test your Zigzag Stitching with proper Tension Control.
Why does my machine only sew zig-zag?
Your stitch selector dial might be stuck on zigzag mode. Check if it’s properly set to straight stitch—this is a common Machine Calibration issue.
Thread Tension and Bobbin Issues can also force zigzag-only stitching if the mechanism’s jammed.
How often should I replace my needle?
Your needle’s like a marathon runner—it won’t last forever. Replace your needle every 8-10 hours of sewing or after each project to maintain stitch quality and prevent fabric damage.
Fresh needles guarantee proper thread tension and fabric compatibility, keeping your work sharp.
Why do my zig-zag stitches skip occasionally?
When Skipped Stitches appear in your ZigZag work, you’re usually dealing with a dull or bent Needle Condition, wrong Needle Size for your Fabric Selection, or wonky Thread Tension.
Troubleshooting starts with swapping your needle, checking Machine Calibration, and tweaking Stitch Length settings.
Conclusion
Think of your sewing machine as a precision instrument—when it throws unexpected zig-zags, it’s simply telling you something’s off-balance.
Now that you’ve walked through tension adjustments, needle checks, and dial settings, you’ve got the tools to diagnose why my sewing machine sew zig zags and fix it fast. Most issues trace back to a loose thread guide or a worn needle you forgot to replace.
Trust your troubleshooting instincts, keep your machine maintained, and those straight seams will be back on track before your next project.
- https://www.thesewingdirectory.co.uk/thread-tension/
- https://www.sewessential.co.uk/blog/how-to-fix-sewing-machine-stitch-quality-problems/
- https://www.threadsmagazine.com/2008/11/02/understanding-thread-tension
- https://www.reddit.com/r/sewing/comments/xs024x/my_machine_is_scrunching_up_the_fabric_more_in/
- https://journals.sagepub.com/doi/full/10.1177/15589250221113479


