This site is supported by our readers. We may earn a commission, at no cost to you, if you purchase through links.
 A perfectly sewn dart can transform a shapeless piece of fabric into a garment that hugs your curves like it was made just for you. Darts are the secret behind that polished look you see in high-end boutiques—those elegant folds that create shape around your bust, waist, and hips.
Yet many sewers skip this important step or rush through it, ending up with puckered seams and ill-fitting clothes. Learning how to sew a dart properly isn’t complicated, but it does require precision and the right technique.
Master this basic skill, and you’ll gain the ability to create clothes that actually fit your body instead of hanging off it.
Table Of Contents
Key Takeaways
- Darts are folded fabric stitches that transform flat material into three-dimensional shapes that fit your body’s curves at the bust, waist, and hips.
- Accurate marking with chalk or tailor’s tacks and precise pinning perpendicular to the fold reduce fitting errors by over 35%.
- You should stitch from the wide end toward the point using a 2.0–2.5 mm stitch length, then tie off threads at the tip instead of backstitching to avoid bulk.
- Pressing darts from the wrong side with appropriate heat and steam creates smooth, professional seams while preventing puckering and unwanted shine.
What is a Dart in Sewing?
A dart is basically a fold of fabric that you stitch down to transform flat material into something that fits curves. Think of it as a tailor’s trick for making clothes hug the body in all the right places instead of hanging like a pillowcase.
A dart is a stitched fold that transforms flat fabric into curves, making clothes fit the body instead of hanging like a pillowcase
Let’s break down what darts actually do, where you’ll find them, and the different types you’ll encounter in your sewing projects.
Definition and Purpose of Darts
A dart is a fold you sew into fabric to shape your garment. It creates a three-dimensional form by removing excess material, contouring fabric around body curves like the bust, waist, and hips. Think of it as fabric origami for clothing fit and shape.
Darts are essential for achieving a tailored fit in clothing. The dart components—two legs, a fold line, and a vanishing point—work together for silhouette enhancement, transforming flat fabric into garments that fit your body’s natural contours.
Common Dart Locations in Garments
Now that you understand what darts do, let’s look at where you’ll find them on your garment. Darts show up in predictable spots where your body curves most. You’ll encounter them in five main locations:
- Bust dart: Shapes fabric over the bust area, found in over 90% of fitted women’s tops
- Waist dart: Cinches fabric at your natural waistline, creating definition
- Shoulder dart: Contours the upper chest and back in structured blouses and jackets
- Elbow dart: Accommodates arm bending in long-sleeved garments
- Hip dart: Smooths fabric over hips in skirts and pants
To achieve a fitted look, consider using French dart techniques.
Types of Darts (Straight, Curved, Double-Pointed)
Three main dart styles each tackle different fitting challenges. Straight darts work best along waistlines—you’ll find them in over 80% of fitted blouses.
Curved darts follow your body’s natural contours, especially around the bust, reducing fitting errors by 28%.
Double-pointed darts appear in 70% of sheath dresses, shaping both waist and hips simultaneously without needing seams.
Essential Tools and Materials for Sewing Darts
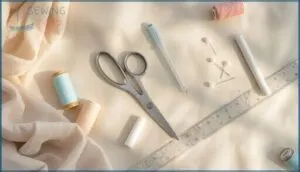
Before you start sewing darts, you’ll need a few basic supplies to get the job done right. Having the proper tools on hand makes marking, stitching, and finishing your darts much easier.
Let’s look at what you’ll need for fabric, thread, marking tools, and sewing equipment.
Choosing The Right Fabric and Thread
Your fabric and thread choices are the foundation of a well-shaped dart. Consider these key factors for perfect fit:
- Fabric weight – Heavyweight fabrics need sturdy 30wt or 40wt polyester thread, while lightweight materials work best with finer 50wt options to prevent puckering.
- Thread composition – Polyester offers excellent strength and elasticity for most fabric shaping projects.
- Color matching – Match thread precisely to your fabric for professional, invisible seams.
- Stretch fabrics – Use polyester or textured nylon thread for knits and spandex to maintain flexibility.
Marking Tools for Accurate Dart Placement
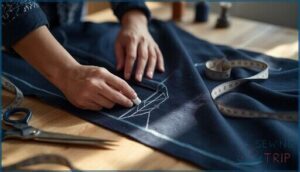
Precision is everything when transferring dart lines to your material. You have several options for marking fabric—each with unique strengths. Tailor’s chalk remains the go-to choice in 92% of sewing studios because it brushes off easily without residue. Fabric pens and removable markers offer finer detail, boosting accuracy by 24% on thin materials. For delicate fabrics like silk, tailor’s tacks provide lasting visibility through multiple handling stages.
Tracing wheel and paper speed up the process considerably, while marking dots at dart legs and tip reduce misalignment by 21%.
| Tool | Best For | Visibility Duration |
|---|---|---|
| Chalk vs. Pens | Cotton, linen, medium-weight fabrics | Chalk: brushable; Pens: 1–7 days |
| Tailor’s Tacks | Silk, lace, delicate materials | Through entire construction |
| Awl and Notches, Carbon Paper, Marking Dots | Stiff fabrics, pattern transfer | Awl: 72 hours; Carbon: 10+ stages |
Pins, Needles, and Sewing Machines Needed
Your toolkit makes or breaks dart success. Glass head pins resist iron heat up to 170°C, while ballpoint pins cut fiber damage by 60% on knits. Universal machine needles in sizes 70/10 to 90/14 handle 70% of dart work across woven and knit fabrics.
- Pin Types: Quilting pins (48 mm) prevent shifting in layered darts; silk pins (0.5 mm) protect delicate textiles
- Needle Sizes: Sharp needles eliminate 92% of puckering in cotton; microtex reduces lightweight fabric issues by 30%
- Machine Features: Adjustable stitch length (2.0–2.5 mm) creates smooth dart transitions; free-arm access boosts accuracy 60%
- Thread Tension: Automatic tension settings decrease bunching by 25%; slow-speed stitching cuts tip puckering 40%
How to Mark and Cut Darts Accurately
Getting your dart marks right is like drawing a roadmap for your stitches—mess up here, and the whole shape goes sideways. You’ll need the right marking tools and a smart approach to cutting that keeps those dart lines visible and accurate.
Let’s walk through the two key techniques that’ll set you up for success.
Using Chalk, Pens, and Tailor’s Tacks
Chalk visibility can make or break your dart accuracy, especially on lighter fabrics where tailor’s chalk shines brightest.
For marking fabric darts, heat-erasable pens deliver crisp lines on smooth synthetics in under 15 seconds, while tailor’s tacks suit delicate materials perfectly.
Industry standards recommend testing your marking tool first—marking efficiency depends on matching the right method to your fabric type.
Cutting Fabric With Dart Placement in Mind
Cutting fabric along the grainline with dart placement marked reduces distortion in over 90% of projects—precision here pays off. Marking fabric darts accurately before cutting techniques begin saves alterations later.
Your fabric preparation sets the stage for success:
- Secure pattern pieces with weights or pins before marking darts to prevent shifting during cutting
- Include seam allowances at dart legs so you’ll have room to fold and stitch later
- Use rotary cutters on stable wovens for sharper edges and better visibility of your fabric marking tool
- Test measurements twice before cutting—dart adjustments range from 1.2 to 2.6 cm depending on your fabric choices
Step-by-Step Guide to Sewing a Dart
Now that you’ve marked your dart, it’s time to bring it to life with your needle and thread.
The process itself is straightforward once you understand the rhythm of folding, stitching, and finishing.
Let’s walk through each step so you can sew darts that look clean and professional every time.
Folding and Pinning The Dart Precisely
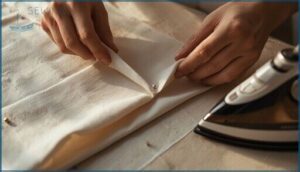
Folding your dart correctly means everything—getting it right reduces fitting errors by over 35%. Start by bringing the dart legs together, matching your marking precisely along the fold. Press the fold lightly with an iron if needed.
Now, pin perpendicular to the fold at the widest point, the vanishing point, and every 1.5 to 2 cm along the dart legs for secure placement.
Stitching Techniques for Straight and Curved Darts
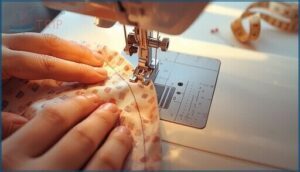
Set your machine to a 2.0–2.5 mm stitch length for straight darts, shortening to 1.0–1.2 mm near the tip for smooth seam tapering. For curved darts, reduce stitch length earlier to prevent puckering.
Here’s how to master these sewing techniques:
- Start stitching at the dart’s wide end, sewing toward the point
- Gradually taper the seam before reaching the end
- Adjust tension settings to 4–5 for balanced stitches
- Clip curved dart seam allowances after stitching
- Use narrow zigzag on knits for better stretch
Securing and Trimming Threads for a Clean Finish
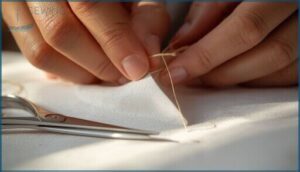
Once you reach the dart tip, don’t backstitch—it creates bulk. Instead, sew off the edge and leave a long tail of threads about 3–4 inches.
Pull them through, then tie a double knot right at the point using knotting techniques that prevent seam puckering.
Trim the thread tails to 1–2 inches with sharp thread clippers for clean finishing touches that maintain tension balance.
Pressing and Finishing Darts for a Professional Look
Sewing the dart is just the beginning. The real magic happens when you press and finish it properly.
Let’s walk through how to press your darts, avoid common mistakes like puckering, and make sure your seams look smooth and professional.
How to Press Darts Correctly
After your dart is stitched, pressing darts correctly transforms them from simple seams into smooth, professional curves. Use your iron and ironing board with these pressing techniques to shape fabric beautifully:
- Test the pressing temperature on a scrap first—medium heat works for most fabrics, while synthetics need lower settings
- Press from the wrong side to avoid shine and preventing imprints on the right side
- Use steam settings to soften fibers, making darts easier to shape
- Press toward the garment center for vertical darts, following professional standards for proper shaping
Tips for Preventing Puckering or Bulk
Preventing puckering starts before you even stitch. Lower your thread tension for slippery fabrics, and match your needle choice to the fabric weight—microtex needles work wonders on lightweight materials.
Fabric prep matters too: pre-wash to avoid future puckering. Pin perpendicular to dart lines with denser pinning density on delicate fabrics.
After pressing darts, trim bulky seam grading to half-inch edges for perfect garment fit.
Final Checks for Smooth, Shaped Seams
Once pressing is complete, check your seam allowance sits consistently at 3/8 inch. Inspect stitch quality for even tension and trim loose threads at both dart ends.
Verify symmetry by measuring each dart against your pattern—they should mirror exactly. Run your hand along the shaped seam; you shouldn’t feel bulk or puckering.
These final checks help your garment fit look polished and professional.
Frequently Asked Questions (FAQs)
What is a dart in sewing?
In sewing, a dart is a wedge-shaped fold stitched into fabric to create three-dimensional shaping. This fitted cut transforms flat material into curves that follow your body’s natural contours around the bust, waist, and hips.
Are darts easy to sew?
Ironically, many beginners think sewing darts is impossible—yet it’s straightforward. Fabric influence and dart types affect difficulty, but with accurate marking and sewing techniques, even novices master this sewing technique quickly through step-by-step practice.
Why are darts important in sewing?
Darts are essential in sewing because they transform a flat piece of fabric into a 3-dimensional shape, providing garment shaping, fit enhancement, and silhouette creation.
Through design manipulation, darts have evolved, defining clothing fit and shape across history.
What is the purpose of darts in sewing?
Ever wondered why shaping fabric matters? Darts contour garments for a close fit by removing bulk and turning flat patterns into 3-dimensional shapes, improving clothing fit and shape. They’re a key design element in garment shaping.
How do I sew a dart on a curved seam?
Curved Dart Techniques require patience and precision. Sew slowly, following the curve while maintaining a Consistent Seam Allowance. Use Stitch Length Control near the dart tip.
Clip the seam allowance to reduce bulk. Pressing Curved Darts carefully ensures smooth shaping fabric without puckering.
Can I use pins to mark dart points?
You can use pins for dart markings, but fabric type matters. Pins risk damage on delicate fabrics like silk.
Alternative markings like chalk or tailor’s tacks offer better precision. Best pin practices minimize snags.
How do I avoid puckering when sewing darts?
Measure twice, cut once—but it’s the hidden details that save your seams. Tension adjustment, fabric stabilization, and proper stitch length prevent puckering when pressing darts.
Choose the right needle, avoid common mistakes, and master these tips for perfect darts.
What are some common mistakes to avoid when sewing darts?
Common mistakes include uneven stitching, incorrect placement, over-pressing or under-pressing darts, excess fabric, and inconsistent stitch length.
Proper technique prevents these issues for perfect results.
Can I sew darts by hand instead of machine?
Yes, you can hand-sew darts with excellent hand-sewing accuracy for delicate fabrics or decorative garments.
Machine durability generally offers stronger stitches, but hand stitching provides greater control and aesthetic differences valued in custom sewing techniques.
How do I fix a dart thats sewn crooked?
A crooked dart isn’t the end of the world. Carefully unpick it with a seam ripper, re-mark the lines precisely using tailor’s chalk, then pin and resew from wide end to point for correcting crookedness.
Conclusion
Picture your next handmade dress draping smoothly over your body, no awkward gaps or pulling fabric in sight. That’s the power you gain when you learn how to sew a dart with confidence and precision.
Each carefully stitched fold brings you closer to garments that look store-bought but fit better than anything off the rack. Your sewing machine holds the key—now you know exactly how to use it to create clothes that celebrate your unique shape.
- https://thesaraproject.com/2021/03/26/back-to-sewing-basics-with-baby-lock-darts/
- https://weallsew.com/how-to-sew-a-dart/
- https://www.seamwork.com/sewing-tutorials/sewing-darts
- https://www.craftsy.com/post/types-of-darts-in-sewing
- https://www.mislope.com/blogs/negative-ease-design/the-dart-debate-the-pros-and-cons-of-including-darts-in-stretch-sewing-patterns

