This site is supported by our readers. We may earn a commission, at no cost to you, if you purchase through links.
To sew a snap button, gather your snap set, needle, and thread.
Separate the ball and socket components, then mark their placement on your fabric layers.
Using chalk or a fabric pen, align the layers precisely and mark the button positions.
Thread your needle and knot the end.
Through the ball side holes, stitch around 5 times.
Attach the socket side, sewing through each hole securely.
Knot the underside for durability.
Check the snap’s fit, making any needed adjustments.
Correct techniques make sure snaps hold up to daily wear and tear – keep reading to master this essential skill.
Table Of Contents
Key Takeaways
- Gather materials: snap set, needle, thread, and fabric
- Align layers, mark placement, and stitch through holes
- Choose appropriate material and size for fabric weight
- Use snap tool for secure and accurate installation
How to Sew a Snap Button?
To sew a snap button, follow these steps:
- Separate the snap and mark the position of the ball snap on the underside of the top flap. Start your stitching with a knot or double backstitch that will lie under the snap.
- Thread your needle through one of the holes at the edge of the snap. Then work through each hole with 2-3 stitches to secure it. Make sure you don’t have stitches showing on the right side of the garment. You can stitch with a normal overstitch or be fancy and use a buttonhole stitch.
About Alexandra Richards
Alexandra Richards, the creator behind EyeLoveKnots, is a craft enthusiast with a passion for needlepoint and crochet. She began her needlepoint journey in 2006 and later learned to crochet in 2015.
Her blog, EyeLoveKnots, is filled with tech-edited patterns and tutorials, showcasing her expertise in various crafts.
Richards isn’t only a skilled crafter but also a model, DJ, and all-around ‘it girl’. Her love for creativity extends beyond crafts, as she’s also a video editor and motion graphics designer, helping brands connect with their audiences through engaging video content.
Richards’s diverse background and creative spirit make her an expert in sewing on snap buttons and teaching others how to do it.
Types of Sew-on Snaps
You’ll find sew-on snaps in a variety of materials like metallic, plastic, and clear options. When selecting a size, keep the fabric weight in mind – larger snaps for heavier fabrics and smaller snaps for delicate materials.
Metallic, Plastic, and Clear Varieties
Snap durability is essential for any project, and sew-on snaps offer various choices to meet your requirements. These snaps are available in different materials like metallic, plastic, and transparent varieties, allowing you to select the optimal option for your project’s specifications. Metallic snaps provide a traditional, robust appearance and are ideal for heavier fabrics, while plastic snaps are lightweight and appropriate for delicate fabrics. Transparent snaps offer an understated, almost unnoticeable appearance, making them perfect for projects where you want to minimize the snap’s visual impact.
When considering snap placement, keep in mind that larger snaps are generally used for heavier fabrics, while smaller snaps are better suited for lighter fabrics. The size of the snap can also affect the snap’s overall look, so choose a size that complements the design of your project.
To guarantee the longevity of your snaps, consider using a snap tool specifically designed for your snap’s size and style. These tools can help you achieve a secure and accurate snap installation, which is crucial for the snap’s durability. Additionally, always follow the manufacturer’s instructions for installing snaps to make sure their proper placement and function.
Size Considerations for Fabric Weight
When choosing the right snap for your project, consider the fabric weight.
Snap strength and durability concerns can impact the snap’s performance.
Thicker fabrics may require larger snaps, while lighter fabrics can handle smaller ones.
Aesthetic preferences also play a role.
Use a snap setting tool or embroidery floss for precision.
Preparing to Sew a Snap Button
To prepare for sewing a snap button, you’ll need a snap button set with the ball and socket components separated, along with a tapestry needle and matching thread. Begin by placing the ball component on the right side of the fabric where you want the snap positioned, ensuring the layers are properly aligned.
Materials Needed
Before you begin sewing a snap button, you’ll need to gather the right materials. Here’s a list of what you’ll need:
- Fabric pen or pencil
- Sewing pin
- Needle
- Thread
- Scissors
- Snaps
- Fabric
Separating Ball and Socket
After gathering your materials, it’s time to address the snap’s ball and socket. This step is essential for a secure fit.
- Disconnect the ball shape from the socket shape with care.
- Indicate the placement on your fabric.
- Select snap materials and sizes judiciously.
- Think about snap colors for a cohesive look.
- Stitch through the holes, proceeding to the next with accuracy.
Mastering snaps entails mastering precision.
Marking and Positioning
To make certain the snap button pieces align perfectly, start by positioning the fabric layers together as they’ll be when fastened. Make a small dot with chalk or a fabric pen at the desired snap location on both layers – this will guide where to sew each snap component.
Aligning Layers
To guarantee seamless sewing placement, start by aligning your fabric selections.
Consider needle size and thread tension for ideal snap security.
Separate and mark the ball and socket sides of your sew-on snap button.
Sew through the holes with 2-3 stitches per hole, moving the needle through the top layer to the next hole.
Repeat for the socket side, aligning using a chalk mark.
Using Chalk for Precision
Utilizing chalk for accuracy in sewing is essential for precise alignment and positioning of fabric pieces. Here are three key tips for utilizing chalk effectively:
- Select the suitable chalk: Tailor’s chalk is available in various forms, such as wax-based or clay-based. For sewing, wax-based chalk is often preferred as it marks the fabric temporarily and can be easily removed with water.
- Apply chalk gently: When utilizing chalk, apply it lightly to the fabric to avoid damaging the material. Be sure to test the chalk on an inconspicuous spot before applying it to the rest of the fabric, as different materials may react differently to the chalk.
- Transfer chalk markings: If you need to move your chalk marks to another piece of fabric, you can use a piece of paper or a clean cloth to transfer the chalk markings. Simply press the paper or cloth over the chalk mark and then press it onto the new fabric.
Sewing the Snap Button
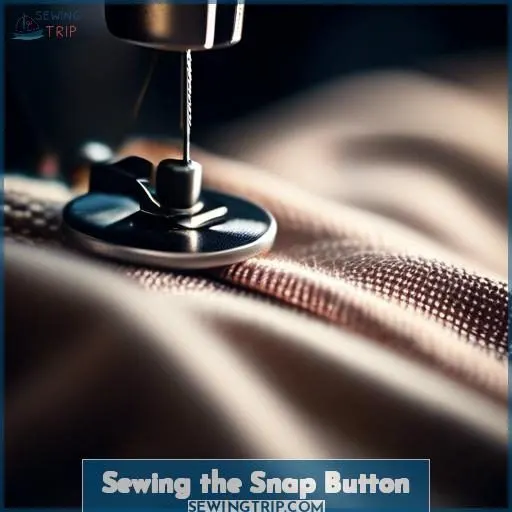
With the snap button pieces separated and positioning marks made, it’s time to sew on the ball side. Thread your needle and knot the end, then stitch through each hole around the snap’s edge at least 5 times, moving the needle up from the underside of the fabric, over the snap’s rim, and back down. This secures the ball side firmly in place.
To attach the socket side, align it with the positioning mark and sew through each hole in the same manner, knotting the thread on the underside when finished. Regularly check that the ball snaps crisply into the socket to verify a solid fastening.
Stitching Ball Side
To sew a snap button, you’ll need to follow these steps:
- Thread the needle: Choose a tapestry needle and match the thread color to your fabric. For example, you can use waxy 2-ply nylon thread for durability.
- Secure the tail end: Weave the thread into the fabric near where you’ll attach the snap button. This helps to secure the thread.
- Bring the needle up through the snap button: Start sewing by bringing the needle up through one of the holes on the snap button.
- Take the needle down: Catch some of the fabric as you bring the needle down, then bring it up again through the same hole of the snap button.
- Repeat: Do this twice more, so there are three wraps around the snap button.
- Move to the next hole: Push the needle across through the top layer of fabric to move to the next hole.
- Knot off: Finish the last hole by weaving in the end at least 5 times to secure.
Remember to run the needle under stitches to hide the thread. Turn your piece over and repeat the process for the other piece of the snap button. If you’re working with delicate fabric, you can also add hot glue behind the snap button for extra support.
Securing Socket Side
To secure the socket side of your snap button, align the holes in the socket with the corresponding holes in the fabric.
Use a needle and thread, ensuring proper thread tension and needle placement.
For thicker fabrics like waterproof jackets or crocheted/knitted fabric, consider using a hole punch or fabric glue for added security.
Remember to test the snap placement before finalizing the stitching.
Knotting for Durability
After securing your snap, it’s knot time! For knot strength that rivals a high temperature hot glue gun, space your knots evenly. Use durable knot materials and techniques, ensuring your masterpiece outlasts any easy alternative to sew on snaps.
Testing and Adjusting Snap Placement
Testing and adjusting snap positioning is essential to make sure the snaps align correctly and remain in place. Here are some suggestions to aid you with this process:
- Alignment Methods: When aligning the snap, utilize a ruler or measuring tape to verify precise positioning. You can also employ a chalk or fabric marker to indicate the desired location on the material.
- Knot Stability: Ensure the knot is tightly tied to prevent the snap from becoming loose. Employ a thread color that complements the fabric or is easily visible.
- Thread Selection: Choose a robust, durable thread for sewing on snaps. This will assist in ensuring the snap remains firmly attached.
- Fabric Compatibility: Take into account the weight and texture of the fabric when selecting the type of snap. For heavier fabrics, use larger snaps, while smaller snaps are appropriate for delicate fabrics.
- Troubleshooting: If the snap doesn’t align properly, attempt to reposition it or use a different type of snap. If the snap falls off, verify if the fabric was properly interfaced prior to installing the snap.
Alternatives to Sewing Snaps
Regarding alternatives to sewing snaps, there are several options to explore.
One such alternative is snap tape, featuring ball snaps on one side and socket snaps on the other.
To use snap tape, simply sew it along the edges with a zipper foot, enabling the ball snaps to be ready for connection.
This method eliminates the need for individual snap alignment, making it a practical and efficient option.
Another alternative is adhesive snaps, which can be affixed to fabrics using a hot glue gun or other adhesive techniques.
Additionally, magnetic snaps and hook and loop fasteners can be used as alternatives to traditional snap buttons.
Frequently Asked Questions (FAQs)
What type of needle should I use for sewing on snaps?
Ah, embarking on a snap-sewing escapade! You’ll want a dependable tapestry needle – its pointed tip and elongated eye make it the perfect partner for grappling those tricky snaps onto fabric. Accuracy and control are essential, so select your needle judiciously.
Can I use a sewing machine to attach snaps?
You can’t use a regular sewing machine to attach snaps. Snap tools or pliers make precise holes in the fabric, so you’ll need to sew them on by hand. But don’t worry, it’s easy–I’ll guide you through the straightforward stitching process.
How do I prevent the snap from coming off after sewing it on?
To prevent snaps from popping off, tie multiple knots when sewing them. Use thick, heavy-duty thread and reinforce with extra stitches. You can also add fabric glue behind the snap for extra grip on slippery materials. With care, your snaps will stay securely fastened.
Can I use different colors of thread when sewing on snaps?
About 80% opt for contrasting thread colors to make snaps pop. You can absolutely do this – a fun way to add personality! Just remember, thicker threads look best for securing thick snaps tightly.
Can I use snaps on heavier fabrics like denim?
Larger, reinforced snaps work perfectly on thick fabrics like denim. The heavy-duty versions have extra-thick prongs that punch right through and grip those beefy materials. Just use a thimble and get those snaps saddled up tight.
Conclusion
Envision your newfound expertise with snaps, transforming garments with professional-looking closures.
Mastering how to sew a snap button empowers you to create durable, stylish pieces that withstand daily wear.
Diligently follow the precise steps outlined, from aligning layers to securing stitches, and you’ll achieve impeccable results every time.
Elevate your sewing skills with this essential technique for a polished, functional finish.


