This site is supported by our readers. We may earn a commission, at no cost to you, if you purchase through links.
A crooked zipper can ruin an otherwise perfect garment. You’ve cut the fabric with care. You’ve stitched every seam with precision. Then the zipper goes in wrong and suddenly your project looks homemade in the worst way.
Learning how to sew in a zipper correctly changes everything. The right technique turns a tricky closure into a smooth professional finish. You’ll need specific tools like a zipper foot and seam ripper. You’ll also need to understand which zipper type works best for your project.
Metal zippers hold up in jeans and bags. Invisible zippers disappear into formal wear. Once you master the basic steps of pinning, basting, and stitching, you can tackle any zipper installation with confidence.
Table Of Contents
- Key Takeaways
- What Supplies Do You Need to Sew a Zipper?
- How to Prepare Fabric for Zipper Installation
- Understanding Zipper Types and Uses
- Step-by-Step Guide to Sewing a Centered Zipper
- How to Sew an Invisible Zipper
- Sewing an Exposed or Decorative Zipper
- Tips for Installing Zippers in Different Projects
- Troubleshooting Common Zipper Sewing Problems
- Advanced Zipper Sewing Techniques
- Where to Buy Quality Zippers and Accessories
- Frequently Asked Questions (FAQs)
- Conclusion
Key Takeaways
- You need the right zipper type for your project—metal zippers work for jeans and bags, invisible zippers disappear into formal wear, and separating zippers open completely for jackets.
- A zipper foot and proper fabric preparation (pressing seams flat, adding interfacing, and accurate pinning) prevent puckering and create a professional finish.
- Centered zippers sit symmetrically in the seam with visible stitching on both sides, while invisible zippers require a special foot and get sewn before the seam closes.
- Match your thread to the fabric instead of the zipper, use a 5/8 inch seam allowance for standard installations, and always baste before making permanent stitches.
What Supplies Do You Need to Sew a Zipper?
You don’t need a lot to sew a zipper. The right supplies make the process easier and help you get professional results.
Here’s what you should have on hand before you start.
Essential Sewing Tools
You need a zipper foot for your sewing machine to stitch close to the teeth. Pins hold everything in place. A seam ripper removes basting stitches. Sharp cutting tools trim fabric and thread. Keep interfacing on hand for lightweight fabrics. A standard needle works for most projects. These tools make zipper installation precise and manageable.
Knowing when to use invisible or separating zippers is also key.
Choosing The Right Zipper
With the right tools ready, zipper selection comes next. Match zipper size to your project opening. Metal zippers offer strength for jeans and bags. Nylon coil types flex well in curved seams. Plastic zippers resist moisture for outdoor gear. Check zipper anatomy before buying.
Invisible types hide in formal wear. Separating zippers work for jackets. Choose material durability based on fabric weight and use. You can also consider zipper size options like size 5 for smaller items or size 10 for larger applications.
Selecting Thread and Notions
Thread material matters as much as zipper choice. Polyester thread works for most installations. Use 40wt thread weight for general projects. Match thread to fabric color instead of the zipper. Your stitches will disappear that way.
Zipper feet attach to your machine for accurate placement. Keep interfacing on hand to stabilize seams. Add double-sided tape for positioning if you want extra control.
How to Prepare Fabric for Zipper Installation
Proper fabric prep makes all the difference between a zipper that lies flat and one that puckers or pulls. You’ll need to handle your seam allowances, stabilize the fabric, and secure everything in place before you start stitching.
These three steps create a solid foundation for any zipper installation.
Marking Seam Allowances
Before you cut your fabric, mark your seam allowance with accurate marking tools like a seam gauge or washable fabric marker. For zipper installation, use a standard 5/8 inch seam allowance width unless your pattern specifies otherwise. Even a 1/16 inch measurement error can impact alignment later.
Mark both sides of the zipper seam, matching placement with pins so your fabric stays symmetrical throughout the weaving process.
Applying Interfacing for Support
Adding interfacing underneath your zipper seam transforms weak points into strong ones. This fabric support layer prevents stretching and puckering, especially on lightweight or knit materials. Industry standards show properly interfaced zippers last considerably longer and maintain their shape.
- Cut interfacing to match your seam allowance width and zipper length
- Apply fusible interfacing to the facing or garment fabric before sewing
- Trim corners and edges to reduce seam bulk
Pressing and Pinning Techniques
Before installing your zipper, you need to press the seam open and pin it properly. Pressing the seam flat prevents puckering and improves finish quality considerably. Use a press cloth to protect fabric types from heat damage.
Pin along the zipper tape at one-inch intervals. This pinning method keeps alignment precise. Different fabric types require adjusted tool variations for best results.
Understanding Zipper Types and Uses
Not all zippers work the same way. Each type has a different purpose and goes into your project differently.
Here’s what you need to know about the main zipper styles you’ll encounter.
Centered Zippers
A centered zipper gives you symmetrical alignment with two identical plackets on both sides of the teeth. This placket balance creates functional ease for opening and closing. You’ll find this style in classic designs like skirts and dresses.
Here’s what makes centered zipper installation effective:
- Equal fabric flaps cover the teeth on both sides
- Stitching consistency keeps lines parallel to the seam
- Proper zipper insertion creates visual balance
- Standard zipper foot simplifies sewing a centered zipper
Invisible Zippers
Invisible zippers disappear into the seam when installed correctly. The coils hide behind the fabric instead of sitting on top. You get a clean finish that works best for dresses and formal wear. This zipper type needs a special foot for proper coil positioning and seam concealment.
| Feature | Invisible Zipper | Best Fabric Choice |
|---|---|---|
| Installation Timing | Before seam is sewn | Lightweight wovens |
| Foot Alignment | Grooves guide coils | Non-bulky materials |
| Market Growth | 8.10% CAGR to 2033 | Knits with lycra |
| Visibility | Completely hidden | Delicate blouses |
The invisible zipper market is expanding rapidly. Demand for closures without visible stitching drives adoption in fashion and athleisure. Asia-Pacific leads growth with China and India’s textile industries pushing innovation.
You’ll need an invisible zipper foot for accurate stitching. The grooves underneath keep coils vertical during sewing. This prevents puckering and maintains proper alignment.
Fabric choice matters greatly. Lightweight materials work best because they conceal the zipper tape effectively. Avoid thick fabrics or denim. The zipper won’t hide properly in bulky weaves. Your effective opening runs about 2.5 cm shorter than the zipper’s nominal length.
Position the zipper before joining the seam. Press seam allowances open first. Pin carefully to prevent shifting during sewing. The technique differs from centered zippers since you stitch close to the coils.
Exposed and Lapped Zippers
Exposed zippers transformed from hidden hardware into bold design statements around 2012. Designers like Michael Kors made zipper aesthetics central to garment identity. You’ll sew these face-up so the teeth stay visible even when closed.
- Lapped zippers hide teeth under an overlapping fabric flap for subtle side closures
- Exposed aesthetics work in tone-on-tone or contrasting colors for visual impact
- Sewing accuracy improves with hand basting and chalk marking your topstitching guide
- Material considerations include adding interfacing to support heavier exposed zipper installations
Lapped functionality requires a 1-inch seam allowance and delivers one visible stitching line. Zipper durability depends on proper technique and fabric support.
Separating Vs. Non-Separating Zippers
Separating zippers split completely at the bottom using an insertion pin and retainer box. You’ll use them in jackets and coats that need full opening. Non-separating zippers stay joined at the base with a bottom stopper.
They dominate market share at 64.5% because they work in dresses, bags, and skirts.
Sewing complexity differs—separating types need precise alignment while non-separating versions offer easier customization options.
Step-by-Step Guide to Sewing a Centered Zipper
A centered zipper is the workhorse of zipper installations. It sits right in the middle of a seam and works well for skirts, pouches, and cushion covers.
Here’s how to sew one from start to finish.
Aligning and Pinning The Zipper
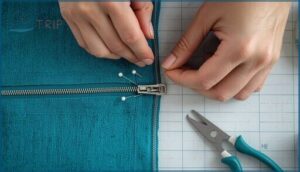
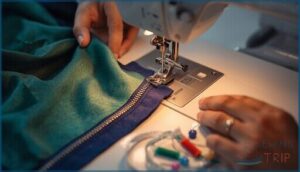
Before installing zippers, position your zipper face-down on the fabric with proper teeth alignment along the seam line. Place pins perpendicular to the zipper tape every two inches for zipper stability. This pin spacing prevents fabric distortion during sewing.
Keep the zipper open while pinning to maintain sewing accuracy. Proper zipper application starts with secure pinning of the zipper tape.
Basting The Seam
After pinning, run a basting stitch along the seam where your zipper will sit. Use the longest stitch length on your machine or hand-stitch with 1/4 to 1/2 inch spacing. This temporary seam holds fabric layers together and boosts alignment accuracy.
Basting benefits include fabric stability and preventing shifts during final sewing. Choose a contrasting thread for easy removal later.
Attaching With a Zipper Foot
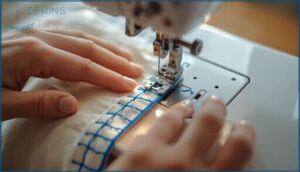
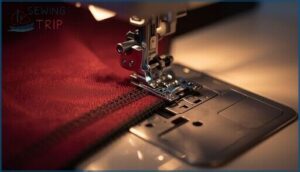
With your basting in place, swap out your regular presser foot for a zipper foot on your sewing machine. This specialty foot lets you stitch close to the zipper teeth without hitting them.
- Attach the zipper foot to the left or right side of the needle
- Position the foot so the needle runs alongside the zipper teeth
- Adjust tension if needed to prevent fabric puckering
- Maintain stitch accuracy by keeping your seam allowance consistent
Removing Basting Stitches
Once your permanent stitches are secure, it’s time to remove the basting. Use a seam ripper to snip the basting thread every few inches. Pull the threads out gently from the side with the longest tail. Work carefully to avoid snagging your fabric or permanent seam.
Contrasting basting thread color makes removal easier. Remove basting before final pressing to prevent thread marks from setting into your fabric.
How to Sew an Invisible Zipper
An invisible zipper disappears into the seam when installed correctly. This technique requires a special foot and a different approach than other zipper types.
Here’s what you need to know to install one properly.
Using an Invisible Zipper Foot
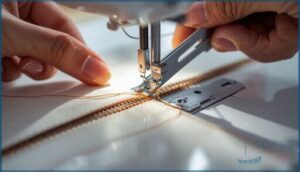
You need the right invisible zipper foot to get professional results. This specialized zipper foot features two grooves underneath that guide the zipper coils during stitching. Clear plastic foot types let you see your work while metal versions offer durability.
Check your machine compatibility before buying. Most modern sewing machines accept snap-on feet that improve seam alignment and installation durability by up to 30%.
Positioning The Zipper
Before sewing zippers, zipper placement determines success. Open the invisible zipper fully and place it face-down on the right side of your fabric. Align zipper stops exactly 1/8 to 5/8 inch below the top seam allowance. This zipper alignment prevents ripples and ensures the teeth sit precisely along your marked seam. Pin carefully to maintain position during this sewing tutorial step.
Stitching and Finishing Techniques
Stitch selection begins with your invisible zipper foot positioned against the coil. Use a basic straight stitch close to the teeth with proper thread tension.
Here are essential sewing techniques for clean seam finishing:
- Sew each zipper tape side separately before closing the bottom seam completely.
- Hand-stitching the final stitches prevents visible topstitch lines on your garment exterior.
- Press seams flat after installation to eliminate bulk near the zipper closure.
- Topstitching tips: keep your needle 1/8 inch from folded edges for professional results.
Sewing an Exposed or Decorative Zipper
An exposed zipper isn’t just functional—it’s a design feature. Unlike invisible zippers that hide away, exposed zippers show off their teeth and pull as part of your project’s look.
Here’s how to install one so it sits flat and looks sharp.
Placement and Marking
An exposed zipper becomes a design feature.
First, lay out the zipper on your fabric to confirm the zipper length matches your opening. Use marking tools like fabric chalk to trace both the top and bottom stops. Add your seam allowance marks at 5/8 inch from the edge.
Pin the zipper tape to prevent distortion and keep the seam stable during installation.
Attaching The Zipper for Visibility
Proper tape alignment makes the difference between an amateur and a polished finish when sewing an exposed zipper. Use basting to temporarily secure the zipper before final stitching, reducing error rates and preventing fraying.
- Position the zipper face-up so the tape shows on the garment exterior.
- Use your zipper foot to stitch 5/8 inch from the fabric edge.
- Apply reinforcement methods like bar tacks at both zipper ends for durability.
Topstitching for a Professional Look
Thread tension and needle selection are crucial for achieving successful topstitching. Industrial guidelines recommend maintaining a 1/4″ distance from the zipper to enhance seam durability. For medium-weight fabrics, a stitch length of 3.0–3.5mm is ideal, while heavy materials require a longer stitch length of 3.5–4.5mm. Proper edge distance and zipper sewing techniques can significantly reduce misalignment by 25%. Testing your setup beforehand can improve topstitching outcomes by 75%.
| Fabric Weight | Needle & Thread |
|---|---|
| Lightweight | 70/10 Microtex, fine thread |
| Medium | 80/12, all-purpose thread |
| Heavy | 100/16 Jeans, topstitch thread |
Tips for Installing Zippers in Different Projects
Different projects need different approaches for zipper installation. The fabric type and project style will change how you prep and sew your zipper.
Here’s what you need to know for the most common sewing projects.
Sewing Zippers in Skirts and Dresses
When sewing zippers into skirts and dresses, you’ll often encounter side-zipper placement and various dress zipper styles. Consider these zipper placement tips for professional garments:
- Mark the zipper stop before attaching the zipper to make certain of accurate positioning.
- Use machine basting to hold the seam during installation in skirts.
- Press seam allowances flat to reduce puckering and misalignment.
Fabric layering requires proper pinning to prevent shifting during sewing a zipper into a skirt.
Adding Zippers to Pouches and Bags
When you shift from garments to bag projects, zipper pouch styles and zippered compartments require different techniques. For bagmaking, choose nylon coil zippers for flexibility or metal options for bag zipper durability. Waterproof zippers work well for outdoor pouches.
Lining zipper integration starts by basting the zipper between outer fabric and lining. A zipper tutorial helps you master sewing a zipper pouch with professional results.
Working With Stretchy or Delicate Fabrics
Stretchy fabrics and delicate materials demand specific sewing techniques for zippers. Knit tape zippers flex with stretch fabrics while preventing distortion. Apply woven interfacing types along seam allowances for stability.
- Adjust stitch settings to zigzag patterns for elasticity
- Use fusible tricot on delicate fabrics like fleece
- Baste first to prevent fabric shifting during installation
Working with stretchy fabrics requires patience but yields professional results when you match zipper flexibility to fabric type.
Troubleshooting Common Zipper Sewing Problems
Even experienced sewers hit snags when installing zippers. The fabric puckers. The zipper won’t lie flat. The teeth don’t line up.
Here’s how to fix the most common problems and get your zipper looking professional.
Fixing Wavy or Puckered Zippers
Ever feel like your zipper’s got a mind of its own? Wavy or puckered seams start when Fabric Compatibility gets ignored or Interfacing Solutions are skipped.
Use a seam ripper to redo uneven stitches, try Tension Adjustment on your machine, and finish with gentle Post-Sewing Fixes—think steam and careful pressing.
Quality Checks catch trouble before it sticks.
Adjusting for Zipper Length Issues
How do you handle mismatched lengths when your zipper just doesn’t fit? Shortening zippers saves projects, but never cut before moving the stop. Zipper extensions rarely work—aim for an exact fit or swap for a better size.
Other times, zipper replacement with a sturdier option avoids future headaches. Small adjustments in stop placement make a big difference for durable seams.
Preventing Fabric Stretch and Misalignment
When your fabric doesn’t behave, think Grainline Stability first; cut panels on the stable grain, not bias. Tension Control is key—avoid tugging the seam or zipper.
Interfacing Choices matter for support. Choose pins that won’t distort the zipper tape. Zipper Selection is crucial; match it to the project.
Use a basting stitch to check alignment before committing.
Advanced Zipper Sewing Techniques
Once you’re comfortable with basic zipper sewing, it’s time to explore some sophisticated techniques. These methods help you create more polished and professional finishes.
Here’s what you can try next.
Sewing Lapped Zippers
Think of sewing a lapped zipper as fitting a puzzle piece under a flap—precision matters. Start with a 5/8 inch seam allowance and press it sharply for clean zipper positioning.
Machine baste the seam, then use a zipper foot to stitch close to the edge. Good fabric handling and careful stitching methods hide the teeth, leaving one tidy, visible seam.
Creating Welt Zipper Pockets
Sewing a welt zipper pocket calls for nimble hands and sharp eyes. Accurate welt construction hinges on marking pocket dimensions wider than the zipper teeth, but not the tape.
Choose fabric that presses well to prevent bulk, then clip corners to dodge distortion. Keep seam symmetry tight—with precision, your zipper pocket turns out crisp, flat, and professional.
Hand-Sewing Zippers for Precision
Precision stitching isn’t just a detail—it’s a game changer for couture applications. Hand-sewing zippers lets you sidestep common errors and take charge of fit. Want professional results? Use these strategies:
- Mark seams clearly
- Keep stitches tight and small
- Reinforce zipper ends
- Match thread and fabric
- Lightly press for a smooth finish
This boosts garment applicability and reflects modern market trends in sewing techniques for beginners.
Where to Buy Quality Zippers and Accessories
Regarding sewing zippers, your project is only as good as your materials. Choosing the right zipper and matching accessories can make the process smoother and your results neater.
Here’s where you can find the best options for every need.
Recommended Zipper Brands
Choosing the right zipper brand can make or break your sewing project. YKK remains the top choice, but don’t overlook Riri or Lampo for luxury zippers, or SBS for solid budget options. Curious about YKK alternatives or sustainable brands? The table below highlights practical options and specialty uses for every sewing need.
| Brand | Notable Strength |
|---|---|
| YKK | Reliable, all-purpose |
| SBS | Budget options, mass |
| Riri | Luxury zippers |
| Lampo | Fashion, decorative |
Sourcing Zippers by The Yard
You’ll find zippers by the yard from online suppliers like YKK Corporation and SBS Zipper, with no yard minimums for most styles.
Bulk discounts kick in around 10 yards, with deeper savings at 100-yard spools.
Material variety includes metal, nylon coil, and plastic teeth for custom applications.
Prices range from $0.65 to $2.00 per yard depending on zipper types and sizes you need.
Finding Matching Zipper Pulls and Notions
After buying zippers by the yard, you’ll need matching slider pulls and notions for smooth function. Pull compatibility depends on zipper types and sizes—nylon coil uses star-bottomed sliders while metal demands sturdy pulls. Here’s what matters when sewing accessories:
- Buy bulk purchasing sets of five pulls in matching colors
- Check brand replacements to match existing stock pulls
- Select zipper stops and tabs by size
- Verify color coordination with your fabric before ordering
Frequently Asked Questions (FAQs)
What is the best way to recycle zippers?
To recycle zippers, remove them from old textiles with a seam ripper. Try zipper material recovery at dedicated centers, reuse them in DIY projects, or explore upcycling zipper art—great for zipper pull replacement or industrial recycling trends.
Can I sew zippers on stretchy fabrics?
Stretchy fabrics act like elastic bands. Yes, you can sew zippers on them, but using Knit Zipper Types, proper Interfacing Importance, smart Needle Selection, and adjusted Stitch Settings are key for preventing waviness at the zipper.
How do I replace a zipper pull?
To replace a zipper pull, use pull replacement tools like needle nose pliers and a screwdriver to remove the old pull.
Choose zipper pull materials and sizing pull replacements that fit your zipper slider, then follow zipper repair process steps.
Are sewing machine feet universal for zippers?
Not every zipper foot fits every sewing machine. Shank height matters most, and brand exclusivity—not all brands share the same system.
Foot adapters help, but certain zipper types or aftermarket feet mightn’t work without the correct presser foot.
What thread type is best for zippers?
To sew a zipper, use polyester thread for strength and flexibility across most zipper types.
For invisible zippers or delicate fabrics, nylon offers subtle seams.
Cotton alternatives suit lightweight garments, but thread weight should always match your fabric choice.
How do you repair a stuck zipper?
For a stuck zipper, try lubrication methods with soap or graphite. Gently wiggle the zipper pull while checking teeth alignment. Remove fabric jams with tweezers. Use slider adjustment if teeth separate.
If these zipper hacks fail, seek professional repair.
Can you reuse a zipper from old clothing?
Who knew a well-used zipper could find new life? If the zipper condition is good—smooth teeth, intact tape—you can reuse it for sewing zippers.
Upcycling methods, recycling initiatives, and zipper types all influence the environmental impact of recycled products.
How do you shorten a metal zipper safely?
Shortening a metal zipper requires tool safety and careful teeth removal. Mark your desired length. Remove teeth above that point with pliers. Install replacement stops. Secure tape ends. Test slider movement before installing the zipper.
What’s the best way to sew zippers into leather?
You’ll wrestle forever with flimsy plastic zippers in leather. Use metal zippers with a leather zipper foot on your sewing machine.
Prep the leather by sanding edges. Apply basting tape before stitching for precision and leather zipper longevity.
How do you replace a zipper slider?
You remove the old slider by taking off the zipper’s top stop with pliers.
Slide the new slider onto the zipper tape.
Then crimp a replacement stop in place to secure it.
Conclusion
A perfect zipper sits in fabric like a strong spine holds a body upright. It’s the foundation of function.
Now that you know how to sew in a zipper, you control the finish of every garment and project. Pick the right type. Use the proper foot. Take your time with alignment.
Each zipper you install builds your skill. Your work will look sharp. Your closures will last.

