This site is supported by our readers. We may earn a commission, at no cost to you, if you purchase through links.
You’ve picked the perfect pattern, chosen your fabric, and you’re ready to start sewing—until you reach the hood. Suddenly, that curved piece looks more complicated than the rest of the garment combined. Many sewers avoid projects with hoods entirely, convinced they require sophisticated skills or special techniques.
The truth is, sewing a hood comes down to understanding a few key steps: taking accurate measurements, cutting your fabric correctly, and assembling the pieces in the right order. Once you know how to sew a hood properly, you’ll find it’s no more difficult than sewing a collar or cuff.
Whether you’re adding a hood to a jacket, sweatshirt, or cape, the process follows the same straightforward sequence that transforms flat fabric into a functional, professional-looking hood.
Table Of Contents
Key Takeaways
- Sewing a hood breaks down into three manageable steps—taking accurate neck and head measurements, cutting fabric with proper seam allowances, and assembling pieces in sequence—making it no harder than sewing a collar once you understand the process.
- The key to a professional-looking hood lies in choosing fabric weight appropriate for your project (fleece for warmth, cotton for breathability), using the right tools like sharp scissors and rotary cutters for clean curves, and matching thread to your fabric type.
- Two-piece hoods create a classic pointed silhouette with a single center seam, while three-piece hoods offer better contouring and fit around the head, though they require more complex pattern work.
- Finishing techniques like pressing seams immediately after stitching, topstitching 2-6mm from edges, and using zigzag stitches or serging to prevent fraying transform a homemade hood into one that looks professionally crafted.
Essential Supplies for Sewing a Hood
Before you start sewing your hood, you’ll want to gather everything you need so you’re not hunting for supplies mid-project.
The right materials make the difference between a hood that looks homemade and one that looks professionally crafted.
Let’s walk through the fabrics, tools, and notions that’ll set you up for success.
Recommended Fabrics for Hoods
The right fabric makes all the difference. For warmth, fleece provides excellent thermal insulation at just 200 gsm, while wool naturally regulates temperature and absorbs moisture. Cotton and linen offer breathability for lighter hoods.
Consider fabric weight, durability factors, and moisture-wicking properties when choosing. If eco-friendliness matters to you, hemp and organic options reduce environmental impact considerably.
Coated fabrics offer enhanced insulation because of their low thermal conductivity.
Must-Have Sewing Tools
Once you’ve picked your fabric, gather the right tools to bring your hood to life. A good sewing machine manages most stitching, while sharp scissors make clean cuts. Don’t skip the iron—it’s key for crisp seams. For sewing by hand and finishing tasks, hand sewing needles are also required.
Here’s what you’ll need:
- Rotary cutter uses include smooth curves and multiple fabric layers
- Measuring tape for accurate neckline and head measurements
- Acrylic ruler guide ensures straight seam allowances
- Seam ripper tips: keep one handy for quick fixes
Choosing Thread and Notions
With your tools ready, turn to thread and notions. Thread compatibility with your fabric matters—polyester works for most hoods, while cotton suits natural fibers. Match thread color to your outer fabric for clean seam finishes. Thread weight should suit your fabric’s thickness.
Don’t forget lining, interfacing for structure, and functional notions like drawstrings or toggles for personalization.
| Notion Type | Purpose | Best For |
|---|---|---|
| Thread | Stitching seams | Color matching fabric |
| Interfacing | Adding structure | Face openings |
| Drawstrings | Adjustable fit | Functional hoods |
How to Measure and Draft a Hood Pattern
A well-fitted hood starts with accurate measurements and a solid pattern. You’ll need to measure your neckline and determine how far you want the hood to extend over your head.
Once you have those numbers down, you can draft a pattern that fits your garment perfectly.
Taking Accurate Neck and Head Measurements
Taking accurate measurements is the foundation of a well-fitting hood. Start with neck circumference around the base where the hood will attach—usually 34-38 cm for adults.
Next, measure head circumference just above your eyebrows. For height measurement, go from your shoulder to the top of your head.
Mark these reference points carefully; even a 1-2 cm difference affects the final fit.
Creating a Custom Hood Pattern
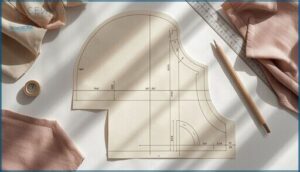
Once you’ve got your measurements, drafting a hood pattern becomes straightforward. Draw a rectangle using half your neckline measurement for the width—remember, the garment’s neckline is usually 10cm larger than your actual neck measurement. For height, use your shoulder-to-head distance plus 10-15cm for comfort.
Two-piece hoods use a simple center seam, while three-piece patterns add shaping for better fit. Mark the front edge 2.5cm lower than the back for natural drape.
Adding Seam Allowance Correctly
Before cutting fabric, you’ll add seam allowance around your entire hood pattern—this extra space makes sewing instructions work. Standard allowances range from ½ inch to ⅝ inch, though fabric type matters.
Here’s how to nail consistent measurement:
- Mark ½ inch around all pattern edges with a ruler
- Add extra for curved seams to prevent puckering
- Include alteration flexibility for fitting adjustments
- Use the same allowance on matching fabric pieces
Proper seam finishing starts here.
Pattern Variations: Two-Piece Vs. Three-Piece Hood
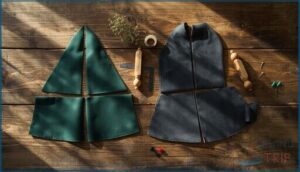
When drafting a hood pattern, you’ll choose between two main styles. Two-piece hoods create a pointed, classic silhouette perfect for capes, while three-piece designs offer rounded, sportier shape differences.
Fit considerations matter—three-piece hoods contour naturally around your head with less bulk. Pattern complexity increases with three pieces, but fabric suitability improves for stiffer materials.
Usage prevalence? Commercial hoodies almost always use three-piece construction.
Cutting and Preparing Hood Fabric
Now that you’ve got your hood pattern ready, it’s time to cut your fabric and set yourself up for smooth sewing ahead.
This step is all about accuracy—getting your pieces cut right and marked clearly will make assembling your hood so much easier.
Let’s walk through how to lay out your pattern, cut both your outer and lining fabrics, and mark the important details you’ll need as you sew.
Laying Out and Pinning Pattern Pieces
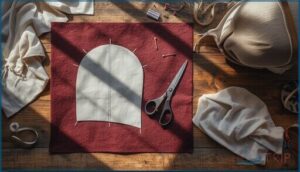
Before you start cutting fabric pieces, you’ll want to make certain proper grainline alignment by placing your hood pattern parallel to the selvedge. For fabrics with texture or directional prints, follow a with-nap layout.
Pin carefully along curves using sharp pins at corners and midpoints for layer stability. Use marking tools like tailor’s chalk to transfer notches and seam lines before preparing the pattern for cutting.
Cutting Outer and Lining Fabrics
You’ve already pinned your pattern, so now you’re ready to cut. Start by prewashing both fabrics to prevent future shrinkage.
When cutting fabric pieces, use sharp scissors and follow the fabric grain carefully. Cut two mirrored pieces from your outside fabric and lining fabric separately, adding your 5/8 inch seam allowance. Pattern mirroring ensures symmetry.
Take your time with curves—cutting challenges often happen when you rush.
Marking Stitch Lines and Notches
Your hood’s success depends on clear markings—they’re like a roadmap for your sewing stitches. Use tailor’s chalk vs. pens based on your fabric; water-soluble pens vanish easily while chalk brushes off.
Mark your seam allowance (that 5/8 inch line) on the wrong side. Add small notches within the seam allowance for accurate notching without compromising fabric integrity.
These marking tools prevent mistakes when sewing a hood step-by-step.
Step-by-Step: Sewing The Hood
Now that your fabric is cut and prepped, it’s time to bring your hood to life. This is where the pieces come together—literally.
You’ll work through four key steps that transform flat fabric into a finished hood ready to attach to your garment.
Stitching The Back Seam
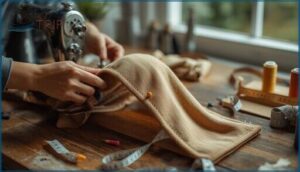
With the hood pieces right side together, you’ll start sewing them together at the center seam. This curved seam needs accurate alignment—pin carefully before stitching. Use a straight stitch with a backstitch at both ends for seam reinforcement.
Three Keys to a Strong Back Seam:
- Maintain a consistent ⅜-inch seam allowance throughout the curve
- Apply proper pressing techniques immediately after stitching
- Add seam finishes like zigzag stitching to prevent fraying
Joining Outer and Lining Pieces
Now you’re ready to bring both fabric pieces together. Place your outer hood and lining right side together (RST assembly), aligning seams carefully at the center back.
Pin along the front curved edge, matching notches. Sew with a consistent seam allowance of ¼ inch, securing layers with a straight stitch.
This creates a clean finish without exposed edges, setting you up perfectly for pressing techniques later.
Turning The Hood Right Side Out
With your sewn seam complete, it’s time for turning the hood right side out. Reach through the unstitched opening and gently pull the fabric through. You’ll notice seam bulk at first—totally normal when sewing hood pieces together.
Here’s your stepbystep guide for curve smoothing:
- Use a point turner to coax curved edges outward without damaging fabric
- Address fabric challenges by trimming excess seam allowance if needed
- Conduct a final inspection for bunching before tool usage in pressing
Pressing and Topstitching for a Professional Finish
After turning, place your hood on an ironing board for seam pressing. A crisp fold along the front opening makes all the difference—professionally pressed seams boost strength and cut puckering by 22%.
Press your hood seams crisply after turning—it strengthens construction and reduces puckering by over a fifth
Next comes topstitch accuracy: stitch 2–6mm from the edge using a 3.0mm stitch length. This finishing touch reduces error and adds market value, transforming your hood from homemade to high-quality.
Attaching and Finishing The Hood on a Garment
You’ve sewn your hood and it looks great—now it’s time to attach it to your garment and add those finishing touches.
This step can feel tricky if you’ve never done it before, but breaking it down makes the process straightforward.
Let’s walk through how to align, attach, and finish your hood so it looks professional and wears well.
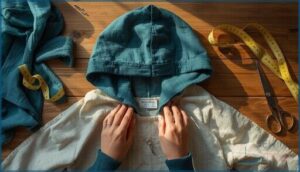
Aligning and Pinning The Hood to The Neckline
Before attaching the hood to a garment, you’ll want to match those notch alignment points carefully. Start your pinning sequence at the center back, then anchor both shoulder seams.
Work from those reference points outward, placing pins perpendicular to the neckline every 1 to 1.5 inches. Gentle fabric handling prevents stretching, and checking your alignment twice now saves error adjustments later.
Sewing The Hood to The Garment
With your hood carefully pinned, you’re ready to stitch. Position your work so the hood faces up—this lets you control the fabric’s natural curve better. Use a standard straight stitch with a 1/2 inch seam allowance, maintaining consistent tension adjustment throughout. Start at the center back and sew toward each front opening in turn, keeping neckline alignment steady.
- Watch your needle guide the two layers together like they were always meant to meet
- Feel the rhythm of your machine as garment construction comes alive under your hands
- Notice how each stitch secures hood placement and brings you closer to a wearable finish
Finishing Seams to Prevent Fraying
After your straight stitch is complete, you’ll need to protect those raw edges from unraveling. A serger works beautifully here, encasing the seam allowance with thread that stops fraying in its tracks.
No serger? A zigzag stitch on your regular machine does the job nearly as well.
For delicate fabrics, try bias binding or even pinking shears for a clean, fray-resistant finish.
Optional Embellishments and Personalization
Want your hood to stand out from the crowd? DIY customization and adding embellishments transform a basic hood into something uniquely yours. Hand embroidery, patches, or digital decoration like heat transfers work beautifully on cotton and fleece.
Material compatibility matters—test your finishing touches on fabric scraps first. With automation technology making personalization easier than ever, even beginners can create custom details that reflect the market growth in expressive, one-of-a-kind garments.
Frequently Asked Questions (FAQs)
How to sew fabric into a hood?
Sewing a hood step-by-step starts with choosing your fabric and cutting mirrored outer and lining pieces. You’ll stitch the back seam first, join the layers, then turn everything right side out for pressing.
Is it hard to sew a hoodie?
A basic hoodie project falls between beginner and intermediate difficulty. You’ll face challenges managing stretchy fabrics and thick seams, but beginner recommendations like using tested patterns and practicing stretch stitches make DIY hoodie construction achievable.
What is the difference between a 2 piece and 3 piece hood?
A two-piece hood uses one center-back seam, while a three-piece hood adds a top panel for better fit and shape.
The three-piece design offers greater comfort and aesthetic outcomes but increases pattern complexity and production costs.
How many yards of fabric for a hood?
You’ll need 1 to 2 yards for most hoods—but fabric width and design complexity can alter this.
Knit vs. woven, yardage guidelines, and waste minimization all play a role in your fabric selection.
Can I add a visor to the hood?
Yes, you can add a visor to your hood pattern. Use fusible interfacing or plastic boning for visor stabilization.
Adapt the pattern by drafting a curved brim, then topstitch it securely between the outer fabric and lining layers.
How do I make a hood waterproof?
To waterproof your hood, apply fabric water repellency treatments or wax coatings.
Then, seal seams with waterproof tape using seam sealing tech.
Choose waterproof lining and layering methods for lasting protection.
What stitch is best for stretchy fabrics?
A zigzag stitch is your safety net when fabric needs to move. Set your sewing machine to width 2 and length 5, or try a stretch stitch for extra durability. Always use polyester thread.
How to alter a hood for kids?
Alter a hood pattern by adjusting width and length based on head circumference measurements. Add seam allowances and consider sizing for growth. Mirror all pattern changes on facings. Test fit with stretch fabric at the neckline to address complaints.
Can you sew a hood without a machine?
Hand-sewing a hood takes more time but needs less equipment—a beautiful paradox. You’ll rely on needlework techniques like backstitch for seams and whipstitch for finishing, making pattern drafting and garment attachment completely possible for beginner sewing.
How do I add a drawstring to my hood?
Start by creating a drawstring casing around your hood’s face opening. Insertion techniques using a safety pin make threading cord simple.
Safety standards require knotting ends securely, preventing withdrawal while maintaining adjustability.
Conclusion
Think of a hood as the finishing touch—a frame that shapes both your garment and your skills. Learning how to sew a hood is like unlocking a new tool in your sewing kit, one that helps you transform flat fabric into something practical and stylish.
Each stitch builds confidence, and every curve teaches patience. With these steps, you’re equipped to tackle hoods on any project, knowing your hands can turn an idea into a wearable reality.
- https://www.muellerundsohn.com/en/allgemein/basic-hood-constructions/
- https://curvysewingcollective.com/hoodie-hacks-drafting-a-hood-from-scratch/
- https://sewandrew.com/2021/12/27/into-the-hoods-diy-how-to-draft-sew-a-hood/
- http://www.cardinal-creations.com/8-major-site-modules/9-detailed-hood-construction
- https://www.twigandtale.com/blogs/twig-and-tale-blog/how-to-adjust-the-size-of-a-hood-pathfinder-grove-pixie-traveller-overland-forester-crossroads

