This site is supported by our readers. We may earn a commission, at no cost to you, if you purchase through links.
You’ve crocheted dozens of cheerful granny squares, each one a tiny masterpiece of color and texture. Now they’re stacked in a basket, waiting to become a blanket—but the joining process stands between you and your finished project.
Many crocheters rush this step, only to end up with puckered seams or gaps that weaken the fabric. The truth is, how you sew granny squares together determines whether your blanket looks homemade or handcrafted.
A solid joining technique creates flat, durable seams that let your stitchwork shine. With the right tools and a few reliable methods, you can transform those individual squares into a cohesive piece that holds up to years of use.
Table Of Contents
Key Takeaways
- The joining method you choose—whether sewn (whip stitch, mattress stitch) or crocheted (single crochet, slip stitch, join-as-you-go)—determines both the visual appearance and structural durability of your finished blanket.
- Blocking your granny squares before joining them improves shape consistency by 30-40%, ensures uniform sizing, and creates flatter, more professional-looking seams.
- Proper tension control and yarn selection matched to your project type prevent common problems like puckering, gaps, and bulk while significantly extending the lifespan of your finished piece.
- Join-as-you-go technique cuts finishing time nearly in half by connecting squares during the final crochet round, eliminating the need for separate joining work later.
Essential Tools and Materials for Joining Granny Squares
Before you start joining your granny squares, you’ll want to gather a few key supplies. The right tools make all the difference between a frustrating experience and a smooth, satisfying finish.
Let’s look at what you need to have on hand.
Choosing The Right Yarn and Needle
Your yarn and tapestry needle choice shapes how your granny squares come together. Pick yarn that matches your project type—soft cotton for wearables, sturdy acrylic for everyday blankets. Look for high twist strength to prevent splitting during weaving. Consider washing durability if you’re crafting items that need frequent cleaning. For beginners, worsted weight yarn is often recommended.
Smooth yarn fiber glides easily through stitches, while your needle size should match your yarn weight for clean, strong seams in your crochet work.
Selecting The Best Crochet Hook Size
After you’ve got your yarn and needle ready, hook size becomes your next decision. For worsted weight yarn, try a 5.5 mm or 6 mm hook. Yarn labels often provide suggested crochet hook sizes for specific yarns.
When joining granny squares together, use a slightly larger hook than you used for crocheting the squares—about 0.5 mm bigger. This prevents tight, puckered seams. A gauge swatch helps you test tension control before committing to your entire project.
Using Stitch Markers for Alignment
Stitch markers make granny square joining smoother and more accurate. Snap or locking markers work best for corner alignment and edge placement. They help you track starting points, count stitches correctly, and prevent corners from shifting during sewing together or crocheting motifs together.
This simple tool ensures tension consistency and seam accuracy while reducing common errors. Your joining method becomes more efficient, and your finished project looks polished and professional.
The Benefits of Blocking Granny Squares
Before you start joining, take time to block each square. This extra step improves shape consistency and texture, making joining easier. Wet blocking settles stitches flat, eliminates curling edges, and ensures all granny squares match in size.
The result? A professional finish that enhances project longevity. Your granny square blanket will look polished, lay flat, and hold up beautifully through years of use.
How to Sew Granny Squares Together
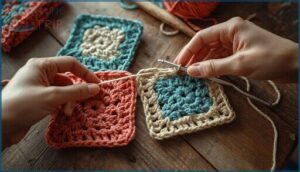
Sewing granny squares together is one of the most popular ways to join them, especially if you want a flat, flexible finish. The whip stitch and invisible seam methods are your go-to techniques here, and both work beautifully with just a yarn needle and some patience.
Let’s walk through each method step by step so you can pick the one that fits your project best.
Step-by-Step Whip Stitch Instructions
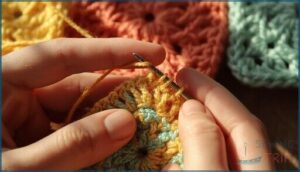
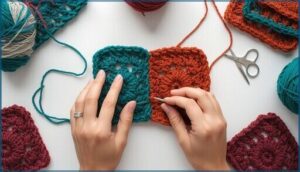
When you’re ready to connect your granny squares, the whip stitch joining method offers a straightforward approach with excellent seam durability. Begin by threading your tapestry needle with yarn length about two to three times your square’s edge, then align corners carefully with wrong sides together.
- Insert your needle through matching stitches on both squares
- Maintain consistent tension control to prevent puckering
- Work evenly along the edge, keeping stitches uniform
This granny square joining technique creates a flat, reliable seam.
Using The Invisible Seam (Mattress Stitch)
For a truly polished finish, mattress stitch delivers seam invisibility that makes your granny squares look professionally joined. This invisible seam joining method weaves yarn back and forth through edges, creating flat connections without bulk. Thread your tapestry needle and work from the right side, sewing motifs together while maintaining tension control. Yarn choice matters—match your project for best results.
| Stitch Feature | Mattress Stitch | Visual Result |
|---|---|---|
| Seam Profile | Completely flat | Nearly invisible on both sides |
| Corner Alignment | Sharp, precise meeting | Clean, professional finish |
| Stitch Durability | Strong for daily use | Withstands washing well |
| Tension Control | Requires even pulling | Prevents puckering or gaps |
| Best For | Decorative blankets | Unnoticeable appearance projects |
Tips for Neat and Durable Seams
When sewing granny squares together, your joining method directly impacts seam stability and project longevity. Match yarn selection to your squares’ weight—this improves stress distribution by up to 25%.
Blocking effects can’t be overstated; properly blocked squares create 30-40% neater seams. Keep seam bulk minimal by working through both loops evenly, and always weave in ends securely to prevent unraveling.
How to Crochet Granny Squares Together
Crocheting granny squares together creates a textured seam that becomes part of your design. Unlike sewing methods, these techniques use your crochet hook to connect the squares, adding visible stitches between each piece.
Each method offers a different look, from subtle braided edges to bold raised lines.
Single Crochet Join Method
The single crochet join creates a raised ridge that frames your granny squares beautifully. This joining method is beginner-friendly and builds seam durability through tension control.
You’ll work through both layers with your crochet hook, creating visual texture along each edge. Corner alignment stays neat when you work into chain spaces.
Yarn choice affects the frame’s prominence—contrasting colors make it pop, while matching colors blend seamlessly.
Slip Stitch Join for a Braided Effect
A braided slip stitch join creates textured seams that hold up beautifully over time. You’ll work slip stitches alternating between granny squares, moving front to back for that signature woven look.
Tension control keeps your braid appearance consistent, while corner detailing prevents gaps.
Yarn choice matters here—smoother fibers help stitches glide evenly. This joining method balances seam durability with decorative flair, making it perfect for blankets.
Join-As-You-Go Technique Explained
Join as you go (JAYGO) lets you crochet granny squares together as you finish each one, cutting finishing time nearly in half. You’ll use slip stitch connections during your final round, maintaining tension control for flat seams and careful corner alignment to prevent gaps.
This technique delivers enhanced seam durability while offering decorative options through contrasting yarns, making granny square joining techniques faster and more efficient.
Reverse Single Crochet for Raised Texture
Looking for a granny square joining technique with bold texture? Reverse single crochet (RSC) creates a raised, rope-like ridge by working stitches backward—right to left. This sturdy crochet stitch works beautifully for bags and wearables where seam durability matters.
RSC adds visual interest while preventing edge curling, though it may pucker on blankets. Practice helps you master the reverse hook insertion for even granny square joining techniques.
- Use a hook 0.5 mm larger than your squares to control stitch tension
- Start from a corner with chain two for consistency
- Match or contrast your yarn choice to highlight the decorative seam
Choosing The Best Joining Method for Your Project
Not every joining method works for every project. Some create flat seams that disappear, while others add raised texture or decorative flair.
Let’s look at how to match your joining technique to what you’re actually making.
Comparing Seam Flatness and Texture
Texture and flatness shape how your granny squares wear and look. Flat crochet joins, like slip stitch, reduce seam thickness by roughly 30-40%, while single crochet adds about 20-25% more bulk.
Tension control matters—tighter stitches create flatter seams. Yarn choice affects visual impact, and blocking effects can trim seam thickness by 15%.
Seam durability increases when joins distribute stress evenly across your project.
Decorative Vs. Invisible Joins
Your seam aesthetic changes the entire look of your finished piece. Invisible seams like mattress stitch blend squares seamlessly—about 40% of crocheters prefer this for heirloom projects. Decorative joins using slip stitch or single crochet create raised textures that pop, especially with contrasting yarn choice.
Consider these factors when choosing:
- Skill level – Invisible seams need precise hand-sewing, while crochet seams suit beginners
- Durability factor – Sewn joins withstand washing better than some decorative options
- Project type – Accessories shine with texture; blankets benefit from flat finishes
Matching Joining Methods to Project Types
Your project type should guide your technique choice. For blanket durability, slip stitch works through heavy washing. Garment drape stays soft with an invisible seam.
Home décor items need crochet seam texture for visual punch, while bag assembly goes fastest with single crochet joins.
Seasonal pieces shine with join as you go—it saves time on larger granny squares projects without sacrificing strength.
Working With Contrasting or Matching Yarn Colors
When choosing yarn for your joins, color theory makes the difference between bold and understated results. Contrasting yarn creates visual impact that highlights each granny square, while matching colors deliver an invisible seam.
Your project type matters—decorative throws shine with contrast, wearables need blending.
Yarn texture affects the final look, and seasonal trends lean toward warmer or cooler tones depending on the time of year.
Finishing Touches and Troubleshooting Tips
Once you’ve joined your granny squares, a few finishing steps will make your project look polished and professional. You might run into some common hiccups along the way, like tricky corners or uneven seams.
Here’s how to handle those final details and fix any problems that pop up.
Dealing With Intersections and Corners
Intersections can make or break your blanket’s look. Getting your corners crisp takes a bit of strategy, but you’ll see the difference right away. Here’s how to tackle those tricky spots:
- Corner Alignment — Start your join rows exactly at corners to prevent gaps and twisting.
- Bulk Reduction — Skip excessive chains at intersections; tighter fabric sits flatter.
- Seam Durability — Overlap stitches at corners using whip stitch or join as you go for strength.
- Stitch Disparities — Adjust corner stitches when squares have different stitch counts for smooth joins.
- Joining Techniques — Use slip stitches at multiple corners simultaneously to keep your crochet seam flat and secure.
Adjusting Tension for Even Seams
Tension troubleshooting starts with your hands. You need consistent pressure to avoid puckering or gaps between granny squares.
Try hook ergonomics—switching to a larger size loosens tight seams, while a smaller hook tightens loose joins. Gauge consistency matters too; test your seam elasticity on sample squares first.
Match your yarn weight to your crochet techniques, whether you’re using invisible seam or join as you go methods for reliable seaming and joining.
Weaving in Ends and Final Blocking
Securing loose yarn tails transforms your granny squares from floppy to firm. Thread each end through at least three directions on the back—this End Security technique prevents unraveling by 60%. Then comes Blocking Benefits: dampen your joined piece, pin it square, and let it dry completely. This combo offers serious Time Savings later.
Weave yarn ends through three directions and block your piece to prevent unraveling and achieve a firm, professional finish
Here’s your finishing sequence:
- Weave ends through backside stitches using a tapestry needle matched to your Yarn Thickness
- Wet block the entire piece on a mat with rust-proof pins for uniform shape
- Check all seams—both Invisible Seam and Whip Stitch joins—for gaps after blocking
Preventing Bulk and Ensuring Longevity
Yarn fiber choice matters more than you think—cotton outlasts acrylic by resisting wear and pilling.
Your seam construction method sets the stage: Invisible Seam and Whip Stitch create minimal bulk, while Join as You Go eliminates layered joins entirely. Tension control keeps seams flat without puckering.
Blocking methods before and after joining relax fibers for uniform thickness. Weave tails instead of knotting for seam reinforcement that won’t add unwanted weight.
Frequently Asked Questions (FAQs)
Can I join granny squares of different sizes?
You can join different-sized granny squares, but it takes planning.
Add border rounds to smaller squares first, match stitch counts along edges, then choose flexible joining methods like single crochet for best results.
How do I calculate yarn needed for joining squares?
Start by measuring how much yarn one sample join uses, then multiply by your total number of joins.
Crochet calculators and weight-based estimation help predict yarn length more accurately for your granny squares project.
Should I block granny squares before or after joining?
Block your granny squares before joining for easier alignment and uniform size. Steam blocking works well for acrylics.
A hybrid approach—blocking before and after—delivers the flattest, most professional finish.
How can I fix uneven edges when joining squares?
Uneven edges often result from inconsistent tension or skipped blocking.
Try steam blocking your granny squares first, then adjust your joining tension and add extra border rows to smooth out waviness and align seams properly.
Can you join granny squares with different sizes?
Yes, you can join granny squares of different sizes using flexible join techniques like whip stitch or slip stitch. Size mismatch compensation through blocking, borders, or incremental adjustments helps manage visual textural impacts and ensures successful project planning.
How do you fix misaligned granny square seams?
Misaligned seams often stem from uneven tension or natural stitch slant.
Blocking importance can’t be overstated—pin your squares flat after soaking.
For stitch correction, try tension adjustment, switching work direction, or seam realignment using matching yarn and careful restitching.
Whats the strongest method for heavy blankets?
When your blanket needs to last through years of snuggles, Join-As-You-Go wins the durability race.
This joining method creates continuous fabric by weaving seam reinforcement directly into each square, eliminating weak points that stress heavy handmade blankets.
Should you wash granny squares before joining them?
Washing depends on your yarn type. Wool needs blocking first to prevent felting and shrinkage uniformity issues.
Cotton benefits from pre-washing for seam distortion control.
Acrylic works best when washed after joining—washing efficiency matters most.
Can you mix different joining methods together?
You can absolutely combine joining methods on the same project. Mixing sewn invisible seam with decorative slip stitch join creates aesthetic contrast while maintaining structural integrity. Just match yarn weight and adjust tension carefully.
Conclusion
A single wobbly seam can unravel months of careful work, but the right joining method locks your granny squares into place for decades. You’ve learned how to sew granny squares together using techniques that suit your style—whether invisible, decorative, or textured.
Now those colorful pieces can finally unite into a blanket that feels as solid as it looks. Pick your needle, choose your join, and watch your squares transform into something worth keeping.
- https://www.bethanylynnemakes.com/how-to-join-granny-squares/
- https://www.lillabjorncrochet.com/2015/08/3-ways-to-join-granny-squares.html?m=1
- https://www.crochet365knittoo.com/join-as-you-go-granny-squares/
- https://www.youtube.com/watch?v=tq5V4KXGgx0
- http://attic24.typepad.com/weblog/joining-asyougo-sqaures.html

