This site is supported by our readers. We may earn a commission, at no cost to you, if you purchase through links.
 When you learn how to read a sewing pattern, you’re basically cracking a code that reveals your creative potential.
Start by examining the pattern envelope for sizing charts and fabric requirements.
The tissue paper pieces contain vital markings: solid lines show cutting edges, dotted lines indicate fold lines, and triangular notches help align pieces.
The grainline arrow tells you how to position fabric properly.
Numbers and letters match pieces together, while circles mark dart points and button placements.
Don’t skip the instruction sheet – it’s your step-by-step roadmap.
Master these basics, and you’ll discover hidden shortcuts that professional seamstresses use, which can help unlock your full potential as a seamstress and reveal new ways to approach sewing projects with professional techniques.
Table Of Contents
Key Takeaways
- Start with the pattern envelope – You’ll find essential information, like sizing charts, fabric requirements, and design variations, that guide your entire project before you even open the pattern pieces.
- Master the symbol language – You need to understand cutting lines (solid borders), grainline arrows (fabric direction), notches (alignment points), and dart markings (shaping areas) to translate pattern pieces correctly.
- Check your measurements against the pattern’s size chart – Do not rely on your clothing size, since pattern companies use different standards, and you will need to compare your bust, waist, and hip measurements for a proper fit.
- Follow the fabric lay plan and sewing instructions systematically – You will avoid waste and mistakes by positioning pattern pieces exactly as shown in the layout diagrams and following the numbered construction steps in order.
How to Read a Sewing Pattern?
Reading a sewing pattern might feel like cracking a secret code at first, but it’s simpler than you think.
Sewing patterns aren’t secret codes – they’re your roadmap to creating beautiful, perfectly fitted garments from scratch.
Understanding sewing patterns starts with grasping the pattern language – the symbols, lines, and markings that guide your entire project.
You’ll need to decode sewing pattern symbols like notches, grainlines, and cutting lines that show exactly where to cut and align your fabric.
Pattern markings explained becomes essential when you’re interpreting measurements and pattern ease to guarantee proper fit.
This sewing pattern guide covers everything from sewing pattern terminology to avoiding common beginner mistakes.
While advanced patterns and alteration techniques come later in your journey, mastering these basics prevents frustration and wasted fabric.
The pattern envelope contains important information about sizes, fabric requirements, and design variations.
Each element works together like pieces of a puzzle, creating your roadmap from fabric to finished garment.
Understanding Sewing Pattern Basics
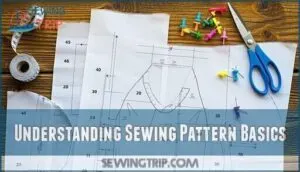
When you first open a sewing pattern, you’ll see strange lines, symbols, and markings that seem like a foreign language.
These basic elements work together to guide you through cutting and constructing your garment, so understanding what each one means will make your sewing project much smoother. Complete concepts and separate lines are key.
Symbols and Lines
Every sewing pattern speaks through sewing pattern symbols that act like a roadmap for your project.
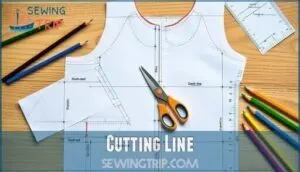
Cutting Lines appear as solid borders around each piece, showing exactly where your scissors should go.
Grainline Direction arrows must align parallel to your fabric’s selvage edge for proper drape and fit.
Notches Alignment uses triangular marks to match seam points perfectly during assembly.
Single notches typically mark front pieces, while double notches indicate back sections.
Dart Markings appear as dotted triangular shapes, creating essential shaping through strategic fabric removal.
The Fold Line tells you where to place pattern pieces on folded fabric, doubling your cutting efficiency.
Understanding these pattern markings explained transforms confusing symbols into clear construction instructions, making your pattern layout guide work seamlessly for professional results.
Many resources explain common symbol meanings for various pattern companies.
Pattern Pieces
Pattern pieces are like puzzle parts that create your complete garment. Each piece shows Piece Identification numbers and names for easy reference.
Pattern pieces are your garment’s blueprint – each numbered piece fits together like a perfectly planned puzzle.
Digital pieces offer convenient Pattern Storage on your device. Study the pattern layout guide and sewing pattern symbols before cutting.
Understanding essential stitches is also vital for assembling these pieces. Master Piece Construction by understanding how notches and markings connect pieces together for perfect sewing instructions results.
Lines and Symbols on Pattern Pieces
Symbols on pattern pieces act as your roadmap to sewing success.
These markings tell you exactly where to cut, fold, and align your fabric pieces. Understanding them prevents costly mistakes and guarantees professional-looking results.
- Cutting lines: Heavy solid lines show where to cut your fabric – your most important boundary
- Grainline meaning: Arrows indicate fabric grain direction for proper drape and fit
- Fold line: Bent arrows mark where fabric should be folded for symmetrical pieces
- Dart markings: Dashed lines with points show where to create fabric shaping
To guarantee proper fit, it’s vital to consult size charts before cutting.
Deciphering Markings on Patterns
Pattern markings might look like secret code at first, but they’re actually your roadmap to sewing success.
You’ll discover that cutting lines, notches, and grainlines work together to show you exactly where to cut, match, and align your fabric pieces.
Cutting Line
Your cutting lines act as your roadmap to pattern success. These cutting lines appear as solid, bold lines around each pattern piece, showing exactly where to cut your fabric. Different cutting styles use varying line thickness and patterns for size identification – dotted lines for one size, dashed for another.
You can find specialized tools for precise cutting techniques online.
| Line Type | Appearance | Purpose | Tip | Common Mistake |
|---|---|---|---|---|
| Solid | Bold, continuous | Main cutting guide | Cut precisely on line | Cutting inside line |
| Dotted | Small dots | Size variation | Count dot patterns | Confusing with fold lines |
| Dashed | Broken segments | Alternative size | Match dash length | Missing pattern changes |
| Dash-dot | Mixed pattern | Multi-size layouts | Follow consistently | Switching between styles |
| Double | Two parallel lines | Seam allowance | Use outer line | Using wrong line |
When following lines and altering lines, your cutting layout depends on accurate line reading for perfect sewing patterns.
Notches
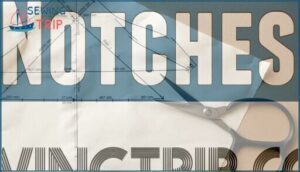
Looking at your sewing pattern, you’ll spot small triangular marks called notches along the cutting lines. These pattern notches act as your roadmap for precise construction. When you’re matching pieces together, you’ll align these notches to guarantee accurate placement every time.
Different sewing patterns use notch variations to help you identify pieces. Single notches typically mark front pieces, while double notches indicate back sections. The notch depth remains consistent across most pattern symbols, making them easy to recognize.
Here’s what makes notches your sewing superpower:
- Prevent twisted seams by providing clear alignment points
- Distinguish similar pieces like left and right sleeves
- Guide fabric marking to reduce cutting errors
- Guarantee perfect matching when pinning pieces together
- Maintain seam accuracy throughout construction
When altering notches, keep their original spacing to preserve the pattern’s integrity. To guarantee seams match perfectly, it’s essential to understand the purpose of notches. These sewing pattern instructions rely on precise notch placement for professional results.
Grainline
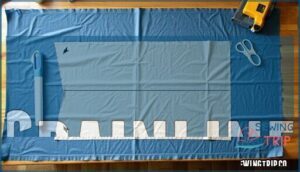
After matching your notches, you’ll spot a grainline arrow on each pattern piece. This straight line with arrows tells you how to align your fabric’s grain with the pattern.
The grainline direction matters because it affects how your finished garment hangs and moves. Place your pattern so the grainline arrow runs parallel to the fabric’s selvage edge.
This keeps the fabric alignment correct and prevents twisted seams. Sometimes you’ll see a bent grainline symbol – that means place the piece on the fabric fold.
Bias grain runs diagonally and creates stretch, while straight grainlines provide stability. Fabric lay plans show proper grain importance for each piece.
Interpreting Pattern Measurements
Pattern measurements tell you exactly what size your finished garment will be and help you choose the right pattern size for your body.
You’ll find two key measurement types on every pattern: the size guide that matches your body measurements and the finished garment measurements that show how much room the completed piece will have.
Finished Garment Measurements
Your pattern’s finished garment measurements reveal the actual dimensions of your completed project.
These numbers include wearing ease and design ease, showing how the garment will fit your body.
Compare these pattern measurements against your body measurements to predict fit accurately. This measurement accuracy helps you make smart alteration decisions before cutting fabric.
Understanding these numbers gives you control over sizing choices and prevents disappointing results. It’s your roadmap to achieving the perfect fit every time.
Because of lack of standardized sizing, it’s especially important to compare your measurements to the pattern’s size chart.
Size Guide
Sizing success starts with understanding that pattern companies use different measurement standards.
Your body measurements won’t always match the size you wear in ready-to-wear clothing. Pattern sizing focuses on bust measurements, hip girths, and other key areas that differ from store-bought clothes. Brand variance means a size 12 in one company might fit like a size 10 in another.
Here’s how to navigate size guides effectively:
- Measure accurately – Take your bust, waist, and hip measurements wearing the undergarments you’ll use with the finished garment
- Compare multiple measurements – Don’t rely on just one measurement; check bust measurements and hip girths against the size chart
- Consider grading sizes – If your measurements span different sizes, you can blend between sizes for a custom fit
Understanding wearing ease helps you choose the right size for your desired fit.
Exploring Pattern Details
Now that you’ve mastered reading measurements, it’s time to examine two essential sections that’ll guide your entire sewing project.
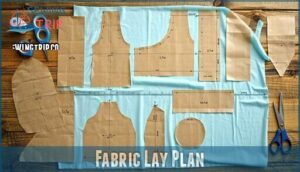
The fabric lay plan shows you exactly how to position pattern pieces on your fabric to avoid waste, while the sewing instructions provide step-by-step directions to turn those flat pieces into your finished garment, following the sewing instructions.
Fabric Lay Plan
Fabric usage optimization starts with understanding your fabric lay plan – the roadmap that shows exactly where each pattern pieces goes on your material. Think of it as a puzzle where every piece must fit perfectly to avoid waste.
Your pattern envelope includes detailed diagrams showing how to arrange pieces based on fabric width and your chosen size. Pay close attention to grainlines – those arrows that must run parallel to your fabric’s selvage edge. Grain alignment affects how your finished garment hangs and moves.
Consider nap considerations for fabrics like velvet or corduroy, where all pieces must face the same direction. Pattern matching for plaids or stripes requires extra fabric beyond the standard requirements.
A well-executed plan can improve material usage greatly. Smart layout optimization means arranging pieces to use every inch efficiently while respecting cutting lines and foldline markings.
Sewing Instructions
Once you’ve planned your fabric layout, sewing instructions become your roadmap to success.
These step-by-step guides walk you through construction using visual aids and clear terminology glossary.
You’ll find instruction clarity in numbered step order, covering seam finishes, seam allowance details, and how pattern symbols connect pattern pieces.
Don’t skip the notches – they’re your alignment lifelines throughout construction.
Key Elements of a Pattern Envelope
The pattern envelope acts like a roadmap that shows you everything you need to know before you start sewing.
You’ll find the pattern number, size range, fabric requirements, and design variations all clearly displayed on the front and back of this essential guide.
Pattern Number and Sizes
Pattern-envelope numbers function like a garment’s DNA, uniquely identifying each design.
You’ll spot this identifier prominently displayed, making reordering or referencing specific patterns effortless.
Most modern patterns offer multisize patterns with size variations spanning several measurements, giving you alteration ease without purchasing multiple versions.
Here’s what matters most:
- Pattern identification – The number system helps you track designs across different pattern companies
- Size guide compatibility – Check if your body measurements fall within the pattern sizing range
- Grading patterns potential – Multisize options let you blend between sizes for custom fits
- Measurement flexibility – Size variations accommodate different body proportions within one envelope
Design Variations and Fabric Recommendations
Your pattern envelope’s design variations reveal endless creative possibilities through different Views like A, B, or C.
Each variation builds upon the base design, featuring unique elements such as sleeve styles, necklines, or hemlines.
These Style Adaptations let you customize one pattern into multiple garments.
Fabric recommendations guide your material selection for superior results.
The envelope specifies suitable fabric types including cotton, linen, silk, or rayon, plus essential details about Fabric Weights and Fiber Content.
You’ll find guidance on drape requirements – whether you need structured cotton for bespoke looks or flowing viscose for feminine silhouettes.
Pay attention to Pattern Matching requirements and Pre-shrinking Fabric instructions.
These recommendations aren’t suggestions – they’re your roadmap to sewing success, ensuring your finished garment matches your vision perfectly.
Frequently Asked Questions (FAQs)
How do I read sewing patterns?
Knowledge is power, so start by examining the envelope for garment views and fabric requirements.
Check your measurements against the size chart, then study pattern pieces for symbols like notches, grainlines, and cutting lines.
Study pattern pieces for a deeper understanding of the garment’s construction.
How to determine the number of pieces in a sewing pattern?
Check the pattern envelope’s back panel where you’ll find a detailed list of all pieces included.
Count each pattern piece mentioned in the cutting layout diagrams – they’re numbered and labeled for easy identification, focusing on complete concepts to ensure accuracy.
How do you understand a sewing pattern?
Most sewers use five key elements to decode patterns effectively.
You’ll master pattern understanding by studying the envelope details, identifying piece symbols, checking measurements against your body, reviewing fabric requirements, and following the step-by-step instructions carefully.
This process involves several steps that help in effective decoding of patterns.
How do I know if I’m a sewing beginner?
You’re likely a beginner if you’ve never sewn a garment, struggle with pattern symbols, don’t know basic stitches, or feel overwhelmed by sewing terminology and instructions.
What is the golden rule sewing pattern system?
Chasing ghosts won’t help you here—there’s no recognized "Golden Rule" in the sewing world.
You might be thinking of basic pattern-reading principles or specific brands’ sizing methods that emphasize accurate measurements.
What do the markings on sewing patterns mean?
Pattern markings guide you through construction like a roadmap. Notches align pieces, grainlines show fabric direction, darts shape curves, and fold lines mark symmetry. They’re your blueprint for professional results.
What does 45 and 60 mean on a sewing pattern?
The numbers 45 and 60 refer to fabric width in inches. You’ll see these measurements in the fabric requirements chart, telling you how much yardage to buy based on your fabric’s width.
What does fold line mean on a sewing pattern?
A fold line tells you where to place your pattern piece on the fabric’s fold.
This creates a symmetrical piece when you cut and unfold it, eliminating the need for seam allowances along that edge.
How to read the markings on a sewing pattern?
Sewing pattern markings are your roadmap to success. Look for notches, darts, grainlines, and cutting lines. Each symbol tells you where to cut, fold, or stitch for perfect results.
How to read a simple sewing pattern?
Most home sewers abandon 70% of their projects due to pattern confusion.
Start by checking the pattern envelope for fabric requirements and notions.
Then examine each piece for grainlines, notches, and cutting lines before laying out your fabric to avoid confusion.
Conclusion
Ironically, once you master how to read a sewing pattern, you’ll realize the real mystery wasn’t the symbols—it was believing you couldn’t decode them.
You’ve now got the tools to tackle any pattern with confidence. Those cryptic markings that once seemed impossible are now your roadmap to creating beautiful garments.
Start with simple projects and gradually work up to complex designs. Remember, every expert seamstress started exactly where you’re today, and this is where your sewing journey begins now.

