This site is supported by our readers. We may earn a commission, at no cost to you, if you purchase through links.
 To master the art of sewing with patterns, you’ll first need to assess your skill level and choose a pattern with suitable complexity.
Carefully measure your body and consult the size chart, opting for a larger size if needed.
Gather all required supplies like fabric, notions, and cutting tools.
Precisely prepare the pattern pieces by printing, assembling, and marking them according to instructions.
When cutting the fabric, precisely follow the layout and grain line indicators, transferring notches for alignment.
With guidance on understanding pattern markings and making alterations, you’ll disclose the secrets to crafting impeccable garments from patterns.
Proceed, and you’ll elevate your sewing prowess.
Table Of Contents
- Key Takeaways
- Choosing the Right Sewing Pattern
- Determining Your Pattern Size
- Gathering Necessary Supplies
- Preparing the Pattern Pieces
- Cutting the Fabric
- Understanding Pattern Markings
- Altering the Pattern
- Sewing the Garment
- Troubleshooting Common Issues
- Preserving the Pattern
- Frequently Asked Questions (FAQs)
- Conclusion
Key Takeaways
- Assess your skill level and choose a sewing pattern with suitable complexity
- Accurately measure your body and consult the size chart to select the right pattern size
- Gather all required supplies like fabric, notions, and cutting tools before starting your project
- Carefully prepare the pattern pieces by printing, assembling, and marking them according to instructions
Choosing the Right Sewing Pattern
When choosing a sewing pattern, you’ll want to assess your skill level and evaluate the garment details – patterns with fewer pieces, simpler construction techniques, and straightforward finishing are ideal for beginners. Additionally, thoroughly review the pattern description to verify it aligns with your desired outcome and skill set.
Consider Skill Level
When choosing a sewing pattern as a beginner, look for designs with simple details and limited complexity. Opt for patterns with fewer pattern pieces, as these will be easier to assemble.
Pay close attention to the fabric recommendations, as the right material can make a big difference in the final fit and appearance of your garment.
Don’t be afraid to start small and work your way up to more advanced projects as your skills improve.
Evaluate Garment Details
When choosing a sewing pattern, carefully evaluate the garment details. Look for simple designs with limited seams, darts, and closures if you’re a beginner. Avoid intricate pattern matching or delicate fabrics until you gain more experience. Focus on garments with straightforward construction, like loose-fitting tops or skirts, to build your sewing skills. (Source)
Review Pattern Description
When reviewing a sewing pattern, examine the garment image and description to understand the complexity. Check the fabric recommendations – the right fabric is essential for the pattern’s success. Consider the intended fit and any pattern alterations needed. Store patterns carefully for future use. With the right pattern and preparation, you’ll be sewing like a pro in no time.
Determining Your Pattern Size
To guarantee proper fit, accurately measure your body according to the pattern instructions, taking into account areas like bust, waist, and hips. Consult the size chart provided with your chosen sewing pattern, and if your measurements fall between sizes, opt for the larger size, as you can more easily tailor a garment down rather than letting out seams.
Measure Body Accurately
Accurately measuring your body is essential for selecting the right sewing pattern size. Use a flexible tape measure and take measurements of your bust, waist, and hips. Follow the pattern’s instructions carefully, standing upright and breathing normally. Record your measurements on a chart to compare against the pattern’s size guide. Virtual measurement tools can also provide a helpful starting point.
Consult Size Charts
Once you’ve measured yourself accurately, it’s time to consult the pattern’s size chart. This chart lists the bust, waist, and hip measurements for each available size. Find the size that best matches your measurements – don’t worry if you’re between sizes, you can adjust the pattern later. The key is choosing a starting point that fits your frame.
Adjust for Ease
When choosing your pattern size, don’t forget to account for ease – the extra fabric allowance that provides comfort and movement. Consult the pattern’s finished garment measurements, compare them to your body measurements, and select a size with the desired ease amount. Remember, ease varies based on the garment type and your personal preference for a closer or looser fit.
Gathering Necessary Supplies
For fabric selection, refer to the pattern’s recommendations on suitable types, weights, and required yardage based on the width and design. You’ll also need notions like zippers, buttons, interfacing, and trims specified in the instructions, as well as essential cutting tools like fabric shears, rotary cutter, mat, and rulers.
Fabric Selection
Selecting the right fabric is essential for your sewing project’s success. Consider the fabric’s texture, color, and print placement. Will it complement the pattern design? Also, factor in potential shrinkage and stretch properties. Consult the pattern’s fabric recommendations, but don’t be afraid to experiment with similar fabrics that align with your vision. The perfect fabric can elevate your creation.
Notions and Trims
Don’t overlook notions and trims – those little extras truly make your garments shine. Stock up on:
- Zippers, buttons, and snaps for fastenings
- Interfacing and stabilizers for structure
- Decorative ribbons, lace, and appliques for flairT
hese embellishments elevate basic pieces into fashionable statements. Set free your creativity with thoughtful finishing touches!
Cutting Tools
With the right cutting tools, you’ll be slicing through fabric like a hot knife through butter.
Invest in a sharp rotary cutter, a large self-healing cutting mat, and a trusty pair of fabric scissors.
Pattern weights are also a game-changer. They hold your pattern pieces in place without the hassle of pins.
These essentials will have you cutting with precision and efficiency.
Preparing the Pattern Pieces
For PDF sewing patterns, you’ll need to print the pattern sheets and assemble them according to the layout guide, carefully aligning the corresponding shapes and markings. Once assembled, mark the pattern pieces with notches, dots, and guidelines according to the instructions, which will aid accurate cutting and construction.
Printing PDF Patterns
Printing PDF sewing patterns at home can save you money, but requires attention to detail. Choose high-quality paper to avoid distortion. Some patterns offer file formats optimized for printing, reducing storage space. For complex designs, consider online printing services for professional results. Always test the scale before committing to the full print.
- Select high-quality paper to prevent distortion.
- Explore file formats optimized for printing.
- Consider online printing services for complex designs.
Assembling Pattern Sheets
Once you’ve printed your PDF pattern, it’s time to assemble the sheets. Align the corners and edges precisely, using a glue stick or tape to secure the pages.
Pay close attention to the grain alignment, as this will guarantee your fabric cuts properly. Store the assembled pattern on cardstock for future use, respecting any copyright considerations.
With a little practice, this step becomes quick and efficient.
Marking Pattern Pieces
Marking pattern pieces is an essential step in sewing success. Transfer marks like notches, darts, and fold lines using tools like tracing wheels, chalk, or tailors tacks. Align the grain of your fabric carefully to guarantee proper fit and drape. With a little practice, you’ll be marking patterns like a pro in no time!
Cutting the Fabric
You’ll want to carefully lay out the pattern pieces on your fabric according to the layout guide, making sure to follow the grain line indicators. Once the pieces are properly positioned, cut around them precisely, using sharp scissors or a rotary cutter, and transfer any markings like notches or dots onto the fabric sections.
Lay Out Pattern Pieces
Once your pattern pieces are prepped, it’s time to lay them out on the fabric. Carefully follow the layout guide provided with your pattern, noting any special instructions for fabric folding or pattern rotation. Align the grainline arrows on each piece parallel to the fabric’s selvage edge. Use pattern weights or pins to secure the pieces in place before cutting.
Cut Fabric Accurately
Now that you’ve carefully laid out your pattern pieces, it’s time to cut the fabric. Refer to the cutting plan or layout guide to determine the most efficient fabric folding and placement.
Cut each pattern piece, accounting for the specified seam allowances. Be mindful of the fabric’s width when purchasing to make sure you have enough yardage.
Take your time and cut precisely along the marked lines for the best results.
Mark Fabric Notches
After cutting your fabric pieces, it’s time to mark the notches. These small triangular or bar-shaped marks on the pattern edges are vital for aligning your fabric pieces accurately. Use a fabric marker or small scissors to snip the notches, ensuring they match up perfectly when sewing. This simple step will keep your seams aligned and your garment construction on track.
- Mark notches precisely where indicated on the pattern.
- Align notches carefully when pinning or basting fabric pieces together.
- Refer to the pattern instructions for the specific number and placement of notches.
Understanding Pattern Markings
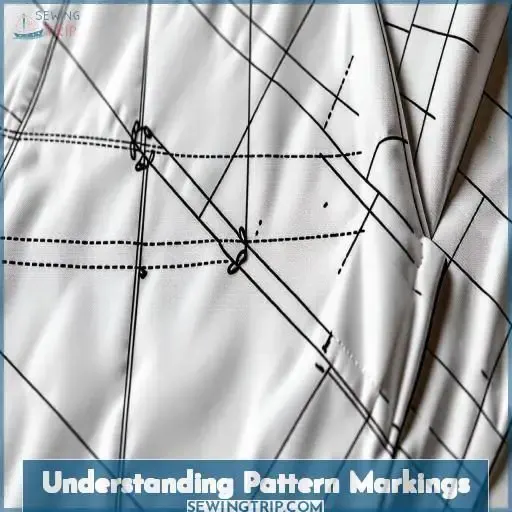
Pattern markings are essential guides that help you accurately construct the garment. Grain line indicators show the fabric’s lengthwise direction, notches and dots align pattern pieces precisely, and sewing lines mark where to stitch seams and details.
Grain Line Indicators
Grain line indicators on sewing patterns show the direction of the fabric grain. Align these arrows with the straight grain of your fabric for the most stable fit.P
lacing pattern pieces on-grain guarantees the fabric hangs properly and minimizes distortion.A
rrows may point in one direction for prints or nap.C
arefully match grain lines when sewing seams for a professional finish.
Notches and Dots
Notches and dots on sewing patterns serve as essential alignment guides. Notches help you match up pattern pieces precisely, ensuring a professional finish. Dots indicate important details like dart placement, pocket positions, and gathering spots.
Pay close attention to these markings when cutting and assembling your fabric – they’ll make the sewing process a breeze.
Mastering pattern markings is key to sewing success.
Sewing Lines
Those dashed lines you see indicate sewing lines and seam allowances. Here are a few key things to keep in mind:
- Extension lines show where to lengthen or shorten
- Fold lines mark where the fabric should bend, not cut
- Sewing lines show you exactly where to stitchT
ake your time decoding these markings – they’re the blueprint to construction success!
Altering the Pattern
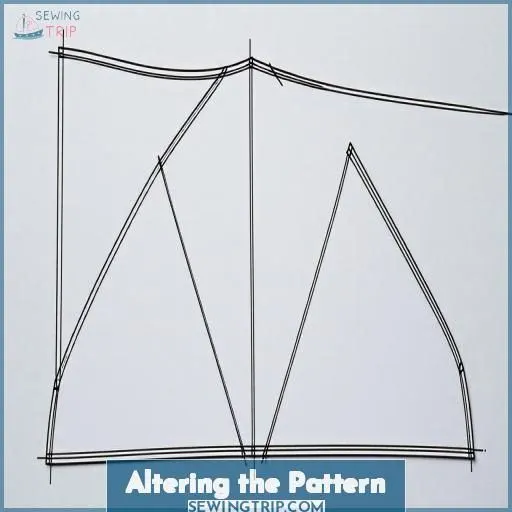
Altering a sewing pattern is essential for achieving the perfect fit. You’ll need to adjust the pattern pieces by resizing darts, lengthening or shortening specific areas, and manipulating other elements to align with your body’s unique measurements.
Adjusting for Fit
Adjusting for Fit (Altering the Pattern)
Altering the pattern is key to achieving the perfect fit. Consider these modifications:
| Adjustment | Technique |
|---|---|
| Bust | Adjust darts or add/remove bust shaping |
| Waist | Take in or let out the waistline |
| Hips | Blend sizes between waist and hips |
Experiment with fabric substitution and seam allowance to verify ease of movement. Master pattern draping for a truly custom garment.
Lengthening or Shortening
If your pattern doesn’t include lengthen or shorten lines, no problem! Simply draw a line perpendicular to the grainline and adjust the length as needed.
For sleeves, lengthen or shorten at the hem.
For a bodice, adjust the waistline.
And for skirts or pants, change the hem length.
Just be sure to make the same adjustments to all corresponding pattern pieces.
Dart Manipulation
Darts are essential for shaping garments to the body. To manipulate darts, you can convert them to gathers, pleats, or tucks for a unique look. Experiment with dart placement and size to achieve the desired fit and silhouette. Remember, proper dart shaping is key to a well-fitted, flattering garment. Try these techniques:
- Dart conversion for alternative shaping
- Dart pleats for decorative details
- Dart tucks for subtle waist emphasis
- Darts and gathers for volume and drape
- Adjust dart size and position for fit
Sewing the Garment
Once the pattern pieces are pinned and cut, you’re ready to start sewing. Constructing the seams precisely according to the pattern instructions is essential. Baste them first if needed, ensuring notches and markings align properly.
To insert zippers and closures, follow the steps carefully. Backstitch at the beginning and end for reinforcement.
Finishing techniques like edge stitching, clipping curves, and understitching will give your garment a professional appearance.
Constructing Seams
Construct seams precisely, aligning notches and following seam allowances. Master various seam types like plain, French, and flat felled for diverse purposes. Finish raw edges neatly using techniques like overlock, zig-zag, or binding for professional results. Press seams flat as you construct; it elevates garment quality immensely. With patience and practice, seam construction becomes effortless.
Inserting Zippers
Inserting zippers is an essential skill for any sewing enthusiast. Master the art of zipper application with these expert tips:
- Choose the right zipper type for your project – standard, invisible, or lapped.
- Align the zipper teeth precisely with the fabric edges for a seamless finish.
- Use a zipper foot to stitch close to the zipper teeth without catching them.
- Troubleshoot common issues like puckering or misalignment for a professional result.
Finishing Techniques
Elevate your garment with professional-looking finishes. Master facing application to create clean necklines and armholes. Utilize seam binding for a polished edge. Strategically place interfacing for structured details. Precisely mark and sew buttonholes for a flawless closure. Explore various hem techniques to achieve your desired look.
| Facing Application | Seam Binding |
|---|---|
| Cleanly finish necklines and armholes | Create a polished edge |
| Stabilize fabric for a crisp appearance | Prevent fraying on raw edges |
| Interfacing Placement | Hem Finishing |
| — | — |
| Reinforce structured elements | Explore blind, rolled, or topstitched hems |
| Provide shape and support | Achieve the perfect length and drape |
Troubleshooting Common Issues
You may encounter fabric distortion, where the fabric stretches or gets pulled out of shape during sewing. Uneven hems are another common issue, resulting from inaccurate measuring, cutting, or stitching. Misaligned patterns, caused by improper pattern placement or cutting, can lead to ill-fitting garments.
Fabric Distortion
Fabric distortion can ruin your sewing projects, but you can prevent it. Stabilize bias-cut fabrics with starch or interfacing. Handle the fabric gently, avoid stretching, and baste seams before stitching. Pay close attention to the fabric’s grain, as off-grain cuts can lead to distortion. With the right techniques, you’ll achieve beautifully stable results every time.
Uneven Hems
When troubleshooting uneven hems, verify carefully marked fabric for accurate cutting. Use sharp fabric scissors to guarantee clean cuts. Consider techniques like hemstitching, blind hemming, rolled hems, or bias tape for different fabric weights and finishes. Overcast the raw edges to prevent fraying. Pressed hems create a polished look, while adjusting the sewing machine’s tension could also resolve the issue. (Source)
Misaligned Patterns
Misaligned patterns can ruin your sewing project. To avoid this, guarantee proper pattern alignment by pinning notches together, basting seams, and using stabilizers. If misalignment occurs, unpick stitches, repin, and resew. Common culprits include:
- Misplaced notches
- Fabric shifting during sewing
- Distorted seams from excessive pinningS
tay calm, troubleshoot the issue, and get your pattern back on track for a flawless finish!(Source)
Preserving the Pattern
To safeguard the lasting preservation of your sewing patterns for future use, consider the following tips:
- Store patterns in protective plastic sleeves to prevent wear and tear
- Transfer delicate paper patterns to durable cardstock for increased longevity
- Use archival-quality materials for storing and handling to maintain pattern durability
- Avoid excessive folding or creasing of patterns to prevent damage over time
- Protect patterns from moisture and sunlight to ensure durable preservation of the paper and ink
Frequently Asked Questions (FAQs)
How to sew patterns together for beginners?
Express your inner designer – start simply yet strategically. Trace key pieces onto sturdy paper, marking details. Cut fabric pieces precisely, following grainlines. Then, pin, baste, and sew step-by-step, embracing mistakes as milestones on your fashion journey.
How do you follow a basic sewing pattern?
Carefully study the pattern guide. Gather required materials listed. Transfer pattern markings to fabric using chalk or tracing paper. Pin pattern pieces to fabric precisely matching notches. Cut fabric following layout guide instructions.
How to use a sewing pattern without cutting it?
To use a sewing pattern without cutting, trace the pieces onto cardstock or tracing paper. Then, pin or weigh them down before cutting fabric. This approach preserves the original pattern for future projects while still allowing you to create your garment efficiently.
How to use a pattern for multiple sizes?
You’ll create a custom garment at the speed of light! To utilize a multi-size pattern, cut the largest size, then overlap smaller sizes’ seam allowances—a clever way to resize with minimal effort. Adjust seamlines to tailor the perfect fit.
How do I store and organize my sewing patterns?
Organize patterns in a filing cabinet or binder with clear labels. Store paper patterns flat or roll them loosely with PDF versions on a secure hard drive. Keep all pattern pieces together in labeled envelopes or plastic sleeves for easy retrieval.
What are the best tools for tracing and modifying patterns?
Tracing patterns like mapping treasure, sharp tools your key: tracing wheel, medical paper, Swedish tracing paper guarantee exact lines. For modifications, invest in pattern weights, hip curve rulers, and French curves for precision and control over design.
How do I match plaids and stripes when cutting fabric?
To match plaids and stripes, align pattern pieces carefully. Pin pieces to the fabric, lining up designs at seams. Use tailor’s chalk to mark guidelines for cutting plaids or stripes straight.
What are some tips for sewing with slippery fabrics?
First things first, grab your sewing machine’s walking foot, which will keep slippery fabric from shifting during stitching. Use a sharp needle for a clean stitch, and consider spraying temporary fabric adhesive or pinning extensively to avoid frustrating fabric migrations.
How do I finish seams neatly on the inside of garments?
Finish seams using a serger, overcasting, or zigzag stitch to prevent fraying. Opt for seam bindings, Hong Kong finishes, flat-felled seams, or French seams for a polished interior on higher-end garments.
Conclusion
Ultimately, mastering the art of using a sewing pattern requires diligent practice and attention to detail.
By carefully following the steps outlined – choosing the appropriate pattern, accurately sizing and preparing materials, understanding markings, and making necessary alterations – you’ll craft impeccable garments that showcase your sewing prowess.
Embrace the challenges, and your dedication will be rewarded with beautifully constructed pieces fitted to your vision.

