This site is supported by our readers. We may earn a commission, at no cost to you, if you purchase through links.
However, mastering the basics will have you sewing like a professional in no time. This step-by-step guide will teach you how to use a Singer sewing machine, covering everything from needle threading to troubleshooting common issues.
Table Of Contents
Key Takeaways
Threading your Singer sewing machine is a breeze once you get the hang of it. Simply follow the steps, and you’ll be sewing like a pro before you know it!
Loading the bobbin correctly is key to avoiding tangles and mastering your machine.
If you encounter stitching problems, stay calm and check the thread quality, tension settings, and needle size to identify the issue.
How to Use Singer Sewing Machine?
Using a Singer sewing machine involves several steps, from threading the machine and loading the bobbin to connecting the threads and troubleshooting any issues. It’s important to select the right needle size, thread type, and bobbin thread colour to match your fabric. You’ll also need to adjust the tension for smooth stitches. When you’re ready to sew, raise the needle and presser foot, and start sewing with the foot pedal or hand wheel. You can also adjust the tension as you sew.
To learn more about using your Singer sewing machine, continue below.
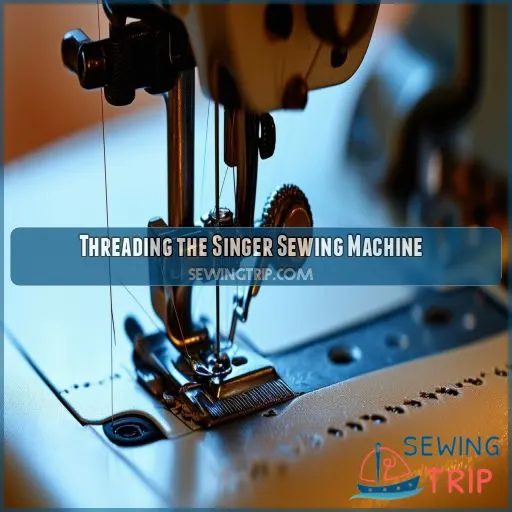
Threading the Singer Sewing Machine
To thread your Singer sewing machine, first guide the thread through the top thread guide, then wrap it around the tension mechanism. Finally, thread the end through the needle eye to complete the process.
Guide Thread Through Top Thread Guide
Threading your Singer sewing machine is simple once you know the steps. Here’s a guide to get you started:
- Guide the thread through the top thread guide.
- Change the thread’s direction by weaving it through the top hook.
- Control tension by threading through the tension mechanism.
- Guarantee smooth stitching by guiding the thread through the take-up lever.
Now your machine is ready for the next step: wrapping the thread around the tension mechanism.
Wrap Thread Around Tension Mechanism
Now, it’s time to wrap the thread around the tension mechanism. This step is important for achieving good thread tension, which is necessary for consistent stitching. You want to make sure the thread is securely wrapped, but not too tight, as this can affect your tension control.
The tension assembly is the component that regulates thread tension, ensuring your stitches are consistent and neat. It’s useful to familiarize yourself with this mechanism, as tension adjustment may be required depending on the thread type and your desired stitching technique.
Thread Through Needle Eye
Threading the needle eye is a vital step in setting up your Singer sewing machine. Here’s a quick guide:
- Choose the right needle size and thread type for your project.
- Make sure the needle is in the correct position and the presser foot is raised.
- Guide the thread through the needle eye, paying attention to the thread color and making sure it matches your project’s requirements.
- Needle Know-How: When selecting a needle, consider the fabric type and weight. Different needles are designed for various fabrics, ensuring smooth stitching and minimizing fabric damage.
- Thread Talk: The type and color of your thread matter. Opt for high-quality thread that matches your fabric color for a seamless finish.
- Precision is Key: Taking the time to thread the needle eye with precision sets the foundation for successful sewing. A well-threaded machine ensures consistent stitching and reduces the risk of tangles or thread breakage.
Loading the Bobbin
To load the bobbin, first insert it into the bobbin case and pull out about 6 inches of thread. Then, catch the bobbin thread with the needle by turning the hand wheel, ensuring it forms a loop.
Insert Bobbin Into Case
Now, let’s discuss loading the bobbin into your Singer sewing machine. This is a fundamental step, as the bobbin plays a pivotal role in creating those ideal stitches you seek.
First, raise the needle and open the bobbin case. This will grant you access to the central component of your machine, where the magic occurs. Next, carefully insert the bobbin into its designated compartment. Verify that it’s firmly positioned; you don’t want it rattling around in there!
You’re one step closer to creating something extraordinary.
Pull Out 6 Inches of Thread
After placing the bobbin into its case, it’s time to pull out about six inches of thread. This step is essential for making sure the bobbin thread is readily available when you start sewing.
Now, you might be asking, "Why six inches?" Well, that length achieves a balance between having sufficient thread for the initial stitching and not having so much that it becomes unwieldy or prone to tangling.
As you pull out the thread, pay attention to how the bobbin fits in its case. Make sure the bobbin sits securely in its case without any wobbling. A proper fit allows for smooth stitching and prevents thread jams.
Also, think about your choice of thread color. While it might seem like a small detail, matching the bobbin thread color to your fabric can help create a seamless appearance, especially if your fabric is lightweight or sheer.
Catch Bobbin Thread With Needle
Now, let’s progress to capturing the bobbin thread with the needle. This is a key step in loading the bobbin and guaranteeing smooth stitching. Here’s how:
- Hold the top thread firmly.
- Turn the hand wheel to bring the needle down and back up again.
- As the needle ascends, it will capture the bobbin thread.
- Gently pull on the top thread to bring the bobbin thread up and out, forming a loop.
This method ensures proper thread loop placement and sets the foundation for achieving the desired tension and stitch quality.
Connecting Top and Bobbin Threads
To connect the top and bobbin threads, pull up both threads to form a loop. Adjust the tension if needed to guarantee smooth stitch formation as you begin sewing.
Pull Up Both Threads to Form a Loop
Now it’s time to connect the top and bobbin threads. Pull both threads up and form a loop big enough to fit over your finger.
This loop is an important part of the thread path, so don’t skip this step!
Push the loop towards the rear of the machine. You’re almost done with the threading process and will be ready to start sewing soon.
Adjust Tension if Needed
Now that you’ve pulled up both threads to form a loop, it’s time to adjust the tension if necessary. This step guarantees your stitches are smooth and even. Here are some tips to help you out:
- Check Tension Settings: If your stitches are too loose or too tight, adjust the tension settings on your machine. This will help you achieve the desired stitch formation.
- Troubleshoot Thread Quality: Sometimes, thread quality can affect stitch formation. If you’re experiencing issues, try using a different type of thread or replacing old thread with new, high-quality thread.
- Bobbin Placement: Make sure the bobbin is placed correctly in the casing and machine. A properly placed bobbin helps with stitch formation and reduces the need for frequent tension adjustments.
Ensure Smooth Stitch Formation
To ensure smooth stitch formation, there are several factors to consider:
Bobbin winding, thread tension, needle selection, fabric type, and stitch length all play a role.
Choose the appropriate needle for the fabric you are working with.
Adjust the stitch length as needed and ensure that your bobbin is wound correctly.
Pay attention to the thread tension settings as they can affect the evenness of your stitches.
Troubleshooting Tips for Sewing
If you’re experiencing stitching issues, check the thread quality and make certain the tension settings are correct. For more detailed guidance, review your instruction manual or watch online tutorials.
Check Thread Quality and Tension Settings
When troubleshooting your sewing, it’s crucial to assess the following:
- Thread Quality: Confirm you’re using high-quality thread that’s free of frays or knots, as this can impact the tension and overall stitch quality.
- Tension Settings: Check that the tension settings on your machine are appropriate for the type of fabric and thread you’re using. Adjustments may be needed to achieve the desired stitch quality.
- Bobbin Thread: Confirm the bobbin thread is properly threaded and hasn’t become tangled or loose, as this can lead to uneven stitches.
- Top Thread: Similarly, confirm that the top thread is correctly threaded through the machine, following the threading guide, to prevent any issues with tension or stitch formation.
Review Instruction Manual or Watch Tutorials
If you’re new to sewing, it’s worth familiarizing yourself with the basics before diving into a project. Reviewing the instruction manual or watching tutorials online can provide valuable insights into needle size, bobbin types, fabric selection, thread colors, and pattern choices. This knowledge will empower you to confidently tackle your next sewing project with the right tools and techniques.
Operating the Singer Sewing Machine
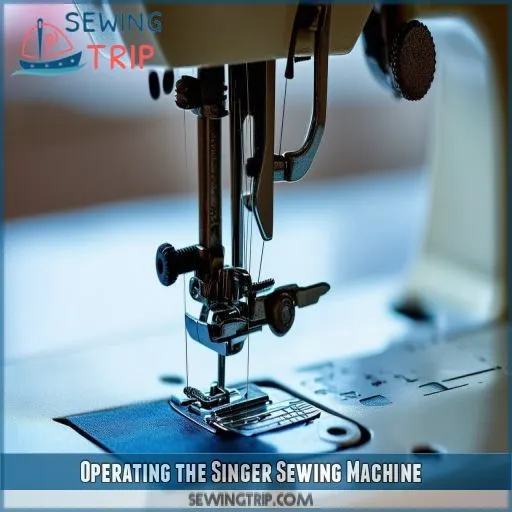
To start using your Singer sewing machine, verify the needle and presser foot are raised. Then, begin sewing by gently pressing the foot pedal or turning the hand wheel.
Raise Needle and Presser Foot
Now that you’ve tackled troubleshooting, it’s time to focus on operating your Singer sewing machine effectively. A key aspect of this is making sure the needle and presser foot are in the correct positions.
The presser foot position is essential for controlling the fabric as you sew. You can adjust it to accommodate different thicknesses of fabric. When you need to raise the presser foot, simply use the lever at the back of the machine to lift it. This gives you easy access to the needle and bobbin area.
Needle height is another important factor. You can adjust it to sew different types of stitches and maintain the machine’s stability. Always check that the needle is in the correct position before starting to sew.
Start Sewing With Foot Pedal or by Hand Wheel
Now that your Singer sewing machine is all set up, it’s time to start sewing!
You have two options to begin: using the foot pedal or turning the hand wheel.
The foot pedal is great for sewing at a consistent speed, leaving both hands free to guide the fabric.
The hand wheel, on the other hand, gives you more control over stitch speed, perfect for intricate work or when a slow and careful approach is needed.
Remember to adjust the bobbin and thread tension as needed for smooth, even stitches. With the right settings and practice, you’ll be sewing like a pro!
Maintenance and Care of Singer Machine
To keep your Singer sewing machine running smoothly, be sure to clean and oil it regularly. Storing the machine in a dry, dust-free environment will also help maintain its performance over time.
Clean and Oil Machine Regularly
To keep your Singer sewing machine in tip-top shape, regular cleaning and lubrication are key.
Make sure to give your machine a good once-over after each use, wiping away any dust or debris with a soft, dry cloth.
Don’t forget to oil it, too; a well-oiled machine is a happy one! Consult your user manual for the best type of oil to use and where to apply it.
Store in a Dry and Dust-free Environment
When not in use, it’s important to store your Singer sewing machine in a dry and dust-free environment to keep it in tip-top shape. Here are some tips to guarantee proper storage:
- Keep it dry: Moisture can cause rust and corrosion, so make sure your machine is stored in a dry place.
- Protect from dust: Use a protective cover to shield your machine from dust and debris.
- Humidity control: If you live in a humid climate, consider using a dehumidifier to prevent moisture buildup.
- Regular cleaning: Even with a cover, dust can still accumulate. Clean your machine regularly to remove any dust or debris.
- Proper storage area: Choose a storage area that’s clean, dry, and well-ventilated. Avoid damp basements or attics with extreme temperatures.
Frequently Asked Questions (FAQs)
How to put thread in sewing machine Singer?
Apologies, I couldn’t find the information to answer your question.
Is a Singer sewing machine easy to use?
The Singer sewing machine is easy to use once you get the hang of it. It’s designed for both beginners and experts, so don’t be intimidated by its appearance. You’ll be crafting in no time.
How to thread a Singer start machine?
First, wind the bobbin and place it in the casing. Next, thread the top of the machine, then the needle. Finally, turn the hand wheel to bring the bobbin thread up.
How does singers sewing machine work?
The Singer sewing machine is a powerful tool for creating your own textile wonders. It’s a machine that stitches fabric and other materials together with thread. It’s a breeze to use and perfect for beginners and experts alike. With its 32 built-in stitches, you can select the perfect stitch for your project, whether it’s a straight stitch or a zigzag.
How do I fix a Singer machine thats jammed?
If your Singer sewing machine is jammed, check for a tangled thread, uneven fabric feeding, or a build-up of lint or dust. Adjust the tension, following your manual’s instructions. If problems persist, service your machine.
Can I use any type of thread?
You can use most brands of thread on your Singer sewing machine. However, for the best results, you should consider the type of fabric you’re using. For example, 100% polyester thread is great for synthetic fabrics and seams, while cotton thread is strong and durable but has no stretch.
What do I do if the bobbin thread runs out?
If your bobbin thread runs out, first check for knots in the thread, which can prevent it from moving smoothly. Cut the knot, untangle, and rethread the bobbin. Also, confirm your needle is inserted correctly, and consider changing it if it’s worn or damaged.
How do I clean my Singer machine?
First, unplug your machine and remove the throat plate. Then, use a nylon brush to clean the dust and fabric fibers. You can also use a screwdriver to clean between the feed dogs.
What kind of needles can I use?
Sewing machines need needles, and Singer has you covered with a range of styles. Use Ball Point for knits, Chromium Regular Point for woven fabrics, and Chromium Ball Point for knit fabrics. Denim or Jeans needles are great for denim, jeans, and canvas.
Conclusion
Now that you’ve mastered the basics of using a Singer sewing machine, you’re ready for your next sewing project.
Confidence will be your companion as you embark on new sewing adventures.
Should you need a quick refresher, refer back to the steps outlined above for threading your machine, loading the bobbin, and troubleshooting. With practice, your sewing skills will flourish and you’ll become a pro in no time!

