This site is supported by our readers. We may earn a commission, at no cost to you, if you purchase through links.
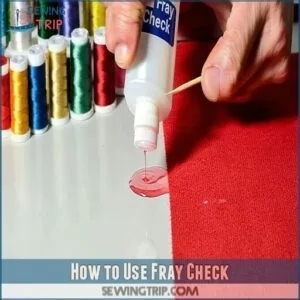 To use Fray Check effectively, you’ll need to apply it with precision.
First, shake the bottle well.
Then, squeeze a small amount onto fabric edges where fraying occurs—think of it as drawing a thin line of protection.
Don’t flood the material; a little goes a long way, just like salt in cooking.
Allow it to dry completely (about 15-30 minutes) before handling your project.
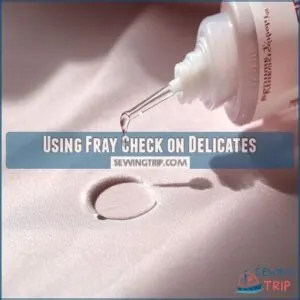
For buttonholes or delicate fabrics, use the applicator tip to place tiny dots instead of continuous lines.
Fray Check dries clear and flexible, becoming virtually invisible on most fabrics.
Proper application techniques can mean the difference between professional-looking results and sticky disasters.
Table Of Contents
Key Takeaways
- Shake the bottle well before use and apply a thin line along raw edges to prevent fraying.
- Allow Fray Check to dry completely for 15-30 minutes before handling and 24 hours before washing.
- Use precise tools like a small brush or toothpick for delicate fabrics, buttonholes, or ribbons to avoid oversaturation.
- Store the bottle upright with a tightly secured cap and unclog the nozzle with a pin if it hardens.
What is Fray Check
Fray Check is a liquid glue designed to stop fabric edges from fraying, making it a must-have for sewing and crafting.
It dries clear and creates a strong, flexible seal that keeps your projects looking neat and lasting longer.
Definition and Purpose
Fray Check is a specialized liquid sealant designed to prevent fabric edges from unraveling.
When applied to raw edges, this clear solution creates a protective barrier that holds threads in place, effectively stopping fraying before it starts.
Think of it as invisible stitching in a bottle!
The sealant composition dries clear and flexible, ensuring your fabric maintains its appearance while substantially enhancing longevity.
It’s particularly useful for projects where fabric edge finishing is vital.
Dritz launched Fray Check, offering a stiff, durable solution for preventing fraying, which is a clear and flexible way to protect your fabric.
Benefits of Using Fray Check
Now that you understand what Fray Check is, let’s look at why it’s worth adding to your sewing kit.
Using this fabric edge finishing solution offers remarkable advantages:
- Extends seam longevity by preventing unraveling
- Maintains professional fabric appearance with invisible protection
- Provides wash durability through multiple laundry cycles
- Creates a flexible seal that moves with your fabric
- Saves time compared to additional sewing techniques
Stop fabric from fraying with just one application, using Fray Check for invisible protection and a flexible seal.
Types of Fabric Suitable for Fray Check
While Fray Check offers numerous benefits, you’ll want to know which fabrics work best with this handy solution.
Raw edges of natural fibers like cotton and linen respond wonderfully, while synthetic blends also take well to application.
Knit fabrics, delicate materials like chiffon, and coated fabrics can all be treated effectively.
Even Aida cloth used in cross-stitch projects benefits from fabric fray prevention along the edges.
Many users find help with projects on the Crochetville online community.
How to Use Fray Check

The essential guide to working with Fray Check involves a straightforward process that’ll save your fabric edges from unraveling. You’ll need to master a few basic techniques to effectively use this fabric fray prevention tool.
Here’s how to properly use Fray Check:
- Hold the bottle at a 45-degree angle about 1/4 inch from your fabric edge for ideal control
- Squeeze gently to release small amounts of product along seams or raw edges
- Use application tools like a toothpick or fine paintbrush for precise placement in tight areas
- Store the bottle upright with the cap tightly secured to prevent drying out
Remember safety precautions when handling Fray Check—work in a ventilated area and keep it away from children. It’s known for its stiff, durable finish, making it ideal for heavy-duty fabrics. While there are Fray Check alternatives available, this tried-and-true solution remains popular for countless project ideas from quilting to embroidery.
Preparation is Key
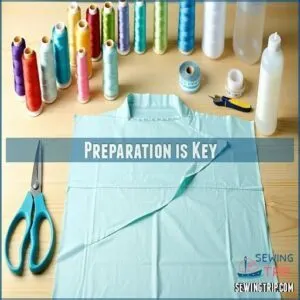
You’ll save yourself a heap of frustration by gathering your supplies and ensuring your fabric is clean and dry before applying Fray Check.
Here’s a short, engaging blockquote in the same practical, instructional tone as the paragraph:
Prep smart with clean, dry fabric—your Fray Check will thank you with professional results that last.
Taking these few minutes to prepare properly will help you achieve professional-looking results that won’t unravel at the first sign of wear.
Gathering Supplies
Before starting your project, you’ll need to gather all your essential tools. For proper Fray Check application, collect the following sewing supplies: a bottle of Fray Check, scrap fabric for testing, small paintbrush or precision applicator, paper towels for spills, and tweezers for detailed work.
Set up your workspace on a flat, well-lit surface with good ventilation—those fumes aren’t anyone’s friend on a stuffy day. You can find sealant product details online, which is useful for understanding the proper application and benefits of using Fray Check.
Cleaning and Drying The Main Fabric
Now that you’ve gathered your supplies, proper fabric cleaning is your next step. Clean fabric guarantees Fray Check adheres correctly and prevents future issues.
Before applying your fray check tool, verify your fabric is:
- Free from dust, oils, and fabric stains
- Completely dry to the touch
- Pre-washed if it’s a new material
- Free from sizing or treatments
For stubborn spots, dab with rubbing alcohol and let dry thoroughly. Different drying methods work for various fabrics, but patience is key here.
Applying Fray Check
You’ll want to apply Fray Check with a gentle squeeze of the bottle, using just enough to coat the fabric’s edge without saturating it.
Once applied, you can spread it evenly with the applicator tip or a small brush to guarantee complete coverage of all potential fraying areas, ensuring complete coverage.
Shaking The Bottle
Now that your supplies are ready, it’s time to tackle the first step of application.
Before using your Fray Check, give the bottle a thorough shake for about 10-15 seconds. This proper shaking guarantees all ingredients blend well, preventing sediment settling at the bottom.
The mixing formula needs agitation techniques to maintain bottle consistency, which directly affects how evenly your sealant application will go. Remember, even distribution equals better results!
This guarantees a durable, stiff finish on the fabric, ensuring a durable and stiff outcome.
Applying Sparingly
When applying Fray Check, less is definitely more. You’ll want to use this liquid sealant sparingly to prevent stiffness and discoloration on your fabric edges.
Follow these application techniques:
- Squeeze gently to release tiny drops along the edge
- Use precision application with the bottle tip for thin, even layers
- Consider a fine paintbrush for delicate areas, avoiding buildup
A light touch prevents staining and guarantees flexibility after drying. To learn more about applying it carefully, explore the product details, which will help you apply Fray Check with the best results and understand the importance of using it sparingly.
Spreading Evenly
Once you’ve dispensed the Fray Check, it’s essential to spread it evenly for effective fraying prevention.
Use applicator types like a small paintbrush or toothpick for precision control.
Consider using a Fray Check paintbrush for even application.
Apply consistent pressure to create a thin, uniform layer thickness – you’ll want just enough to seal without unwanted buildup.
Think of it like frosting a delicate cake; you’re aiming for that perfect coverage that won’t overwhelm your fabrics.
Drying and Inspecting
You’ll need to wait for your Fray Check to dry completely before handling your fabric, which typically takes 15-30 minutes depending on how much you’ve applied.
Once dry, inspect the treated areas carefully for any residue or excess product that might need to be gently removed with a damp cloth, ensuring a clean finish with minimal effort.
Waiting for The Sealant to Dry
Patience pays off when waiting for Fray Check to dry completely.
The liquid seam sealant typically needs 15-30 minutes in ideal conditions, though thicker applications require more time.
Environmental factors like humidity and temperature substantially impact drying time.
For faster drying methods, use a hairdryer on low heat or place the project in direct sunlight.
Don’t rush this vital fray prevention step—proper drying guarantees lasting results, as it is crucial for the lasting results.
Inspecting for Residue
Once your Fray Check has had time to set, you’ll need to thoroughly check for any residue.
Look for white or clear buildup along the fabric edges where you’ve applied the sealant. Hold the material up to good lighting and run your fingers gently over the treated areas, feeling for stiffness or irregularities that might indicate excess product.
This inspection guarantees your sewing project maintains a professional finish.
Removing Excess
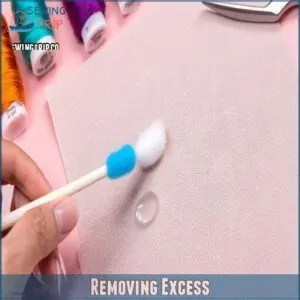
What should you do when you notice excess Fray Check on your fabric? Don’t panic—it’s fixable!
Carefully remove any product build-up before it fully sets:
- Use a damp cloth for still-wet residue
- Apply rubbing alcohol on a cotton swab for semi-dried spots
- Try nail polish remover (acetone) for stubborn areas
- Gently scrape hardened bits with your fingernail without damaging the fabric
Machine Washability
You’ll need to wait a full 24 hours after applying Fray Check before tossing your fabric items into the washing machine.
Once properly dried, your treated edges will maintain their seal through multiple wash cycles, keeping those pesky frays at bay while you focus on more important things than unraveling seams, which is a key benefit of using Fray Check.
Waiting 24 Hours Before Laundering
A vital 24-hour waiting period stands between your Fray Check application and that first wash cycle.
This drying time guarantees the sealant fully cures, maximizing its strength and bonding to fabric edges.
Why wait? Because premature laundering can compromise the sealant’s integrity, potentially undoing all your careful application techniques.
Think of it as giving your fabric’s new protective shield time to properly armor up before facing the washing machine’s battlefield.
Following Washing Instructions
Your fabric’s care tag holds the key to maintaining Fray Check’s effectiveness.
Always follow the specific laundering guidelines listed on your garment when washing treated items. Choose the appropriate wash cycle and water temperature to prevent undue stress on sealed edges.
Most Fray Check applications work with standard fabric care routines, but delicate fabrics might require gentle cycles to preserve both the sealant and the material’s integrity.
Maintaining The Sealant’s Integrity
Longevity is essential in the context of your Fray Check applications.
To maintain the sealant’s integrity, avoid exposing treated fabrics to harsh conditions like bleach or abrasive cleaning methods.
You’ll notice reapplication needs after multiple washes—that’s normal.
Store treated items properly and follow proper drying time (24 hours minimum).
Prolonging the lifespan of your seam sealant guarantees your fabric stays fray-free through many wash cycles, which is crucial for longevity.
Using Fray Check on Delicates
You’ll need a gentler touch when applying Fray Check to delicate fabrics like silk, chiffon, or fine ribbons.
Apply a thin, precise line using the bottle’s tip or a small brush, making sure you don’t oversaturate the material which could leave stiff spots or discoloration.
This reorganization improves readability by separating the introduction from the application instructions, with a focus on the potential risks of oversaturate.
Applying to Buttonholes
Now that your Fray Check is ready for laundering, let’s tackle buttonholes—those notoriously fussy fabric openings.
Apply Fray Check between buttonhole stitch rows before cutting for maximum edge sealing. Use a small brush for controlled application rather than the bottle spout. Allow 15-30 minutes drying time before proceeding with your project.
- Your fingers won’t catch on those pesky frayed threads anymore!
- No more embarrassing buttonhole failures during important meetings
- Say goodbye to that sinking feeling when buttonholes start unraveling
Applying to Ribbons
Ribbons need special attention to prevent those pesky frayed edges. For ribbon edge types from satin to grosgrain, use a brush application tip for better control.
Apply Fray Check to the cut ends with a small paintbrush rather than directly from the bottle. This prevents stains and gives you precision.
Fray Block, conversely, offers superior fabric flexibility.
Hold ribbons over scrap paper while applying to catch any drips and protect your work surface, ensuring a clean and precise application with Fray Check or Fray Block.
Applying to Yarn
Tangled yarn ends won’t be a problem anymore with proper Fray Check application.
For best results, hold the narrow spout directly against yarn ends, ensuring all fibers are coated evenly.
Work over a paper towel to prevent stains.
Unlike soap and water methods that only work on natural fibers, Fray Check provides fabric fray control for all yarn types.
Allow sufficient drying time before handling your project.
Specialized Applications
You’ll find Fray Check works wonders on challenging materials like jeans, elastic, and chiffon when you know the right techniques.
These specialized applications extend beyond basic uses, allowing you to protect your toughest fabrics with the same reliable results, and Fray Check works to achieve this.
Using on Jeans
Preserving your favorite jeans requires special attention to combat fraying.
Apply Fray Check along denim edges, working with various denim types from lightweight to heavyweight.
For distressed jeans, add a thin layer around intentional tears to prevent excessive fraying while maintaining style.
When repairing tears or reinforcing hem durability, use the product sparingly—just a small bead will effectively seal fabric edges without stiffening your comfortable denim, ensuring you can maintain your denim and its style.
Using on Elastic
When working with elastic, stretch it taut before applying Fray Check to prevent fabric edges from fraying.
Apply sparingly using a small brush for precise application methods on various elastic types.
Allow 15-30 minutes between coats and give it 2 hours to dry completely.
This fabric fray treatment maintains stretch retention while avoiding stiffness that could affect your sewing project’s durability, and full strength is reached after 24 hours, ensuring the elastic remains usable and the project’s overall durability.
Using on Chiffon
Chiffon’s ultra-delicate nature requires special care when applying Fray Check. While elastic tolerates heavier application, chiffon demands precision to avoid discoloration.
When sealing chiffon fabric edges, there are specific steps to follow:
- Use the smallest possible amount of fabric sealant for edges
- Apply with a toothpick rather than directly from the bottle
- Test on a scrap piece first to confirm no visible residue forms
Chiffon washability remains intact after proper application if you allow full drying time.
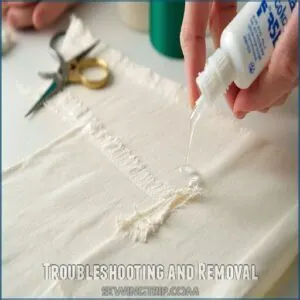
Troubleshooting and Removal
You’ll find fixing Fray Check mishaps isn’t as scary as finding a stain on your wedding dress.
When spots appear or you need to reapply, these simple solutions will help you dissolve unwanted residue and refresh your fabric protection.
Dissolving Fray Check
While specialized fabrics require careful handling, sometimes you’ll need to completely dissolve Fray Check.
Rubbing alcohol is your most effective solution—soak the affected area for at least 30 minutes to break down this nylon-based sealant.
Acetone works too, especially on stubborn spots or to thin thickened product.
Always test these alcohol solvents on an inconspicuous area first, as they may affect fabric color or cause fabric damage during residue removal.
Removing Unwanted Spots
Despite your careful application, unwanted Fray Check spots happen.
For immediate residue removal, grab rubbing alcohol or acetone (nail polish remover) and apply it to the stain before it dries.
Dab gently—don’t rub—to avoid fabric damage.
Prevention tips: place cardboard under your project while working and keep a cotton swab handy for quick cleanup of any accidental drips, following these prevention tips.
Reapplying Fray Check
You’ll need to touch up your Fray Check when signs of wear and tear become visible.
For maximum fabric durability, follow these frequency guidelines: reapply every 10-15 washes on high-stress areas or after noticing sealant degradation.
Add thin application layers rather than one thick coat to protect fabric edges without stiffness.
Remember, frequent washing and friction accelerate breakdown, so monitor seams regularly—especially on frequently used items where sewing techniques might need reinforcement to ensure maximum fabric durability.
Frequently Asked Questions (FAQs)
What is Fray check & how do you use it?
Fray Check is a clear liquid that stops fabric edges from unraveling.
To use it, apply sparingly along raw edges, let it dry for 15-30 minutes, then wash after 24 hours for full durability.
What is a frailty score and how is it calculated?
A frailty score evaluates an individual’s vulnerability to adverse health outcomes.
You calculate it by evaluating physical, cognitive, and social factors using scales like the Clinical Frailty Scale, assigning a rating based on overall condition.
Does fray check really work?
Over 60% of crafters swear by Fray Check for sealing edges, and yes, it works.
It keeps fabric intact, prevents pesky unraveling, and dries clear.
Just apply sparingly for neat, professional-looking results.
How to use Fray check on interfacing?
To use Fray Check on interfacing, test a small area first.
Apply a thin line along edges using the applicator tip. Let it dry completely, around 15-30 minutes.
Avoid overusing to prevent stiffness.
How do you fix a fray check?
When Fray Check hardens or clogs, think of it like an old ketchup bottle—you just need a little troubleshooting.
Unclog the nozzle with a pin, soak dried residue in acetone, and you’re good!
Why do you need a fray check?
You need a fray check to keep fabric edges neat and prevent threads from unraveling.
It’s like giving your sewing projects a safety net, ensuring they last longer without turning into a frayed mess.
How long to let Fray Check dry before washing?
Don’t worry about messing it up—Fray Check dries clear.
Let it sit for at least 24 hours before washing.
This gives it time to fully cure, ensuring your fabric edges stay perfectly sealed.
Is Fray Check just glue?
Fray Check isn’t just glue; it’s a liquid sealant designed specifically to stop fabric edges from fraying.
Unlike regular glue, it dries clear, stays flexible, and resists washing—perfect for keeping fabric edges intact, making Fray Check a unique solution.
Does Fray Check wash away?
It’s not disappearing ink; Fray Check doesn’t wash away.
Once it dries, typically after 24 hours, it creates a durable seal that withstands machine washing and drying, keeping your fabric edges neat and intact.
Can Fray Check be used on leather?
You can use Fray Check on leather, but it’s not ideal.
Leather edges don’t fray like fabric.
Instead, use edge burnishing or specific leather sealants for a cleaner, professional finish that lasts.
Conclusion
Think of Fray Check as your sewing project’s safety net, holding loose threads in place.
By mastering how to use Fray Check—applying it sparingly, letting it dry fully, and targeting delicate areas like buttonholes—you’ll achieve polished, professional results every time.
Its clear, flexible finish offers protection without compromising your fabric’s look or feel.
Whether working with jeans, ribbons, or chiffon, this simple tool keeps fraying at bay, ensuring your creations stand the test of time.


