This site is supported by our readers. We may earn a commission, at no cost to you, if you purchase through links.
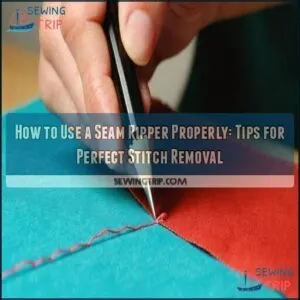 To use a seam ripper properly, hold it like a pencil for control.
The pointed tip slides under stitches, while the curved blade or safety ball cuts threads cleanly.
For tight seams, gently pierce a stitch, then lift and slice—don’t rush, or you might tear the fabric.
To remove long seams, guide the safety ball along the thread, letting the blade do the work.
Work on a flat, well-lit surface to avoid mistakes, and brush away loose threads as you go.
Mastering small, controlled movements is key to efficiency and precision.
Choosing the right ripper adds to your success!
Table Of Contents
Key Takeaways
- Use the sharp point of the seam ripper to slide under stitches and cut them cleanly without damaging the fabric.
- Always keep the red ball against the fabric to prevent tearing or creating holes, especially on delicate materials.
- Work in a well-lit workspace to see stitches clearly and avoid mistakes during stitch removal.
- Maintain your seam ripper by cleaning the blade after every use, storing it properly, and sharpening or replacing dull blades as needed.
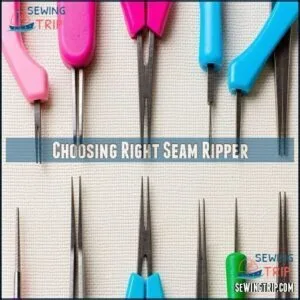
Choosing Right Seam Ripper
Picking the right seam ripper can make removing stitches faster and protect your fabric from damage.
The right seam ripper speeds up stitch removal while safeguarding your fabric, making it an essential tool for every sewing kit.
Look for one with a sharp blade, a comfortable grip, and the right size for your project.
Essential Parts of a Seam Ripper
A seam ripper has four essential parts: the handle, blade, sharp tip, and the little red ball.
The blade’s sharpness guarantees precise cuts, while the red ball glides smoothly along fabric without damage.
Handle ergonomics boost comfort during use, and point width affects control.
You can find replacement seam ripper parts if any become damaged.
Material quality impacts durability, making this sewing tool indispensable for removing stitches accurately in any seam ripper tutorial.
Selecting The Right Size and Style
Choosing the right seam ripper is key for precise stitch removal.
Consider these:
- Handle ergonomics: Thicker, ergonomic handles reduce hand fatigue.
- Blade sharpness and point width: Sharp blades and fine points handle detailed work better.
- Size preference: Larger seam rippers offer control, while compact ones fit smaller spaces.
Seam rippers come in various sizes and styles.
Find one that fits your sewing tools guide and sewing kit needs.
Evaluating Durability and Sharpness
When picking a seam ripper, evaluate durability and sharpness carefully.
A strong blade guarantees effective unpicking without snagging fabric.
Check the blade material and point integrity for long-lasting cutting performance.
Test handle strength to avoid breakage during use.
Here’s a quick comparison to help:
| Feature | Ideal Option | Why It Matters | Common Issue |
|---|---|---|---|
| Blade Material | Stainless steel | Resists rust, stays sharp | Dulls with heavy use |
| Point Integrity | Needle-sharp | Precision unpicking | Blunts quickly |
| Handle Strength | Ergonomic, sturdy plastic | Prevents snapping | Weak materials break |
| Longevity Testing | Trusted brands | Built to last | Poor quality weakens |
Assessing Comfort and Ergonomics
A seam ripper should feel like an extension of your hand.
Look for an ergonomic seam ripper with a handle design that reduces hand fatigue during long sewing sessions.
Tool weight matters—too heavy can strain, too light may lack control.
Grip comfort guarantees precision, while user posture improves with a well-balanced tool.
It’s a sewing kit essential.
Using Seam Ripper Properly
To use a seam ripper properly, start by exposing the stitches.
Pull the fabric apart gently to locate threads clearly—this boosts Stitch Visibility.
Insert the sharp tip under a stitch, keeping the red ball against the fabric for Fabric Protection.
Push the blade softly to slice the thread, Avoiding Holes.
Patience Matters, especially with stubborn seams or sewing mistakes.
Consider assessing seam allowances to determine if alterations are possible.
Practice Technique to unpick seams efficiently over time.
Always guide the seam ripper carefully to remove stitches without damaging your project.
Preparing Workspace Carefully
Set up your workspace with good lighting and a clean, flat surface to keep everything visible and under control.
Gather your tools and materials nearby, so you’re not scrambling mid-task, and ensure that your workspace remains clean.
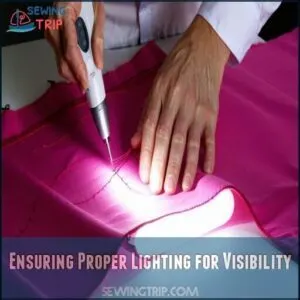
Ensuring Proper Lighting for Visibility
Good lighting is vital when using a seam ripper to remove stitches.
Position task lighting directly on your project to reduce glare and prevent eye strain.
Magnification options can help with precision, especially on detailed work.
Proper lighting guarantees you see every thread clearly, making it easier to unpick seams without mishaps.
This sewing tip improves efficiency and accuracy.
To further enhance visibility, consider using LED light strips for brighter illumination, which is crucial for good lighting and precision work.
Organizing Tools and Materials
Before using your seam ripper, set up your workspace.
Keep sewing tools, sewing notions, and essentials like scissors and thread handy.
Invest in smart storage solutions for sewing supplies.
Arrange your workspace layout for easy tool accessibility.
Practice material sorting by size or type for efficiency.
Good inventory management guarantees you’ll grab the right item when needed, every time, with proper management.
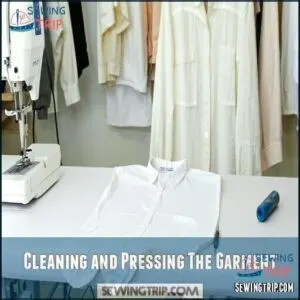
Cleaning and Pressing The Garment
Cleaning your garment before thread removal makes a big difference.
Stains or dirt can damage fabrics during sewing techniques.
Pressing it smooth makes better visibility for seam ripper work.
Follow these steps:
- Wash and dry clothes per fabric care instructions.
- Remove stains gently before ironing.
- Use the correct ironing techniques for fabric type.
- Store clean garments properly to prevent creases, which is crucial for maintaining the garment’s quality and making the thread removal process easier, and ensuring the garment looks its best after seam ripper work.
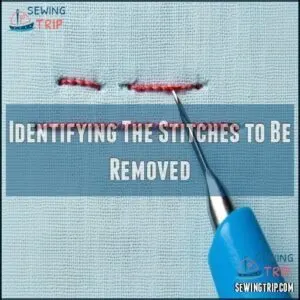
Identifying The Stitches to Be Removed
Spotting the right stitches makes seam removal easier. Look closely at the stitch type, thread color, and how seams are constructed. Check the fabric weave—it reveals the stitch purpose, like basting or decorative.
| Factor | What to Look For | Why It Matters |
|---|---|---|
| Stitch Type | Straight, zigzag, reinforced | Guides your seam ripper use |
| Thread Color | Matches or contrasts with fabric | Helps pinpoint stitches |
| Seam Construction | Single or double stitching | Indicates removal challenges |
Focus helps avoid errors!
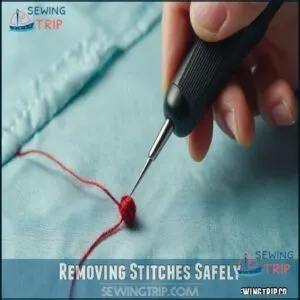
Removing Stitches Safely
When removing stitches, it’s important to work slowly and stay precise to protect your fabric from damage.
Use the seam ripper’s sharp blade and safety ball properly to cut threads without tearing the material.
Handling Delicate or Slippery Fabrics
Keep delicate fabrics steady by sandwiching them with tissue paper for better Fabric Stabilization.
Avoid pulling tightly to protect the grainline.
Slow ripping with a seam ripper minimizes damage, especially on fabrics with high Stitch Density.
Adjust Needle Size to match, reducing tension issues.
Gentle Tension Control as you remove stitches guarantees precision without tearing or distorting the fabric.
Tackling Tight or Reinforced Seams
Tight, reinforced seams can be tricky, especially with bar tacks or dense stitches.
Approach with patience and precision, using your seam ripper’s sharp point to loosen threads without tugging.
- For bar tacks, slice threads one at a time, avoiding fabric snags.
- Layered fabric handling requires light pressure to prevent damage.
- Industrial seams may need deliberate cuts along reinforcing threads.
Working With Knit Fabrics and Stretch Stitches
Knit fabrics stretch, so unpick stitches carefully to avoid runs.
Insert the seam ripper’s point under one stitch at a time and cut gently, keeping the sharp edge away from the fabric.
Stabilize the knit while unpicking, and choose needles with proper tension for stretch stitches.
| Problem | Risk | Solution | Result |
|---|---|---|---|
| Stretchy knits | Creates holes | Unpick stitch-by-stitch | Fabric stays intact |
| Tight stretch stitches | Fabric pull tears | Stabilize while removing | Keeps seams clean |
| Deep-set stitches | Hard to access | Use pointed seam ripper | Precise stitch removal |
| Improper stitching | Distorts fabric | Check tension, needle | Smooth, durable seams |
The key to successful unpicking is to work carefully and use the right tools, like a seam ripper, to minimize damage to the knit fabric.
By following these steps and being mindful of stretch stitches, you can unpick your work with confidence.
Removing Decorative or Topstitching
Removing decorative stitching or topstitching requires patience to avoid fabric damage.
Use your seam ripper’s point and blade carefully for intricate stitching.
- Lift thread with the pointed end, snipping a few stitches.
- Work from the underside for better precision.
- Cut every few stitches, then pull the thread.
- Hold fabric taut for clean removal.
- Match thread colors to spot stitches easily, ensuring a clean removal.
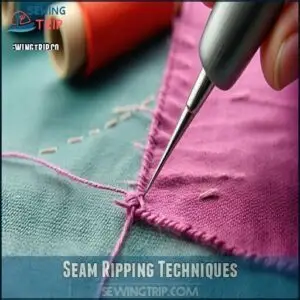
Seam Ripping Techniques
Using a seam ripper correctly starts with knowing how to position its parts for different stitches. With the right techniques, you can remove threads cleanly while keeping your fabric intact.
Inserting The Point Under The Stitch
Start by sliding the sharp point under a stitch, making sure only the thread is caught. The thread catch is key—angle matters! Maintain light fabric tension to expose stitches, facilitating accurate point placement.
Use a gentle push to guide the seam ripper under individual stitches without damaging fabric. Here’s a quick stitch-removal guide:
| Step | Action | Key Tip |
|---|---|---|
| 1. Identify | Find the stitch to remove | Work in good lighting |
| 2. Insert | Slip the point under the thread | Angle matters! |
| 3. Align | Position fabric for easier handling | Apply slight tension |
| 4. Push | Gently push the ripper under the stitch | Avoid piercing fabric |
| 5. Progress | Repeat for each individual stitch | Patience guarantees results |
Repeating the process for each individual stitch, with patience, will help ensure that the stitches are removed cleanly and without damage to the fabric.
Pushing The Blade to Cut Threads
Gently push the seam ripper’s blade beneath the thread with controlled pressure. Keep an eye on the stitch angle while maintaining fabric tension to avoid snags.
The sharpness of the blade guarantees a clean cut, so guide it steadily. This technique is key in how to unpick stitches efficiently without damaging your fabric.
Alternative tools can also aid seam removal. Remember, precision matters.
Using The Safety Ball for Continuous Cutting
The safety ball on a seam ripper guarantees fabric protection during continuous cutting.
Align the ball against the fabric, blade facing the stitches, and slide smoothly along the seam.
Use gentle, controlled pressure to avoid snags, and remember that ball size matters for comfort and efficiency, allowing you to balance speed vs. accuracy when removing rows of stitches in one motion.
Removing Loose Threads and Debris
Once stitches are cut cleanly, threads and fabric lint often linger. Use Thread Removal Tools like tweezers or small brushes to pluck remaining threads.
For static cling solutions, run a dryer sheet over the surface. Adhesive lint rollers also work well for debris removal methods. Neat thread handling keeps projects pristine.
Here’s a quick guide:
| Task | Tool Example | Tip |
|---|---|---|
| Picking Threads | Tweezers | Work gently to avoid pulls. |
| Lint Control | Dryer Sheet | Minimize static cling. |
| Debris Clean-Up | Adhesive Roller | Roll in one direction. |
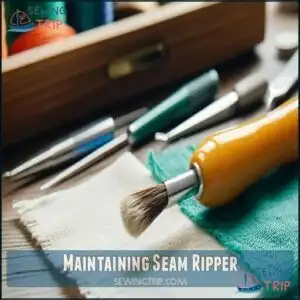
Maintaining Seam Ripper
Taking care of your seam ripper keeps it sharp and effective, ensuring it performs well every time.
By cleaning the blade, storing it properly, and checking for wear, you’ll extend its life and avoid frustrating snags, which helps in taking care of the overall tool.
Cleaning The Blade After Each Use
Cleaning your seam ripper blade is key to keeping it effective. Regular care prevents lint buildup and dulling.
Follow these steps:
- Use a soft cloth or alcohol wipe for blade residue removal.
- Avoid harsh cleaners that can damage the metal.
Checking your seam ripper after each sewing session to guarantee safe cleaning tools maintain its sharpness and efficiency is crucial. Regular maintenance helps in extending equipment lifespan, which is vital for sewing sessions.
Sharpening or Replacing Dull Blades
Dull seam ripper blades reduce efficiency.
Sharpening methods, like using 000-grade steel wool or a bead reamer, can extend your blade’s lifespan. A bead reamer’s roughened surface acts like a file, allowing for controlled sharpening.
Alternatively, replacing the blade might make financial sense. Compare costs and frequency of replacement to decide.
For ergonomic seam rippers like Dritz, investing in replacements or sharpening tools guarantees fabric repair stays smooth and effective.
| Option | Tool/Method | Pros | Cons |
|---|---|---|---|
| Sharpening | Steel wool | Affordable, reusable | Time-consuming |
| Sharpening | Bead reamer | Effective, controlled | Initial cost |
| Blade replacement | New blade model | Quick, convenient | Adds expense |
| Bulk seam rippers | Multiple tools | Cost-efficient | Potential waste |
Proper Storage to Prevent Damage
Store your seam ripper in a dry, cool spot to prevent rust and maintain blade protection.
Avoid tossing it into crowded drawers, which can compromise handle integrity.
Instead, use a small case or organizer for safe placement.
Humidity control is vital, so keep it away from damp areas.
Proper storage guarantees your seam ripper stays sharp and ready for precise stitching tasks.
Inspecting for Wear and Tear
After proper storage, always check your seam ripper for issues.
Focus on these:
- Blade Sharpness: A dull blade struggles with stitches, risking fabric damage.
- Handle Stability and Tip Condition: Wobbly handles or bent tips make stitch removal harder.
- Ball Integrity and Rust Prevention: A damaged ball can snag fabric, while rust weakens performance.
Replace or fix if needed.
Frequently Asked Questions (FAQs)
What is the difference between a stitch ripper and a seam ripper?
Imagine fixing a fabric mistake—you might wonder if a stitch ripper and seam ripper differ.
They don’t.
Both terms refer to the same essential sewing tool used to unpick stitches efficiently, protecting fabric.
Should you use a seam ripper?
Absolutely, you should use a seam ripper.
It’s a game-changer for fixing sewing mistakes, removing bad stitches, or even opening buttonholes.
With care, it preserves fabric while saving you time and frustration.
How to open up a seam with a seam ripper?
A seam ripper is your fabric’s gentle surgeon.
Slide the point under a stitch, cut carefully with the blade, and pull threads apart.
Use the red ball to protect fabric, avoiding tears or holes.
How do you rip a fabric with a seam ripping tool?
Gently slide the pointed tip under a stitch to loosen it, and guide the blade’s curve through the thread.
Use the red ball for safety, keeping fabric intact while pulling stitches apart smoothly.
How do you sharpen a seam ripper?
Think of sharpening your seam ripper like reviving a dull knife.
Use a whetstone or fine-grit sandpaper to gently hone the blade’s edge.
Test for sharpness on spare thread, ensuring precision without overdoing it.
What is the right way to use a seam ripper?
Start by sliding the sharp point under a stitch, ensuring it catches just the thread.
Gently push until the blade cuts through.
Use the red ball side to avoid scratching or tearing delicate fabric.
What is the little red ball on a seam ripper for?
Nearly 80% of sewists praise the red ball’s role in fabric protection.
It prevents tears by gliding smoothly along seams while cutting, letting you remove stitches efficiently without damaging your material—perfect for delicate fabrics!
How to use a seam ripper to remove a patch?
Slip the sharp tip under the patch’s edge, cutting the stitches holding it.
Use the red ball against the fabric to prevent damage.
Focus stitch-by-stitch for control, ensuring no tears or holes.
How do you use a ripper?
Using a seam ripper is like wielding a tiny sword of precision—insert the pointed tip under the stitch, gently guide it to the blade, and slice through.
Repeat carefully to protect your fabric.
What is the proper way to use a seam ripper?
Hold the fabric taut, insert the seam ripper’s sharp point under a stitch, and guide it gently to the blade.
Use the red ball to protect fabric, cutting stitches cleanly without damaging your project.
Conclusion
Mastering how to use a seam ripper properly guarantees your sewing projects stay on track.
Precision is key—focus on small, steady movements and let the tool do the work.
A well-lit space makes a big difference, and understanding fabric types guides your technique.
Keep your seam ripper clean, sharp, and stored safely for peak performance.
With practice, you’ll remove stitches effortlessly, avoiding fabric damage and saving time, making every sewing challenge more manageable and precise.

