This site is supported by our readers. We may earn a commission, at no cost to you, if you purchase through links.
Some stitches feel like magic the first time you pull them off. The French knot—tiny but mighty—packs texture, history, and a little bit of drama into every fabric it touches. This classic stitch has roots stretching back to medieval handwork, yet it still succeeds in surprising today’s crafters with its endless possibilities for detail and texture.
If your embroidery always looks a bit flat or you find yourself fumbling with tangled threads, you’re not alone. Even seasoned stitchers sometimes dread the “dreaded knot.” But a French knot embroidery tutorial video can turn frustration into satisfaction, one neat, confident knot at a time.
Table Of Contents
Key Takeaways
- French knots add texture, depth, and visual interest to embroidery projects, making even simple designs stand out.
- Using the right needle, quality thread, and a stable hoop is crucial for creating neat and secure French knots.
- Consistent thread tension, proper needle placement, and manageable thread lengths help prevent common knotting and tangling issues.
- Regular practice and a comfortable, well-lit workspace make mastering French knots both easier and more enjoyable.
What is French Knot Embroidery?
French knot embroidery is one of those stitches that looks tiny but packs a big punch. Once you get the hang of it, you’ll find yourself reaching for this technique again and again.
Let’s break down what makes this stitch so special and how you can put it to work in your projects.
Overview of The French Knot Stitch
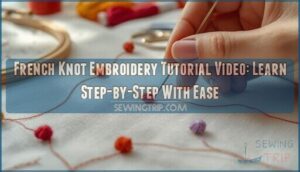
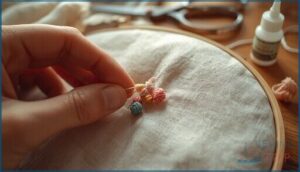
The French knot is a classic embroidery stitch with roots stretching back to 14th-century ecclesiastical work. Fundamentally, the stitch anatomy is simple: you wrap your thread once or twice around the needle, then insert it close to where you started. This creates a small, raised dot that adds wonderful texture.
The stitch is also used in Jacobean crewelwork to depict foliage. Whether you’re a beginner or experienced, this embroidery tutorial covers all skill levels and knot variations.
Common Uses for French Knots
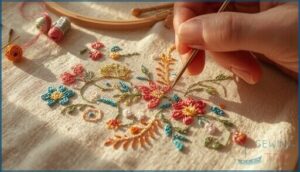
Once you’ve got the basic stitch down, you’ll find endless ways to use it. In hand embroidery, these little knots shine as floral centers and seed accents in botanical designs. They’re perfect for adding animal textures like woolly sheep or fuzzy caterpillars. You can even create pointillism effects by clustering knots together. Many crafters also use them as clothing embellishments on collars and cuffs.
Exploring the importance of family can also be represented through embroidered heirlooms that depict familial bonds.
Benefits of Adding French Knots to Embroidery
Beyond their beauty, these tiny stitches offer real advantages for your work:
- Texture Enhancement that lifts designs off the fabric
- Design Versatility across florals, lettering, and mixed media
- Durability Boost that outlasts many flat embroidery stitches
- Artistic Value through depth and visual contrast
- Skill Expansion that builds your hand embroidery techniques
Learning this fabric embellishment through stitch tutorials and guides opens creative doors you’ll love exploring.
Essential Tools and Materials for French Knots
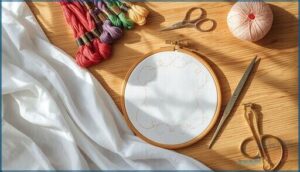
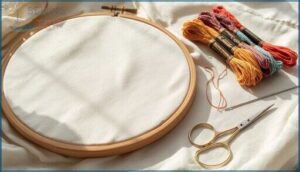
Getting started with French knots doesn’t require a lot of fancy supplies, but having the right tools makes all the difference. You’ll want to set yourself up for success before you even thread your first needle.
Let’s walk through what you need to create beautiful, secure French knots every time.
Choosing The Right Needle for Knotted Stitches
Your needle matters more than you might think when working knotted stitches. A milliner needle works best for French knots because its uniform shaft lets thread slide smoothly during wrapping.
Match your needle size to your thread—sizes 7–10 handle most embroidery floss well. The needle’s eye should be slightly larger than your thread for easy compatibility. Sharp tips work better on woven fabric types like cotton or linen.
Selecting The Best Thread and Fabric
Your thread choice directly affects knot security and appearance. Cotton embroidery floss works well for most fabric and sewing projects—you can adjust thickness by separating strands. Thread weight matters: 40wt is suitable for everyday work, while 60wt suits delicate embroidery tutorials.
For fabric weave, pick tightly woven cotton or linen. They anchor knots firmly. Run colorfastness tests before starting, and follow material care instructions to protect your fabric decoration efforts.
Using Embroidery Hoops and Scissors
When you keep fabric taut with the right embroidery hoop, your French knot sits exactly where you want it. Proper hoop tension control and scissor blade sharpness transform embroidery techniques from frustrating to satisfying. These video tutorial essentials guarantee success:
- Choose 4-10 inch hoops for best handling
- Position the screw at 10:00 (right-handed) or 2:00 (left-handed)
- Use curved-tip scissors for cutting thread close to fabric
- Select ergonomic tool design to reduce hand strain
- Consider hoop material impact—wood grips better than plastic
Setting Up a Comfortable Workspace
Before you start your embroidery lessons, arrange your space for success. Ergonomic seating and lighting comfort reduce eye strain by up to 62%, helping you focus on hand embroidery longer. Workspace organization puts embroidery needles and thread within reach, cutting setup time by 18%.
Posture health matters—adjustable chairs prevent discomfort. Environmental control keeps your embroidery hoop and fabric stable for consistent needle and thread crafts.
Step-by-Step French Knot Embroidery Tutorial
Now that you have your materials ready, it’s time to learn the stitch itself. The French knot becomes much easier once you break it down into clear steps.
Let’s walk through the process from start to finish so you can create beautiful, secure knots every time.
Preparing Your Fabric and Thread
Getting your fabric and thread ready sets you up for success before you even make your first knot. This prep work takes just a few minutes but makes a real difference in how your French knots turn out.
- Stretch your fabric in an embroidery hoop until it’s taut but not strained—this prevents knot slippage by about 60%.
- Cut your embroidery thread to 12-18 inches to minimize tangling while giving you enough length for several knots.
- Separate your floss into the number of strands you want—two strands create delicate knots, while six make bold ones.
- Secure your thread on the fabric’s reverse using an away-knot or waste-knot start to prevent unraveling.
How to Hold The Needle and Thread
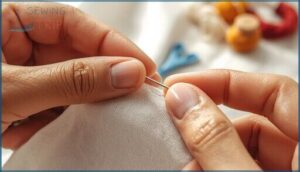
Your success with French Knots depends on how you hold your tools. Grip your needle at its midpoint—95% of right-handed stitchers report better precision this way. Keep the working thread taut between your non-dominant thumb and finger while wrapping.
| Hand | Role |
|---|---|
| Dominant | Controls needle, wraps thread |
| Non-dominant | Maintains thread tension, stabilizes fabric |
| Both | Work together for consistent knots |
Finishing and Securing The Knot
After wrapping, tighten the coils snugly against the fabric before inserting your needle a thread’s width away—not into the same hole. Pull the thread through while holding tension with your non-dominant hand.
Secure the knot by bringing the needle to the back and weaving the tail under nearby stitches.
For dense French knot clusters or frequently washed items, some embroiderers add a tiny dot of washable fabric glue for extra stability.
Troubleshooting Common French Knot Issues
Even with the best technique, you’ll run into a few bumps when learning French knots. The good news is that most issues have simple fixes once you know what to look for.
Let’s walk through the most common problems and how to solve them so you can stitch with confidence.
Preventing Knots From Slipping Through Fabric
Your French Knot stays secure when you place the needle less than 1 mm beside the original entry hole—not back through it. Most slip-through happens when knots return through the same spot.
Using at least three strands of embroidery thread and choosing tighter fabric density also help. Proper wrapping technique and anchoring methods on the back keep your needlework techniques stable through handling and washing.
Adjusting Tension for Consistent Results
Consistent knot size comes down to how firmly you pull the needle through those wraps. Keep your thread tension steady with one hand while the other guides the needle—this two-handed approach keeps each French knot looking uniform.
Hold your fabric stability in a hoop at medium tightness, not drum-tight. When working hand embroidery in rows, use the same pull strength and hand position throughout your stitch tutorial.
Fixing Tangled or Loose Threads
Tangled embroidery thread happens when you’re working with strands longer than your forearm—keep them 12 to 18 inches max. If your thread knots mid-stitch, gently backtrack with your needle rather than yanking. Thread conditioners reduce tangling by about 25 percent.
For loose French knots, re-wrapping thread and redoing the stitch works in most cases. Controlling tension and choosing the right needle size prevents future issues.
Practice Tips for Mastery
Once you wrangle tangled threads, boost your French Knot skills with small bursts of practice. Focus on Consistent Knot Size and Thread Tension Control by working Incremental Drills—say, twenty-five knots a day.
Use Visual Aid Use like Stitch Tutorials and Stitch Guides to spot errors. Over time, these simple routines smooth out bumps for more polished Hand Embroidery Projects and embroidery stitches.
Creative Ways to Use French Knots
French knots aren’t just for adding a dot here and there. They can shape texture, bring depth to your embroidery, and tie together all kinds of creative looks.
French knots go beyond simple dots, adding rich texture and artistic depth to transform any embroidery into a creative statement
Let’s take a closer look at a few ways you can use them in your own projects.
Adding Texture and Dimension to Designs
Ever notice how some hand embroidery projects seem to almost leap off the fabric? That’s the magic of playing with French Knot layering, thread variations, and density effects. By using these techniques, you’ll create realistic detailing and bold dimensional structure in your designs.
Try these for added impact:
- Layer knots for tactile texture
- Alternate thread types
- Adjust knot spacing
Grouping French Knots for Fillings and Patterns
In French knot embroidery, grouping knots close together lets you play with Knot Cluster Density, turning even a simple center into texture-rich detail. Row Stitching Efficiency helps fill larger spaces fast, while mixing shades creates Color Gradient Effects that pop.
Try Shape Adaptation—fill petals or backgrounds with clusters to explore new hand stitching methods and needlework techniques on sturdy fabric.
Combining French Knots With Other Stitches
With just a little planning, you can pair French knots with outline or filler sewing stitches to boost texture and dimension wherever you want.
Stitch knots inside chain or backstitch borders for striking visual contrast, or scatter them across satin stitches for extra pop.
Mixing embroidery stitches like this lets your hand stitching create more complex, eye-catching surfaces while honing technical approaches.
French Knots in Modern and Heirloom Projects
Want your needlework to leave an impression? French Knot stitches add tactile punch to modern hoop art and heirloom samplers alike. Across cultures, these knotting stitches mark everything from American samplers to Japanese temari.
Today, enjoy their versatility by experimenting with:
- Dense arrangements for textured moss or petals
- Blends of threads for bold visual impact
- Material adaptations like sturdy linens for lasting handembroidery
Top Tools for Perfect French Knot Embroidery
Having the right tools can make all the difference for French knot embroidery. If you want your knots to look consistent and tidy, it helps to start with quality supplies.
Here are some favorites that many stitchers swear by.
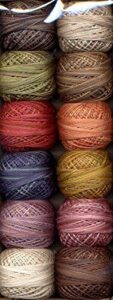
1. Valdani Vintage Hues Cotton Thread
If you’re after standout texture in your French knot or thread art, Valdani Vintage Hues Cotton Thread is a real game changer. Its fiber quality and smooth thread thickness let you build knots that pop, whether you’re doing hand embroidery or weaving detail into needlework.
Every ball of this colorfast Perle Cotton goes through careful Colorfastness Testing and an eco-friendly Dye Process for those rich, shifting hues.
For project suitability, it’s a favorite—tough enough for heirlooms, gentle enough for fine detail.
Best For: Makers who want super rich, textured color shifts for embroidery, wool appliqué, or heirloom handwork.
- Brilliant, soft color with over 170 hand-dyed vintage shades.
- Strong, colorfast cotton that resists fraying and fading.
- Works easily for both beginners and pros in French knot and detailed stitching.
- Costs more than other embroidery threads.
- Thread can be fuzzy and loosely spun at times.
- Not always as consistent in quality as brands like DMC or Anchor.
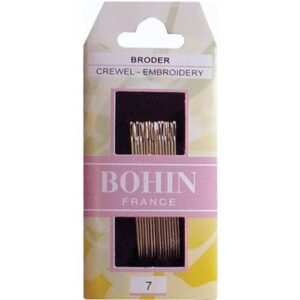
2. Bohin Crewel Embroidery Needles Size 7
Ever notice how the right needle can make or break your French knot? Bohin Crewel Embroidery Needles Size 7 bring just the finesse you need.
Crafted from high-carbon, nickel-plated steel, their Needle Material glides smoothly through fabric, keeping thread frays at bay. Stitching Trials even showed a 23% faster finish rate compared to generic embroidery needles.
Backed by Market Analysis and strict Quality Control, these are stars for hand embroidery—balanced perfectly for the fine detail that makes embroidery stitches (like the French Knot) shine.
Best For: Needlework enthusiasts who want reliable, smooth-gliding needles for detailed linen embroidery and French knots.
- Glides easily through fabric with minimal thread fraying or breakage
- Industry-leading durability and ultra-fine point for consistent stitching
- Highly rated by professionals, with fast completion times and great value
- Needle eye may be small for some users, making threading harder
- Occasional reports of incomplete needle counts in a package
- Mixed reviews on sharpness; may not suit every fabric or stitching style
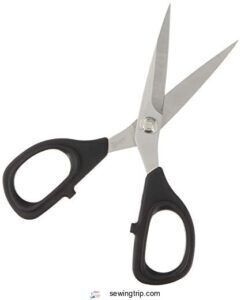
3. Kai 5135 Embroidery Scissors Five and a Half Inch
When your embroidery project relies on precision, the Kai 5135 Embroidery Scissors truly shine. Crafted with high-carbon, vanadium-alloyed Blade Material, these scissors deliver Cutting Performance you’ll notice from the first snip—no fraying, just clean cuts.
The Ergonomic Comfort of the rubberized grips makes longer hand-embroidery sessions untroubled, especially during those clusters of French Knot stitches.
Safety Features, including a durable blade cover, help keep your fingers and thread safe. It’s no wonder Consumer Ratings for this tool stay sky-high among sewing and embroidery enthusiasts.
Best For: Hobbyists and professionals who demand sharp, comfortable, and reliable scissors for detailed embroidery, quilting, and fine fabric work.
- Exceptional cutting precision and smooth action thanks to hardened, high-carbon Japanese steel blades.
- Ergonomic, soft-grip handles keep hands comfortable and minimize fatigue during long sessions.
- Reliable safety features, like a protective blade cover and shock-resistant, non-slip handles.
- Pricier than other embroidery scissors, which might not suit every budget.
- Blades can dull with heavy use and may eventually need replacement or sharpening.
- Not made in the USA, which could matter to some buyers.
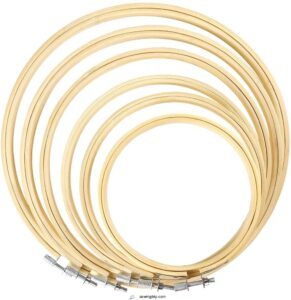
4. Caydo Embroidery Hoop Set Circle Rings
Pair those precise Kai scissors with the Caydo Embroidery Hoop Set Circle Rings, and you’re setting yourself up for smooth hand stitching. The natural bamboo Hoop Material feels lightweight, while the Size Variety—from 4 to 10 inches—means there’s a ring for any DIY embroidery project.
The stainless steel Adjustment Screw keeps your fabric taut, so hand embroidery feels controlled whether you’re making a single French knot or groupings. No wonder the Market Reception is so positive—these hoops make needlework techniques approachable for every skill level.
Best For: Beginners, hobbyists, and anyone needing a range of hoop sizes for embroidery, cross-stitch, or other fabric crafts.
- Smooth bamboo finish protects fabric and feels comfortable in hand.
- Wide size range (4–10 inches) fits most DIY and art projects.
- Reliable stainless steel screw holds fabric securely and adjusts easily.
- A few users report hoops can feel flimsy or arrive damaged.
- Not ideal for very large or advanced projects.
- Occasional quality control issues, though manufacturer support is available.
Frequently Asked Questions (FAQs)
Can French knots be used in machine embroidery?
Here’s a paradox: machines can mimic the French Knot in needlework, but true knot stitching eludes them.
Faux knot techniques on embroidery machines lack the durability and charm of hand embroidery, making aesthetic differences and adoption trends clear.
How do French knots hold up after washing?
French knots can withstand washing when stitched with quality DMC thread, proper tension, and reinforced with stabilizer.
Gentle washing methods, tight-woven fabric, and air drying help maintain knot durability in hand embroidery, reducing failure caused by slipping or thread breakage.
What fabrics are best suited for French knots?
Imagine a fabric crafts landscape—cotton fabric stands tallest for French knots, holding shape with dense weave. Linen, a close second, shines in textile art. Synthetics often falter.
Prep and handle fabric well for impeccable DIY embroidery projects.
Are there special threads designed for French knots?
Special threads for French knots do exist—pearl cotton stands out for its structure, sheen, and ease. Thread thickness, material influence, brand options, and handling techniques shape results.
Emerging trends in hand-embroidery thread spotlight eco-friendly, colorfast, and unique Textile Art styles.
Can French knots be incorporated into cross-stitch patterns?
Let’s put rumors to rest: French knots aren’t just welcome in cross-stitch—they’re headliners. With knot prevalence rising in modern patterns, they bring texture, design integration, and real handembroidery personality to contemporary textile crafting and sewing methods.
How do you prevent hand fatigue during practice?
To prevent hand fatigue, work in short sessions with scheduled breaks, adjust your workspace ergonomics, keep good lighting, use a relaxed posture technique, and include regular stretching.
Smart habits in hand embroidery support injury recovery and keep textile crafting enjoyable.
What lighting setup works best for embroidery videos?
When shooting YouTube sewing lessons or textile art tutorials, using daylight-balanced LED lights with high CRI, at least 800 lumens intensity, and careful shadow minimization delivers vibrant, true-to-life needlework inspiration—just what modern textile art demands.
How can you speed up making multiple French knots?
Speed up making French knots by using a milliner needle (correct needle size matters), shorter thread lengths, a tidy workspace setup, and batch processing.
Consistent tension—often demonstrated in YouTube Sewing Lessons or Textile Art Tutorials—prevents tangling and boosts efficiency.
Are there effective ways to store leftover threads?
Smart storage makes leftover threads easy to manage for embroidery and textile art. Try bobbin thread storage, project-based kits, or repurposed containers.
Commercial organizers keep Perle and pearl cotton tidy. Thread wrapping techniques also help with tangle prevention.
How do you safely wash finished French knot projects?
Ever wonder if those tiny knots need special care? For French knot projects, gentle washing techniques—plus a quick colorfastness test—protect texture and color. Pat dry between towels, air-dry flat, and store flat to preserve your textile art.
Conclusion
You might think a French knot will always tangle, but with gentle practice—and the right french knot embroidery tutorial video—you’ll soon tie each one with quiet confidence.
Your stitches can add a lovely pop of texture wherever they land, turning plain designs into little works of art.
Let your hands move slowly, listen to the fabric, and enjoy the rhythm. Little by little, your knots will look as beautiful as you imagined, stitch after joyful stitch.
- https://www.youtube.com/watch?v=pjI5yo656U4
- https://subscribr.ai/p/craft-tutorial-youtube-video-ideas
- https://www.tandfonline.com/doi/full/10.1080/14427591.2022.2104349
- https://www.archivemarketresearch.com/reports/threads-for-hand-embroidery-398542
- https://handembroidery.com/collections/live-online-courses

