This site is supported by our readers. We may earn a commission, at no cost to you, if you purchase through links.
First, understand your body shape to pick the perfect style. Pear-shaped gals may love a cinched waist and flared skirt, while apple shapes shine in an empire waist.
Next, gather your supplies and set up a cozy sewing nook. Download the pattern, take accurate measurements, and select your size.
Cut the fabric carefully, then construct that bodice with precision – darts, sleeves, and zippers, oh my!
The final steps are adding the skirt and making any final tweaks for a dress that fits like a dream.
With a little know-how, you’ll be sewing fitted dresses in no time.
Table Of Contents
- Key Takeaways
- Choosing the Right Pattern
- Preparing to Sew
- Printing and Understanding the Pattern
- Cutting Out the Fabric
- Constructing the Bodice
- Adding the Skirt and Finishing Touches
- Fitting and Adjusting the Dress
- Variations and Inspiration
- Troubleshooting and Tips
- Frequently Asked Questions (FAQs)
- Conclusion
Key Takeaways
- Embrace Your Body Shape: Understanding your body type is like finding the secret ingredient to the perfect recipe. Whether you’re an apple or a pear, choose styles that flatter you and make you feel like a million bucks.
- Prep Your Sewing Space: Set up a cozy, well-lit nook with all your tools—even snacks! Sewing’s like a movie marathon session; once you start, you won’t want to stop.
- Cutting and Construction Magic: Cutting fabric feels like assembling a puzzle, with each piece fitting just so. Nail those darts and zippers to craft a bodice that hugs and highlights your curves effortlessly.
- Personalize and Perfect: Adding final touches is like decorating a cake—the perfect embellishment can make it truly yours. Try on your masterpiece, tweak it with love, and strut your stuff like the fashion guru you are!
Choosing the Right Pattern
Choosing the right pattern for your fit and flare dress is like picking the perfect movie for a cozy night in; it all starts with understanding what suits you best. Different patterns complement different body types, so knowing your shape will help you find a style that flatters and makes you feel fabulous.
Understanding Your Body Type
When choosing a dress pattern, first embrace your unique body shape. Whether you’re an hourglass or more of an apple, prioritize what suits you. Measure your bust and waist accurately; it’s like having the secret recipe for a flattering silhouette. Customize your sewing patterns confidently with our tips—because life’s too short for ill-fitting clothes!
Selecting a Flattering Style
When selecting a flattering fit and flare dress pattern, consider your body shape. Pear-shaped figures may suit a dress with a cinched waist and flared skirt, while apple shapes may prefer a dress with an empire waist. Experiment with necklines, sleeve lengths, and fabric drape to find a style that accentuates your best features.
Free Fit and Flare Dress Patterns
Free dress patterns are a great way to explore different styles without spending any money.
They are especially helpful for beginners, as they allow you to practice your sewing skills without the pressure of a costly mistake.
These patterns can inspire you to try new things and give you the freedom to make alterations to create a truly unique garment.
Popular Pattern Brands for Fit and Flare Dresses
Looking for simplicity in your sewing tutorial? Check out popular fit and flare dress pattern brands like McCall’s, Butterick, Vogue, and Burda. They’re the bees knees for easy dress patterns and even offer vintage dress flavors. Whether you’re dreaming of a wrap dress or a chic midi, these brands have got you covered, making your sewing journey a breeze!
Preparing to Sew
Before you start stitching your fit and flare masterpiece, gather essential supplies like fabric, matching thread, and your trusty sewing machine. Make sure your workspace is neat, well-lit, and ready to turn that fabric into your next favorite dress—bonus points for snacks nearby because once you start sewing, you mightn’t want to stop!
Gathering Essential Supplies
Before you start sewing, gather your essential supplies.
Snag 2-3 yards of your dream fabric, the pattern, matching thread, sharp scissors, pins, a measuring tape, and an iron.
Don’t forget to prep your sewing machine – thread it up and make sure the needle is in tip-top shape.
With your tools at the ready, you’ll be sewing like a pro in no time!
Setting Up Your Workspace
Now that you’ve gathered your supplies, let’s jump into creating the ideal workspace! Make sure your lighting banishes shadows setting the stage for stitching success. Consider these must-haves:
- Organized Tools: Corral chaos with caddies.
- Comfy Seating: Keep backaches at bay.
- Machine Setup: Make it rock solid.
- Inspiration Board: Showcase mini, maxi, and summer dresses for flair.
Ready, set, sew!
Choosing the Right Fabric for Your Dress
Selecting the right fabric is no small potatoes! Consider fabric weight and drape for that perfect pleated dress or flowy sun dress. Texture and color matching are key to a convertible dress with tie sleeves. Also, don’t forget care instructions—unlike a baby doll dress, fabrics need TLC!
| Factor | Tip |
|---|---|
| Weight | Light for summer dresses |
| Drape | Silky for flow |
| Color | Match skin tone |
| Care | Machine wash preferred |
Preparing Your Sewing Machine
You’ve picked your fabric—perhaps eyeing that painterly summer dress vibe or gearing up for chic winter dresses. Now, let’s talk sewing machines. Here’s your to-do list:
- Wind that bobbin—it’s the heart of your machine.
- Choose the right needle—size matters!
- Thread the machine—like leading a needle dance.
- Experiment with different foot options—each stitch a new adventure.
Printing and Understanding the Pattern
Downloading and printing your free dress pattern is the first step to sewing your perfect fit. Next, take a close look at the pattern symbols and markings to understand how the pieces fit together.
Downloading and Printing the Pattern
Great, your workspace’s ready! Now, download your pattern. Aim for PDF efficiency—saving paper, avoiding printing errors. Choose printing quality suitable for visible markings. Compare PDF versus paper, weighing convenience against pattern size accuracy. Here’s a handy checklist:
| Pattern Size | Quality Tip | Common Pitfalls |
|---|---|---|
| Large | High | Misaligned lines |
| Medium | Medium | Fuzzy markings |
| Small | Low | Ink fade over time |
Need more advice? Don’t worry, you’ll soon master this like a pro!
Understanding Pattern Symbols and Markings
Pattern symbols are your dressmaking’s secret code. Seam allowances tell where to stitch, while grain lines show how fabric should dance along the pattern. Grab marking tools to transfer fabric markings accurately. Imagine them like whispered hints guiding your cutting and sewing journey. It feels like following a dressmaking treasure map, with each symbol a valuable clue!
Taking Your Measurements and Choosing a Size
First things first, grab a measuring tape, your best friend in the sewing adventure. Measure your bust, waist, and hips, and don’t forget the dress length for that personal touch. Select a size with enough ease of movement so you can waltz through life’s moments. Remember, it’s better to tweak a larger size than wrestle with a snug one.
Adjusting the Pattern for a Perfect Fit
Once you’ve printed your pattern, it’s time to make any necessary adjustments for a perfect fit.
Start by comparing your measurements to the pattern’s sizing chart. This will help you determine if you need to size up or down.
Next, make any bust, waist, or skirt length adjustments by adding or subtracting seam allowances.
Cutting Out the Fabric
Cutting out the fabric is where your dress begins to take shape, so grab your scissors and get ready to feel like a design star. With the right setup and a touch of precision, you’ll breeze through this stage with fabric pieces that are perfectly prepped for sewing.
Laying Out the Fabric and Pattern Pieces
You’ve got your pattern downloaded and printed; now let’s tackle fabric layout.
Make sure your table space is ample, aligning each piece with the fabric grain.
Think of it as arranging puzzle pieces—they should nestle perfectly.
Secure them with pinning.
Choose cutting tools that slice through like butter—after all, pattern alignments are as important as coffee on a Monday morning!
Cutting Accurately and Efficiently
Grab your fabric cutting tools and let’s get started! Place your pattern pieces thoughtfully, ensuring grain alignment like a pro. Imagine your fabric as a puzzle—each piece fits just so. Use rotary cutter tips to glide smoothly, making your cutting layout precise. Stay calm; even if you snip the odd thread, it’s all part of the learning curve!
Tips for Cutting Delicate or Thick Fabrics
When working with delicate fabrics like chiffon or thick materials like denim, take extra care during cutting.
Use a sharp rotary cutter or scissors, and pin the pattern pieces securely to prevent shifting.
For delicates, consider using a tissue paper or lightweight stabilizer underneath to add stability.
When cutting multiple layers, take your time and cut slowly for clean, precise edges.
Transferring Pattern Markings to the Fabric
Transferring pattern markings can feel like decoding a secret message. Use a fabric pencil or chalk to mark key symbols—think of them as tiny road signs guiding your sewing journey. Choose marking tools wisely to avoid disappearing ink disasters. With practice, you’ll master transfer methods, ensuring every stitch lands where it should, giving you sewing freedom and control!
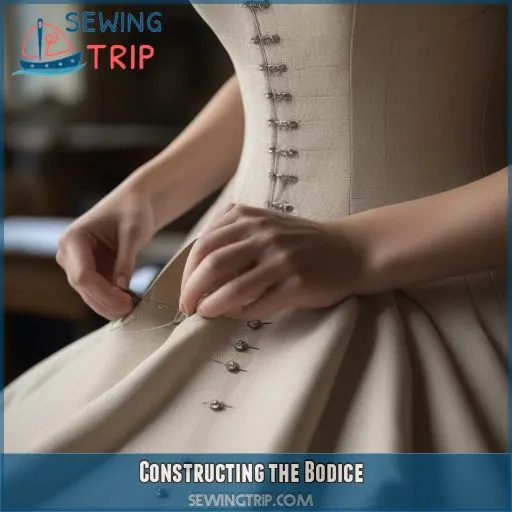
Constructing the Bodice
Building the bodice is where your dress starts to take shape, allowing you to control fit like a sewing superhero. With some stitching magic, you’ll connect the front and back, add shaping darts, and maybe even sneak in a zipper for a perfect fit that hugs without a hug.
Sewing the Front and Back Pieces Together
Ready to sew the front and back pieces together? Well, grab those parts and lets stitch them up, creating the heart and soul of the bodice.
- Pinning techniques: Align right sides together, pin securely.
- Sewing seams: Use a straight stitch for smooth connections.
- Matching fabric: Pattern alignment makes for a lovely flow.
- Right side, Wrong side: Check before sewing!
Adding Darts and Shaping the Bodice
Next, you’ll add darts to the bodice to shape and contour the fabric to your curves. Darts are essential for creating a fitted, flattering silhouette. Refer to the pattern instructions for dart placement, and don’t be afraid to experiment to find the perfect fit.
| Fabric Choice | Dart Placement | Bust Fitting |
|---|---|---|
Choose a fabric with some stretch for ease of movement.
Darts should start at the bust point and taper down to the waist.
Adjust dart size and location to accommodate your bust shape.
Creating a Fitted Sleeve or Armhole
Getting a killer sleeve fit means mastering sleeve cap shaping and armhole ease. First, when cutting, make sure you’re accommodating your bicep snugly yet comfortably. Then, with finesse, use gathering techniques to ease the sleeve into the armhole. Think of it as fitting puzzle pieces—patience is key here. Trust your instincts for precise sleeve placement; you’ve got this!
Adding a Zipper or Closure
With sleeves in place, let’s face the zipper beast like pros! Opt for an invisible zipper, its seamless magic. Mark the fabric, pin the invisible zipper snugly, and sew steadily. If zippers aren’t your jam, try other closure options like buttons or hooks. Mastering these sewing techniques will make sure your dress closure is secure, stylish, and frustration-free.
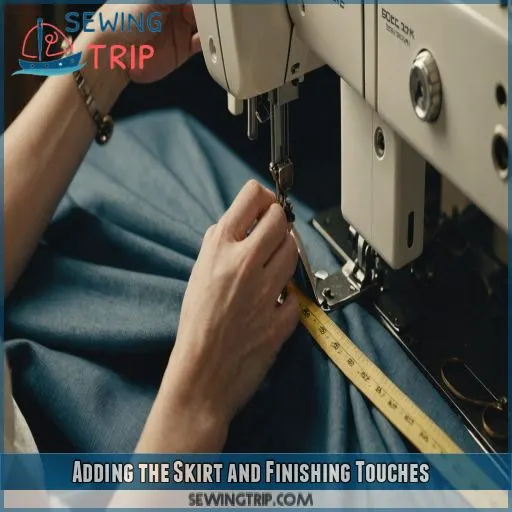
Adding the Skirt and Finishing Touches
Now that you’ve mastered the bodice, it’s time to give your dress some flair with the skirt. Grab your fabric scissors—it’s not magic, but you’ll be amazed at how quickly your dress comes together with a few precise stitches and a dash of enthusiasm.
Cutting and Sewing the Skirt Pieces
Now it’s time to tackle the skirt! Start by cutting out the skirt pieces according to the pattern instructions. Pay close attention to the grain line and layout the pieces to maximize fabric efficiency. When sewing the skirt panels, use precise seam allowances and press the seams open to create a smooth, professional finish.
Gathering and Attaching the Skirt to the Bodice
Attaching the skirt to the bodice can feel like a dance, but follow these steps, and you’ll master it. First, gather the skirt fullness evenly and pin it to match the bodice seam. Use gathering techniques like basting stitches for control.
- Experiment with waistband options for personal flair.
- Choose skirt attachment methods to make a secure fit.
- Adjust gathers to achieve desired fullness.
Hemming the Bottom Edge of the Dress
| As your masterpiece nears completion, it’s time to hem the bottom edge of your dress. Adjust your sewing machine settings for even stitching that’ll handle fabric edges like a pro. Consider your dress length: a quick knee-length cut or a flowing maxi? | Dress Length | Hem Style |
|---|---|---|
| Short | Rolled | |
| Midi | Blind Stitch | |
| Knee | Narrow Hem | |
| Maxi | Double Fold |
Adding Any Final Embellishments
You’ve sewn your fit and flare, now let’s sprinkle some magic with the final touches! Whether it’s delicate lace trims or bold buttons, go wild – this is your masterpiece! Add a dainty ribbon for charm or bold applique for a statement. Maybe even some beading if you’re feeling fancy! Like finishing a puzzle, these details complete your unique dress.
Fitting and Adjusting the Dress
Now that you’ve sewn the dress, it’s time to try it on and make any necessary adjustments for a perfect fit. Don’t be afraid to get hands-on – pinning, tucking, and tweaking the bodice and skirt until it hugs your curves just right.
Trying on the Dress and Identifying Areas for Adjustment
You’ve added the skirt—now it’s showtime! Don your masterpiece and twirl in front of that mirror. Look for areas needing tweaks: Is the bust fit too snug? Maybe the sleeve length is slightly off, or the waist fit feels wonky? Adjust the hem length if it’s resembling a wedding train. Remember, skirt fullness affects that magical fit.
Making Adjustments to the Bodice and Skirt
Customizing the perfect fit involves taming your dress’s bodice and skirt. Feel like a master seamstress by following these steps:
- Adjust the waist shaping for a streamlined silhouette.
- Add fullness to the skirt for extra flair and twirl.
- Alter the neckline for elegance and comfort.
- Tweak sleeve adjustments to show mastery without breaking a sweat.
You’re sewing magic!
Adding or Removing Darts for a Better Fit
Alright, you’ve assessed the bodice and skirt but need a spot-on shape. Let’s chat darts. Think of darts as a clever sculptor, shaping curves for the bust fit and waist. Adjust dart placement to perfect waist shaping. If you need more room or less, add or remove darts like a maestro conducting a symphony of fabric.
Final Fitting and Hemming
Now that you’ve tried on the dress, it’s time to get that perfect fit.
Start by hemming the dress to your desired length – no more tripping over excess fabric!
Use a sharp pair of scissors and take your time for a clean, professional finish.
With a few final tweaks, your custom fit and flare dress will be ready to shine.
Variations and Inspiration
Explore dressmaking with countless variations to match your unique style, from short sleeves for summer gardens to long sleeves for winter warmth. Don’t be afraid to add your flair with embellishments and accessoriesafter all, who said a dress couldn’t multitask?
Short Sleeve and Long Sleeve Options
Sleeve lengths can add a world of difference to your dress.
Short sleeves work wonders with summer fabrics, offering breezy, carefree vibes ideal for sunny escapades.
Long sleeves crafted from cozy winter fabrics wrap you in warmth, keeping chills at bay.
Experiment with sleeve styles and cuff variations to express your unique flair—after all, why not wear your creativity?
Mini, Maxi, and Midi Lengths
So, you’ve nailed the sleeves! Now, let’s talk hemlines: mini, midi, or maxi? Choose mini for a flirty night out, midi for casual brunches, or maxi for a dramatic entrance. Each length caters to different occasions and enhances your silhouette. Use flowy fabrics for movement or structured materials for elegance. Your dress, your stage—own it!
Winter and Summer Dress Ideas
When the weather turns chilly, embrace winter-friendly fabrics like velvet, wool, and corduroy to craft cozy yet stylish dresses. For summer, opt for lightweight, breathable fabrics like linen, cotton, and rayon to create breezy, effortless looks. Layer with cardigans, scarves, and tights to adapt your dresses seamlessly between seasons.
- Velvet Midi Dress: Luxurious and elegant for holiday parties.
- Linen Maxi Dress: Airy and comfortable for warm-weather adventures.
- Wool Shift Dress: Polished and versatile for the office or weekend.
Adding Embellishments and Accessories
Jazz up your handmade dress with delightful additions! Beading can add a touch of sparkle—like a sprinkle of stardust. Lace transforms the ordinary into the extraordinary, providing an elegant twist. Don’t underestimate buttons, those charming closures with personality. Pockets, both practical and magical, give you power. Belts cinch your waist like a hug, adding flair to finesse your fit.
Troubleshooting and Tips
Sewing can be a journey full of unexpected twists, but you don’t have to tackle those troubles alone. Learn from the snags and stitches of others’ experiences and transform your sewing challenges into seamless successes—who knew tackling fabric could be this rewarding?
Common Mistakes and How to Fix Them
Even the best seamstress can trip on sewing hurdles. Worry not; we’ve got your back!
- Fabric choice: Resist the siren call of stretch without experience.
- Zipper insertion: Seam ripper’s your friend, not foe.
- Dart placement: Make your bust proud.
- Neckline fit: Not too tight; it’s not a turtleneck.
- Sleeve length: Hugs, not strangles!
Tips for Working With Different Fabrics
Frequently, working with different fabrics requires adjusting your sewing techniques.
For lightweight fabrics like chiffon, use a fine needle and gentle handling to avoid puckering.
Heavier fabrics like denim may need a stronger needle and walking foot to feed evenly.
Always prewash fabrics to account for shrinkage, and test seams on scraps to make sure the right stitch length and tension are used.
Time-Saving Techniques and Shortcuts
Moving from fabric challenges to speedy sewing techniques is like shifting gears in a well-tuned machine. Keep your stitches quick and precise with these techniques:
- Use pre-cut fabric to save time.
- Employ a serger for neat edges.
- Try quick hems with fabric glue.
- And, your secret weapon: bulk pinning.
Advanced Techniques for a Professional Finish
Achieve a dressmaker’s nirvana with these tips for a professional finish. Master French seams for those polished insides. Invisible zippers are your secret weapon for seamless design.
| Technique | Description |
|---|---|
| French Seams |
Clean finish, inside out.
Seamless closures.
Strong edges, no frays.
Adds style and strength.
Embrace pressing techniques—ironing isn’t just for shirts!
Frequently Asked Questions (FAQs)
Where can I find free dress sewing patterns?
Finding free dress sewing patterns is like hunting for buried treasure—you’ve got plenty of maps on sites like Pinterest, Mood Fabrics, and Sew Daily. Check them out, and you’ll discover gems that fulfill your creative freedom.
How many easy dress sewing patterns are there?
There are countless easy dress patterns available online and in craft stores, just waiting for you to get started! With every pattern, you’ll find the perfect blend of creativity and challenge, fueling your DIY fashion journey.
How do you make a dress based on a pattern?
To make a dress from a pattern, follow the guide: choose fabric, cut the pieces, and sew them together. Remember, Rome wasn’t built in a day—take your time, keep practicing, and soon you’ll master it!
How many free dress sewing patterns are there?
Did you know there are 12 fabulous free fit-and-flare dress patterns to explore? Get started with sewing and tap into your inner fashionista with these customizable designs. Crafting your perfect dress has never been this fun!
How do I choose the best fabric for my dress?
Choosing fabric for your dress is like picking the perfect partner—you want compatibility! Consider the occasion and season: cotton for breathability, satin for elegance, or jersey for comfort. Match your fabric choice with style goals.
What tools are essential beyond basic sewing supplies?
Beyond the basics, a rotary cutter and mat can speed up fabric cutting, while a seam ripper and point turner will help you finesse those tricky details. And don’t forget a good pair of sharp fabric shears – they’ll make all the difference!
How can I ensure my seams are durable?
To make sure your seams are as strong as a knight’s armor, use a shorter stitch length, backstitch at the start and end, and choose high-quality thread. A serger or zigzag stitch can lend extra durability.
Can alterations be done after sewing is complete?
Absolutely, you can make alterations after sewing’s done. Think of it as giving the dress a little tweak here and there—nip in the waist, let out a seam—until it fits just like a glove!
Are there common mistakes to avoid when sewing a dress?
When sewing a dress, avoid rushing through measurements, using dull scissors, or skipping the pressing step. It’s like following a recipe — precision and patience make sure the final dish (or dress) is truly delightful!
Conclusion
With a bit of know-how and elbow grease, you’ll be sewing fitted dresses like a pro in no time.
Just take the plunge, follow the steps, and you’ll be rocking a custom-fitted dress that flatters your figure to a T.
So what are you waiting for?
Grab your sewing machine and get to work on that dream fitted dress pattern you’ve been eyeing!

