This site is supported by our readers. We may earn a commission, at no cost to you, if you purchase through links.
 Ready to sew a dress and reveal your inner fashion designer?
Start by choosing an easy pattern that matches your style and skill level.
Pre-wash your fabric to prevent unexpected shrinkage, then carefully trace and cut your pattern pieces, making sure to match those grainlines.
Master basic techniques like dart placement and zipper installation—they’ll transform your dress from homemade to high-fashion.
Use sharp scissors, pin carefully, and sew slowly for professional-looking seams. Practice with forgiving fabrics like jersey, which stretch and forgive beginner mistakes.
Remember, every stitch builds confidence, and soon you’ll be creating custom dresses that fit like a dream.
Table Of Contents
- Key Takeaways
- How to Sew a Dress
- Tips for Sewing With Jersey Fabric
- Beginner-Friendly Dress Patterns
- How Long Does It Take to Sew a Dress?
- Sewing a Simple Dress for Beginners
- How to Sew a Dress: Step-by-Step Tutorial
- Tips for Dressmaking Success
- Easy Dress Patterns for Beginners
- Dressmaking Notes and Recommendations
- Dressmaking Authors to Follow
- Frequently Asked Questions (FAQs)
- Conclusion
Key Takeaways
- You will transform fabric into a wearable masterpiece by choosing the right pattern, understanding basic sewing techniques, and practicing precise cutting and stitching.
- Your first dress might take 3-8 hours, but don’t get discouraged—start with beginner-friendly patterns, prewash your fabric, and take your time mastering each step.
- Essential tools like sharp fabric scissors, a reliable sewing machine, a seam ripper, and quality pins are your secret weapons for creating a professional-looking dress.
- Fabric choice is crucial—start with forgiving materials like cotton knits or polyester blends that will help you build confidence and learn without getting frustrated.
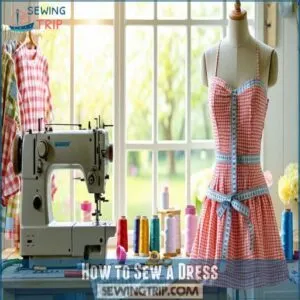
How to Sew a Dress
Ready to turn fabric into your very own custom dress?
With some patience, practice, and simple sewing techniques,
you’ll transform yards of material into a stunning garment that’ll make you proud of your newfound fashion design skills.
Selecting a Pattern and Fabric
Dive headfirst into dress-making by selecting an easy, forgiving pattern with flowing lines. Your fabric adventure begins here!
- Breathe life into your creative dreams
- Embrace imperfection as your sewing superpower
- Transform simple fabric into wearable art
- Discover your inner fashion designer
Trace pattern pieces carefully, matching grain lines for sewing success.
Preparing and Cutting The Fabric
Your fabric is the canvas, and careful preparation sets the stage for sewing success.
Pre-wash your chosen material to prevent future shrinkage surprises.
Lay out your sewing pattern carefully, matching grainlines precisely. Use sharp fabric scissors or a rotary cutter, and mark seam allowances with tailor’s chalk.
Precision here transforms good intentions into a perfectly crafted dress.
Sewing Darts and Pleats
Mastering dart placement transforms fabric into a silhouette that hugs curves, with precise stitching and careful pressing creating a professional, flattering finish.
Installing a Zipper (if Needed)
Zipper anxiety? Take a deep breath!
Installing zippers becomes second nature with practice.
Grab your trusty zipper foot and line up the coil precisely, pinning it in place. Baste carefully, then sew slowly from bottom to top.
Keep your stitches straight and even, checking alignment frequently.
Don’t stress—each zipper you conquer builds your sewing confidence, transforming intimidation into skill.
Stitching Shoulder Seams
After conquering the zipper, align your front and back shoulder seams.
With careful attention to proper fabric care, ensuring the longevity of your dress.
Pin layers carefully, matching notches and seam allowances.
Sew slowly using a straight stitch, then press those seams flat with your iron.
to create a crisp, professional finish that’ll make your dress shine.
Attaching Neckline Facing
Now that your shoulder seams are sewn, let’s polish that neckline!
Pin the facing smoothly, clip those curves to prevent bunching, then understitch for a pro finish.
Press carefully to create a crisp, clean edge that screams handmade perfection.
Sewing Side and Armhole Seams
With your neckline facing in place, it’s time to conquer side and armhole seams.
Match notches precisely.
Ease sleeve caps smoothly.
Adjust seam allowances for a killer fit that’ll make your dress pop.
Hemming The Dress
Wondering how to transform your dress from unfinished to fabulous? Hemming is your secret weapon for a polished look.
Here are some pro hemming techniques to nail your dress finish:
- Measure twice, pin carefully, and mark your desired hem height
- Choose between blind hem, decorative edge, or traditional straight stitch
- Press your hem before sewing for crisp, professional results
- Use matching thread to create invisible hemlines
- Test your technique on scrap fabric first to build confidence
Pressing The Completed Dress
After hemming, your dress deserves a final polish through steam ironing.
Different fabric types demand unique pressing techniques—silk whispers, cotton shouts. Glide your iron gently to avoid creating unwanted shine.
Press seams flat, transforming your handmade creation from homemade to professional.
A crisp finish elevates your dress, showcasing your newfound sewing skills and creative triumph.
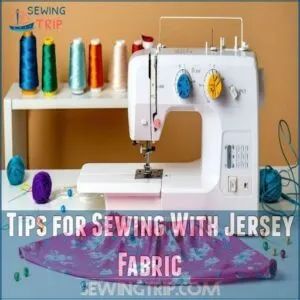
Tips for Sewing With Jersey Fabric
When you’re diving into jersey fabric sewing, think of it like taming a wild, stretchy beast that’s secretly your best fashion ally. Mastering this knit material transforms your dressmaking game from frustrating to fabulous.
- Feel the fabric’s potential whisper beneath your fingertips
- Embrace the challenge of conquering stretchy seams
- Discover the magic of movement-friendly garments
- Reveal your inner design superhero
- Celebrate each perfectly stitched jersey project
- Experience the thrill of wearing something you created
Your secret weapons include ballpoint or stretch needles that glide through jersey without skipping stitches, and it’s key to choose the right needle sizes for jersey. Use a zigzag or stretch stitch to let the fabric move. Pin carefully, handle gently, and press with low heat to maintain the fabric’s delicate nature. Twin needle hemming adds a professional touch that’ll make your jersey dress look store-bought. Remember, every stitch brings you closer to sewing confidence – one stretchy seam at a time.
Beginner-Friendly Dress Patterns
You’ve got big dreams of creating your own unique dress, and choosing the right beginner-friendly pattern is your first step to sewing success.
With options like the breezy Brunch Dress, comfy Tee Dress, and chic Copen Dress, you’ll find a pattern that matches your style and skill level.
turning your fashion fantasies into reality.
Brunch Dress
Your jersey fabric skills set the stage for sewing a brunch dress that’ll turn heads!
Pick a soft knit with a high neck and tie waist – your ticket to summer style.
This beginner-friendly Brunch Dress pattern lets you rock a handmade look without breaking a sweat.
Grab your pattern, choose forgiving fabrics, and get ready to strut your sewing superpowers.
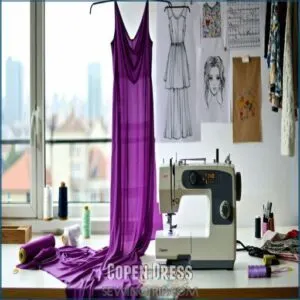
Copen Dress
Crafting the Copen Dress transforms beginners into sewing heroes, turning fabric dreams into wearable reality.
Master this style with four key moves:
- Select stretchy knit fabrics
- Match grainlines precisely
- Install invisible zippers smoothly
- Press seams like a pro
Your dress awaits – each stitch brings you closer to fashion freedom, revealing the artist hidden within your creative spirit.
Summer Dress
From the Copen’s structured lines, breeze into a summer dress that whispers freedom.
Skater-shaped and playful, this pattern lets you dance with lightweight fabrics.
experiment with necklines, and add personality through cheeky pockets or bold embellishments.
Ruffled Off-Shoulder Dress
Want to rock a stunning ruffled off-shoulder dress?
Grab your pattern and choose a flowy fabric that moves with you.
Pin carefully, cut precisely, and let those dreamy ruffles dance with your personal style.
First Day Dress
Occasionally, helping your little girl shine on her first school day starts with a dreamy, handmade dress that tells her story.
Craft a personalized masterpiece she’ll treasure:
- Choose vibrant jersey fabrics that spark joy and comfort
- Customize necklines and lengths to match her unique personality
- Add playful touches like her name or favorite character print
Tee Dress
Transforming a simple tee into a personalized dress opens up a world of creative possibilities.
- Select soft, stretchy knits that flow
- Experiment with sleeve lengths and hemlines
- Upcycle old shirts into unique fashion statements
Make your tee dress a canvas for self-expression!
How Long Does It Take to Sew a Dress?
From the moment you first unroll a pattern to the final stitch, sewing a dress can feel like an epic journey of creativity and skill. Your first dress might take anywhere from 3-8 hours, depending on your skill level and project complexity. Understanding the importance of choosing the right fabric can also greatly impact your project’s overall time and success.
Here’s what to expect when diving into dressmaking:
- Start with simple, beginner-friendly patterns
- Prewash and press fabric before cutting
- Read the entire pattern instructions beforehand
- Organize your sewing space and tools
- Take breaks to avoid frustration
- Practice precise cutting and marking
- Match thread color to your fabric
- Use the right needle for your fabric type
- Keep seam ripper nearby for quick fixes
Time management is your secret weapon. Don’t rush through each step – sewing a dress is about enjoying the process, not racing to the finish line. Your first dress might feel like wrestling a complicated puzzle, but each stitch brings you closer to a wearable masterpiece. Remember, every professional started exactly where you’re now: learning, practicing, and transforming fabric into fashion.
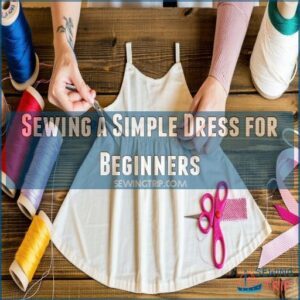
Sewing a Simple Dress for Beginners
Ready to turn that fabric in your closet into your dream dress?
With some basic sewing skills and a bit of patience,
you’ll transform simple materials into a stunning, personalized outfit that’ll make you proud of your creative talents.
Basic Tools for Sewing
Your ticket to DIY fashion magic starts with a few key sewing tools.
Essential sewing supplies include sharp fabric scissors, precision measuring tools, and a reliable sewing machine with versatile needle choices.
Grab a seam ripper for quick fixes, quality pins, and hand-sewing needles that match your fabric type.
An iron and ironing board become your best friends for crisp, professional-looking seams.
Stock up on matching thread, a water-soluble fabric marker, and an assortment of zippers and buttons. YouTube tutorials can help you master these beginner sewing supplies in no time.
Tips for Dressmaking
After gathering your sewing tools, sharp skills await you in dressmaking!
Matching zippers to fabric weight keeps projects looking pro.
Pin fabric layers carefully before cutting to prevent slippage—precision is your secret weapon.
Practice neck facings on scrap material until edges look crisp and clean. Even pressure on the foot pedal transforms uneven stitches into smooth side seams.
Study your pattern thoroughly before starting; understanding each piece prevents frustrating mid-project surprises.
Remember, every stitch brings you closer to creating a garment that’ll turn heads and spark conversations.
How to Sew a Dress: Step-by-Step Tutorial
Ready to transform fabric into a stunning dress that’ll make heads turn?
You’ll discover how to turn your sewing dreams into reality with this easy-to-follow, step-by-step tutorial.
That breaks down the process into simple, manageable actions anyone can master.
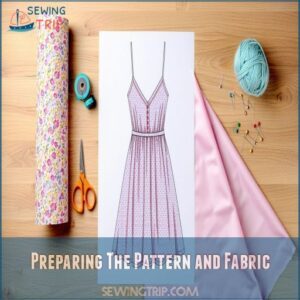
Preparing The Pattern and Fabric
Many sewing adventures begin with a strategic fabric and pattern selection.
Grab your chosen sewing pattern and inspect it carefully, checking size measurements and design details.
Pre-wash your fabric to prevent shrinkage later, then iron it smooth.
Lay out your pattern pieces, matching grainlines precisely. Carefully trace and cut fabric with sharp scissors, leaving ample seam allowance for future adjustments.
Marking and Sewing Darts
Three key dart placement tips will transform your dressmaking journey. Pin your dart lines with precision, thread-tracing each stitching path to achieve precision.
- Embrace the art of dart variations
- Master pressing techniques for crisp edges
- Troubleshoot common sewing challenges with confidence
Sewing The Back Zipper
After precise dart placement, you’re ready to tackle the back zipper – your dress’s secret weapon for a polished finish.
Grab your zipper foot and take a deep breath.
Align the zipper teeth with your seam, pinning carefully. Sew slowly, keeping the fabric smooth and edges matched.
Pro tip: use an invisible zipper for that seamless, professional look that’ll make your DIY dress shine.
Sewing The Shoulder Seams
When you’re ready to tackle shoulder seams, grab your pressed fabric pieces and align them with precision.
Pin the shoulders together, matching notches and respecting your pattern’s seam allowance.
Stitch carefully, using a straight stitch and maintaining consistent tension.
Press the newly sewn seams flat, creating a crisp, professional finish that’ll make your dress look store-bought.
Attaching Neck Facings
Let’s tackle that shoulder seam momentum and shape your neckline facing like a pro. Your facing is the secret weapon for a polished dress interior.
When creating a sleeveless dress, combining one-piece facing with lining can prevent lining visibility, creating a clean finish suitable for formal dresses, learn more about Sleeveless Dress Lining.
Here’s your game plan:
- Pin lightweight fusible interfacing to facing pieces
- Match facing to neckline, right sides together
- Stitch with precision, leaving no room for wobbles
- Clip curved edges for smooth contours
- Understitch to keep facing hidden and sleek
Sewing Side Seams
After perfecting your neck facing, you’re ready to shape your dress with side seams. Master these seam techniques like a pro:
- Align pattern notches precisely
- Pin sides with careful attention
- Sew from underarm to hem smoothly
- Trim seam allowances neatly
- Press seams open for crisp finish
For the best results, use a sharp sewing machine needles suitable for the type of fabric you’re working with.
Your dress is taking form, transforming fabric into wearable art with each careful stitch.
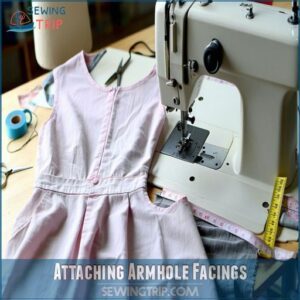
Attaching Armhole Facings
With side seams sewn smoothly, you’re now ready to master armhole facings. These fabric frames transform raw edges into polished perfection.
When attaching armhole facings, keep in mind the overall dress construction techniques to achieve a professional finish.
Pin facing pieces precisely, matching notches with surgical accuracy. Stitch, clip those curved edges, and press flat like a pro.
| Facing Tip | Action |
|---|---|
| Pin Alignment | Match raw edges exactly |
| Curve Clipping | Prevent bunching smoothly |
| Pressing | Use steam for crisp finish |
| Understitching | Secure facing invisibly |
Your dress is taking shape!
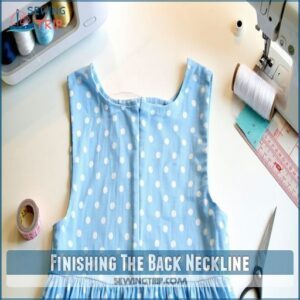
Finishing The Back Neckline
How will you transform that raw edge into a polished masterpiece? Finishing the back neckline requires precision and care.
- Apply lightweight fusible interfacing to stabilize the area
- Create a clean, narrow facing or bias binding
- Understitch the facing to prevent rolling
- Press the neckline edge for a crisp, professional finish
Your dress’s neckline is now runway-ready!
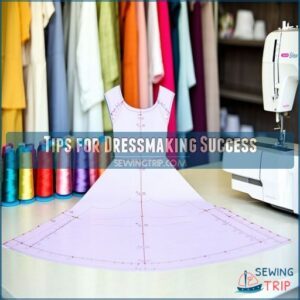
Tips for Dressmaking Success
You’re about to start on a dressmaking journey where breaking down complex tasks into simple steps can transform your sewing experience from overwhelming to achievable.
By focusing on smart fabric choices, pre-washing your material, and taking each technique one stitch at a time, you’ll build confidence and create beautiful dresses that showcase your growing skills.
Breaking Dressmaking Into Manageable Steps
At every step of your dressmaking journey, breaking down the process into bite-sized chunks can transform a challenging project into an achievable creative adventure.
Embrace the learning curve with these strategic approaches:
- Slice through fabric methodically, tracing pattern lines with precision
- Test-fit garment sections before committing to permanent stitches
- Press seams after completing each segment, creating crisp, professional edges
Your dress will emerge, stitch by stitch, from careful planning and patient craftsmanship. Breaking down the process into smaller steps will help you succeed. This will make the project more achievable and less challenging. Strategic approaches are key to success.
Importance of Fabric Choice
Your fabric is the secret sauce of dress sewing magic. Selecting the right material transforms your project from meh to marvelous. Let’s decode the fabric selection mystery with this emotional guide:
| Fabric Type | Beginner Friendliness | Emotional Impact |
|---|---|---|
| Cotton Knit | Excellent | Comfort & Joy |
| Polyester Blend | Good | Versatility & Hope |
| Silk | Challenging | Elegance & Dreams |
Fabric selection is key to a successful sewing project. The right material can elevate your creation.
Pre-Washing Fabric Before Starting
After nailing fabric selection, prewashing becomes your secret weapon against wardrobe disasters.
Toss that fabric in the wash before cutting to dodge shrinkage surprises.
Different fabric types demand different care—cotton might need a hot spin, while delicate knits prefer a gentle cycle. Colorfastness test? Drop a fabric scrap in warm water to check bleeding.
Pro tip: iron everything flat before pattern cutting.
Preventing issues now saves heartbreak later when you sew a dress that fits like a dream.
Easy Dress Patterns for Beginners
You don’t need advanced sewing skills to create your own stunning dress—just the right pattern and a bit of patience.
With these beginner-friendly dress designs, you’ll transform simple fabric into a gorgeous, personalized outfit.
That’ll make you proud of your newfound sewing superpowers.
Brunch Dress by Missy Rose
Releasing creativity with the Missy Rose Brunch Dress, sewists craft a flirty high-necked wonder.
Experiment with bustline adjustments, play with fabric choices, and transform a simple pattern.
Into a personalized statement piece that screams confidence and style.
Copen Dress by Made to Sew
Every beginner needs a trusty dress pattern that teaches essential skills, and the Copen Dress from Made to Sew is your perfect sewing companion.
Master the art of dressmaking with this versatile shift design that’ll boost your confidence stitch by stitch.
- Practice precise dart placement for flattering silhouettes
- Learn zipper installation techniques
- Experiment with sleeve variations
- Customize length to match your style
This pattern transforms novice sewists into dress design pros.
Summer Dress by Kreena Desai
After mastering the Copen Dress, you’ll breeze through Kreena Desai’s summer dress pattern.
Her design offers liberating style with flowy silhouettes and breezy fabric choices.
To achieve this look, consider using lightweight breathable fabrics. Embrace sewing challenges, pick light satin or cotton, and craft a dress that screams summer confidence and personal flair.
Off The Shoulder Dress by MYSTYLEDIARYY
If you’re craving an off-the-shoulder dress that screams summer vibes, MYSTYLEDIARYY’s pattern is your ticket to sewing freedom.
This design tackles tricky sewing challenges with easy-to-follow steps.
Master fabric choices like lightweight cotton or stretchy jersey, and you’ll breeze through creating a stunning off-shoulder silhouette that’ll have everyone asking, "Did you really make that?
First Day Dress by MADE Everyday
Ready to level up your sewing game? The First Day Dress by MADE Everyday is your ticket to pro-level skills.
- Master 14 pattern pieces with precision cutting
- Craft a lined bodice that screams professional finish
- Rock an invisible zipper for that runway-worthy silhouette
Embrace the challenge and transform fabric into fashion magic!
Dressmaking Notes and Recommendations
After mastering those beginner dress patterns, you’re ready to level up your dressmaking game.
Thread selection is your secret weapon—match it to your fabric’s personality. Polyester threads work magic on most wovens, while specialty fabrics demand their own thread match.
Stay tape becomes your bestie for stabilizing tricky seams, and a smooth lining fabric can transform your dress from homemade to haute couture.
Don’t forget to follow the patternmaking fundamentals, drafting ease into patterns, to guarantee a precise fit. Pro tip: Always create a test garment to nail the fit before cutting your dream fabric.
Mark those pattern tweaks for future projects, and don’t be afraid to add personal flair. Your unique touch turns a simple dress into a statement piece that screams "you".
Dressmaking Authors to Follow
Take your dressmaking journey to the next level by exploring favorite dressmaking books and blogs that’ll spark your creativity.
Tim Gunn’s Fashion Bible offers insider tips that’ll transform your sewing skills, while pattern designers like Tilly Walnes and Gertie Hirsch provide beginner-friendly sewing tutorials that break down complex techniques.
For those interested in Tilly Walnes patterns, you’ll find a wealth of inspiration online.
Follow top sewing YouTubers who share step-by-step dress sewing guides that make learning feel like a chat with a crafty friend.
Seek out independent sewists on Instagram and Pinterest who showcase innovative dressmaking tutorials for beginners. Their real-world insights will help you stitch with confidence, turning fabric and thread into wearable art that reflects your unique style and creative spirit.
Frequently Asked Questions (FAQs)
How do you make a dress by sewing?
Grab fabric and a pattern, then cut pieces carefully.
Stitch shoulder seams, add darts, and install a zipper.
Press each seam and try on your dress, making adjustments until it fits perfectly and looks fabulous.
How do you sew a dress on a sewing machine?
Set up your sewing machine with the right needle and thread.
Choose a simple pattern, cut fabric carefully, and pin pieces together.
Sew seams slowly, press as you go, and you’ll create a dress that’s uniquely yours.
How long does it take to sew a dress?
Sewing a dress varies widely. Beginners spend 4-8 hours, while experienced sewers could whip one up in 2-3 hours.
Your skill level, pattern complexity, and fabric choice dramatically impact the total time investment.
Mastering basic construction techniques like sewing darts and seams can greatly cut down sewing time.
Is it difficult to sew a dress?
Learning to sew a dress isn’t rocket science.
With patience and practice, you’ll discover a world of creativity.
Start with simple patterns, watch tutorials, and don’t fear mistakes—they’re your best teachers on this exciting crafting journey.
How can I learn to sew a dress?
Don’t worry about messing up—everyone starts somewhere!
Grab a simple pattern, choose forgiving fabric like cotton.
Watch YouTube tutorials, start with basic stitches.
Practice on scrap material, and celebrate each small victory in your sewing journey.
How do you sew a dress lining?
Grab soft, lightweight fabric like silk or cotton.
Cut lining pieces slightly smaller than your dress pattern.
Pin carefully, sew with minimal ease, and press seams flat to create a smooth, professional-looking interior finish.
What Type of Thread Should I Use for Sewing Dresses?
Like a reliable paintbrush to an artist, your thread choice can make or break your dress.
Choose polyester thread for stretch fabrics, all-purpose polyester for cotton, and silk thread for delicate silk garments to guarantee a durable and professional finish.
Choose these threads to ensure a durable and professional finish.
How Can I Hem My Dress if I Don’t Have a Sewing Machine?
You can hand-sew a hem using a needle and thread.
Choose small, even stitches and work slowly.
Fold the fabric edge twice to prevent fraying.
Then carefully stitch around the dress’s bottom for a clean, professional finish.
What’s the Best Way to Cut Out My Dress Pieces Accurately?
Grab sharp fabric scissors and painter’s tape.
Mark fabric’s wrong side, lay pattern pieces strategically on folded material.
Trace carefully with chalk, ensuring grainline alignment.
Double-check measurements before cutting for precision.
Can a beginner sew a dress?
Sewing savvy starts small!
Beginners can absolutely craft their first dress by choosing simple patterns, practicing basic techniques, and using forgiving fabrics like soft cotton knits.
Start simple, stay patient, and enjoy your creative journey.
Conclusion
Your DIY dress journey’s about to transform from fabric fantasy to wearable art!
Remember, every stitch tells a story, and sewing a dress isn’t just about creating clothing—it’s about crafting confidence.
Whether you’re a nervous beginner or a budding designer, these techniques will guide you to create stunning, personalized dresses.
Keep practicing, embrace imperfections, and soon you’ll be turning heads with your handmade fashion magic.
Just sew a dress, and watch your creativity bloom with handmade fashion magic!

